
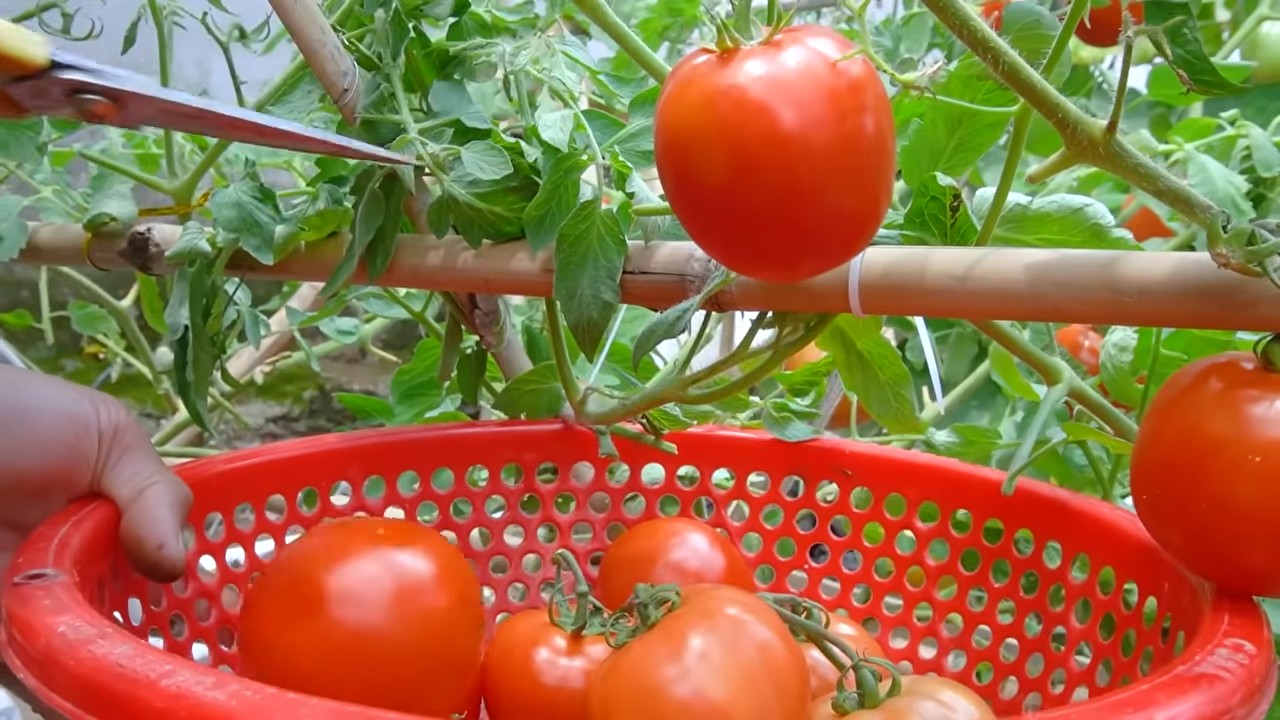
Tomato growing system: Ever dream of biting into a juicy, sun-ripened tomato you grew yourself, bursting with flavor that store-bought ones just can’t match? I know I have! But the thought of sprawling vines, complicated watering schedules, and potential pests can be daunting. That’s where the magic of DIY comes in! This article is your passport to creating a thriving tomato garden, even if you’re short on space, time, or experience.
Growing tomatoes has been a cherished tradition for centuries, with roots tracing back to South America. From humble beginnings as wild berries, tomatoes have become a global culinary staple, celebrated in countless dishes and cultural traditions. Think of Italian pasta sauces, Spanish gazpacho, or even just a simple BLT – the tomato is the star!
But let’s face it, modern life is busy. Who has time to dedicate hours to tending a garden? That’s why I’m sharing some clever and easy-to-implement DIY tricks and hacks to simplify your tomato growing system. Whether you’re dealing with limited space on a balcony, battling pesky pests, or simply want to maximize your yield, these tips will empower you to cultivate a bountiful harvest. Get ready to roll up your sleeves and transform your space into a tomato-lover’s paradise!
DIY Self-Watering Tomato Planter: Never Forget to Water Again!
Hey there, fellow gardening enthusiasts! Are you tired of constantly worrying about watering your tomato plants, especially during those scorching summer months? Well, I’ve got the perfect solution for you: a DIY self-watering tomato planter! This project is surprisingly easy, budget-friendly, and will keep your tomato plants happy and hydrated, even when you’re away on vacation. Trust me, once you try this, you’ll never go back to traditional watering.
What You’ll Need
Before we dive into the construction, let’s gather our supplies. This is where the “DIY” part really shines, as you can often repurpose items you already have around the house.
* Two Large Plastic Containers: Think storage totes, buckets, or even large trash cans (unused, of course!). One container needs to fit inside the other, leaving a few inches of space at the bottom. The outer container will act as the water reservoir, and the inner container will hold the soil and your tomato plant.
* A Smaller Plastic Container or Pot (Optional, but Recommended): This will act as a barrier to prevent soil from clogging the water reservoir. It should be smaller than the inner container.
* PVC Pipe (About 12-18 inches long, 2-3 inches in diameter): This will be our watering tube, allowing us to easily refill the reservoir.
* Drill with Various Drill Bits: We’ll need these to create drainage holes and a hole for the PVC pipe.
* Landscape Fabric or Burlap: This will prevent soil from seeping into the water reservoir.
* Potting Mix: Choose a high-quality potting mix specifically formulated for vegetables.
* Tomato Plant Seedling: Of course, we need a tomato plant! Choose a variety that suits your space and climate.
* Measuring Tape or Ruler: For accurate measurements.
* Utility Knife or Scissors: For cutting the landscape fabric.
* Gravel or Small Rocks: To improve drainage in the inner container.
* Water: For, well, watering!
* Gloves: To keep your hands clean.
Building Your Self-Watering Tomato Planter
Okay, let’s get our hands dirty! This project is broken down into a few key phases to make it super manageable.
Phase 1: Preparing the Containers
This is where we modify our containers to create the self-watering system.
1. Drill Drainage Holes in the Inner Container: Take the container that will hold the soil (the inner container). Using a drill bit (around 1/4 inch), drill several drainage holes in the bottom. These holes will allow excess water to drain into the reservoir. I usually aim for about 6-8 holes, evenly spaced.
2. Drill a Hole for the PVC Pipe: Now, on the side of the outer container (the reservoir), near the bottom, drill a hole that’s slightly larger than the diameter of your PVC pipe. This is where we’ll insert the pipe to refill the water. Make sure the hole is low enough that the bottom of the inner container will sit above it when placed inside the outer container.
3. (Optional) Drill Overflow Holes: To prevent overwatering during heavy rain, you can drill a few small overflow holes on the side of the outer container, just below the bottom of the inner container when it’s placed inside. This will allow excess water to escape.
Phase 2: Assembling the System
Now we put all the pieces together to create the self-watering magic.
1. Insert the PVC Pipe: Slide the PVC pipe into the hole you drilled in the outer container. You want it to fit snugly. You can use a bit of waterproof sealant around the pipe if you want to ensure a watertight seal, but it’s usually not necessary.
2. Line the Bottom of the Inner Container: Place a layer of gravel or small rocks at the bottom of the inner container. This will further improve drainage and prevent the drainage holes from becoming clogged.
3. Add Landscape Fabric: Cut a piece of landscape fabric or burlap that’s large enough to line the bottom and sides of the inner container. This will prevent the potting mix from seeping into the water reservoir. Make sure the fabric covers all the drainage holes.
4. Place the Inner Container Inside the Outer Container: Carefully lower the inner container into the outer container. Make sure it sits securely and that there’s a gap of a few inches between the bottom of the inner container and the bottom of the outer container. This gap is our water reservoir.
5. (Optional) Place the Smaller Container: If you’re using the smaller container, place it upside down in the center of the inner container, on top of the landscape fabric. This will create a barrier that prevents soil from directly contacting the water reservoir, further reducing the risk of clogging.
Phase 3: Planting Your Tomato Plant
The moment we’ve been waiting for! Time to get our tomato plant settled in its new home.
1. Add Potting Mix: Fill the inner container with high-quality potting mix, leaving a few inches of space at the top. If you used the smaller container, fill the space around it with potting mix.
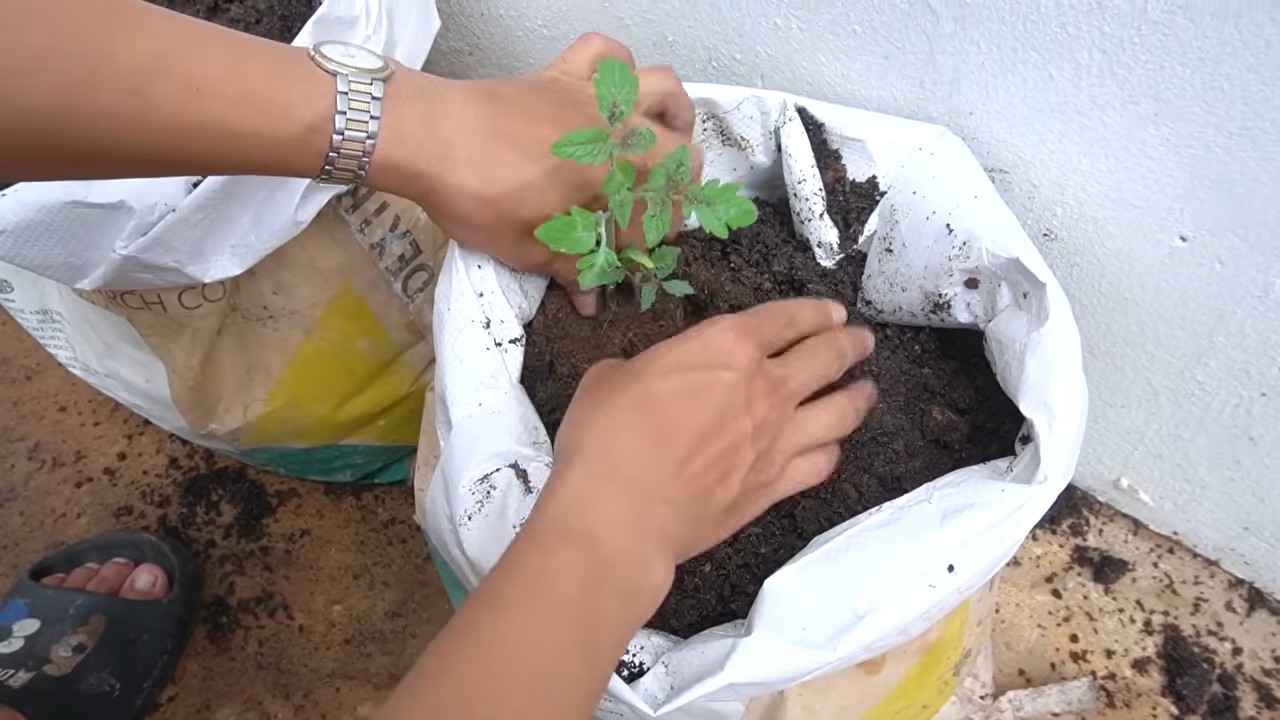
2. Plant Your Tomato Seedling: Carefully remove your tomato seedling from its nursery pot and gently loosen the roots. Dig a hole in the center of the potting mix and plant the seedling, making sure the top of the root ball is level with the soil surface.
3. Water Thoroughly: Water the potting mix thoroughly from the top, until water starts to drain into the reservoir. This will help settle the soil and get the self-watering system started.
4. Mulch (Optional): Add a layer of mulch around the base of the tomato plant to help retain moisture and suppress weeds.
Maintaining Your Self-Watering Tomato Planter
Now that your self-watering tomato planter is built and your plant is happily settled in, here’s how to keep it thriving.
1. Refill the Reservoir: Check the water level in the reservoir regularly, especially during hot weather. You can do this by looking down the PVC pipe. When the water level is low, simply refill the reservoir through the pipe until it’s full.
2. Fertilize Regularly: Even though the planter is self-watering, your tomato plant still needs nutrients. Fertilize regularly with a balanced fertilizer according to the package instructions. You can add the fertilizer directly to the water in the reservoir or apply it to the soil.
3. Provide Support: As your tomato plant grows, it will need support. Use stakes, cages, or trellises to keep the plant upright and prevent the branches from breaking under the weight of the tomatoes.
4. Monitor for Pests and Diseases: Keep an eye out for common tomato pests and diseases, such as aphids, whiteflies, and blight. Treat any problems promptly with appropriate organic or chemical controls.
5. Prune Regularly: Prune your tomato plant regularly to remove suckers (the small shoots that grow between the main stem and the branches). This will help improve air circulation and encourage fruit production.
Troubleshooting Tips
Even with the best planning, sometimes things don’t go exactly as expected. Here are a few troubleshooting tips to help you overcome any challenges.
* Soil is Too Wet: If the soil in the inner container is constantly soggy, it could be a sign that the drainage holes are clogged or that the potting mix is too dense. Try poking the drainage holes with a small stick to clear any blockages. You can also amend the potting mix with perlite or vermiculite to improve drainage.
* Soil is Too Dry: If the soil is constantly dry, even when the reservoir is full, it could be that the landscape fabric is preventing water from wicking up into the soil. Try poking a few small holes in the fabric to allow water to pass through more easily.
* Algae Growth in the Reservoir: Algae can sometimes grow in the water reservoir, especially if the planter is exposed to direct sunlight. This isn’t usually harmful to the plant, but it can be unsightly. To prevent algae growth, you can add a small amount of hydrogen peroxide to the water in the reservoir.
* Plant is Not Growing Well: If your tomato plant isn’t growing well, it could be due to a variety of factors, such as poor soil, lack of sunlight, or nutrient deficiencies. Make sure your plant is getting at least 6-8 hours of sunlight per day and that you’re fertilizing it regularly.
Why This Works So Well
The beauty of this self-watering system lies in its simplicity and effectiveness. The water reservoir provides a constant supply of moisture to the plant’s roots, preventing them from drying out. The landscape fabric acts as a wick, drawing water up from the reservoir into the soil. This system also helps to conserve water, as it reduces evaporation and runoff. Plus, it’s incredibly convenient, as you don’t have to water your
Conclusion
So, there you have it! Transforming your gardening game with this simple, yet incredibly effective, DIY tomato growing system is more than just a project; it’s an investment in fresh, flavorful, and abundant harvests. We’ve walked you through the steps, highlighting the ease and affordability of creating your own self-watering setup. But why is this a must-try?
Firstly, it addresses the most common challenges faced by tomato growers: inconsistent watering and nutrient delivery. By providing a consistent supply of both, you’re setting your plants up for success from the very beginning. No more guessing whether you’ve watered enough or worrying about nutrient deficiencies hindering growth. This system takes the guesswork out of the equation, allowing you to focus on other aspects of gardening, like pest control and pruning.
Secondly, it’s incredibly adaptable. Feel free to experiment with different container sizes to suit your space and the variety of tomatoes you’re growing. For smaller patio tomatoes, a smaller bucket or container will suffice. For larger, indeterminate varieties, opt for larger containers to accommodate their extensive root systems. You can also adjust the nutrient solution based on the specific needs of your tomato plants. Some gardeners prefer using organic fertilizers, while others opt for synthetic options. The choice is yours!
Consider adding a trellis or support system to your DIY tomato growing system. As your tomato plants grow, they’ll need support to prevent them from toppling over, especially when laden with fruit. A simple bamboo stake or a more elaborate cage can make a world of difference.
Another variation to consider is incorporating companion planting. Planting basil, marigolds, or other beneficial herbs and flowers alongside your tomatoes can help deter pests and attract pollinators, further enhancing the health and productivity of your plants.
Beyond the practical benefits, building your own tomato growing system is a rewarding experience in itself. It’s a chance to connect with nature, learn about plant physiology, and enjoy the satisfaction of growing your own food. Plus, it’s a sustainable and eco-friendly way to garden, reducing your reliance on store-bought produce and minimizing your environmental impact.
We wholeheartedly encourage you to give this DIY tomato growing system a try. It’s a game-changer for tomato enthusiasts of all levels, from beginners to seasoned gardeners. The rewards are well worth the effort, and you’ll be amazed at the difference it makes in the health and yield of your tomato plants.
Don’t just take our word for it! We’d love to hear about your experiences. Share your photos, tips, and variations in the comments below. Let’s create a community of tomato growers who are passionate about sustainable and productive gardening. What worked for you? What challenges did you face? What modifications did you make to the system? Your insights will be invaluable to other gardeners who are embarking on this journey.
So, grab your buckets, gather your supplies, and get ready to experience the joy of growing your own delicious tomatoes with this simple, effective, and customizable DIY tomato growing system. Happy gardening!
Frequently Asked Questions (FAQ)
What type of container is best for a DIY tomato growing system?
The best type of container depends on the size of the tomato variety you plan to grow. For smaller, determinate varieties like patio tomatoes, a 5-gallon bucket or container will usually suffice. For larger, indeterminate varieties like beefsteak or heirloom tomatoes, opt for a larger container, such as a 10-gallon or even a 20-gallon container. The container should be made of food-grade plastic to ensure it’s safe for growing edible plants. Also, make sure the container is opaque to prevent algae growth in the nutrient solution. Dark-colored containers are generally preferred.
How often should I refill the water reservoir in my DIY tomato growing system?
The frequency of refilling the water reservoir depends on several factors, including the size of the container, the size of the tomato plant, the weather conditions, and the type of growing medium you’re using. In general, you should check the water level in the reservoir daily, especially during hot and dry weather. When the water level drops significantly, refill the reservoir with fresh water and nutrient solution. As a general guideline, you may need to refill the reservoir every 1-3 days during peak growing season.
What type of growing medium should I use in my DIY tomato growing system?
A well-draining and nutrient-rich growing medium is essential for success with a DIY tomato growing system. A good option is a soilless mix consisting of peat moss, perlite, and vermiculite. This mix provides excellent drainage and aeration, which are crucial for healthy root development. You can also add compost or other organic matter to the mix to provide additional nutrients. Avoid using garden soil, as it can become compacted and poorly drained in containers.
What type of fertilizer should I use in my DIY tomato growing system?
You can use either organic or synthetic fertilizers in your DIY tomato growing system, depending on your preferences. Organic fertilizers, such as compost tea, fish emulsion, and bone meal, provide a slow-release source of nutrients and promote beneficial microbial activity in the soil. Synthetic fertilizers, such as water-soluble tomato fertilizers, provide a quick and readily available source of nutrients. Follow the instructions on the fertilizer package carefully to avoid over-fertilizing, which can damage your plants. A balanced fertilizer with an NPK ratio of 10-10-10 or 14-14-14 is a good starting point.
How do I prevent pests and diseases in my DIY tomato growing system?
Prevention is key when it comes to pests and diseases in your DIY tomato growing system. Start by using disease-resistant tomato varieties. Regularly inspect your plants for signs of pests or diseases, such as aphids, whiteflies, or fungal spots. Remove any affected leaves or plants immediately. You can also use organic pest control methods, such as insecticidal soap or neem oil, to control pests. Ensure good air circulation around your plants to prevent fungal diseases. Avoid overwatering, as this can create a favorable environment for diseases.
Can I use this system indoors?
Yes, you can use this system indoors, but you’ll need to provide adequate lighting. Tomatoes require at least 6-8 hours of direct sunlight per day, or the equivalent in artificial light. LED grow lights are a good option for indoor tomato growing, as they are energy-efficient and provide the full spectrum of light that plants need. You’ll also need to ensure good air circulation and ventilation to prevent fungal diseases.
How do I prune my tomato plants in this system?
Pruning is important for maximizing fruit production in your DIY tomato growing system. For indeterminate tomato varieties, prune off the suckers that grow between the main stem and the branches. These suckers will drain energy from the plant and reduce fruit production. For determinate tomato varieties, pruning is generally not necessary. Remove any yellowing or diseased leaves to improve air circulation and prevent the spread of disease.
What are some common problems I might encounter with this system and how do I fix them?
Some common problems include blossom end rot (caused by calcium deficiency), nutrient deficiencies (yellowing leaves), and pest infestations. Blossom end rot can be prevented by ensuring consistent watering and adding calcium to the soil. Nutrient deficiencies can be addressed by using a balanced fertilizer. Pest infestations can be controlled with organic pest control methods. Regularly monitor your plants and address any problems promptly to ensure a healthy and productive tomato harvest.

Leave a Comment