
Harvesting cantaloupe can be tricky, right? I know I’ve definitely had my share of overripe, mushy melons and rock-hard, tasteless ones. But what if I told you there’s a super simple, almost foolproof DIY trick that can take the guesswork out of knowing when your cantaloupe is perfectly ripe and ready to pick?
For centuries, gardeners have relied on intuition and experience to determine the ripeness of their melons. From tapping and sniffing to examining the stem, these methods, passed down through generations, often yielded mixed results. Think about it – cantaloupe, with its sweet aroma and juicy flesh, has been cultivated since ancient times, enjoyed by pharaohs in Egypt and emperors in Rome. It’s a fruit steeped in history, and we deserve to enjoy it at its peak flavor!
That’s why I’m so excited to share this easy bag setup for harvesting cantaloupe. This DIY hack not only protects your precious melons from pests and sunscald but also provides a visual cue, making it incredibly easy to identify when they’re ready to be harvested. No more guessing games, no more wasted fruit! This simple trick will help you enjoy the sweetest, most flavorful cantaloupe you’ve ever tasted, straight from your own garden. Let’s get started!
DIY Cantaloupe Harvesting Hack: The Easy Bag Setup
Hey there, fellow gardeners! Are you tired of your precious cantaloupes rotting on the vine or getting nibbled on by critters before you even get a chance to enjoy them? I know I was! That’s why I developed this super simple, yet effective, cantaloupe harvesting hack using just a few common items. It’s all about creating a supportive “hammock” for your ripening melons, protecting them from ground moisture, pests, and even accidental bumps. Let’s get started!
What You’ll Need
Before we dive in, let’s gather our supplies. This is a low-cost project, so you probably already have most of these things lying around:
* Mesh Produce Bags: Think the kind you get onions or oranges in. The sturdier, the better. I prefer the ones from citrus fruits as they tend to be more durable. You’ll need one bag per cantaloupe you want to support.
* Twine or Garden Tape: Something strong and weather-resistant to tie the bag to the vine. Garden tape is gentler on the plant, but twine works just fine.
* Scissors or a Knife: For cutting the twine or tape.
* Optional: A small piece of cardboard or plastic sheeting (for extra ground protection, especially in damp climates).
Why This Hack Works
This method is all about providing support and protection. Here’s why it’s so effective:
* Prevents Rot: By lifting the cantaloupe off the ground, you eliminate direct contact with moist soil, which is a breeding ground for mold and rot.
* Deters Pests: The mesh bag acts as a physical barrier against some ground-dwelling pests, like slugs and snails.
* Reduces Bruising: The bag cushions the cantaloupe, preventing bruising from accidental bumps or falls.
* Easy Monitoring: You can easily check the ripeness of the cantaloupe without disturbing it too much.
* Air Circulation: The mesh allows for good air circulation around the melon, further reducing the risk of rot.
Step-by-Step Instructions: Bagging Your Cantaloupes
Okay, let’s get to the fun part! Here’s how to set up your cantaloupe support system:
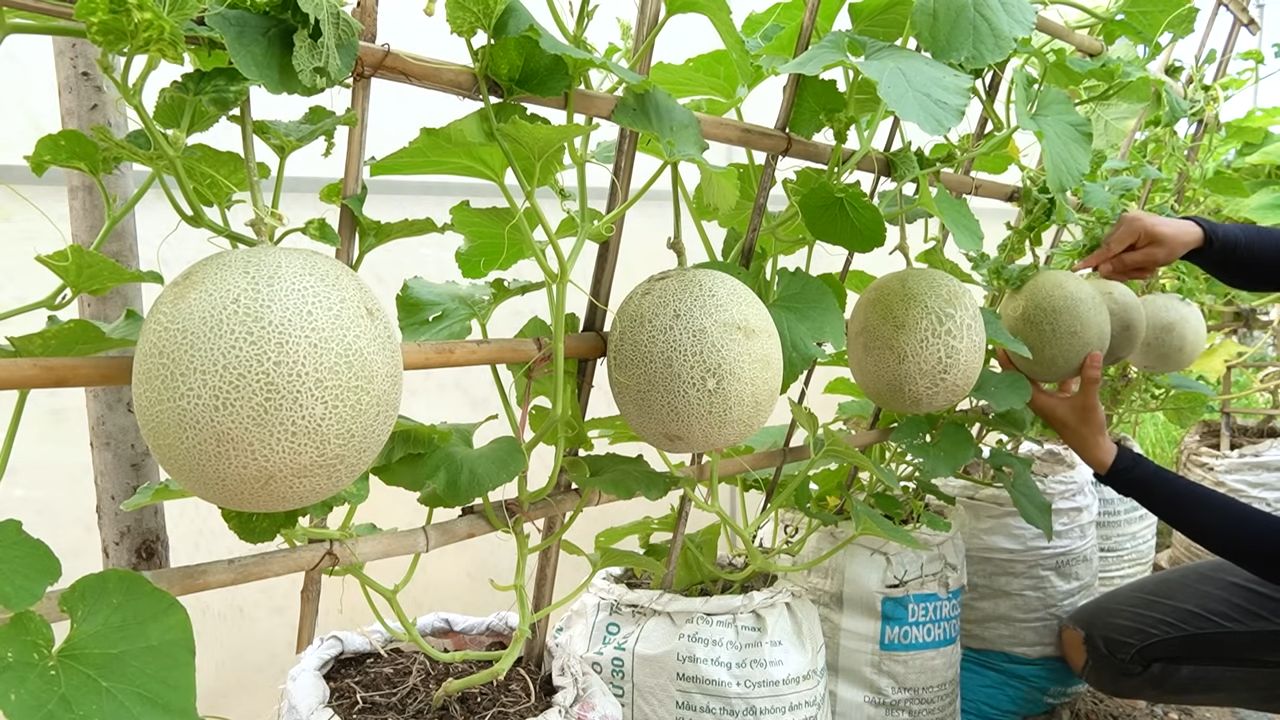
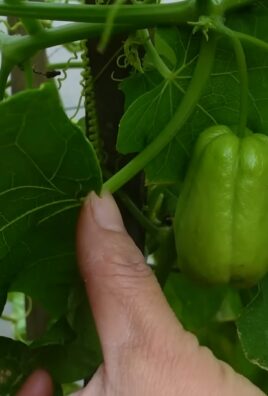
1. Identify Ripening Cantaloupes: This is crucial. You want to bag cantaloupes that are almost ready to harvest, but not quite. Look for these signs:
* Color Change: The skin should be turning from green to a tan or yellowish color, depending on the variety.
* Aromatic Smell: A sweet, cantaloupe-y aroma is a good sign of ripeness.
* Stem Crack: A slight crack forming around the stem where it connects to the melon is a telltale sign. Don’t wait for the stem to completely detach, or you might miss the perfect harvesting window!
* Gentle Pressure: The blossom end (opposite the stem) should yield slightly to gentle pressure. Don’t squeeze too hard, or you’ll bruise the melon.
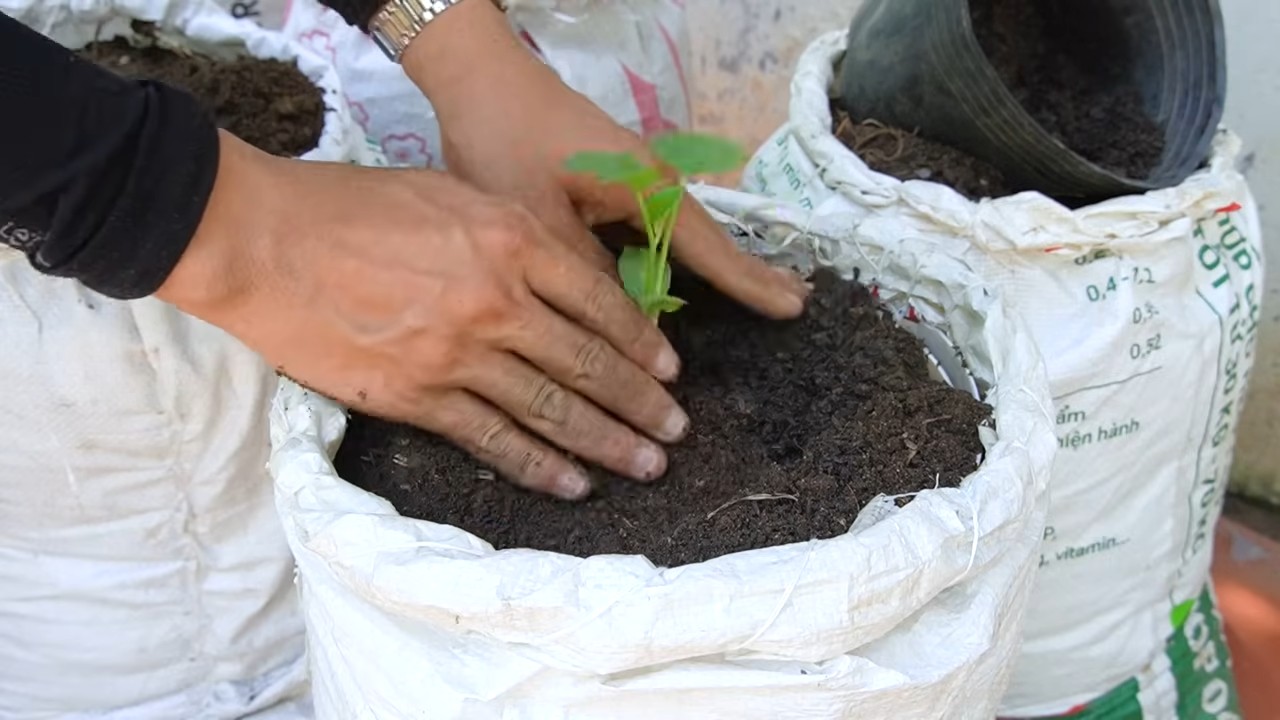
2. Prepare the Mesh Bag: Open the mesh bag wide. If it’s a particularly long bag, you might want to trim it down a bit, leaving enough room to cradle the cantaloupe comfortably.
3. Position the Bag: Gently lift the cantaloupe and slide the mesh bag underneath it. You want the cantaloupe to be sitting comfortably inside the bag, with the bag supporting its weight. Be careful not to damage the vine!
4. Secure the Bag to the Vine: This is the most important step. You need to securely attach the bag to the vine so that it can support the weight of the cantaloupe. Here’s how I do it:
* Find a Strong Point: Look for a sturdy part of the vine near the cantaloupe. This could be a thicker stem or a leaf node.
* Tie the Twine or Tape: Cut a length of twine or garden tape (about 12-18 inches should be enough). Tie one end of the twine or tape securely to the top of the mesh bag, gathering the mesh together.
* Attach to the Vine: Wrap the other end of the twine or tape around the sturdy part of the vine and tie it securely. Make sure the knot is tight enough to hold the weight of the cantaloupe, but not so tight that it constricts the vine. If using garden tape, wrap it around the vine several times for extra security.
* Check the Support: Gently tug on the bag to make sure it’s securely attached to the vine. The cantaloupe should be supported by the bag, not resting on the ground.
5. Optional: Add Ground Protection: If you live in a particularly damp climate, or if your garden soil tends to stay wet, you might want to add a small piece of cardboard or plastic sheeting underneath the bag. This will provide an extra layer of protection against moisture. Just make sure it doesn’t block air circulation.
6. Repeat for Other Cantaloupes: Repeat steps 1-5 for all the cantaloupes that are nearing ripeness.
Troubleshooting Tips
Sometimes, things don’t go exactly as planned. Here are a few common issues you might encounter and how to fix them:
* Bag is Too Small: If the mesh bag is too small to comfortably hold the cantaloupe, try using two bags. Simply overlap the openings of the two bags and secure them together with twine or tape.
* Vine is Too Weak: If the vine is too weak to support the weight of the cantaloupe, you can try using a stake or trellis to provide additional support. Tie the bag to the stake or trellis instead of the vine.
* Bag is Slipping: If the bag is slipping down the vine, try tightening the twine or tape. You can also try using a different type of knot that is less likely to slip.
* Critters are Still Getting In: If you’re still having problems with pests, you can try adding a layer of netting around the bag. This will provide an extra barrier against critters.
Harvesting Your Bagged Cantaloupes
Now for the best part – harvesting! Once your cantaloupes are ripe (remember those signs from step 1?), it’s time to enjoy the fruits (or rather, melons) of your labor.
1. Check for Ripeness: Give your cantaloupe one last check to make sure it’s perfectly ripe. The stem should be starting to slip easily from the vine.
2. Cut the Vine: Using your scissors or knife, carefully cut the vine just above the point where it’s attached to the cantaloupe. Be gentle and avoid damaging the melon.
3. Remove the Bag: Untie the twine or tape that’s holding the bag to the vine.
4. Enjoy! Your perfectly ripened, protected cantaloupe is now ready to be enjoyed! Slice it up and savor the sweet, juicy flavor.
Extra Tips for Cantaloupe Success
Here are a few extra tips to help you grow the best cantaloupes possible:
* Choose the Right Variety: Different cantaloupe varieties have different ripening times and flavor profiles. Do some research to find a variety that is well-suited to your climate and your taste preferences.
* Provide Plenty of Sunlight: Cantaloupes need at least 6-8 hours of sunlight per day to thrive.
* Water Regularly: Water your cantaloupes deeply and regularly, especially during hot, dry weather. Avoid getting the leaves wet, as this can lead to fungal diseases.
* Fertilize Properly: Cantaloupes are heavy feeders, so they need plenty of nutrients. Use a balanced fertilizer according to the package directions.
* Control Pests and Diseases: Keep an eye out for common cantaloupe pests and diseases, such as aphids, squash bugs, and powdery mildew. Take action to control these problems as soon as you notice them.
Why I Love This Method
I’ve been using this cantaloupe bagging hack for years, and it’s made a huge difference in my harvest. I used to lose so many cantaloupes to rot and pests, but now I can enjoy almost every single one. It’s a simple, inexpensive, and effective way to protect your precious melons and ensure a bountiful harvest. Plus, it gives me a little thrill every time I see those bags hanging in the garden, knowing that a delicious cantaloupe is ripening inside!
So, give this hack a try and let me know how it works for you. Happy gardening!
Conclusion
So, there you have it! This simple, yet incredibly effective, DIY trick for harvesting cantaloupe using an easy bag setup is a game-changer for any home gardener. Forget the guesswork and the potential for bruised or damaged fruit. This method provides a gentle, supportive cradle for your ripening cantaloupes, ensuring they detach at peak ripeness and remain pristine until you’re ready to enjoy their sweet, juicy goodness.
Why is this a must-try? Because it simplifies the entire harvesting process. No more constant checking and prodding, hoping to catch the cantaloupe at that perfect moment. The bag acts as a visual cue, signaling when the fruit is ready to release. It also protects the cantaloupe from ground pests and rot, maximizing your yield and minimizing waste. Plus, it’s incredibly cost-effective, utilizing materials you likely already have on hand.
Beyond the basic setup, there are several variations you can explore to tailor this method to your specific needs and garden conditions. For instance, if you live in a particularly windy area, consider using a heavier-duty bag or securing it more firmly to the vine with twine. You could also experiment with different types of bags, such as breathable mesh bags, to further improve air circulation and prevent moisture buildup. If you’re growing multiple cantaloupe varieties, color-coding your bags can help you easily identify which fruit is which. For smaller cantaloupe varieties, consider using smaller bags to conserve materials and reduce unnecessary bulk.
We’ve found that this method is particularly beneficial for gardeners who are new to growing cantaloupe, as it eliminates much of the uncertainty surrounding harvesting. However, even experienced growers can appreciate the convenience and reliability of this easy bag setup. It’s a simple solution that yields consistently excellent results.
Don’t just take our word for it, though. We wholeheartedly encourage you to try this DIY trick for harvesting cantaloupe in your own garden. We’re confident that you’ll be amazed by how easy and effective it is. And once you’ve experienced the joy of harvesting perfectly ripe, unblemished cantaloupes, we’d love to hear about your experience! Share your photos, tips, and variations in the comments below. Let’s build a community of cantaloupe enthusiasts who are all enjoying the fruits (literally!) of their labor. Happy harvesting!
Frequently Asked Questions (FAQ)
What type of bag is best for this DIY cantaloupe harvesting method?
The ideal bag is a lightweight, breathable material that can support the weight of a ripening cantaloupe. Burlap bags, paper bags (especially those designed for produce), or even repurposed plastic grocery bags (with holes punched for ventilation) can work well. Avoid using thick, non-breathable plastic bags, as they can trap moisture and lead to rot. The size of the bag should be appropriate for the size of the cantaloupe variety you are growing. A bag that is too small will restrict growth, while a bag that is too large will be cumbersome and may not provide adequate support.
How do I know when the cantaloupe is ready to harvest, even with the bag?
While the bag provides support and protection, you still need to monitor the cantaloupe for signs of ripeness. Look for the following indicators:
* **Color Change:** The skin of the cantaloupe should change from green to a tan or yellowish color. The netting on the rind should also become more prominent and raised.
* **Aroma:** A ripe cantaloupe will have a sweet, musky aroma, especially near the stem end. You may be able to detect this aroma even with the bag in place.
* **Stem Separation:** The most reliable sign is when the stem begins to crack and separate easily from the fruit. This is called “slipping.” The bag helps catch the cantaloupe when this happens, preventing it from falling and bruising.
* **Sound:** Some gardeners listen for a hollow sound when they tap the cantaloupe. This can be a sign of ripeness, but it’s not always reliable.
Will this method work for other types of melons, like honeydew or watermelon?
While this method is primarily designed for cantaloupe, it can be adapted for other melons, but with some considerations. Honeydew melons are similar in size and growth habit to cantaloupe, so the same bag setup can generally be used. However, watermelons are much larger and heavier, requiring a significantly stronger and larger bag or support system. You might need to use a sling made of sturdy fabric or netting instead of a bag. Also, watermelons don’t “slip” from the vine like cantaloupes, so you’ll need to rely on other indicators of ripeness, such as the tendril closest to the fruit turning brown and dry, and the underside of the melon turning yellow.
What if the bag gets wet from rain? Will that cause the cantaloupe to rot?
Excessive moisture can indeed promote rot, so it’s important to ensure good drainage and air circulation. If you live in a rainy climate, consider using a breathable bag material like burlap or mesh. You can also cut small slits in the bottom of the bag to allow water to drain out. Avoid using plastic bags without ventilation holes, as they will trap moisture. Regularly check the bag and the cantaloupe for signs of rot, such as soft spots or mold. If you notice any problems, remove the bag and allow the cantaloupe to air dry.
How do I attach the bag to the vine without damaging it?
The key is to be gentle and avoid putting too much stress on the vine. Use soft twine or garden tape to loosely secure the bag to the vine. Avoid tying the bag too tightly, as this can restrict the flow of nutrients to the cantaloupe. The goal is simply to provide enough support to keep the bag in place and prevent it from falling off. You can also use a small stake or trellis to provide additional support for the bag and the vine.
Can I reuse the bags for multiple harvests?
Yes, you can reuse the bags, especially if they are made of durable material like burlap. However, it’s important to clean and disinfect the bags between uses to prevent the spread of diseases. Wash the bags with soap and water, and then rinse them thoroughly. You can also soak them in a diluted bleach solution (1 part bleach to 10 parts water) for a few minutes to kill any pathogens. Allow the bags to dry completely before storing them.
What if the cantaloupe falls out of the bag before it’s fully ripe?
If the cantaloupe falls out of the bag prematurely, it may still ripen off the vine, but it won’t be as sweet or flavorful as if it had ripened fully on the vine. Place the cantaloupe in a cool, dry place and allow it to ripen for a few days. Check it regularly for signs of ripeness, such as a softening of the rind and a sweet aroma. You can also place it in a paper bag with an apple or banana, as these fruits release ethylene gas, which can help accelerate the ripening process.
Does this method protect against pests and diseases?
The bag can provide some protection against ground pests, such as squash bugs and cucumber beetles, by creating a physical barrier. However, it won’t protect against airborne pests or diseases. It’s still important to monitor your plants regularly for signs of pests or diseases and take appropriate action, such as applying organic pesticides or fungicides. Good air circulation and proper watering practices can also help prevent diseases.
Is this method suitable for all climates?
This method is generally suitable for most climates, but you may need to make some adjustments depending on your specific conditions. In hot, sunny climates, consider using a bag made of a lighter-colored material to reflect sunlight and prevent the cantaloupe from overheating. In humid climates, ensure good air circulation to prevent rot. In windy climates, secure the bag more firmly to the vine.
How does this DIY cantaloupe harvesting method compare to other methods?
Compared to other methods, this DIY bag setup offers several advantages. It’s more reliable than simply waiting for the cantaloupe to fall off the vine, as it prevents bruising and damage. It’s also more convenient than constantly checking the cantaloupe for signs of ripeness. And it’s more cost-effective than buying specialized harvesting equipment. Overall, this method provides a simple, effective, and affordable way to harvest perfectly ripe cantaloupes.

Leave a Comment