
Double melon harvest – sounds like a gardener’s dream, right? Well, it doesn’t have to be just a dream! Imagine biting into not one, but two juicy, sun-ripened melons from the same plant. That’s the kind of satisfaction we’re aiming for in this DIY guide. For centuries, gardeners have sought ways to maximize their yields, and while modern techniques offer some solutions, sometimes the simplest, most time-tested tricks are the most effective.
Melons, with their sweet, refreshing taste, have been cultivated for thousands of years, tracing back to ancient Africa and Asia. They’ve been prized for their nutritional value and delicious flavor, becoming a symbol of summer abundance in many cultures. But let’s face it, growing melons can be tricky. They need the right amount of sun, water, and nutrients, and even then, you might only get one melon per plant. That’s where our DIY trick comes in!
I’m going to show you a simple, yet effective method to potentially double melon harvest from your existing plants. This isn’t just about bragging rights (though that’s a nice bonus!). It’s about making the most of your garden space, increasing your food security, and enjoying even more of that delicious, homegrown goodness. Who wouldn’t want to learn how to get more from their melon patch? Let’s dive in and unlock the secrets to a bountiful melon harvest!
Double Your Melon Harvest: A DIY Trellis System for Vertical Growth
Hey fellow gardeners! Are you dreaming of overflowing melon baskets but short on space? I’ve got the perfect solution for you: a DIY trellis system that will let your melons climb, maximizing your yield and saving precious garden real estate. This project is surprisingly simple, and the results are absolutely worth the effort. Let’s get started!
Materials You’ll Need
Before we dive in, let’s gather our supplies. This list might seem long, but most of these items are readily available at your local hardware store.
* Wooden Posts (4×4): I recommend using pressure-treated lumber for longevity. The height will depend on the type of melon you’re growing. For smaller melons like cantaloupe, 6-8 feet should suffice. For larger watermelons, you might want to go a bit taller, around 8-10 feet. You’ll need at least two posts, but for a larger trellis, consider using more for added stability.
* Wooden Boards (2×4): These will form the horizontal supports of your trellis. The length will depend on the desired width of your trellis. I usually go for 4-6 feet.
* Heavy-Duty Netting or Mesh: This is what your melons will climb on! Choose a netting with openings large enough for you to easily reach through and harvest your melons. I prefer a sturdy nylon netting or even welded wire mesh for extra support, especially for heavier varieties.
* Galvanized Screws or Nails: Use screws or nails that are long enough to securely fasten the wooden posts and boards together. I recommend using screws for a stronger and more durable connection.
* Heavy-Duty Landscape Fabric or Weed Barrier: This will help suppress weeds around the base of your trellis.
* Metal Stakes or Ground Anchors: These will provide extra stability to your trellis, especially in windy areas.
* Twine or Plant Ties: For gently guiding the melon vines and securing the developing fruits to the trellis.
* Measuring Tape
* Level
* Drill with appropriate drill bits
* Saw (for cutting wood if needed)
* Shovel or Post Hole Digger
* Gloves
* Safety Glasses
Planning Your Trellis
Before you start building, take a moment to plan the layout of your trellis. Consider the following:
* Sunlight: Melons need plenty of sunshine, so choose a location that receives at least 6-8 hours of direct sunlight per day.
* Soil: Melons thrive in well-drained soil that is rich in organic matter. Amend your soil with compost or other organic materials before planting.
* Space: Make sure you have enough space for your trellis and the surrounding melon plants. Consider the mature size of the melon variety you’re growing.
* Wind: If your area is prone to strong winds, choose a sheltered location or reinforce your trellis with extra stakes or ground anchors.
* Melon Variety: Different melon varieties have different weights. Smaller melons like cantaloupe and honeydew will be easier to support than large watermelons. Choose your netting and support system accordingly.
Building the Trellis Frame
Okay, let’s get our hands dirty! This is where the fun begins.
1. Prepare the Posts: If your wooden posts aren’t already the desired length, use a saw to cut them to size. I like to treat the bottom portion of the posts with a wood preservative to prevent rot.
2. Dig the Post Holes: Use a shovel or post hole digger to dig holes for your posts. The depth of the holes should be about 1/3 of the post’s length. For example, if your posts are 6 feet tall, dig holes that are 2 feet deep. Space the holes according to the desired width of your trellis.
3. Set the Posts: Place the posts into the holes and ensure they are plumb (perfectly vertical) using a level. Backfill the holes with soil, tamping it down firmly around the posts. You can also use concrete to set the posts for extra stability, but it’s not always necessary.
4. Attach the Horizontal Supports: Once the posts are securely in place, attach the wooden boards (2x4s) to the posts to create the horizontal supports of your trellis. Use galvanized screws or nails to fasten the boards to the posts. I usually attach one board near the top of the posts and another one about halfway down. You can add more boards for extra support if needed. Make sure the boards are level before securing them.
Adding the Netting
Now for the part that will actually hold our melons!
1. Attach the Netting: Unroll your heavy-duty netting or mesh and attach it to the wooden frame. Use staples, zip ties, or even heavy-duty twine to secure the netting to the posts and horizontal supports. Make sure the netting is taut and evenly distributed. I like to start at the top and work my way down, pulling the netting tight as I go.
2. Reinforce the Netting (Optional): For extra support, especially for heavier melon varieties, you can reinforce the netting with additional twine or wire. Run twine horizontally and vertically across the netting, creating a grid pattern. This will help distribute the weight of the melons and prevent the netting from sagging.
Preparing the Planting Area
Almost there! Now let’s get the ground ready for our melon plants.
1. Clear the Area: Remove any weeds, rocks, or debris from the planting area around the base of your trellis.
2. Amend the Soil: Melons thrive in well-drained soil that is rich in organic matter. Amend your soil with compost, aged manure, or other organic materials. Work the amendments into the soil to a depth of at least 6 inches.
3. Install Landscape Fabric: Lay down heavy-duty landscape fabric or weed barrier around the base of your trellis. This will help suppress weeds and conserve moisture. Cut holes in the fabric where you will plant your melon seedlings.
4. Water the Soil: Water the soil thoroughly before planting your melon seedlings.
Planting and Training Your Melons
The final step! Let’s get those melons growing.
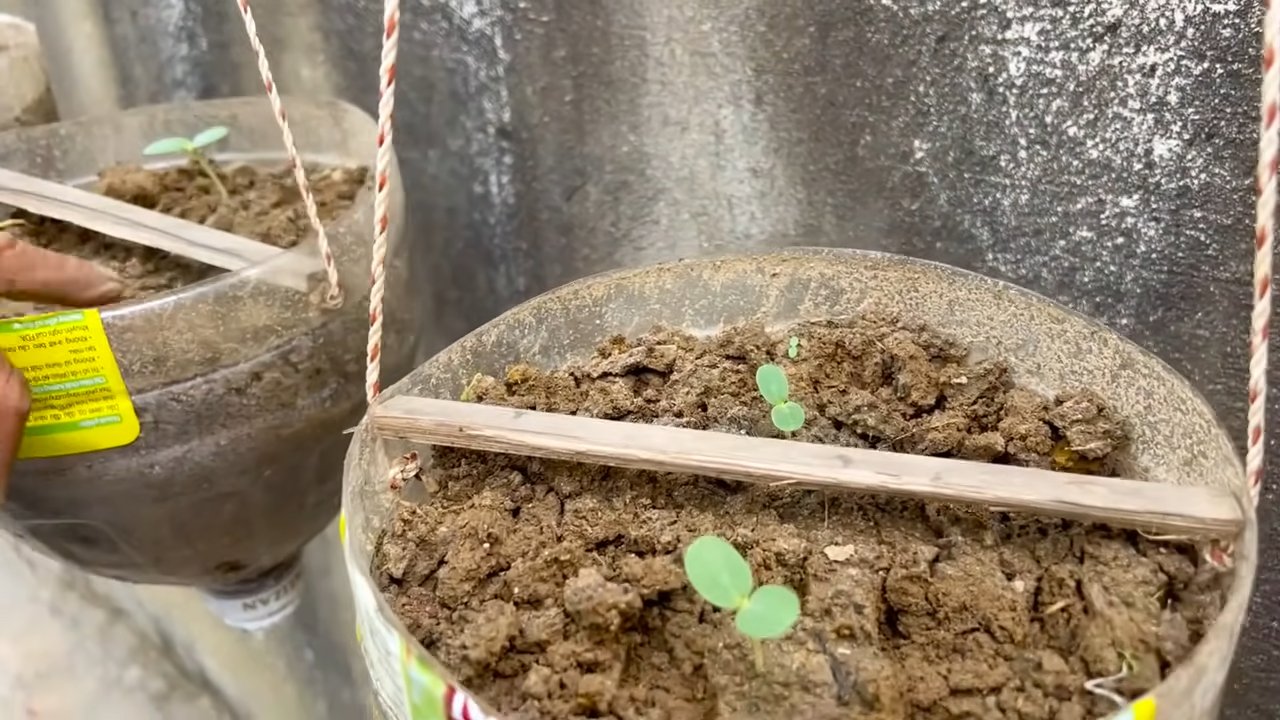
1. Plant Your Melon Seedlings: Carefully plant your melon seedlings in the holes you cut in the landscape fabric. Space the seedlings according to the recommendations for your specific melon variety.
2. Water Regularly: Water your melon seedlings regularly, especially during dry periods. Melons need plenty of water to thrive.
3. Fertilize: Fertilize your melon plants with a balanced fertilizer according to the package directions.
4. Train the Vines: As your melon vines grow, gently guide them up the trellis. Use twine or plant ties to secure the vines to the netting. Encourage the vines to spread out evenly across the trellis.
5. Support the Melons: As the melons develop, they will need extra support. You can use slings made from old t-shirts, pantyhose, or netting to support the melons. Tie the slings to the trellis to prevent the melons from falling off. I’ve even seen people use old plastic grocery bags! Get creative!
6. Monitor for Pests and Diseases: Keep an eye out for pests and diseases and take action promptly if you notice any problems.
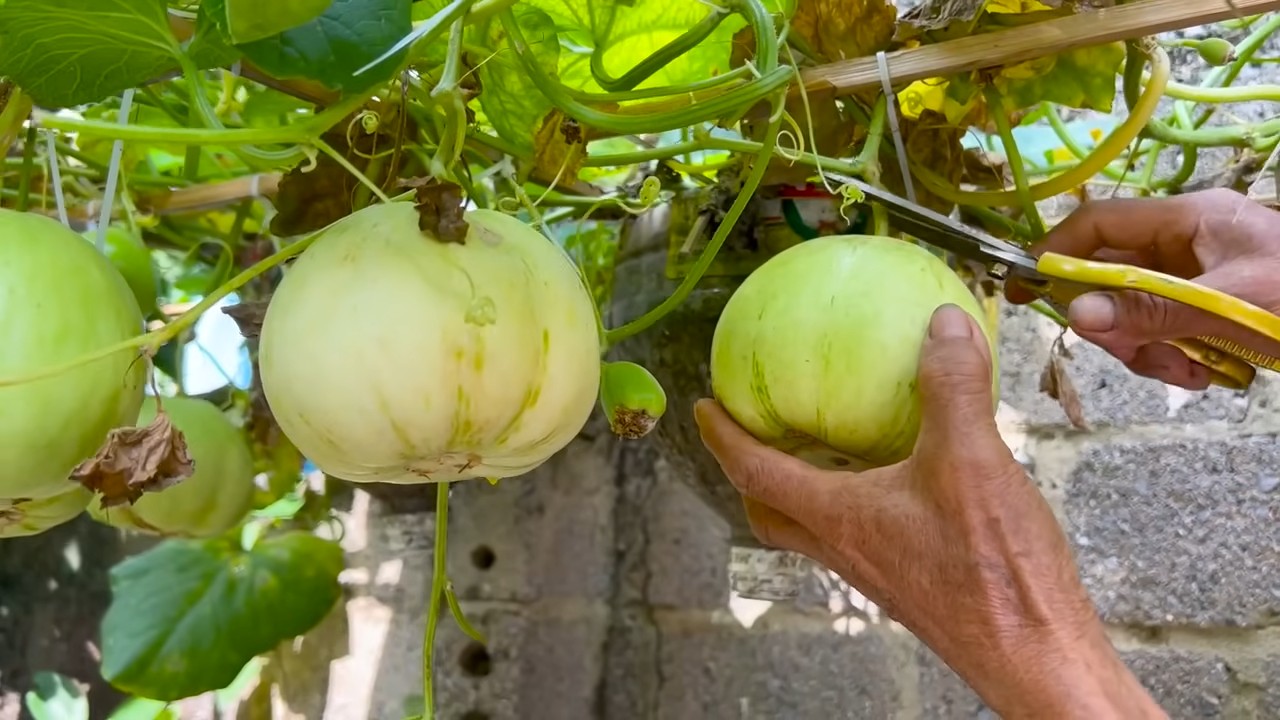
7. Harvest: Harvest your melons when they are ripe. The exact timing will depend on the melon variety. Look for signs of ripeness such as a change in color, a sweet aroma, and a slight give when you press on the blossom end of the melon.
Tips for Success
Here are a few extra tips to help you maximize your melon harvest:
* Choose the Right Melon Variety: Some melon varieties are better suited for vertical growing than others. Look for varieties that are compact and have smaller fruits.
* Prune Your Melon Vines: Pruning your melon vines can help improve air circulation and reduce the risk of disease. Remove any dead or yellowing leaves.
* Provide Adequate Support: Make sure your trellis is strong enough to support the weight of the melons. Reinforce the netting and use slings to support the developing fruits.
* Water Deeply and Regularly: Melons need plenty of water, especially during hot weather. Water deeply and regularly, but avoid overwatering.
* Protect from Pests and Diseases: Monitor your melon plants for pests and diseases and take action promptly if you notice any problems. Use organic pest control methods whenever possible.
And there you have it! With a little bit of effort, you can build your own DIY trellis system and double your melon harvest. Happy gardening! I hope you enjoy the fruits (or should I say, melons!) of your labor.
Conclusion
So, there you have it! This simple, yet incredibly effective DIY trick for achieving a double melon harvest is a game-changer for any gardener, regardless of experience level. We’ve walked you through the process, highlighting the key steps and offering insights into why this method works so well. It’s not just about getting more melons; it’s about maximizing your garden’s potential and enjoying the fruits (or rather, the melons!) of your labor to the fullest extent.
Think about it: imagine the satisfaction of harvesting twice the amount of juicy, sweet melons from the same amount of space. Picture the abundance you can share with friends, family, and neighbors. Envision the delicious summer salads, refreshing smoothies, and delightful desserts you can create with your bountiful harvest. This isn’t just a gardening technique; it’s an investment in a more fruitful and fulfilling gardening experience.
But the beauty of this DIY method lies not only in its effectiveness but also in its adaptability. Feel free to experiment with different melon varieties. While we’ve focused on watermelons and cantaloupes, this technique can also be applied to honeydew melons, Galia melons, and even smaller varieties like sugar kiss melons. Just be sure to adjust the support system accordingly to accommodate the size and weight of the developing fruits.
Consider exploring variations on the support system as well. If you don’t have pantyhose readily available, you can use netting, burlap sacks, or even repurposed t-shirts. The key is to provide adequate support to prevent the stems from breaking under the weight of the developing melons. You can also experiment with different fertilizers and soil amendments to further enhance the growth and flavor of your melons. Adding compost or well-rotted manure to the soil can provide essential nutrients and improve drainage.
Don’t be afraid to get creative and tailor this DIY trick to your specific gardening conditions and preferences. The most important thing is to give it a try and see the amazing results for yourself. We are confident that you will be thrilled with the increased yield and the overall health and vigor of your melon plants.
We truly believe that this DIY trick for a double melon harvest is a must-try for any gardener looking to maximize their yield and enjoy a more abundant harvest. It’s simple, cost-effective, and incredibly rewarding.
Now, it’s your turn! We encourage you to put this DIY trick into practice and experience the joy of harvesting twice the amount of delicious melons. And most importantly, we want to hear about your experience! Share your photos, tips, and stories with us in the comments section below. Let’s create a community of gardeners who are passionate about maximizing their yields and enjoying the fruits (or melons!) of their labor. What worked for you? What challenges did you face? What variations did you try? Your feedback is invaluable and will help other gardeners learn and grow.
So, grab your gardening gloves, gather your supplies, and get ready to embark on a journey to a more abundant melon harvest. We can’t wait to hear about your success! Happy gardening!
Frequently Asked Questions (FAQ)
1. What types of melons work best with this double harvest technique?
This technique works well with a variety of melon types, including watermelons, cantaloupes, honeydew melons, and Galia melons. Smaller varieties like sugar kiss melons are also suitable. The key is to ensure that the support system is adequate for the size and weight of the developing fruits. For larger melons like watermelons, you may need to use a sturdier support system, such as netting or burlap sacks. For smaller melons, pantyhose or repurposed t-shirts may suffice. Experiment with different varieties to see which ones thrive best in your garden and with this particular method.
2. When is the best time to implement this technique?
The best time to implement this technique is when the melon plants are young and actively growing. Ideally, you should start training the vines and providing support as soon as the first few fruits begin to develop. This will allow the plants to adapt to the support system and prevent the stems from breaking under the weight of the developing melons. Monitor your plants regularly and adjust the support system as needed to accommodate the growing fruits.
3. How often should I water and fertilize my melon plants when using this technique?
Melon plants require consistent watering and fertilization, especially when they are producing multiple fruits. Water deeply and regularly, ensuring that the soil remains moist but not waterlogged. Fertilize every 2-3 weeks with a balanced fertilizer or a fertilizer specifically formulated for melons. You can also add compost or well-rotted manure to the soil to provide essential nutrients and improve drainage. Monitor your plants closely and adjust the watering and fertilization schedule as needed based on their growth and appearance.
4. What if I don’t have pantyhose? What else can I use for support?
If you don’t have pantyhose readily available, there are several other materials you can use for support. Netting, burlap sacks, or even repurposed t-shirts can all be effective alternatives. The key is to choose a material that is strong enough to support the weight of the developing melons and that allows for good air circulation. Make sure to secure the support system properly to prevent the melons from falling and damaging the plants.
5. How do I know when the melons are ripe and ready to harvest?
Determining when a melon is ripe and ready to harvest can be tricky, but there are a few key indicators to look for. For watermelons, look for a dull thud when you tap the melon, a creamy yellow spot on the underside where it rests on the ground, and a dried tendril near the stem. For cantaloupes, look for a sweet aroma, a slight give when you press on the blossom end, and a stem that slips easily from the vine. For honeydew melons, look for a creamy yellow color and a slightly waxy feel. Always check multiple indicators to ensure that the melons are fully ripe before harvesting.
6. Can this technique be used in containers or raised beds?
Yes, this technique can be used in containers or raised beds, but you may need to adjust the support system accordingly. Choose a container or raised bed that is large enough to accommodate the mature size of the melon plants. Provide adequate drainage and use a high-quality potting mix or soil. You may also need to provide additional support for the vines, such as a trellis or stakes. Monitor the plants closely and adjust the watering and fertilization schedule as needed based on their growth and appearance.
7. What are some common problems I might encounter, and how can I address them?
Some common problems you might encounter when growing melons include pests, diseases, and nutrient deficiencies. Pests such as aphids, squash bugs, and cucumber beetles can damage the plants and reduce yields. Diseases such as powdery mildew and fusarium wilt can also affect the health and productivity of the plants. Nutrient deficiencies can cause stunted growth, yellowing leaves, and poor fruit development. To address these problems, monitor your plants regularly and take action as soon as you notice any signs of trouble. Use organic pest control methods, such as insecticidal soap or neem oil, to control pests. Apply fungicides to prevent or treat diseases. Fertilize regularly with a balanced fertilizer or a fertilizer specifically formulated for melons to prevent nutrient deficiencies.
8. Will this technique affect the taste or quality of the melons?
No, this technique should not negatively affect the taste or quality of the melons. In fact, by providing adequate support and ensuring that the plants receive sufficient water and nutrients, this technique can actually improve the taste and quality of the melons. The increased airflow around the fruits can also help to prevent diseases and improve ripening. However, it is important to monitor the plants closely and adjust the watering and fertilization schedule as needed to ensure that the melons develop properly.
9. How much space do I need to implement this technique effectively?
The amount of space you need to implement this technique effectively will depend on the variety of melon you are growing and the size of your garden. In general, melon plants require a fair amount of space to spread out and produce fruits. However, by using this technique and providing vertical support, you can maximize the use of your space and grow more melons in a smaller area. Aim for at least 2-3 feet of space between plants and provide adequate support for the vines to climb.
10. Is this technique suitable for beginner gardeners?
Yes, this technique is suitable for beginner gardeners. It is relatively simple to implement and does not require any special skills or equipment. However, it is important to do your research and understand the basic needs of melon plants before you begin. Monitor your plants regularly and take action as soon as you notice any signs of trouble. With a little bit of effort and attention, even beginner gardeners can successfully use this technique to achieve a double melon harvest.

Leave a Comment