
Bagged corn high yield is the dream of every home gardener, isn’t it? Imagine stepping out into your backyard and harvesting ears of sweet, juicy corn that rival anything you’d find at the farmer’s market. Forget those flimsy stalks producing only one or two small ears; we’re talking about a bountiful harvest right in your own backyard!
Growing corn has a rich history, dating back thousands of years to its origins in Mesoamerica. It’s been a staple crop for countless cultures, providing sustenance and playing a vital role in traditions. But you don’t need acres of farmland to enjoy the fruits (or rather, the kernels!) of your labor.
Many people struggle to achieve a truly impressive corn yield in their home gardens. They might face issues like poor soil, inadequate pollination, or simply not knowing the right techniques. That’s where these DIY tricks and hacks come in! I’m going to share some simple yet effective strategies to help you maximize your bagged corn high yield, even in a small space. From soil preparation to pollination boosters, these tips will transform your corn-growing game. Get ready to impress your neighbors with your homegrown cornucopia!
DIY High-Yield Corn Growing in Bags: A Gardener’s Guide
Hey there, fellow gardening enthusiasts! Ever dreamed of a bountiful corn harvest, even without a sprawling field? Well, I’m here to tell you it’s totally achievable, and surprisingly easy, with a little DIY magic and some trusty bags. Growing corn in bags is a fantastic way to maximize your yield in a small space, extend your growing season, and even control the soil conditions perfectly. Let’s dive into how you can create your own mini cornfield, right in your backyard (or even on your balcony!).
What You’ll Need: The Essential Supplies
Before we get our hands dirty, let’s gather our supplies. This is crucial for a smooth and successful corn-growing adventure.
* Large, Sturdy Bags: Think big! We’re talking about heavy-duty grow bags, burlap sacks, or even repurposed feed bags. Aim for a minimum of 15-20 gallons in size per bag. The bigger, the better, as corn roots need room to stretch.
* High-Quality Potting Mix: This is the foundation of our corn kingdom. A well-draining mix is essential. I recommend a blend of compost, peat moss (or coco coir), and perlite or vermiculite. Avoid using garden soil directly, as it can compact and hinder drainage.
* Corn Seeds: Choose a variety that suits your climate and growing season. Look for “early maturing” varieties if you have a shorter growing season. Sweet corn is a popular choice, but feel free to experiment!
* Slow-Release Fertilizer: Corn is a heavy feeder, so a slow-release fertilizer will provide a steady supply of nutrients throughout the growing season. Look for a balanced formula (e.g., 10-10-10) or one specifically designed for vegetables.
* Watering Can or Hose: Consistent watering is key to happy corn plants.
* Optional:
* Mycorrhizae: These beneficial fungi can help improve nutrient uptake.
* Dolomitic Lime: If your soil is acidic, dolomitic lime can help raise the pH.
* Stakes or Trellis: For taller varieties, staking can prevent them from toppling over in strong winds.
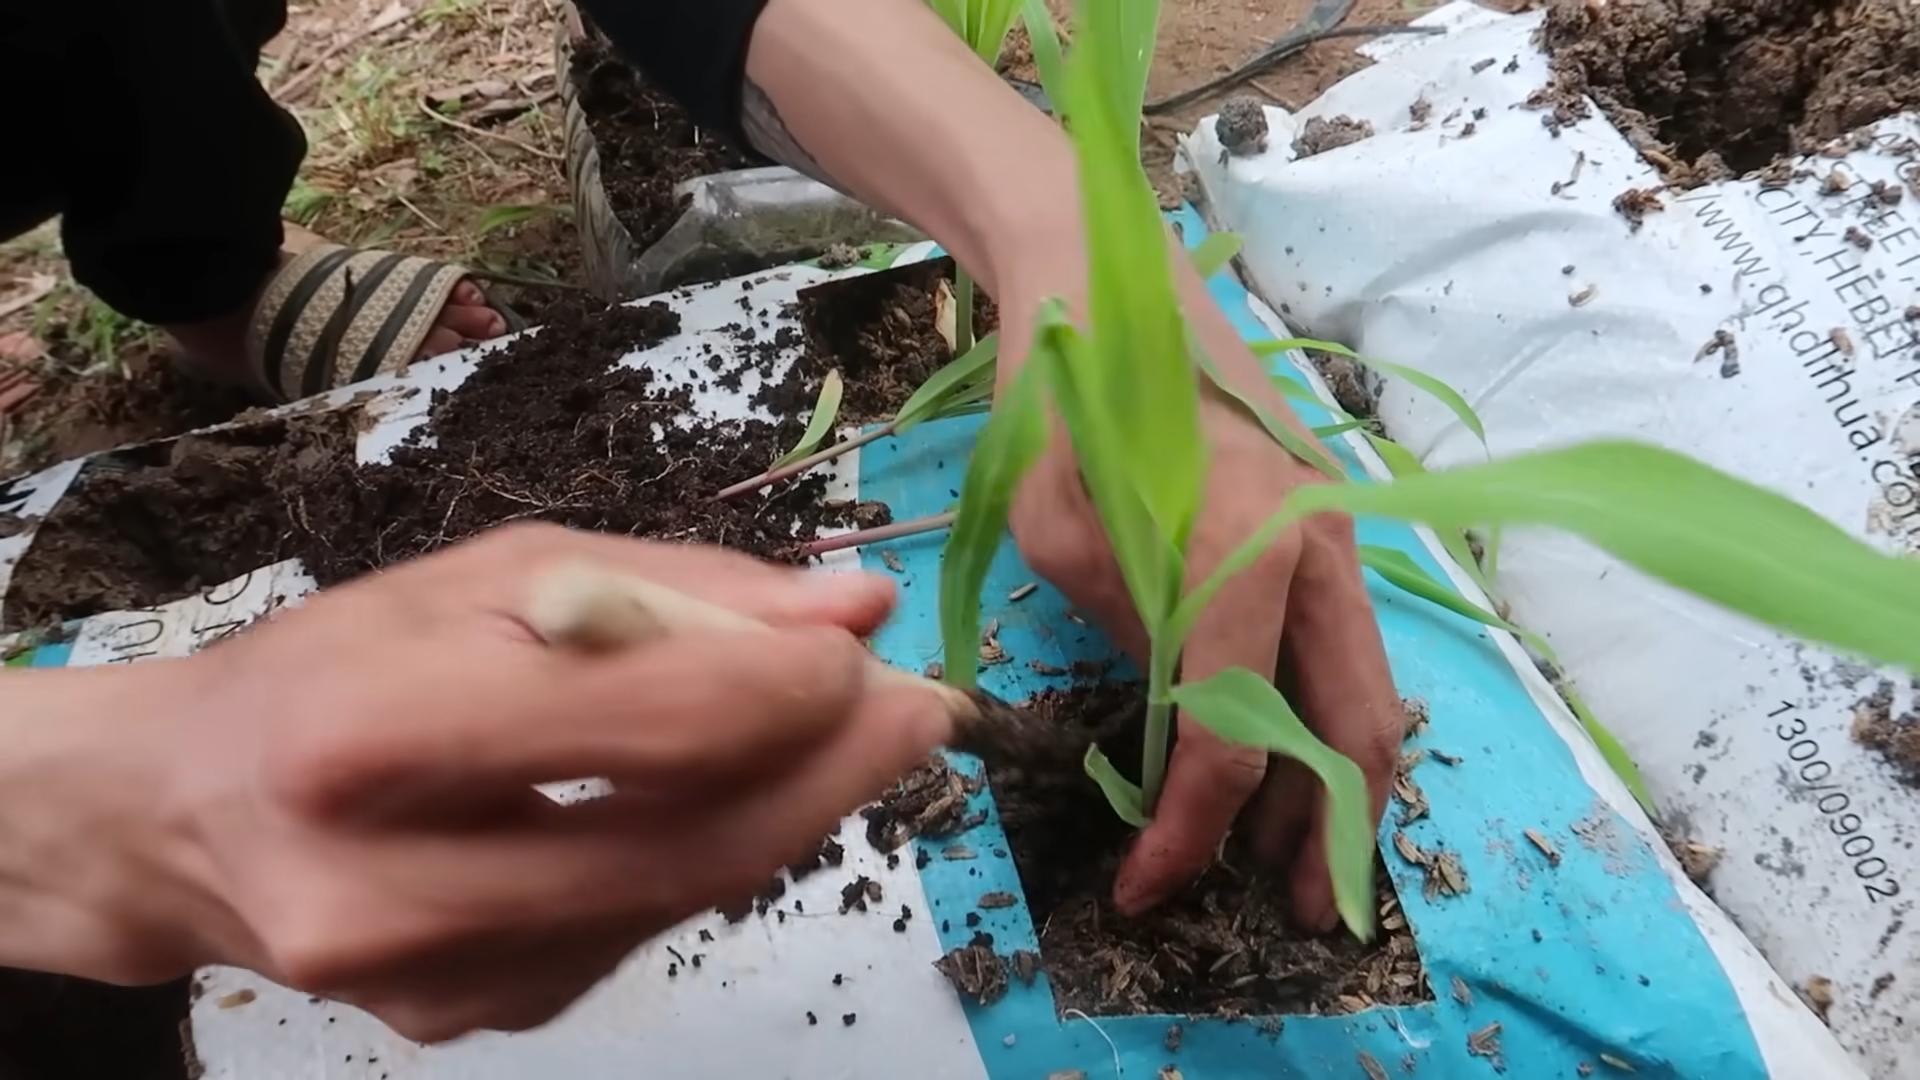
Preparing Your Bags: The Foundation for Success
This step is all about creating the perfect environment for your corn seeds to thrive.
1. Choose Your Location: Corn needs at least 6-8 hours of direct sunlight per day. Pick a spot that gets plenty of sunshine. If you’re using bags on a patio or balcony, make sure it’s a sunny one!
2. Prepare the Bags: If you’re using burlap sacks or feed bags, make sure they’re clean and free of any debris. If they don’t have drainage holes, poke several holes in the bottom to allow excess water to escape. This is crucial to prevent root rot.
3. Fill the Bags: Now, it’s time to fill your bags with the potting mix. Leave about 2-3 inches of space at the top of the bag. This will make watering easier and prevent the soil from washing away.
4. Incorporate Fertilizer: Mix the slow-release fertilizer into the top few inches of the potting mix. Follow the instructions on the fertilizer package for the correct amount. If you’re using mycorrhizae, sprinkle it into the planting holes as you sow the seeds.
5. Water Thoroughly: Before planting, water the potting mix thoroughly until water drains out of the bottom of the bag. This will help settle the soil and ensure that the seeds have access to moisture right from the start.
Planting Your Corn Seeds: The Seeds of Hope
Now for the exciting part – planting those little kernels that will transform into towering stalks of corn!
1. Spacing is Key: Corn needs to be planted in blocks, rather than rows, to ensure proper pollination. Plant 4-6 seeds per bag, spacing them evenly apart.
2. Planting Depth: Plant the seeds about 1-2 inches deep. Use your finger or a small trowel to create a hole, drop in the seed, and cover it with soil.
3. Water Gently: After planting, water the seeds gently to avoid disturbing them.
4. Label Your Bags: It’s always a good idea to label your bags with the variety of corn you’re growing and the date you planted them. This will help you keep track of your progress.
Caring for Your Corn: Nurturing Your Crop
This is where the real work begins. Consistent care is essential for a healthy and productive corn crop.
1. Watering: Corn needs consistent moisture, especially during germination and tasseling (when the tassels appear at the top of the plant). Water deeply whenever the top inch of soil feels dry to the touch. Avoid overwatering, as this can lead to root rot.
2. Fertilizing: Corn is a heavy feeder, so you’ll need to supplement the slow-release fertilizer with additional feedings throughout the growing season. I like to use a liquid fertilizer every 2-3 weeks, especially during the tasseling and ear development stages.
3. Weeding: Keep the bags free of weeds, as they can compete with the corn for nutrients and water. Hand-pull any weeds that appear.
4. Pollination: Corn is wind-pollinated, so it’s important to ensure good air circulation around your plants. You can also hand-pollinate the corn by gently shaking the tassels to release pollen onto the silks (the strands that emerge from the developing ears). Do this in the morning when the pollen is most active.
5. Pest Control: Keep an eye out for common corn pests, such as corn earworms, aphids, and Japanese beetles. If you spot any pests, take action immediately. You can use organic pest control methods, such as insecticidal soap or neem oil.
6. Staking (Optional): If you’re growing a tall variety of corn, you may need to stake the plants to prevent them from toppling over in strong winds. Use sturdy stakes and tie the stalks to the stakes with soft twine.
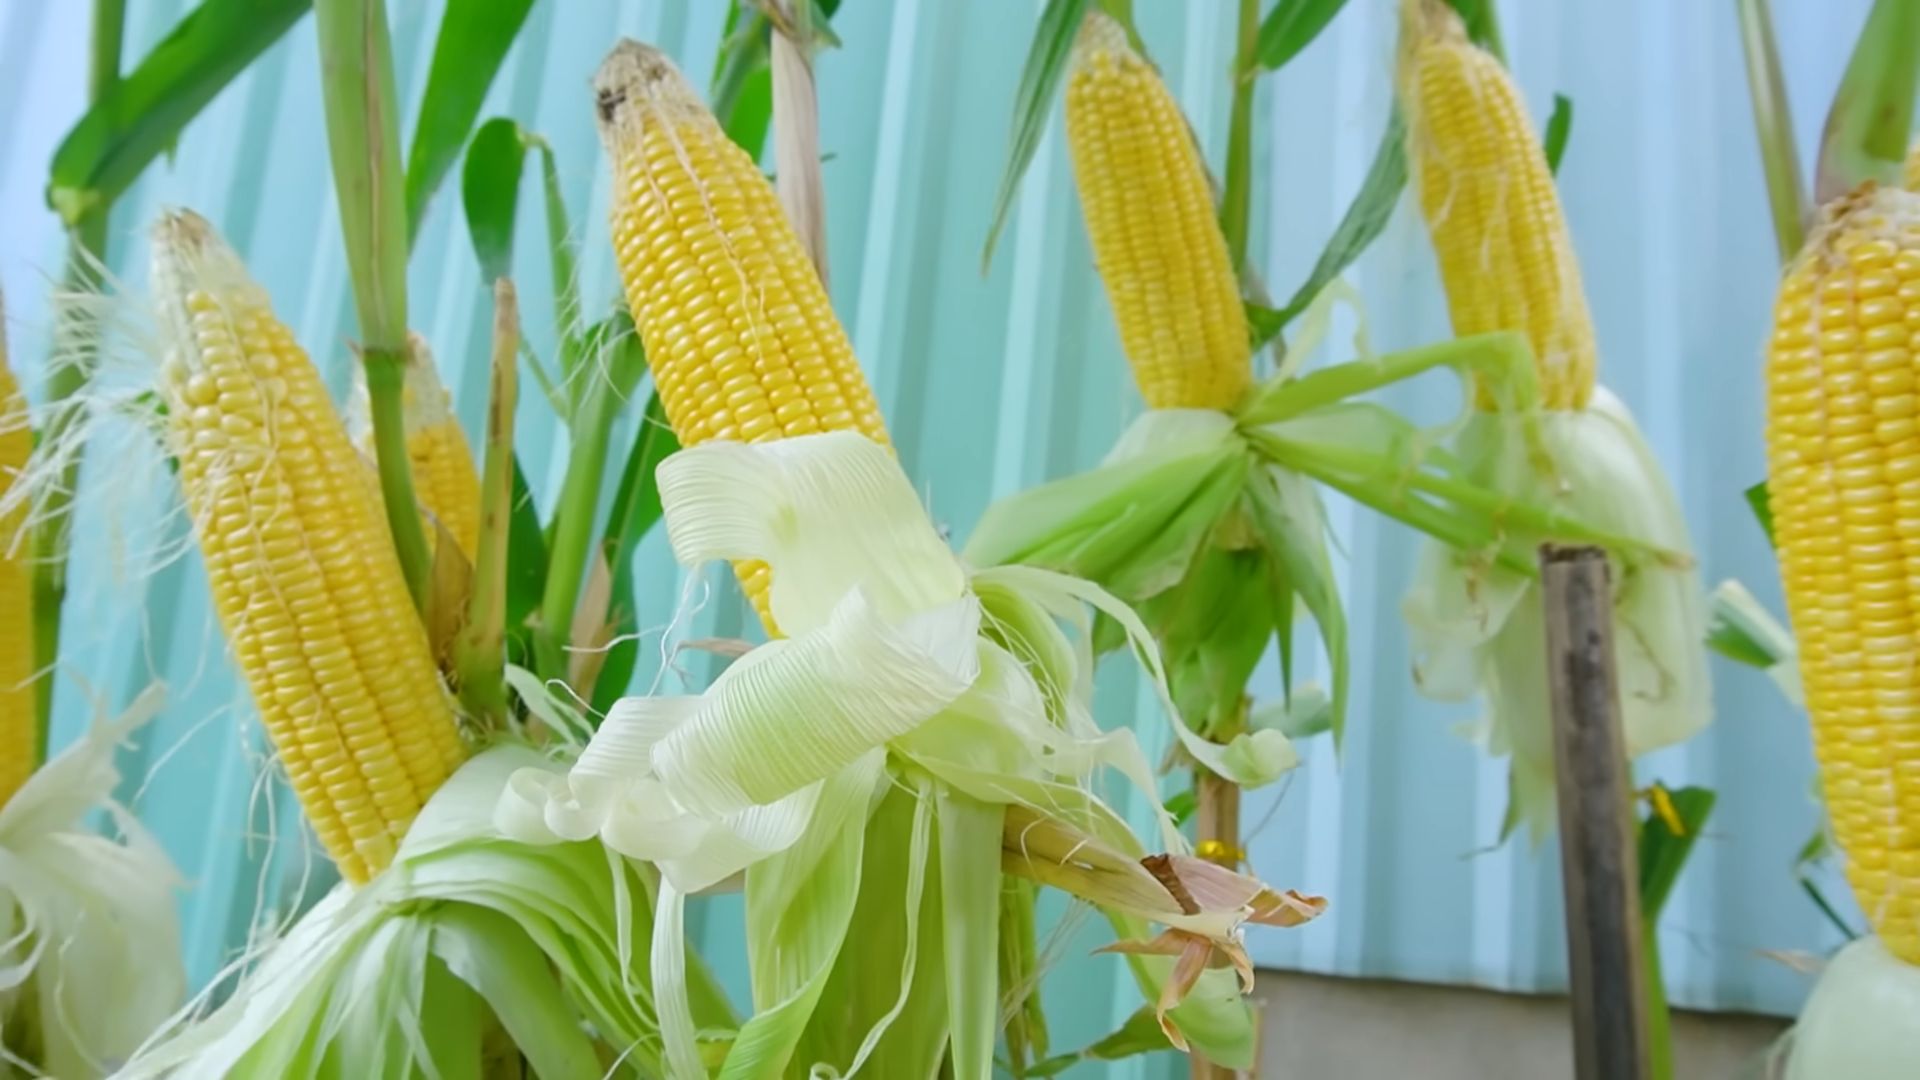
Harvesting Your Corn: The Sweet Reward
After all your hard work, it’s time to reap the rewards of your labor!
1. Timing is Everything: The key to harvesting sweet corn is to pick it at the peak of ripeness. The silks should be brown and dry, and the kernels should be plump and milky when you puncture them with your fingernail.
2. The “Feel” Test: Gently squeeze the ear of corn. It should feel full and firm.
3. Harvesting Technique: To harvest the corn, grasp the ear firmly and twist it downward. It should snap off easily from the stalk.
4. Enjoy Your Harvest: Freshly picked corn is the sweetest and most delicious. Enjoy it grilled, boiled, or roasted. You can also freeze or can your corn for later use.
Troubleshooting: Addressing Common Issues
Even with the best care, you might encounter some challenges along the way. Here are some common issues and how to address them:
* Poor Germination: If your seeds don’t germinate, it could be due to several factors, such as cold soil, poor-quality seeds, or overwatering. Make sure the soil is warm enough (at least 60°F) before planting. Use fresh, high-quality seeds. And avoid overwatering, which can cause the seeds to rot.
* Yellowing Leaves: Yellowing leaves can be a sign of nutrient deficiency, especially nitrogen. Fertilize with a nitrogen-rich fertilizer to correct the deficiency.
* Stunted Growth: Stunted growth can be caused by a variety of factors, such as poor soil, lack of sunlight, or pest infestations. Make sure your corn plants are getting enough sunlight, water, and nutrients. Check for pests and take action if necessary.
* Poor Pollination: Poor pollination can result in ears with missing kernels. Hand-pollinate the corn to improve pollination. Ensure good air circulation around your plants.
* Root Rot: Root rot is caused by overwatering and poor drainage. Make sure your bags have adequate drainage holes. Avoid overwatering.
Choosing the Right Corn Variety: Tailoring to Your Needs
Selecting the right corn variety is crucial for success. Consider your climate, growing season length, and personal preferences.
* Sweet Corn: The most popular choice for home gardeners. Varieties like ‘Sugar Buns’, ‘Honey Select’, and ‘Silver Queen’ are known for their sweetness and flavor.
* Popcorn: If you love popcorn, consider growing a popcorn variety like ‘Strawberry Popcorn’ or ‘Japanese Hulless’.
* Flour Corn: Used for making cornmeal and tortillas. ‘Blue Hopi’ and ‘Red Aztec’ are popular choices.
* Dent Corn: Primarily used for animal feed, but some varieties can be used for making hominy and grits.
Conclusion
So, there you have it! Transforming ordinary bagged corn into a high-yield powerhouse is not just a possibility; it’s a surprisingly simple reality. We’ve walked through the steps, highlighting the key techniques that unlock the full potential hidden within those kernels. This isn’t just about saving money; it’s about taking control of your garden, understanding the growing process, and ultimately, reaping a more bountiful harvest.
Why is this DIY trick a must-try? Because it addresses the common frustrations of gardeners who find their bagged corn underperforming. It’s about optimizing germination rates, ensuring strong seedling development, and giving your corn plants the best possible start in life. By implementing these techniques, you’re not just planting seeds; you’re investing in a more robust and productive corn crop.
Consider these variations to tailor the process to your specific needs and environment. If you live in a particularly dry climate, consider extending the soaking period slightly to ensure adequate hydration. For those in cooler regions, providing a heat mat during the germination phase can significantly improve success rates. Experiment with different types of organic fertilizers to find what works best for your soil. You could even try companion planting with beans or squash to further enhance the growing environment.
Don’t be afraid to experiment! Gardening is a journey of discovery, and every season brings new opportunities to learn and refine your techniques. The key is to observe your plants, pay attention to their needs, and adapt your approach accordingly.
We are confident that this method will significantly improve your corn yield. Imagine the satisfaction of harvesting ears of corn that are larger, sweeter, and more abundant than ever before. Picture the delicious meals you can create with your homegrown bounty, knowing that you played an active role in nurturing them from seed to table.
Now, it’s your turn! We wholeheartedly encourage you to try this DIY trick for boosting your **bagged corn high yield**. Gather your supplies, follow the steps outlined above, and prepare to be amazed by the results. We are eager to hear about your experiences. Share your successes, your challenges, and any variations you discover in the comments section below. Let’s build a community of gardeners who are passionate about maximizing their harvests and sharing their knowledge with others. Your insights could be invaluable to someone else who is just starting out. Let’s grow together!
Frequently Asked Questions (FAQ)
Q: What kind of bagged corn is best for this method?
A: This method works well with most varieties of bagged corn intended for planting. Look for corn that is specifically labeled as “seed corn” or “planting corn.” Avoid using corn intended for animal feed, as it may not have been properly treated or stored for optimal germination. Open-pollinated or heirloom varieties are often excellent choices, as they tend to be more adaptable and resilient. Hybrid varieties can also be used successfully, but be aware that the seeds produced from hybrid corn may not breed true in subsequent generations. Check the seed packet for information on the specific variety and its recommended growing conditions.
Q: How long should I soak the corn seeds?
A: We recommend soaking the corn seeds for 12-24 hours. This allows the seeds to fully hydrate, which is crucial for successful germination. Avoid soaking for longer than 24 hours, as this can lead to the seeds becoming waterlogged and potentially rotting. If you are unsure, start with a shorter soaking period and monitor the seeds closely. You should see them begin to swell as they absorb water.
Q: What type of soil is best for growing corn?
A: Corn thrives in well-drained, fertile soil that is rich in organic matter. A slightly acidic to neutral pH (between 6.0 and 7.0) is ideal. Before planting, amend your soil with compost, well-rotted manure, or other organic materials to improve its structure and fertility. If your soil is heavy clay, consider adding sand or perlite to improve drainage. A soil test can help you determine the specific nutrient deficiencies in your soil and guide your fertilization strategy.
Q: How much sunlight does corn need?
A: Corn requires at least 6-8 hours of direct sunlight per day to thrive. Choose a planting location that receives full sun throughout the growing season. Insufficient sunlight can lead to stunted growth, reduced yields, and increased susceptibility to pests and diseases.
Q: How often should I water my corn plants?
A: Corn needs consistent moisture, especially during germination and early growth. Water deeply and regularly, ensuring that the soil remains consistently moist but not waterlogged. As the plants mature, they will require more water, particularly during tasseling and ear development. A good rule of thumb is to water when the top inch of soil feels dry to the touch. Consider using a soaker hose or drip irrigation to deliver water directly to the roots, minimizing water loss through evaporation.
Q: What kind of fertilizer should I use for corn?
A: Corn is a heavy feeder and benefits from regular fertilization. A balanced fertilizer with a higher nitrogen content is generally recommended, especially during the early stages of growth. You can use a granular fertilizer, a liquid fertilizer, or a combination of both. Organic options include compost tea, fish emulsion, and blood meal. Follow the instructions on the fertilizer packaging carefully to avoid over-fertilizing, which can damage the plants. Side-dressing with additional nitrogen fertilizer when the plants are knee-high can further boost growth and yield.
Q: How do I prevent pests and diseases from affecting my corn crop?
A: Prevention is key when it comes to pests and diseases. Start by selecting disease-resistant varieties of corn. Practice crop rotation to prevent the buildup of soilborne pathogens. Keep your garden clean and free of weeds, which can harbor pests and diseases. Monitor your plants regularly for signs of infestation or disease. Common corn pests include corn earworms, aphids, and Japanese beetles. Common diseases include corn smut and leaf blight. Use organic pest control methods whenever possible, such as insecticidal soap, neem oil, or Bacillus thuringiensis (Bt). If necessary, use chemical controls as a last resort, following the instructions on the product label carefully.
Q: When is the best time to harvest corn?
A: Corn is typically ready to harvest about 20-30 days after the silks emerge. The silks should be dry and brown, and the ears should feel plump and full. To check for ripeness, peel back a portion of the husk and puncture a kernel with your fingernail. If the liquid that comes out is milky, the corn is ready to harvest. If the liquid is clear, the corn is not yet ripe. If the liquid is doughy, the corn is overripe. Harvest the corn in the morning, when the sugars are at their peak.
Q: Can I save seeds from my corn crop for next year?
A: You can save seeds from open-pollinated or heirloom varieties of corn, but be aware that the seeds produced from hybrid corn may not breed true in subsequent generations. To save seeds, allow the ears to dry completely on the stalk. Once the husks are dry and brown, remove the kernels from the cob and store them in an airtight container in a cool, dry place. Be sure to label the seeds with the variety and date of harvest.
Q: What if my bagged corn doesn’t germinate well even after following these steps?
A: Several factors can affect germination rates. First, double-check the expiration date on the seed packet. Old seeds may have reduced viability. Ensure the soil temperature is within the optimal range for corn germination (60-70°F). Overwatering or underwatering can also hinder germination. If you suspect a soilborne disease, consider treating the seeds with a fungicide before planting. Finally, some varieties of corn are simply more difficult to germinate than others. If you consistently experience poor germination rates, try switching to a different variety.

Leave a Comment