
Grout cleaning: Oxiclean vs. Gel – Which Reigns Supreme in Your Bathroom?
Let’s face it, nobody enjoys grout cleaning. It’s the bane of every homeowner’s existence, that tedious chore that seems to take forever and never quite gets the job done. But what if I told you there’s a way to make this dreaded task easier, faster, and maybe even…dare I say…enjoyable? Okay, maybe not enjoyable, but definitely less painful!
For generations, keeping our homes sparkling clean has been a symbol of pride and well-being. From ancient civilizations using natural remedies to modern-day cleaning solutions, the quest for a spotless home is a timeless pursuit. And in today’s world, where time is precious, finding effective and efficient cleaning methods is more important than ever.
That’s where this DIY showdown comes in. You’re probably wondering which method is best for grout cleaning. We’re diving deep into the battle of Oxiclean versus grout cleaning gel. Both promise sparkling results, but which one truly delivers? We’ll explore the pros and cons of each, share my personal experiences, and give you the ultimate verdict on which method will leave your grout looking brand new. Say goodbye to dingy grout lines and hello to a brighter, cleaner bathroom! This article will provide you with the knowledge and confidence to tackle this chore like a pro, saving you time, money, and a whole lot of elbow grease.

DIY Grout Cleaning Showdown: Oxiclean Powder vs. Gel Grout Cleaner
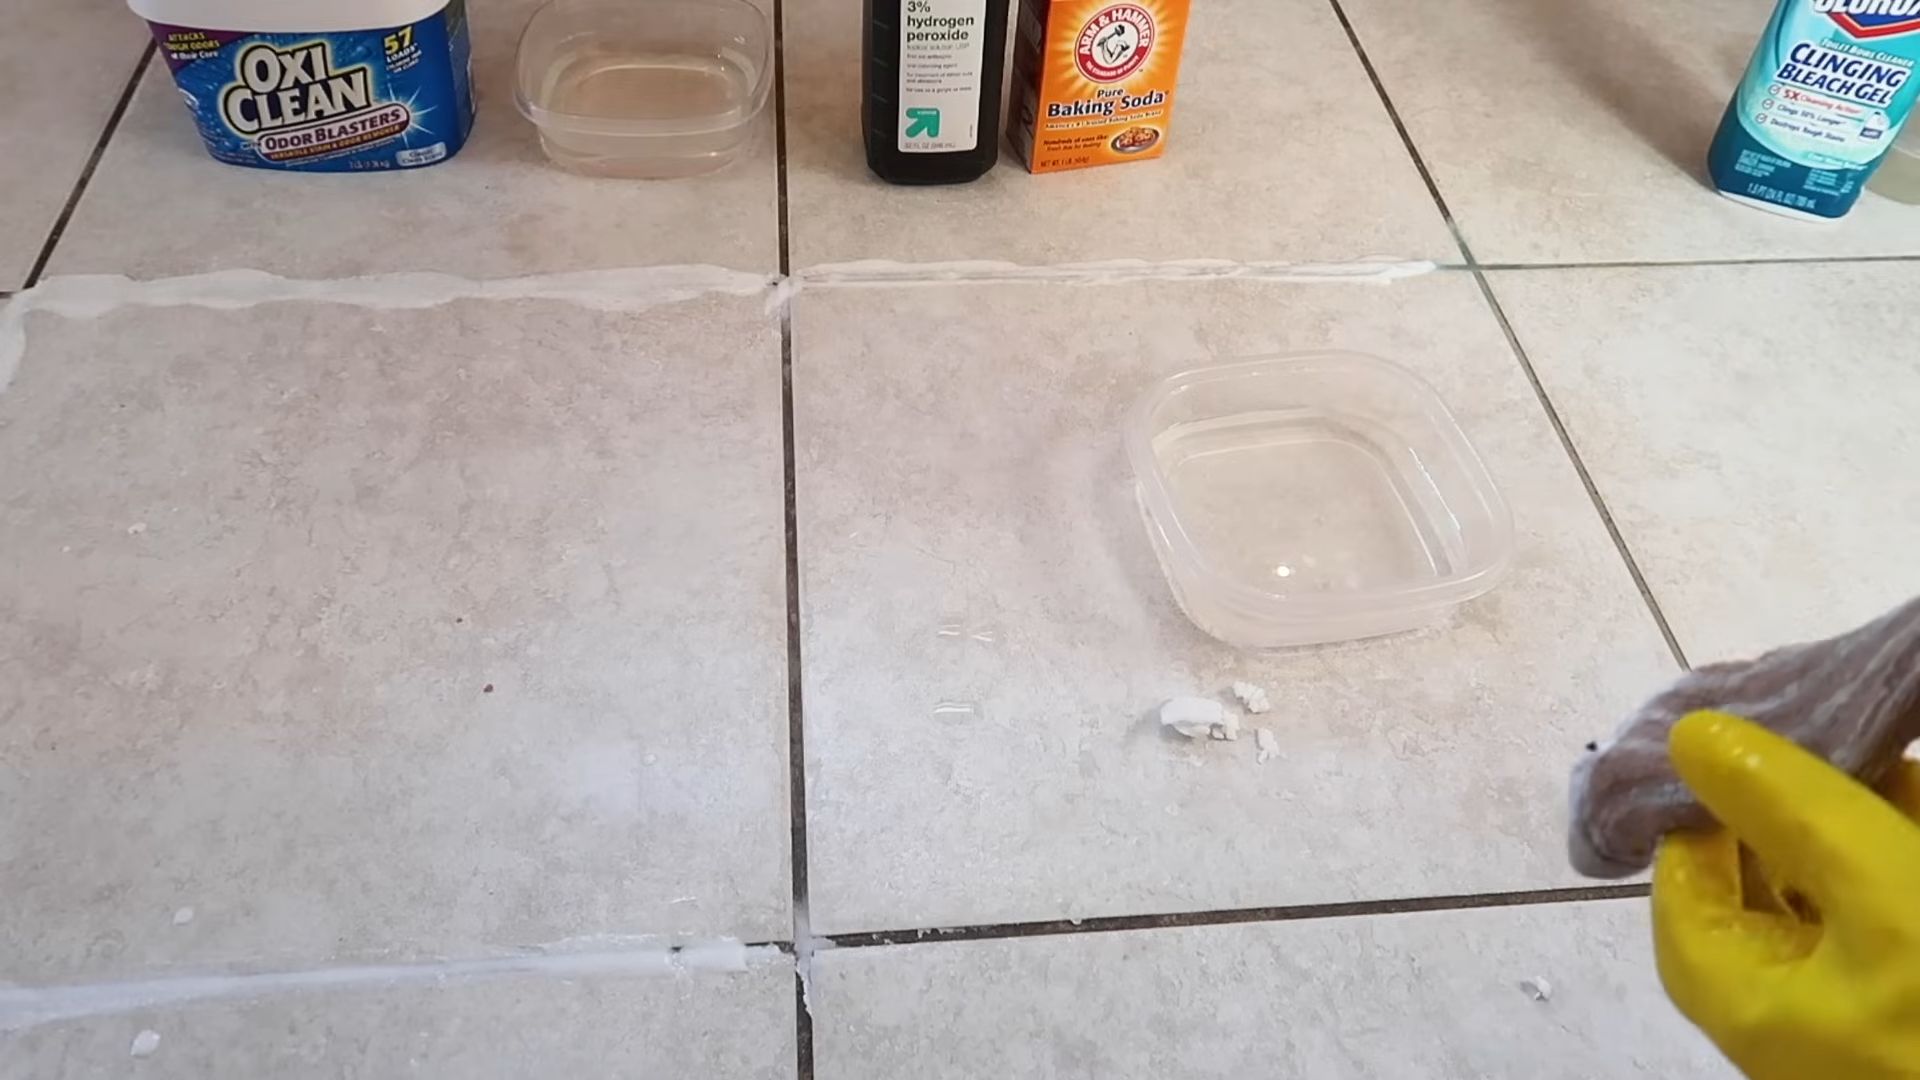
Okay, friends, let’s talk grout. That lovely, yet perpetually dirty, stuff between your tiles. I’ve battled grimy grout for years, and I’m always on the hunt for the *absolute best* cleaning method. Today, we’re putting two popular contenders head-to-head: Oxiclean powder and gel grout cleaner. I’ll walk you through my process, step-by-step, so you can decide which works best for *your* grout situation.
What You’ll Need
Before we dive in, gather your supplies. Having everything ready makes the process so much smoother.
* **For Oxiclean Powder Method:**
* Oxiclean Versatile Stain Remover (the powder form)
* Warm water
* Small bucket or container
* Old toothbrush or grout brush
* Spray bottle (optional, but helpful)
* Clean cloths or paper towels
* Protective gloves (trust me, you’ll want these!)
* Eye protection (safety first!)
* Small spoon or spatula for mixing
* **For Gel Grout Cleaner Method:**
* Gel grout cleaner (I’ve had good luck with several brands, but read reviews!)
* Old toothbrush or grout brush
* Clean cloths or paper towels
* Protective gloves
* Eye protection
* Small bowl of clean water
* **General Supplies (for both methods):**
* Vacuum cleaner or broom (to remove loose debris)
* Floor cleaner (for a final clean)
* Mop (for a final clean)
* Good ventilation (open windows!)
Prepping the Battlefield (Your Grout!)
No matter which method you choose, proper prep is key.
1. **Vacuum or Sweep:** Start by thoroughly vacuuming or sweeping the area you’ll be cleaning. This removes loose dirt, dust, and debris, allowing the cleaner to work directly on the grout. Don’t skip this step – it makes a huge difference!
2. **Ventilate:** Open windows and doors to ensure good ventilation. Cleaning products can have strong odors, and you want to avoid breathing them in.
3. **Protect Yourself:** Put on your protective gloves and eye protection. Grout cleaners can be irritating to the skin and eyes.
Oxiclean Powder Method: Step-by-Step
This method relies on the power of oxygen to lift stains and grime. It’s a bit more involved than the gel method, but many find it incredibly effective.
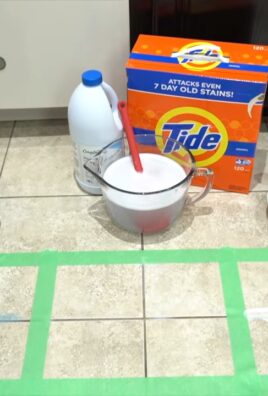
1. **Mix the Oxiclean Paste:** In your small bucket or container, mix Oxiclean powder with warm water to form a paste. I usually aim for a consistency similar to toothpaste – thick enough to stick to the grout, but not so thick that it’s difficult to apply. A good starting ratio is about 1 part Oxiclean powder to 2 parts warm water. You can always adjust the ratio to get the consistency you want.
2. **Apply the Paste:** Using your old toothbrush or grout brush, apply the Oxiclean paste directly to the grout lines. Work in small sections to prevent the paste from drying out. Be generous with the application, ensuring that the grout is completely covered.
3. **Let it Sit (the Magic Happens Here!):** This is where the Oxiclean works its magic. Allow the paste to sit on the grout for at least 15-30 minutes. For heavily stained grout, you can let it sit for up to an hour. Keep an eye on it to make sure it doesn’t completely dry out. If it starts to dry, lightly mist it with water from your spray bottle.
4. **Scrub, Scrub, Scrub:** After the soaking time, it’s time to scrub! Use your toothbrush or grout brush to scrub the grout lines vigorously. You’ll likely see the dirt and grime start to lift. Don’t be afraid to put some elbow grease into it, especially on stubborn stains.
5. **Rinse Thoroughly:** Once you’ve scrubbed the entire area, rinse the grout lines thoroughly with clean water. You can use a damp cloth, sponge, or even a spray bottle to remove all traces of the Oxiclean paste. Make sure you get it all – any residue left behind can attract dirt.
6. **Dry and Inspect:** Use clean cloths or paper towels to dry the area. Inspect the grout lines to see if any stains remain. If so, repeat steps 2-5 on those areas.
Gel Grout Cleaner Method: Step-by-Step
Gel grout cleaners are designed to cling to the grout, allowing the cleaning agents to penetrate and dissolve dirt and grime. They’re generally easier to apply than the Oxiclean paste.
1. **Apply the Gel:** Squeeze the gel grout cleaner directly onto the grout lines. Most gel cleaners have a nozzle that allows for precise application. Again, work in small sections to prevent the gel from drying out. Apply a generous amount, ensuring that the grout is completely covered.
2. **Let it Sit (Patience is Key!):** Allow the gel to sit on the grout for the amount of time recommended on the product label. This is usually between 5-10 minutes, but always follow the manufacturer’s instructions.
3. **Scrub (But Gently!):** After the soaking time, use your toothbrush or grout brush to scrub the grout lines. Gel cleaners often loosen the dirt more easily than the Oxiclean paste, so you may not need to scrub as vigorously.
4. **Rinse Thoroughly:** Rinse the grout lines thoroughly with clean water. Use a damp cloth or sponge to remove all traces of the gel cleaner. You may need to rinse several times to ensure that all residue is gone.
5. **Dry and Inspect:** Use clean cloths or paper towels to dry the area. Inspect the grout lines for any remaining stains. If necessary, repeat steps 1-4 on those areas.
Final Touches (For Both Methods)
Once you’ve cleaned the grout, it’s time to give your floor a final clean.
1. **Clean the Tiles:** Use your regular floor cleaner to clean the tiles surrounding the grout. This will remove any cleaner residue and leave your floor sparkling.
2. **Mop the Floor:** Mop the entire floor to remove any remaining dirt or cleaner.
3. **Dry Thoroughly:** Allow the floor to dry completely before walking on it.
Comparing the Two Methods: My Thoughts
Okay, so which method is better? Honestly, it depends on the severity of your grout stains and your personal preference.
* **Oxiclean Powder:** I find that Oxiclean powder is incredibly effective on heavily stained grout. The oxygen-based cleaning action really lifts stubborn dirt and grime. However, it requires a bit more effort to mix and apply, and it can be a bit messy. It’s also important to be careful not to get the paste on colored grout, as it could potentially lighten it.
* **Gel Grout Cleaner:** Gel grout cleaners are much easier to apply and rinse. They’re a good option for lightly stained grout or for regular maintenance cleaning. However, they may not be as effective on heavily stained grout as the Oxiclean powder.
Ultimately, the best method is the one that works best for you and your grout. I recommend trying both methods and seeing which one gives you the best results.
Tips and Tricks for Grout Cleaning Success
* Test in an Inconspicuous Area:** Before cleaning your entire floor, test the cleaner in a small, inconspicuous area to make sure it doesn’t damage the grout or tiles.
* Use a Grout Sealer:** After cleaning your grout, consider applying a grout sealer. This will help to protect the grout from future stains and make it easier to clean.
* Clean Regularly:** The best way to keep your grout clean is to clean it regularly. This will prevent dirt and grime from building up and making it harder to clean. A quick scrub with a grout brush and some soapy water every week or two can make a big difference.
* Consider a Steam Cleaner: For a chemical-free cleaning option, consider using a steam cleaner. The high-pressure steam can loosen dirt and grime without the need for harsh chemicals.
* Don’t Use Abrasive Cleaners:** Avoid using abrasive cleaners or scouring pads on your grout, as they can damage the surface and make it more susceptible to staining.
* Be Patient:** Grout cleaning can be a time-consuming process, especially if your grout is heavily stained. Don’t get discouraged if you don’t see results immediately. Keep scrubbing and rinsing, and you’ll eventually get there.
I hope this guide has been helpful! Happy grout cleaning!
Conclusion
So, there you have it! Ditching the harsh chemicals and embracing the power of Oxiclean for grout cleaning is not just a trend; it’s a game-changer for a sparkling home and a healthier environment. We’ve explored how this simple, readily available product can effectively tackle even the most stubborn grout stains, leaving your tiles looking brand new.
Why is this DIY trick a must-try? Because it’s effective, affordable, and significantly less abrasive than many commercial grout cleaners. You’re not just cleaning; you’re preserving the integrity of your grout and tiles. The harsh chemicals in some grout cleaners can actually erode grout over time, leading to more frequent and costly repairs. Oxiclean, on the other hand, offers a gentler approach that delivers impressive results without the long-term damage. Plus, the reduced fumes and safer ingredients make it a much more pleasant experience for you and your family.
But the best part? The versatility! While we’ve focused on the classic Oxiclean powder and water paste, don’t be afraid to experiment. For particularly tough stains, consider adding a small amount of baking soda to the paste for extra scrubbing power. If you prefer a spray application, dissolve the Oxiclean in warm water and use a spray bottle to saturate the grout lines before scrubbing. For vertical surfaces like shower walls, a slightly thicker paste will adhere better and prevent dripping. You can even use an old toothbrush for precision cleaning in tight corners and crevices.
Don’t limit yourself to just bathrooms and kitchens! This Oxiclean grout cleaning method works wonders on tiled entryways, laundry rooms, and even outdoor patios. Just be sure to test a small, inconspicuous area first to ensure compatibility with your specific tile and grout type.
We’re confident that once you try this simple DIY trick, you’ll be amazed by the results. It’s a cost-effective, eco-friendly, and surprisingly powerful way to restore the beauty of your tiled surfaces.
So, ditch the expensive, chemical-laden cleaners and embrace the power of Oxiclean. Give it a try, and we guarantee you’ll be thrilled with the results. We encourage you to share your experiences with us! Let us know in the comments below how this DIY grout cleaning method worked for you, any variations you tried, and any tips you discovered along the way. Your feedback will help others achieve sparkling clean grout and a healthier home. Let’s revolutionize grout cleaning, one tile at a time!
Frequently Asked Questions (FAQ)
1. Is Oxiclean safe to use on all types of grout?
While Oxiclean is generally considered safe for most types of grout, it’s always best to test it in an inconspicuous area first. This is especially important for colored grout, as there’s a small chance it could cause fading, although this is rare. Apply a small amount of the Oxiclean paste to a hidden area, let it sit for the recommended time, and then rinse it off. If you don’t notice any discoloration or damage, you can proceed with cleaning the rest of the grout. Also, be mindful of the type of tile you have. While Oxiclean is generally safe for tile, certain delicate or natural stone tiles might require special care.
2. How long should I leave the Oxiclean paste on the grout?
The recommended dwell time for the Oxiclean paste is typically 10-15 minutes. This allows the Oxiclean to penetrate the grout and break down the stains. However, for heavily stained grout, you may need to leave it on for a bit longer, up to 30 minutes. Keep an eye on the paste to ensure it doesn’t dry out completely. If it starts to dry, lightly mist it with water to keep it active. After the dwell time, scrub the grout with a brush and rinse thoroughly with clean water.
3. What kind of brush should I use for scrubbing the grout?
A stiff-bristled brush is ideal for scrubbing grout. An old toothbrush works well for small areas and tight corners. For larger areas, you can use a grout brush with a longer handle for better leverage. Avoid using metal brushes, as they can scratch the tile and damage the grout. Nylon or plastic bristles are the best choice.
4. Can I use Oxiclean on epoxy grout?
Epoxy grout is generally more resistant to staining than cement-based grout. While Oxiclean can be used on epoxy grout, it may not be as effective on certain types of stains. Always test in an inconspicuous area first. If you’re unsure, consult the manufacturer’s recommendations for cleaning epoxy grout.
5. How often should I clean my grout with Oxiclean?
The frequency of grout cleaning depends on several factors, including the amount of foot traffic, the type of grout, and the level of staining. In high-traffic areas like bathrooms and kitchens, you may need to clean your grout every few weeks. In less frequently used areas, you can clean it every few months. Regular cleaning will help prevent stains from setting in and make the cleaning process easier.
6. What if the Oxiclean doesn’t remove all the stains?
If the Oxiclean doesn’t completely remove all the stains, there are a few things you can try. First, repeat the cleaning process, leaving the Oxiclean paste on for a longer dwell time. You can also try adding a small amount of baking soda to the paste for extra scrubbing power. For particularly stubborn stains, you may need to use a commercial grout cleaner specifically designed for tough stains, but always test it in an inconspicuous area first and follow the manufacturer’s instructions carefully.
7. How can I prevent grout from getting stained in the first place?
Prevention is key to keeping your grout clean and stain-free. Seal your grout regularly with a grout sealer. This will create a barrier that prevents stains from penetrating the grout. Wipe up spills immediately to prevent them from setting in. Use mats and rugs in high-traffic areas to protect the grout from dirt and grime. And finally, ventilate your bathroom well to prevent mold and mildew growth.
8. Can I use Oxiclean on colored grout?
While Oxiclean is generally safe for colored grout, there is a small risk of fading. It is crucial to test the Oxiclean solution on an inconspicuous area of the colored grout before applying it to the entire surface. Observe the test area for any signs of discoloration or fading after the recommended dwell time. If no adverse effects are observed, you can proceed with cleaning the rest of the colored grout.
9. Is it necessary to wear gloves when cleaning grout with Oxiclean?
While Oxiclean is generally considered a safer alternative to harsh chemical cleaners, it is still recommended to wear gloves when cleaning grout with Oxiclean. This will help protect your skin from irritation and dryness. Additionally, wearing gloves will provide a better grip on the brush and prevent your hands from getting dirty.
10. Can I use a power scrubber with Oxiclean for grout cleaning?
Yes, you can use a power scrubber with Oxiclean for grout cleaning, but exercise caution. Start with a low-speed setting and a soft brush attachment to avoid damaging the grout or tile. Test the power scrubber in an inconspicuous area first to ensure it doesn’t cause any scratches or discoloration. Avoid applying too much pressure, as this can also damage the grout. Rinse the area thoroughly after scrubbing.

Leave a Comment