
Grow Mint on Balcony: Imagine stepping onto your balcony and being greeted by the invigorating aroma of fresh mint. Sounds delightful, right? For centuries, mint has been cherished not only for its refreshing flavor but also for its medicinal properties. From ancient Roman banquets where mint adorned tables to traditional Moroccan tea ceremonies, this herb boasts a rich history and cultural significance.
But let’s be honest, who has the space for a sprawling garden these days? That’s where balcony gardening comes in! And that’s why I’m so excited to share some simple, yet effective, DIY tricks to help you grow mint on balcony, even if you’re a complete beginner. I know, I know, mint can be a bit of a garden bully, taking over everything in its path. But fear not! I’ve got you covered with clever container solutions and easy-to-follow tips to keep your mint happy and contained.
This DIY guide is perfect for anyone who wants to add a touch of freshness to their cooking, create soothing teas, or simply enjoy the beauty of a thriving green space, all without leaving the comfort of their apartment. So, grab your gardening gloves, and let’s transform your balcony into a minty oasis!
Growing Mint on Your Balcony: A Beginner’s Guide
Hey there, fellow plant enthusiast! Ever dreamed of stepping onto your balcony and snipping fresh mint for a refreshing mojito or a flavorful addition to your tea? Well, dream no more! Growing mint on your balcony is surprisingly easy, even if you don’t have a green thumb. I’m going to walk you through everything you need to know to cultivate your own thriving mint patch, right outside your door.
Why Grow Mint on Your Balcony?
Before we dive in, let’s talk about why mint is such a fantastic balcony plant.
* It’s incredibly versatile: Mint can be used in drinks, desserts, savory dishes, and even as a natural insect repellent.
* It’s easy to grow: Seriously, mint is practically foolproof. It’s a vigorous grower and can tolerate a wide range of conditions.
* It’s fragrant: The aroma of fresh mint is simply delightful and can add a lovely scent to your balcony.
* It’s a natural pest repellent: Mint can help deter unwanted insects from your balcony garden.
* It’s therapeutic: Mint has many health benefits, including aiding digestion and relieving stress.
Choosing the Right Mint Variety
There are many different types of mint, each with its own unique flavor and aroma. Here are a few popular varieties that are well-suited for balcony gardening:
* Spearmint: This is the classic mint flavor, perfect for mojitos and teas.
* Peppermint: A stronger, more intense mint flavor, great for desserts and candies.
* Chocolate Mint: A unique variety with a hint of chocolate flavor.
* Apple Mint: A milder, fruitier mint flavor.
* Orange Mint: A citrusy mint flavor that’s perfect for summer drinks.
I recommend starting with spearmint or peppermint, as they are the most common and easiest to find. Once you’ve mastered those, you can experiment with other varieties.
What You’ll Need
Here’s a list of the supplies you’ll need to get started:
* Mint seeds or a mint plant: You can start from seeds, but buying a small plant from a nursery or garden center is much faster and easier.
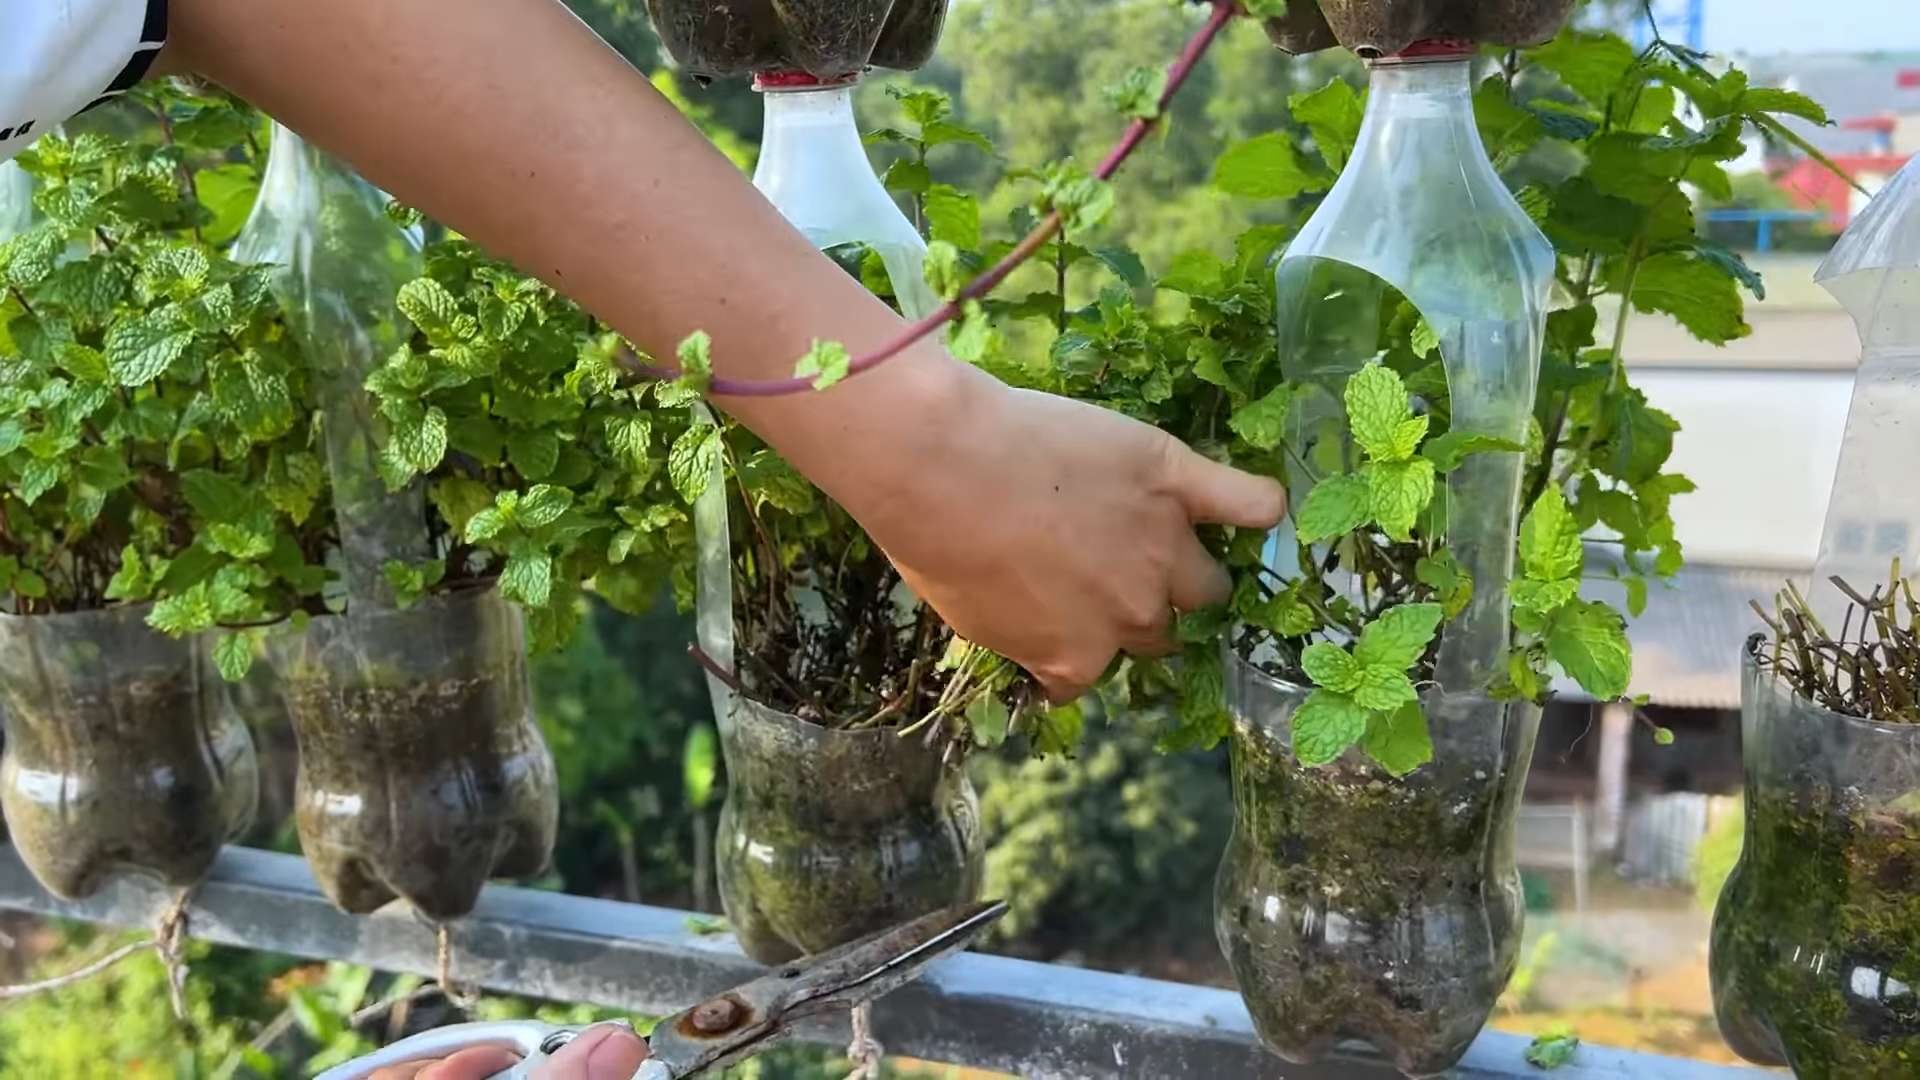
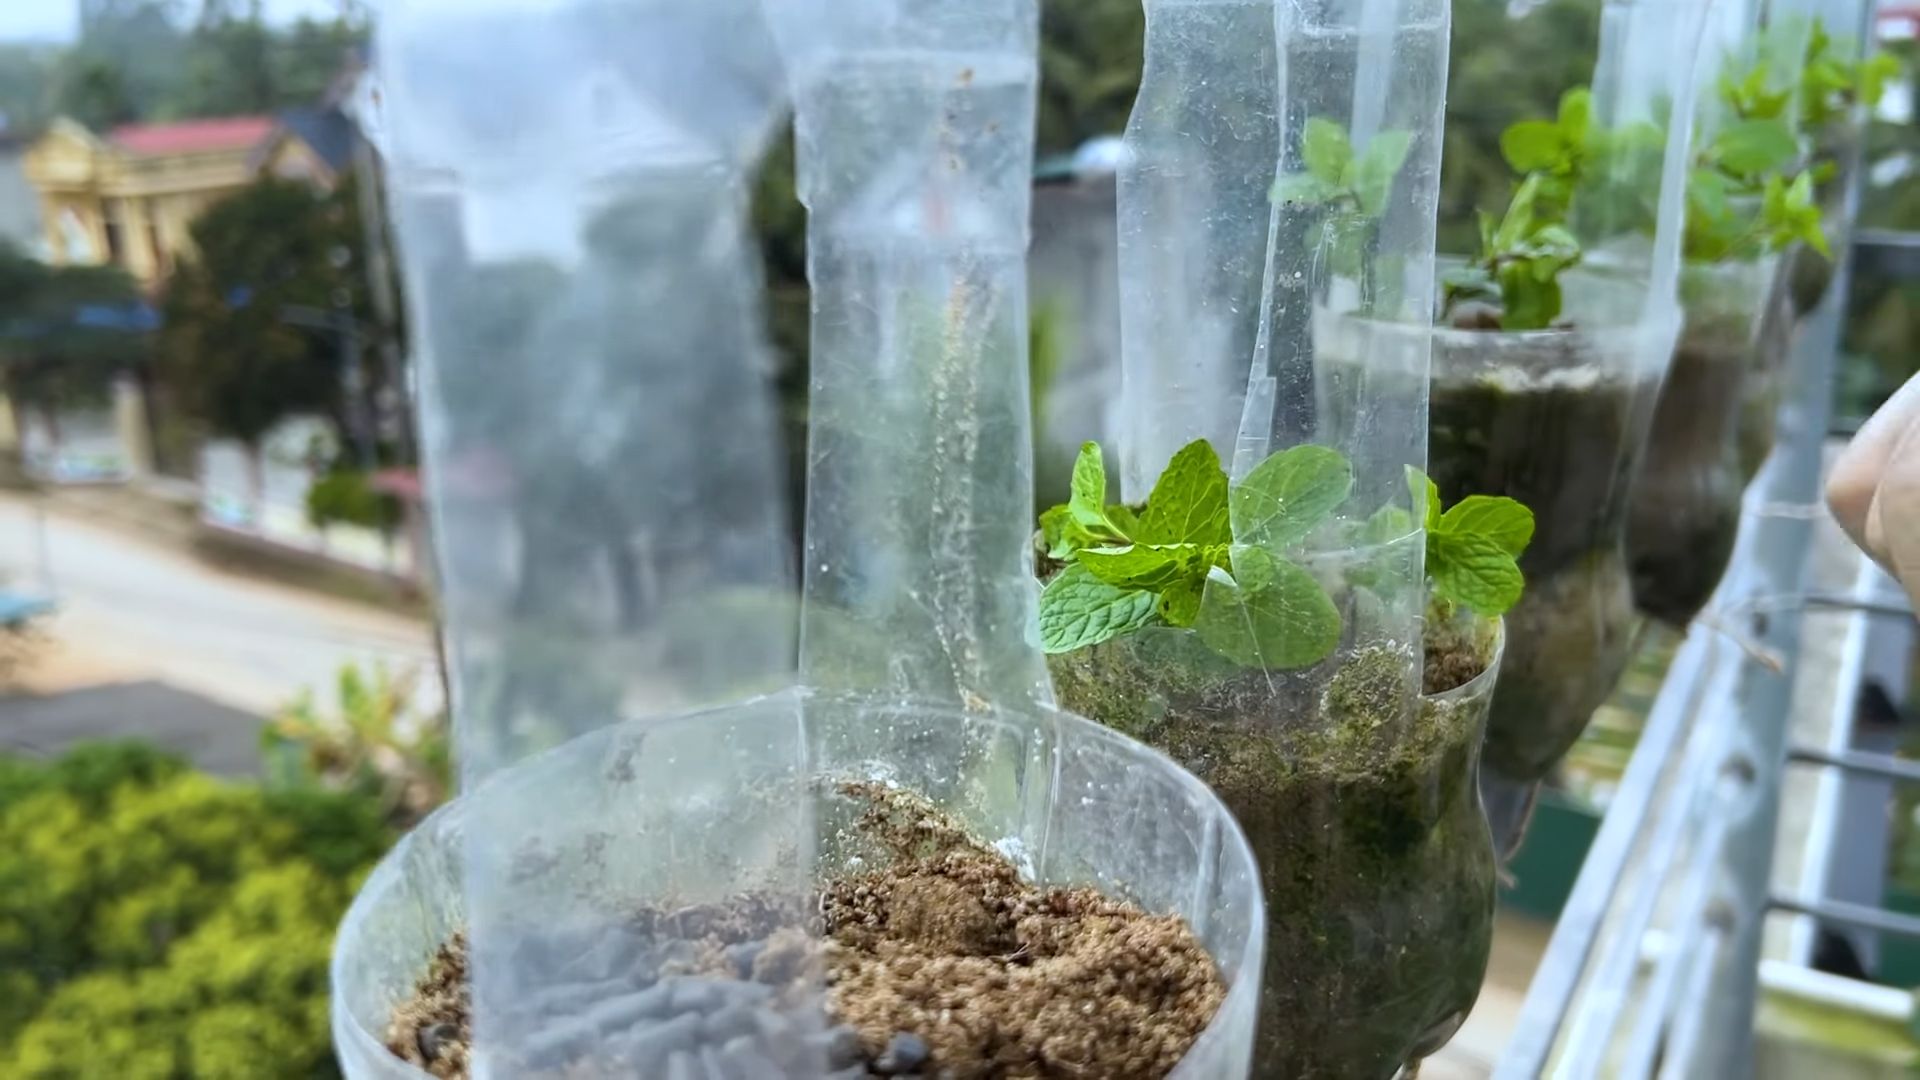
* A pot or container: Choose a pot that is at least 12 inches in diameter and has drainage holes. Mint spreads quickly, so it’s best to keep it contained.
* Potting soil: Use a good-quality potting mix that is well-draining.
* Watering can or hose: For watering your mint plant.
* Scissors or pruning shears: For harvesting and pruning.
* Optional: Fertilizer: A balanced liquid fertilizer can help your mint plant thrive.
Step-by-Step Instructions: Planting Your Mint
Okay, let’s get our hands dirty! Here’s how to plant your mint:
1. Prepare the pot: Fill the pot with potting soil, leaving about an inch of space at the top.
2. Plant the mint: If you’re starting from seeds, sprinkle them evenly over the soil and cover them with a thin layer of soil. If you’re planting a mint plant, gently remove it from its container and loosen the roots. Dig a hole in the soil that is large enough to accommodate the root ball and place the plant in the hole. Backfill with soil and gently pat it down.
3. Water thoroughly: Water the soil until it is evenly moist.
4. Place in a sunny location: Mint thrives in a sunny location, but it can also tolerate partial shade. Aim for at least 4-6 hours of sunlight per day.
Caring for Your Mint Plant
Now that your mint is planted, here’s how to keep it happy and healthy:
1. Water regularly: Mint needs consistent moisture, so water it whenever the soil feels dry to the touch. Be careful not to overwater, as this can lead to root rot.
2. Fertilize occasionally: Feed your mint plant with a balanced liquid fertilizer every few weeks during the growing season.
3. Prune regularly: Pruning encourages bushier growth and prevents the plant from becoming leggy. Simply snip off the top leaves and stems with scissors or pruning shears.
4. Control spreading: Mint is a vigorous grower and can quickly spread if left unchecked. To prevent it from taking over your balcony garden, keep it contained in a pot or container. You can also prune it regularly to keep it under control.
5. Watch out for pests and diseases: Mint is generally pest-resistant, but it can be susceptible to aphids, spider mites, and powdery mildew. If you notice any signs of pests or diseases, treat them promptly with an appropriate insecticide or fungicide.
Harvesting Your Mint
The best part about growing mint is being able to harvest it whenever you need it! Here’s how to harvest your mint:
1. Harvest in the morning: The best time to harvest mint is in the morning, after the dew has dried but before the sun gets too hot.
2. Snip off the stems: Use scissors or pruning shears to snip off the stems of the mint plant, leaving about an inch of stem above the soil.
3. Use fresh or dry: You can use the mint fresh or dry it for later use. To dry mint, simply hang the stems upside down in a cool, dry place until they are completely dry.
Troubleshooting Common Mint Problems
Even with the best care, you might encounter a few problems with your mint plant. Here are some common issues and how to fix them:
* Yellowing leaves: This could be a sign of overwatering, underwatering, or nutrient deficiency. Adjust your watering schedule and fertilize your plant if necessary.
* Leggy growth: This is usually caused by insufficient sunlight. Move your mint plant to a sunnier location.
* Powdery mildew: This is a fungal disease that can cause a white, powdery coating on the leaves. Treat it with a fungicide.
* Aphids or spider mites: These pests can suck the sap from the leaves, causing them to become yellow and distorted. Treat them with an insecticide or insecticidal soap.
Overwintering Your Mint
Mint is a perennial plant, which means it will come back year after year. However, in colder climates, it may need some extra protection during the winter. Here’s how to overwinter your mint:
1. Move the pot indoors: If you live in a cold climate, bring your mint plant indoors before the first frost.
2. Place in a sunny location: Place the pot in a sunny location, such as a windowsill.
3. Water sparingly: Water the mint plant sparingly during the winter, only when the soil feels dry to the touch.
4. Prune back: Prune back the mint plant to about 2-3 inches tall.
5. Return outdoors in the spring: Once the weather warms up in the spring, you can gradually acclimate your mint plant to the outdoors and return it to your balcony.
Creative Ways to Use Your Balcony-Grown Mint
Now that you have a thriving mint patch, here are some creative ways to use your fresh mint:
* Mojitos: The classic Cuban cocktail, made with mint, lime, sugar, rum, and soda water.
* Mint tea: A refreshing and soothing tea, made with fresh mint leaves and hot water.
* Mint lemonade: A refreshing twist on classic lemonade, made with mint, lemons, sugar, and water.
* Mint chocolate chip ice cream: A classic flavor combination, made with mint extract and chocolate chips.
* Mint pesto: A flavorful pesto, made with mint, basil, garlic, pine nuts, Parmesan cheese, and olive oil.
* Mint chutney: A spicy and flavorful chutney, made with mint, cilantro, green chilies, ginger, garlic, and lemon juice.
* Garnish: Use fresh mint leaves as a garnish for desserts, salads, and cocktails.
* Potpourri: Dry mint leaves and use them in potpourri to add a refreshing scent to your home.
* Insect repellent: Place fresh mint leaves around your balcony to deter unwanted insects.
Mint Propagation: Expanding Your Minty Empire
Mint is incredibly easy to propagate, meaning you can create new mint plants from cuttings. This is a great way to expand your mint collection or share your mint with friends and family. Here’s how to propagate mint:
1. Take a cutting: Use scissors or pruning shears to take a cutting from a healthy mint plant. The cutting should be about 4-6 inches long and have several leaves.
2. Remove the lower leaves: Remove the leaves from the bottom inch of the cutting.
3. Place in water: Place the cutting in a glass of
Conclusion
So, there you have it! Growing mint on your balcony isn’t just a possibility; it’s a delightful and rewarding experience waiting to happen. We’ve walked you through the simple steps, from choosing the right container and soil to providing the perfect amount of sunlight and water. But why is this DIY trick a must-try?
Firstly, imagine stepping onto your balcony and being greeted by the invigorating aroma of fresh mint. It’s an instant mood booster and a constant reminder of the little green oasis you’ve created. Secondly, having a readily available supply of fresh mint elevates your culinary creations to a whole new level. Think refreshing mojitos on a warm evening, flavorful mint chutney to accompany your favorite dishes, or a simple sprig of mint to garnish your desserts. The possibilities are endless!
Beyond the sensory and culinary benefits, growing your own mint is also an incredibly sustainable practice. You’re reducing your reliance on store-bought herbs, which often come with plastic packaging and a hefty carbon footprint. Plus, you’re connecting with nature in a small but meaningful way, fostering a sense of calm and well-being.
But the beauty of this DIY project lies in its adaptability. Feel free to experiment with different varieties of mint. Chocolate mint adds a unique twist to desserts, while spearmint is perfect for teas and cocktails. You can also try companion planting. Mint is known to repel certain pests, so consider planting it near other herbs or vegetables on your balcony to create a thriving ecosystem. Another variation is to create a tiered mint garden using stacked planters, maximizing your space and adding visual interest. You can even propagate your mint by taking cuttings and starting new plants, effectively multiplying your mint supply for free!
Don’t be afraid to get creative and personalize your mint-growing experience. The most important thing is to start! Even if you’ve never gardened before, growing mint on your balcony is a beginner-friendly project that yields impressive results.
We’re confident that once you experience the joy of harvesting your own fresh mint, you’ll be hooked. So, grab your supplies, follow our guide, and embark on this exciting journey. And most importantly, we want to hear about your experiences! Share your photos, tips, and stories with us in the comments below. Let’s create a community of balcony mint growers and inspire others to embrace the joys of urban gardening. We are eager to see how you make this DIY trick your own!
Frequently Asked Questions (FAQ)
Q: What kind of container is best for growing mint on a balcony?
A: The best container for growing mint on a balcony is one that is at least 12 inches in diameter and 12 inches deep. This will provide enough space for the roots to grow and spread. The container should also have drainage holes to prevent waterlogging, which can lead to root rot. Terracotta pots, plastic containers, and even repurposed buckets can all work well, as long as they meet these requirements. Consider the weight of the container, especially if your balcony has weight restrictions. Lighter materials like plastic might be preferable in such cases.
Q: What type of soil should I use for growing mint?
A: Mint thrives in well-draining, nutrient-rich soil. A good potting mix specifically formulated for herbs is ideal. You can also create your own mix by combining equal parts of potting soil, compost, and perlite or vermiculite. The compost provides essential nutrients, while the perlite or vermiculite improves drainage and aeration. Avoid using garden soil, as it can be too heavy and compact for container gardening.
Q: How much sunlight does mint need?
A: Mint prefers partial shade to full sun. Ideally, it should receive at least 4-6 hours of sunlight per day. However, in hot climates, afternoon shade is beneficial to prevent the leaves from scorching. Observe your balcony throughout the day to determine the areas that receive the most sunlight and position your mint accordingly. If your balcony doesn’t receive enough natural light, you can supplement with a grow light.
Q: How often should I water my mint plant?
A: Mint needs consistent moisture to thrive. Water your mint plant whenever the top inch of soil feels dry to the touch. Avoid overwatering, as this can lead to root rot. During hot weather, you may need to water more frequently. Check the soil moisture daily and adjust your watering schedule accordingly. A good rule of thumb is to water deeply until water drains out of the drainage holes.
Q: How do I fertilize my mint plant?
A: Mint benefits from regular fertilization, especially during the growing season (spring and summer). Use a balanced liquid fertilizer diluted to half strength every 2-4 weeks. Alternatively, you can use a slow-release fertilizer at the beginning of the growing season. Avoid over-fertilizing, as this can lead to leggy growth and a less intense flavor.
Q: How do I harvest mint?
A: You can harvest mint leaves as needed throughout the growing season. Simply pinch or cut off the stems just above a leaf node. This will encourage the plant to branch out and produce more leaves. Avoid harvesting more than one-third of the plant at a time, as this can stress the plant. For the best flavor, harvest mint in the morning after the dew has dried.
Q: How do I prevent mint from spreading too much?
A: Mint is known for its aggressive growth habit. To prevent it from spreading too much in your container, you can prune it regularly. You can also plant it in a separate container to prevent it from taking over other plants. If you notice runners (horizontal stems that spread along the surface of the soil), prune them back to contain the plant’s growth.
Q: What pests and diseases affect mint?
A: Mint is generally pest-resistant, but it can be susceptible to aphids, spider mites, and whiteflies. These pests can be controlled with insecticidal soap or neem oil. Mint can also be affected by fungal diseases such as powdery mildew and rust. To prevent these diseases, ensure good air circulation around the plant and avoid overwatering. If you notice any signs of disease, remove the affected leaves and treat the plant with a fungicide.
Q: Can I grow mint indoors?
A: Yes, you can grow mint indoors, but it requires bright light. Place your mint plant near a sunny window or under a grow light. Ensure good air circulation and water regularly. Indoor-grown mint may not be as vigorous as outdoor-grown mint, but it can still provide a fresh supply of leaves.
Q: How do I overwinter my mint plant?
A: In colder climates, mint can be overwintered indoors. Before the first frost, cut back the plant to a few inches above the soil line and bring it indoors. Place it in a cool, bright location and water sparingly. In the spring, gradually acclimate the plant to outdoor conditions before moving it back to your balcony. In milder climates, mint may survive outdoors with some protection, such as a layer of mulch around the base of the plant.

Leave a Comment