
Rooftop Potato Growing Method: Imagine harvesting a bounty of fresh, homegrown potatoes right from your own rooftop! Sounds like a dream, right? Well, it doesn’t have to be! For centuries, humans have cultivated potatoes in various ingenious ways, from the terraced fields of the Andes to small backyard gardens. Now, with space at a premium, especially in urban environments, innovative techniques like the rooftop potato growing method are making it easier than ever to enjoy the taste of freshly dug spuds.
But why should you bother with growing potatoes on your roof? Well, for starters, it’s incredibly rewarding! There’s nothing quite like the satisfaction of nurturing a plant from seed (or in this case, a seed potato) to harvest. Plus, homegrown potatoes taste infinitely better than anything you’ll find in the supermarket. They’re fresher, more flavorful, and you know exactly what went into growing them.
More importantly, the rooftop potato growing method is a fantastic solution for those of us with limited garden space. Whether you live in an apartment with a small balcony or a house with a tiny yard, you can still enjoy the pleasures of growing your own food. This DIY guide will walk you through everything you need to know, from choosing the right container to harvesting your delicious rooftop crop. Get ready to transform your rooftop into a potato paradise!

Rooftop Potato Growing: A DIY Guide to Spud-tacular Success!
Hey there, fellow gardening enthusiasts! Ever dreamt of growing your own potatoes, but lack the sprawling backyard to do it? Well, fret no more! I’m here to share my tried-and-true method for growing potatoes right on your rooftop (or balcony, patio – any sunny, flat space will do!). It’s surprisingly easy, incredibly rewarding, and a fantastic way to maximize your urban gardening potential. Get ready for some homegrown goodness!
What You’ll Need: The Potato Powerhouse Toolkit
Before we dive in, let’s gather our supplies. This is crucial for a smooth and successful potato-growing adventure.
* Large Containers: Think big! We’re talking at least 20-gallon containers per potato plant. Fabric grow bags are fantastic because they allow for excellent drainage and aeration, but large plastic tubs with drainage holes drilled in the bottom work just as well. I personally love using old recycling bins – just make sure they’re thoroughly cleaned!
* Seed Potatoes: These aren’t your regular grocery store potatoes. Seed potatoes are specifically grown for planting and are certified disease-free. You can find them at your local garden center or online. Choose a variety that suits your taste and climate. I’m a big fan of Yukon Gold for their creamy texture and delicious flavor.
* Potting Mix: A well-draining potting mix is essential. Avoid using garden soil, as it can become compacted in containers. I like to create my own mix using equal parts compost, peat moss (or coconut coir), and perlite. This provides the perfect balance of nutrients, moisture retention, and drainage.
* Fertilizer: Potatoes are heavy feeders, so a good fertilizer is a must. I recommend using an organic fertilizer specifically formulated for vegetables. Look for one with a balanced NPK ratio (nitrogen, phosphorus, and potassium). Bone meal is also a great addition for promoting strong root growth.
* Watering Can or Hose: Consistent watering is key to happy potatoes.
* Shovel or Trowel: For planting and adding soil.
* Mulch (Optional): Straw or shredded leaves can help retain moisture and suppress weeds.
* Protective Gear (Optional): Gloves and a hat are always a good idea when gardening.
Step-by-Step: From Seed to Spud
Alright, let’s get our hands dirty! Here’s the breakdown of how to grow potatoes in containers on your rooftop:
1. Prepare Your Seed Potatoes: A week or two before planting, it’s time to “chit” your seed potatoes. This means encouraging them to sprout. Place them in a cool, bright location (but not direct sunlight) until they develop short, green sprouts, also known as “eyes.” You can even cut larger seed potatoes into smaller pieces, ensuring each piece has at least one or two eyes. Let the cut surfaces dry for a day or two before planting to prevent rot. I usually cut mine into pieces about the size of a golf ball.
2. Fill Your Containers: Add about 4-6 inches of your potting mix to the bottom of each container. Mix in a handful of your chosen fertilizer and bone meal. This will provide a nutrient-rich base for your potato plants.
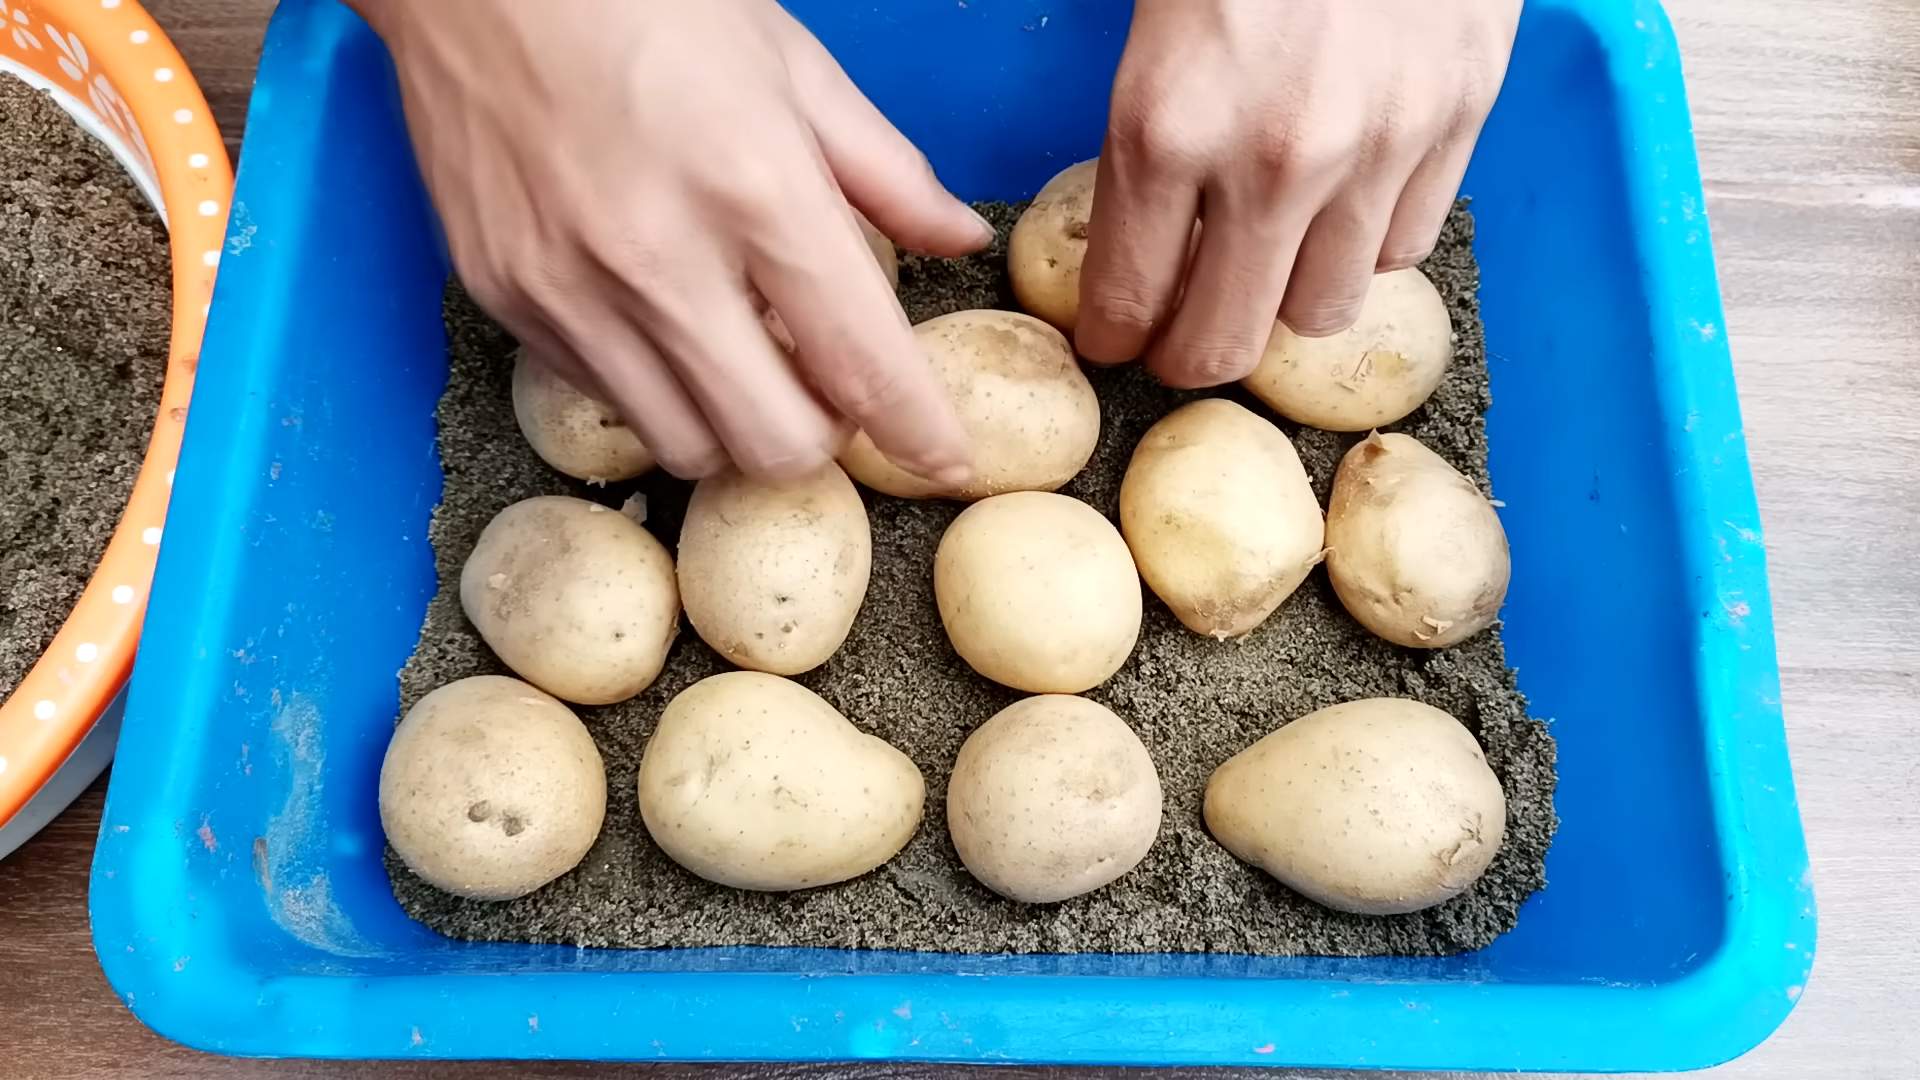
3. Plant Your Seed Potatoes: Place your sprouted seed potato pieces (or whole seed potatoes if they’re small) on top of the soil, with the sprouts facing upwards. Space them about 12 inches apart if you’re planting multiple pieces in the same container.
4. Cover with Soil: Gently cover the seed potatoes with another 4-6 inches of potting mix. Water thoroughly, making sure the soil is evenly moist but not waterlogged.
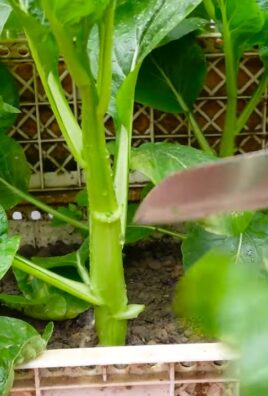
5. “Hilling” – The Secret to More Potatoes: This is where the magic happens! As your potato plants grow, you’ll need to “hill” them. This means adding more soil around the stems of the plants. When the stems are about 6-8 inches tall, add another 4-6 inches of soil, burying the lower part of the stems. Repeat this process every few weeks as the plants grow, until the container is almost full. The buried stems will sprout more roots, and more roots mean more potatoes! I usually hill my potatoes every two weeks.
6. Watering and Fertilizing: Potatoes need consistent moisture, especially during tuber formation. Water deeply whenever the top inch of soil feels dry to the touch. Avoid overwatering, as this can lead to rot. Continue to fertilize your plants every few weeks with your chosen fertilizer, following the instructions on the package.
7. Sunlight: Potatoes need at least 6-8 hours of sunlight per day. Make sure your containers are placed in a sunny location on your rooftop.
8. Pest and Disease Control: Keep an eye out for common potato pests like aphids, potato beetles, and flea beetles. You can control these pests with organic insecticides like neem oil or insecticidal soap. Also, watch out for diseases like early blight and late blight. Proper watering and good air circulation can help prevent these diseases. If you spot any signs of disease, remove the affected leaves immediately.
Harvest Time: Digging Up Your Treasure!
After about 80-100 days, your potato plants should be ready for harvest. Here’s how to know when it’s time to dig in:
* The plants will start to flower: This is a good sign that tubers are forming.
* The foliage will begin to yellow and die back: This indicates that the plants are nearing the end of their life cycle.
To harvest, gently tip the container onto its side and carefully remove the soil, searching for your buried treasure! You can also reach into the container and feel around for the potatoes. Be careful not to damage them with your shovel or trowel.
Once you’ve harvested your potatoes, let them dry in a cool, dark place for a few days to cure. This will help them develop a thicker skin and store longer.
Troubleshooting: Common Potato Problems and Solutions
Even with the best planning, you might encounter a few bumps along the road. Here are some common potato problems and how to fix them:
* Potato Scab: This is a common disease that causes rough, scabby patches on the potato skins. It’s usually caused by alkaline soil. To prevent potato scab, make sure your soil pH is slightly acidic (around 6.0). You can also add sulfur to the soil to lower the pH.
* Green Potatoes: Potatoes that are exposed to sunlight will turn green and produce a toxic substance called solanine. Avoid eating green potatoes, as they can cause nausea and vomiting. To prevent green potatoes, make sure to hill your plants regularly and keep the tubers covered with soil.
* Small Potatoes: If your potatoes are small, it could be due to a lack of nutrients, water, or sunlight. Make sure you’re fertilizing your plants regularly, watering them deeply, and providing them with plenty of sunlight.
* Rotting Potatoes: Rotting potatoes are usually caused by overwatering or poor drainage. Make sure your containers have drainage holes and avoid overwatering.
Tips and Tricks for Potato-Growing Success
Here are a few extra tips to help you grow the best potatoes possible:
* Choose the right variety: Different potato varieties have different growing requirements. Choose a variety that is well-suited to your climate and growing conditions.
* Use certified seed potatoes: Avoid using grocery store potatoes, as they may be treated with chemicals that prevent sprouting.
* Rotate your crops: Avoid planting potatoes in the same container year after year. This can help prevent soilborne diseases.
* Add compost to your soil: Compost is a great way to improve soil fertility and drainage.
* Mulch your plants: Mulch can help retain moisture, suppress weeds, and regulate soil temperature.
* Be patient: Potatoes take time to grow. Don’t get discouraged if you don’t see results right away.
Enjoy Your Homegrown Harvest!
Growing potatoes on your rooftop is a fun, rewarding, and delicious experience. With a little bit of planning and effort, you can enjoy a bountiful harvest of homegrown potatoes. So get out there, get your hands dirty, and start growing! I promise, the taste of those freshly dug potatoes will be well worth the effort. Happy gardening!
Conclusion
So, there you have it! Transforming your rooftop into a thriving potato patch is not just a whimsical dream; it’s an achievable reality with this simple, effective DIY method. We’ve walked you through the process, highlighting the ease and accessibility of growing your own potatoes, even without a traditional garden. But why is this a must-try?
Firstly, consider the unparalleled freshness. Imagine harvesting potatoes just moments before preparing your favorite dish. The taste difference is remarkable – a vibrant, earthy flavor that store-bought potatoes simply can’t match. Secondly, think about the satisfaction of knowing exactly where your food comes from and how it was grown. You control the inputs, ensuring organic, pesticide-free potatoes for you and your family. This is especially important in today’s world where food security and sustainable practices are paramount.
Beyond the practical benefits, rooftop potato growing is a fantastic learning experience. It connects you with nature, teaches you about plant life cycles, and provides a rewarding hobby that can be enjoyed by people of all ages. It’s a conversation starter, a source of pride, and a tangible demonstration of your commitment to a more sustainable lifestyle.
But the best part? The possibilities are endless! Feel free to experiment with different potato varieties. Russets, Yukon Golds, red potatoes – each offers a unique flavor and texture profile. You can also adjust the size of your growing containers to suit your available space and desired yield. Consider adding companion plants like marigolds or basil to deter pests and enhance the overall health of your potato plants.
For those with limited rooftop space, consider vertical potato towers. These ingenious structures maximize growing potential in a small footprint. Or, if you’re feeling adventurous, try growing potatoes in stacked tires or repurposed burlap sacks. The key is to provide ample drainage and support for the growing plants.
Don’t be afraid to get your hands dirty and embrace the learning process. There will be challenges along the way, but the rewards are well worth the effort. From the first sprout to the final harvest, you’ll be amazed by the resilience and productivity of these humble root vegetables.
We wholeheartedly encourage you to give this DIY rooftop potato growing method a try. It’s a fun, rewarding, and sustainable way to grow your own food, right in the heart of the city. And once you’ve experienced the joy of harvesting your own homegrown potatoes, we’d love to hear about it! Share your experiences, photos, and tips in the comments below. Let’s create a community of rooftop potato growers and inspire others to embrace the joys of urban gardening. Let us know what kind of fertilizer you used, what kind of soil you used, and what kind of yield you got. Your insights could be invaluable to other aspiring gardeners.
So, grab your seed potatoes, gather your supplies, and get ready to transform your rooftop into a potato paradise! You won’t regret it.
Frequently Asked Questions (FAQ)
What kind of potatoes are best for rooftop growing?
The best potatoes for rooftop growing are generally those that are well-suited to container gardening. This often means choosing varieties that are relatively compact and early-maturing. Some excellent choices include:
* **Yukon Gold:** These potatoes are known for their creamy texture and buttery flavor. They are relatively early-maturing and perform well in containers.
* **Red Potatoes (e.g., Red Pontiac, Red Norland):** Red potatoes are another good option for container growing. They are typically smaller and have a waxy texture, making them ideal for boiling and salads.
* **Fingerling Potatoes:** These long, slender potatoes are prized for their unique shape and nutty flavor. They are well-suited to container growing and come in a variety of colors.
* **Irish Cobbler:** An early season potato that is great for boiling and has a mild flavor.
* **Russet Potatoes (with caution):** While russets are traditionally grown in the ground, some gardeners have success growing them in large containers. Be sure to provide ample space and support for the growing plants.
Ultimately, the best potato variety for you will depend on your personal preferences and growing conditions. Experiment with different varieties to see what works best in your rooftop garden.
How much sunlight do potatoes need when grown on a rooftop?
Potatoes need at least 6-8 hours of direct sunlight per day to thrive. Rooftops are often ideal locations for growing potatoes because they typically receive ample sunlight. However, it’s important to consider the orientation of your rooftop and any potential obstructions that may block sunlight. If your rooftop receives less than 6 hours of direct sunlight, you may need to supplement with artificial lighting.
What kind of soil is best for growing potatoes in containers?
Potatoes need well-draining soil that is rich in organic matter. A good potting mix for potatoes should consist of:
* **Compost:** Compost provides essential nutrients and improves soil structure.
* **Peat Moss or Coco Coir:** These materials help retain moisture and improve drainage.
* **Perlite or Vermiculite:** These materials improve aeration and drainage.
* **Slow-Release Fertilizer:** A slow-release fertilizer will provide a steady supply of nutrients to your potato plants throughout the growing season.
Avoid using heavy clay soil, as it can become waterlogged and inhibit root growth.
How often should I water my rooftop potato plants?
Water your potato plants regularly, especially during hot, dry weather. The soil should be consistently moist, but not waterlogged. Check the soil moisture by sticking your finger into the soil. If the top inch of soil feels dry, it’s time to water. Be sure to water deeply, allowing the water to reach the bottom of the container. Avoid overhead watering, as this can promote fungal diseases.
How do I “hill” potatoes in containers?
Hilling is the process of adding soil around the stems of potato plants as they grow. This encourages the plants to produce more potatoes along the buried stems. To hill potatoes in containers:
1. Start with a container that is only partially filled with soil.
2. As the potato plants grow, gradually add more soil around the stems, burying the lower leaves.
3. Continue hilling the potatoes until the container is almost full.
How do I know when my rooftop potatoes are ready to harvest?
Potatoes are typically ready to harvest when the foliage begins to yellow and die back. This usually occurs about 80-100 days after planting. To check if your potatoes are ready, gently dig around the base of the plant and feel for potatoes. If the potatoes are the desired size, you can harvest them.
What are some common pests and diseases that affect rooftop potato plants?
Some common pests and diseases that can affect rooftop potato plants include:
* **Potato Beetles:** These beetles can defoliate potato plants. Handpick them off the plants or use an organic insecticide.
* **Aphids:** Aphids can suck the sap from potato plants. Spray them with insecticidal soap or neem oil.
* **Fungal Diseases (e.g., Early Blight, Late Blight):** These diseases can cause leaf spots and stem lesions. Prevent fungal diseases by providing good air circulation and avoiding overhead watering. Use a fungicide if necessary.
Can I grow potatoes on my rooftop if I live in a cold climate?
Yes, you can grow potatoes on your rooftop even if you live in a cold climate. However, you will need to start your potatoes indoors several weeks before the last frost. You can also use row covers or other protective measures to protect your plants from frost. Choose early-maturing potato varieties that will have enough time to mature before the first frost.
What kind of fertilizer should I use for rooftop potato growing?
Use a balanced fertilizer that is specifically formulated for vegetables. Look for a fertilizer with an NPK ratio of around 10-10-10 or 14-14-14. Apply the fertilizer according to the package directions. You can also supplement with organic fertilizers such as compost tea or fish emulsion.
Is rooftop potato growing safe for my roof?
Rooftop potato growing is generally safe for most roofs, but it’s important to consider the weight of the containers and the potential for water damage. Be sure to use lightweight containers and provide adequate drainage. If you are concerned about the weight of the containers, consult with a structural engineer.


Leave a Comment