
Bell pepper container gardening tips are your ticket to fresh, flavorful peppers right outside your door, even if you don’t have a sprawling backyard! Imagine plucking a vibrant, sun-ripened bell pepper straight from your patio to add to your salad or stir-fry. Sounds dreamy, right? For centuries, container gardening has allowed people to cultivate their own food in limited spaces, from ancient rooftop gardens to modern apartment balconies. It’s a practice rooted in resourcefulness and a deep connection to nature.
But let’s be honest, growing bell peppers can sometimes feel like a challenge. They need the right conditions, and getting it wrong can lead to disappointing results. That’s where these DIY tricks and hacks come in! I’m going to share my tried-and-true secrets for successful bell pepper container gardening tips, helping you avoid common pitfalls and maximize your harvest. Whether you’re a seasoned gardener or just starting out, these simple yet effective techniques will empower you to grow delicious, healthy bell peppers with ease. So, grab your gardening gloves, and let’s get started!
Growing Bell Peppers in Containers: A Comprehensive DIY Guide
Hey there, fellow gardening enthusiasts! I’m so excited to share my tried-and-true method for growing vibrant, delicious bell peppers right in containers. Whether you have a sprawling backyard or just a sunny balcony, this guide will walk you through every step, from choosing the right container to harvesting your bountiful crop. Let’s get started!
Choosing the Right Container and Soil
This is where our bell pepper adventure begins! The right foundation is crucial for success.
* Container Size: Bell peppers need room to stretch their roots. I recommend a container that’s at least 12 inches in diameter and 12 inches deep. A 5-gallon bucket works perfectly, but larger is always better! Think about it – the bigger the pot, the more space for roots, and the more peppers you’ll get.
* Material: Plastic, terracotta, or even fabric pots are all viable options. Plastic pots retain moisture better, which can be helpful in hot climates. Terracotta pots are more breathable, preventing waterlogging. Fabric pots are fantastic for air pruning roots, leading to healthier plants. I personally love using repurposed plastic containers – just make sure they’re clean and have drainage holes!
* Drainage: This is non-negotiable! Bell peppers hate sitting in soggy soil. Ensure your container has plenty of drainage holes at the bottom. If you’re using a container without pre-made holes, drill some yourself.
* Potting Mix: Forget garden soil! It’s too heavy and compacts easily in containers. Instead, opt for a high-quality potting mix specifically designed for containers. Look for a mix that’s well-draining and contains ingredients like peat moss, perlite, and vermiculite. I often amend my potting mix with compost for added nutrients.
Selecting Your Bell Pepper Variety
The world of bell peppers is vast and colorful! Choosing the right variety for your climate and preferences is key.
* Consider Your Climate: Some varieties are better suited for cooler climates, while others thrive in hot, sunny conditions. Check the seed packet or plant label for information on the ideal growing conditions for each variety.
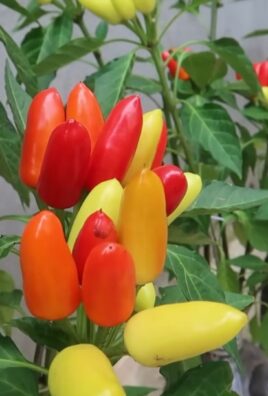
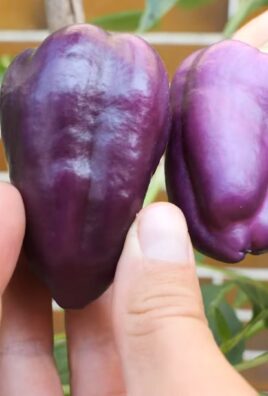
* Color and Flavor: Bell peppers come in a rainbow of colors – green, red, yellow, orange, and even purple! Each color has a slightly different flavor profile. Green peppers are often slightly bitter, while red, yellow, and orange peppers are sweeter.
* Size and Shape: Bell peppers also vary in size and shape. Some are small and blocky, while others are long and slender. Consider how you plan to use your peppers when making your selection.
* My Recommendations: I’ve had great success with ‘California Wonder’ (a classic green bell pepper), ‘Yolo Wonder’ (another reliable green variety), ‘Golden Bell’ (a sweet yellow pepper), and ‘Red Knight’ (a prolific red pepper). Don’t be afraid to experiment and find your favorites!
Planting Your Bell Pepper Seedlings
Now for the fun part – getting those little seedlings into their new homes!
1. Prepare Your Container: Fill your chosen container with the potting mix, leaving about an inch or two of space at the top.
2. Water the Soil: Thoroughly water the potting mix until it’s evenly moist but not soggy.
3. Gently Remove the Seedling: Carefully remove the bell pepper seedling from its nursery pot. Gently loosen the roots if they’re tightly bound.
4. Plant the Seedling: Dig a hole in the potting mix that’s large enough to accommodate the seedling’s root ball. Place the seedling in the hole and gently backfill with potting mix. Make sure the top of the root ball is level with the surrounding soil.
5. Water Again: Water the newly planted seedling thoroughly.
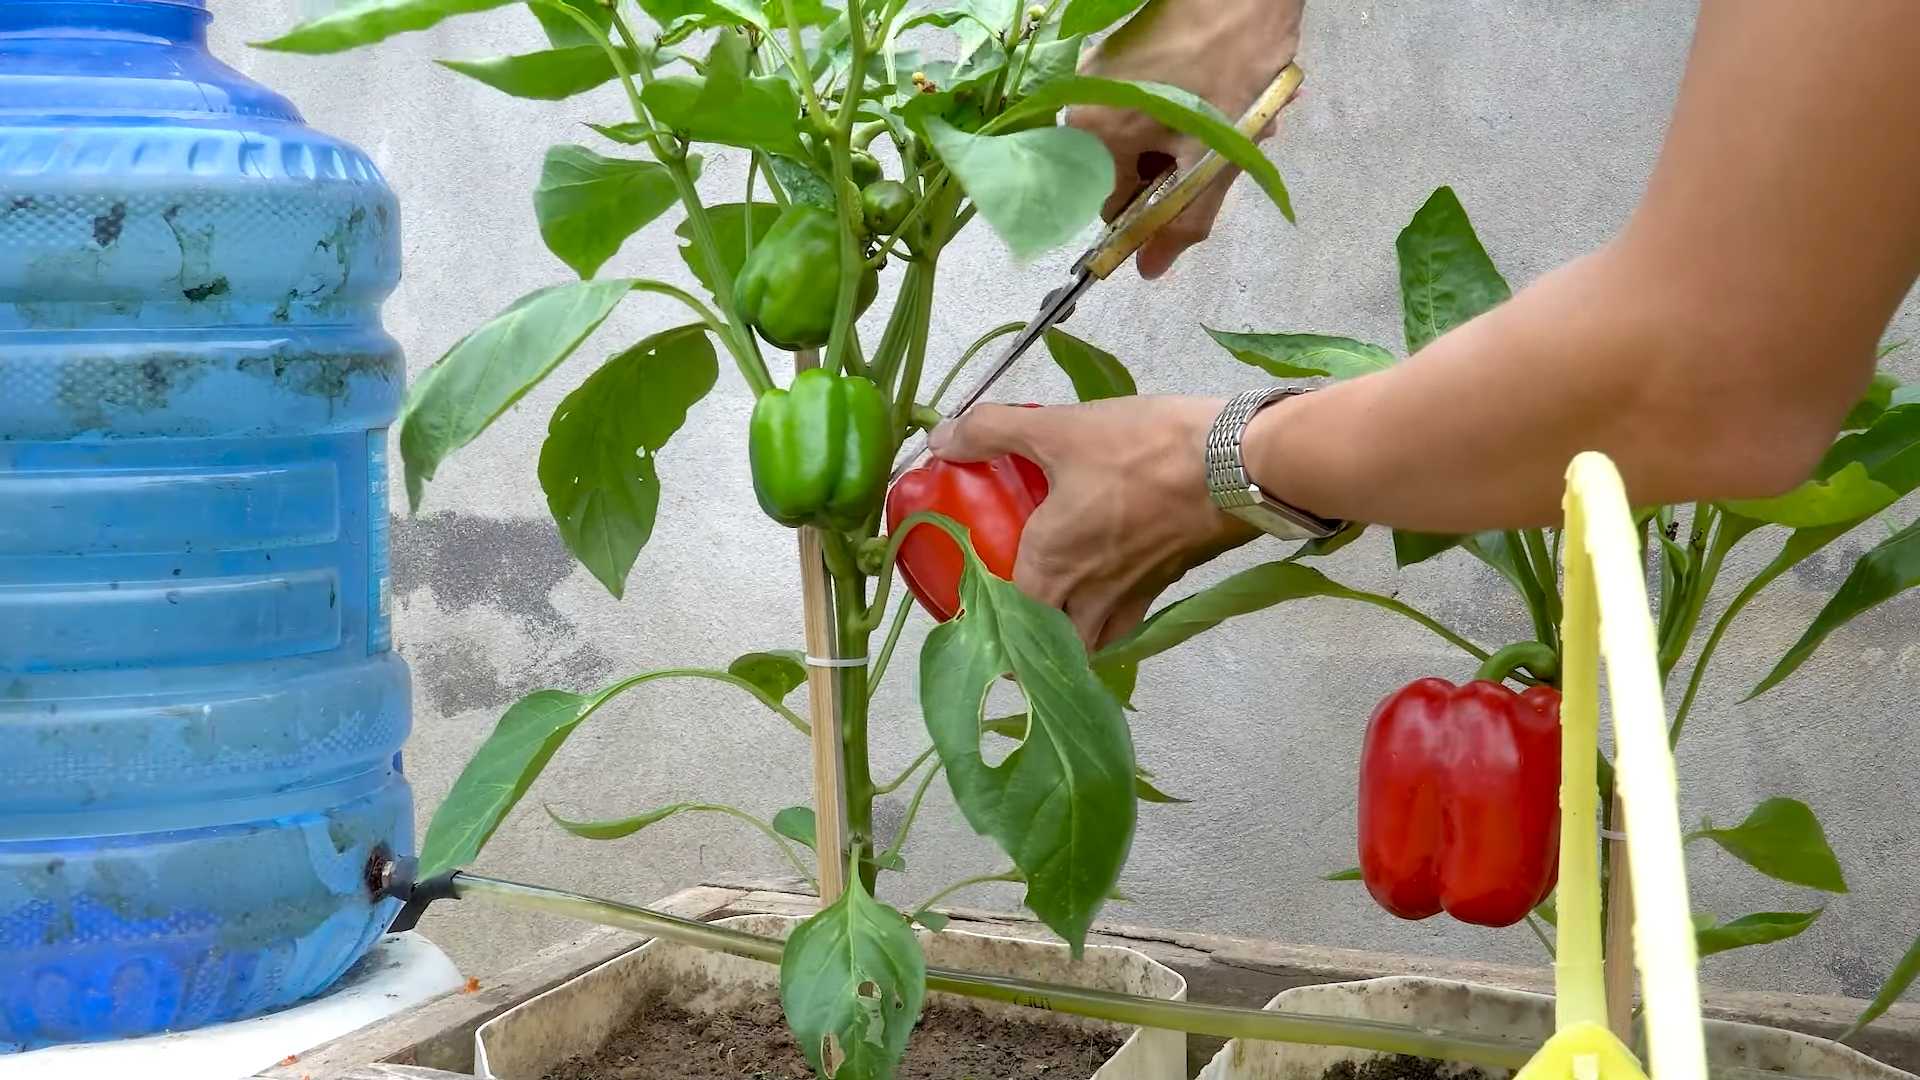
6. Add Support (Optional): If you’re growing a tall or heavy-yielding variety, consider adding a stake or tomato cage to provide support. This will prevent the plant from toppling over as it grows.
Caring for Your Container Bell Peppers
Consistent care is essential for healthy, productive bell pepper plants.
* Sunlight: Bell peppers need at least 6-8 hours of direct sunlight per day. Place your container in the sunniest spot you can find. If you’re growing indoors, consider using grow lights to supplement natural sunlight.
* Watering: Water your bell pepper plants regularly, especially during hot, dry weather. Check the soil moisture by sticking your finger into the soil. If the top inch of soil feels dry, it’s time to water. Avoid overwatering, as this can lead to root rot. I usually water deeply every 2-3 days, depending on the weather.
* Fertilizing: Bell peppers are heavy feeders and need regular fertilization to thrive. Use a balanced fertilizer (e.g., 10-10-10) every 2-3 weeks. You can also use a liquid fertilizer diluted according to the package directions. I like to use a fertilizer specifically formulated for tomatoes and peppers, as it contains the right balance of nutrients.
* Pruning: Pruning can help improve air circulation and encourage fruit production. Remove any suckers (small shoots that grow from the base of the plant) as they appear. You can also prune away any yellowing or diseased leaves.
* Pest and Disease Control: Keep an eye out for common pests like aphids, whiteflies, and spider mites. You can control these pests with insecticidal soap or neem oil. Prevent fungal diseases by ensuring good air circulation and avoiding overwatering. If you notice any signs of disease, remove the affected leaves immediately.
Dealing with Common Problems
Even with the best care, you might encounter a few challenges along the way. Here’s how to troubleshoot some common problems:
* Blossom-End Rot: This is a common problem in bell peppers, characterized by a dark, sunken spot on the bottom of the fruit. It’s caused by a calcium deficiency. To prevent blossom-end rot, ensure your soil is rich in calcium and water your plants consistently. You can also add calcium to the soil by mixing in crushed eggshells or bone meal.
* Sunscald: This occurs when the peppers are exposed to too much direct sunlight, causing them to develop white or yellow patches. To prevent sunscald, provide some shade during the hottest part of the day. You can use shade cloth or move the container to a shadier location.
* Poor Fruit Set: Sometimes, bell pepper plants produce lots of flowers but few fruits. This can be caused by a variety of factors, including temperature extremes, lack of pollination, and nutrient deficiencies. To improve fruit set, ensure your plants are getting enough sunlight and water. You can also hand-pollinate the flowers by gently shaking the plant or using a small paintbrush to transfer pollen from one flower to another.
Harvesting Your Bell Peppers
The moment you’ve been waiting for – harvesting your delicious bell peppers!
1. Timing: Bell peppers are typically ready to harvest 60-90 days after transplanting, depending on the variety. The peppers should be firm, glossy, and fully colored.
2. Technique: Use a sharp knife or pruning shears to cut the pepper from the plant, leaving about an inch of stem attached. Avoid pulling the pepper off, as this can damage the plant.
3. Storage: Freshly harvested bell peppers can be stored in the refrigerator for up to a week.
Extending the Growing Season
Want to enjoy fresh bell peppers for even longer? Here are a few tips for extending the growing season:
* Start Seeds Indoors: Start your bell pepper seeds indoors 6-8 weeks before the last expected frost. This will give your plants a head start on the growing season.
* Use Row Covers: Row covers can protect your plants from frost and cold temperatures, allowing you to extend the growing season in the spring and fall.
* Bring Containers Indoors: If you live in a cold climate, you can bring your container bell pepper plants indoors for the winter. Place them in a sunny location and provide supplemental light if needed.
Enjoying Your Homegrown Bell Peppers
Congratulations! You’ve successfully grown your own bell peppers in containers. Now it’s time to enjoy the fruits (or rather, vegetables) of your labor. Use your homegrown bell peppers in salads, stir-fries, omelets, or any other dish that calls for these versatile veggies. There’s nothing quite like the taste of a fresh, homegrown bell pepper! I love roasting them with a little olive oil and garlic – so simple and delicious!
Happy gardening, and may your containers be overflowing with colorful, flavorful bell peppers!

Conclusion
So, there you have it! Transforming your patio, balcony, or even a sunny windowsill into a thriving bell pepper haven is entirely within your reach. We’ve explored the ins and outs of bell pepper container gardening, from selecting the perfect pot and soil to nurturing your plants for a bountiful harvest. This isn’t just about growing vegetables; it’s about connecting with nature, enjoying the satisfaction of cultivating your own food, and adding a vibrant splash of color to your living space.
Why is this DIY approach a must-try? Because it empowers you to control the growing environment, ensuring your bell peppers receive the optimal conditions for success. You’re not at the mercy of unpredictable weather patterns or soil conditions. You choose the best soil mix, provide consistent watering, and protect your plants from pests and diseases. Plus, container gardening is incredibly space-efficient, making it ideal for urban dwellers or anyone with limited garden space.
But the beauty of bell pepper container gardening lies in its adaptability. Feel free to experiment with different varieties of bell peppers. Try growing sweet bell peppers like ‘California Wonder’ or ‘Yolo Wonder’ for classic flavor. Or, if you prefer a bit of heat, explore varieties like ‘Jalapeno M’ or ‘Anaheim’. You can even mix and match different colored bell peppers in the same container for a visually stunning display.
Consider companion planting to further enhance your bell pepper garden. Marigolds can deter pests, while basil can improve the flavor of your peppers. You can also add herbs like oregano or thyme to create a fragrant and beneficial ecosystem within your containers.
Don’t be afraid to get creative with your container choices. While standard plastic pots are perfectly functional, you can also use repurposed items like old buckets, wooden crates, or even fabric grow bags. Just ensure that your chosen container has adequate drainage holes to prevent waterlogging.
The key to success is observation and responsiveness. Regularly check your plants for signs of pests or diseases, and adjust your watering and fertilizing schedule as needed. Remember, gardening is a learning process, and every season brings new challenges and opportunities.
We wholeheartedly encourage you to embark on your own bell pepper container gardening adventure. It’s a rewarding experience that will provide you with fresh, delicious peppers and a sense of accomplishment. And most importantly, share your experiences with us! We’d love to hear about your successes, challenges, and any tips or tricks you’ve discovered along the way. Post photos of your thriving bell pepper plants, share your favorite recipes using your homegrown peppers, and inspire others to join the container gardening movement. Let’s cultivate a community of passionate gardeners who are dedicated to growing their own food, one container at a time. So grab your pots, soil, and bell pepper seedlings, and let’s get growing!
Frequently Asked Questions (FAQ)
What is the best size container for growing bell peppers?
The ideal container size for a single bell pepper plant is at least 12 inches in diameter and 12 inches deep, which translates to about 5-7 gallons. Larger containers, such as 10-gallon pots, are even better as they provide more room for root growth and help retain moisture. If you plan to grow multiple bell pepper plants in a single container, choose a larger container accordingly, ensuring each plant has adequate space. Remember, adequate space is crucial for healthy root development, which directly impacts the plant’s ability to absorb nutrients and produce a bountiful harvest. Smaller containers can restrict root growth, leading to stunted plants and reduced yields.
What type of soil is best for bell pepper container gardening?
Bell peppers thrive in well-draining, nutrient-rich soil. A high-quality potting mix specifically formulated for vegetables is your best bet. Avoid using garden soil directly in containers, as it tends to compact and doesn’t drain well. You can also create your own potting mix by combining equal parts of peat moss (or coconut coir), perlite, and compost. The peat moss or coconut coir helps retain moisture, the perlite improves drainage, and the compost provides essential nutrients. Adding a slow-release fertilizer to your potting mix at planting time will provide a steady supply of nutrients throughout the growing season.
How often should I water my bell pepper plants in containers?
Watering frequency depends on several factors, including the size of the container, the weather conditions, and the type of potting mix you’re using. Generally, you should water your bell pepper plants whenever the top inch of soil feels dry to the touch. During hot, sunny weather, you may need to water daily, while during cooler, cloudy weather, you may only need to water every few days. Avoid overwatering, as this can lead to root rot. Ensure that your container has adequate drainage holes to allow excess water to escape. A good rule of thumb is to water deeply until water drains out of the bottom of the container.
How much sunlight do bell pepper plants need?
Bell peppers require at least 6-8 hours of direct sunlight per day to thrive. Choose a sunny location for your containers, such as a south-facing patio or balcony. If you don’t have a spot that receives full sun, you can supplement with grow lights. Insufficient sunlight can lead to leggy plants with poor fruit production. If you’re growing your bell peppers indoors, place them near a sunny window or use grow lights to provide adequate illumination. Rotate your plants regularly to ensure even light exposure on all sides.
What are some common pests and diseases that affect bell pepper plants in containers?
Common pests that can affect bell pepper plants include aphids, spider mites, and whiteflies. These pests can suck the sap from the leaves, causing them to yellow and wilt. You can control these pests by spraying your plants with insecticidal soap or neem oil. Diseases that can affect bell pepper plants include blossom end rot, fungal leaf spot, and powdery mildew. Blossom end rot is caused by a calcium deficiency and can be prevented by adding calcium to the soil. Fungal leaf spot and powdery mildew can be prevented by ensuring good air circulation and avoiding overhead watering. Regularly inspect your plants for signs of pests or diseases and take action promptly to prevent them from spreading.
How do I fertilize my bell pepper plants in containers?
Bell peppers are heavy feeders and require regular fertilization to produce a bountiful harvest. Start by adding a slow-release fertilizer to your potting mix at planting time. Then, supplement with a liquid fertilizer every 2-3 weeks throughout the growing season. Choose a fertilizer that is specifically formulated for vegetables and has a balanced NPK ratio (nitrogen, phosphorus, and potassium). Avoid over-fertilizing, as this can lead to excessive foliage growth at the expense of fruit production. Follow the instructions on the fertilizer label carefully.
When is the best time to harvest bell peppers?
Bell peppers are typically ready to harvest 60-90 days after transplanting, depending on the variety. You can harvest them when they are fully colored and firm to the touch. Use a sharp knife or pruning shears to cut the peppers from the plant, leaving a short stem attached. You can also harvest green bell peppers, but they will be less sweet than fully ripe peppers. The longer you leave the peppers on the plant, the sweeter they will become. Regular harvesting encourages the plant to produce more peppers.
Can I overwinter my bell pepper plants in containers?
In warmer climates (zones 9-11), you may be able to overwinter your bell pepper plants in containers. Before the first frost, prune back the plants and move them to a sheltered location, such as a garage or greenhouse. Water sparingly throughout the winter, allowing the soil to dry out between waterings. In colder climates, it’s best to treat bell pepper plants as annuals and start with new seedlings each spring. However, you can try bringing your plants indoors and providing them with supplemental light to keep them alive over the winter, although they may not produce much fruit.
What are some good companion plants for bell peppers in containers?
Companion planting can benefit bell pepper plants by attracting beneficial insects, repelling pests, and improving soil health. Some good companion plants for bell peppers include basil, marigolds, oregano, thyme, and carrots. Basil repels aphids and whiteflies, while marigolds deter nematodes. Oregano and thyme attract beneficial insects, such as ladybugs and lacewings, which prey on pests. Carrots can help improve soil drainage. Avoid planting bell peppers near fennel or kohlrabi, as these plants can inhibit their growth.
How can I prevent blossom end rot in my bell pepper plants?
Blossom end rot is a common problem in bell peppers, characterized by a dark, sunken spot on the bottom of the fruit. It’s caused by a calcium deficiency, which can be due to inconsistent watering, poor soil drainage, or a lack of calcium in the soil. To prevent blossom end rot, ensure that your bell pepper plants receive consistent watering, especially during hot, dry weather. Improve soil drainage by adding perlite or vermiculite to your potting mix. You can also add calcium to the soil by incorporating bone meal or crushed eggshells. If you suspect a calcium deficiency, you can spray your plants with a calcium chloride solution.
Leave a Comment