
Grow Broccoli from Seed and unlock the joy of harvesting your own delicious, nutrient-packed florets right from your backyard! Imagine serving up a vibrant, homegrown broccoli dish, knowing you nurtured it from a tiny seed to a culinary masterpiece. It’s more achievable than you think, and this DIY guide will show you exactly how.
Broccoli, a member of the brassica family, has a rich history dating back to the Roman Empire. For centuries, it has been cherished for its health benefits and unique flavor. Today, with increasing awareness of sustainable living and healthy eating, growing your own vegetables, like broccoli, is becoming increasingly popular. But let’s be honest, sometimes the thought of starting from scratch can feel daunting. That’s where this guide comes in!
Many people shy away from starting broccoli from seed, fearing it’s too complicated or time-consuming. They often resort to buying seedlings, which can be expensive and limit your variety choices. But I’m here to tell you that grow broccoli from seed is not only easier than you think, but it’s also incredibly rewarding. You’ll have complete control over the growing process, ensuring your broccoli is organic and free from harmful chemicals. Plus, you’ll save money and gain a deeper connection to your food. So, let’s dive in and discover the secrets to successful broccoli cultivation from seed!
Growing Broccoli from Seed: A Complete DIY Guide
Hey there, fellow gardening enthusiasts! I’m so excited to share my tried-and-true method for growing broccoli from seed. It’s surprisingly easy, incredibly rewarding, and way cheaper than buying those pre-grown plants from the nursery. Plus, you get to choose from a wider variety of broccoli types! Let’s dive in!
Why Grow Broccoli from Seed?
Before we get started, let’s quickly touch on why growing from seed is so awesome:
* Cost-Effective: Seeds are significantly cheaper than starter plants.
* Variety: You’ll have access to a much broader selection of broccoli varieties, including heirlooms and unique cultivars.
* Control: You have complete control over the growing process, from soil to fertilization.
* Satisfaction: There’s nothing quite like the feeling of nurturing a plant from a tiny seed to a bountiful harvest.
Materials You’ll Need
Okay, let’s gather our supplies. Here’s what you’ll need to successfully grow broccoli from seed:
* Broccoli Seeds: Choose a variety that suits your climate and preferences. Some popular choices include ‘Waltham 29’, ‘DiCicco’, and ‘Calabrese’.
* Seed Starting Trays or Pots: I prefer using seed starting trays with individual cells, but small pots work just as well.
* Seed Starting Mix: This is a light, sterile soil mix specifically designed for starting seeds. Don’t use garden soil!
* Watering Can or Spray Bottle: For gentle watering.
* Grow Lights (Optional but Recommended): Especially if you’re starting seeds indoors during the winter months.
* Heat Mat (Optional): To speed up germination.
* Labels and a Permanent Marker: To keep track of your varieties.
* Small Trowel or Spoon: For transplanting seedlings.
* Fertilizer: A balanced, water-soluble fertilizer for feeding your seedlings.
* Garden Soil: For transplanting into your garden or larger containers.
* Compost or Aged Manure: To enrich your garden soil.
When to Start Your Seeds
Timing is crucial for broccoli success! Broccoli is a cool-season crop, meaning it thrives in cooler temperatures.
* For a Spring Crop: Start your seeds indoors 6-8 weeks before the last expected frost.
* For a Fall Crop: Start your seeds indoors 10-12 weeks before the first expected frost.
You can find your average frost dates online by searching for your zip code and “average frost dates.”
Starting Your Seeds Indoors: Step-by-Step
Alright, let’s get our hands dirty! Here’s how I start my broccoli seeds indoors:
1. Prepare Your Seed Starting Trays: Fill each cell of your seed starting tray (or your individual pots) with seed starting mix. Gently tap the tray to settle the mix.
2. Moisten the Soil: Water the seed starting mix thoroughly until it’s evenly moist but not soggy. You want it to feel like a wrung-out sponge.
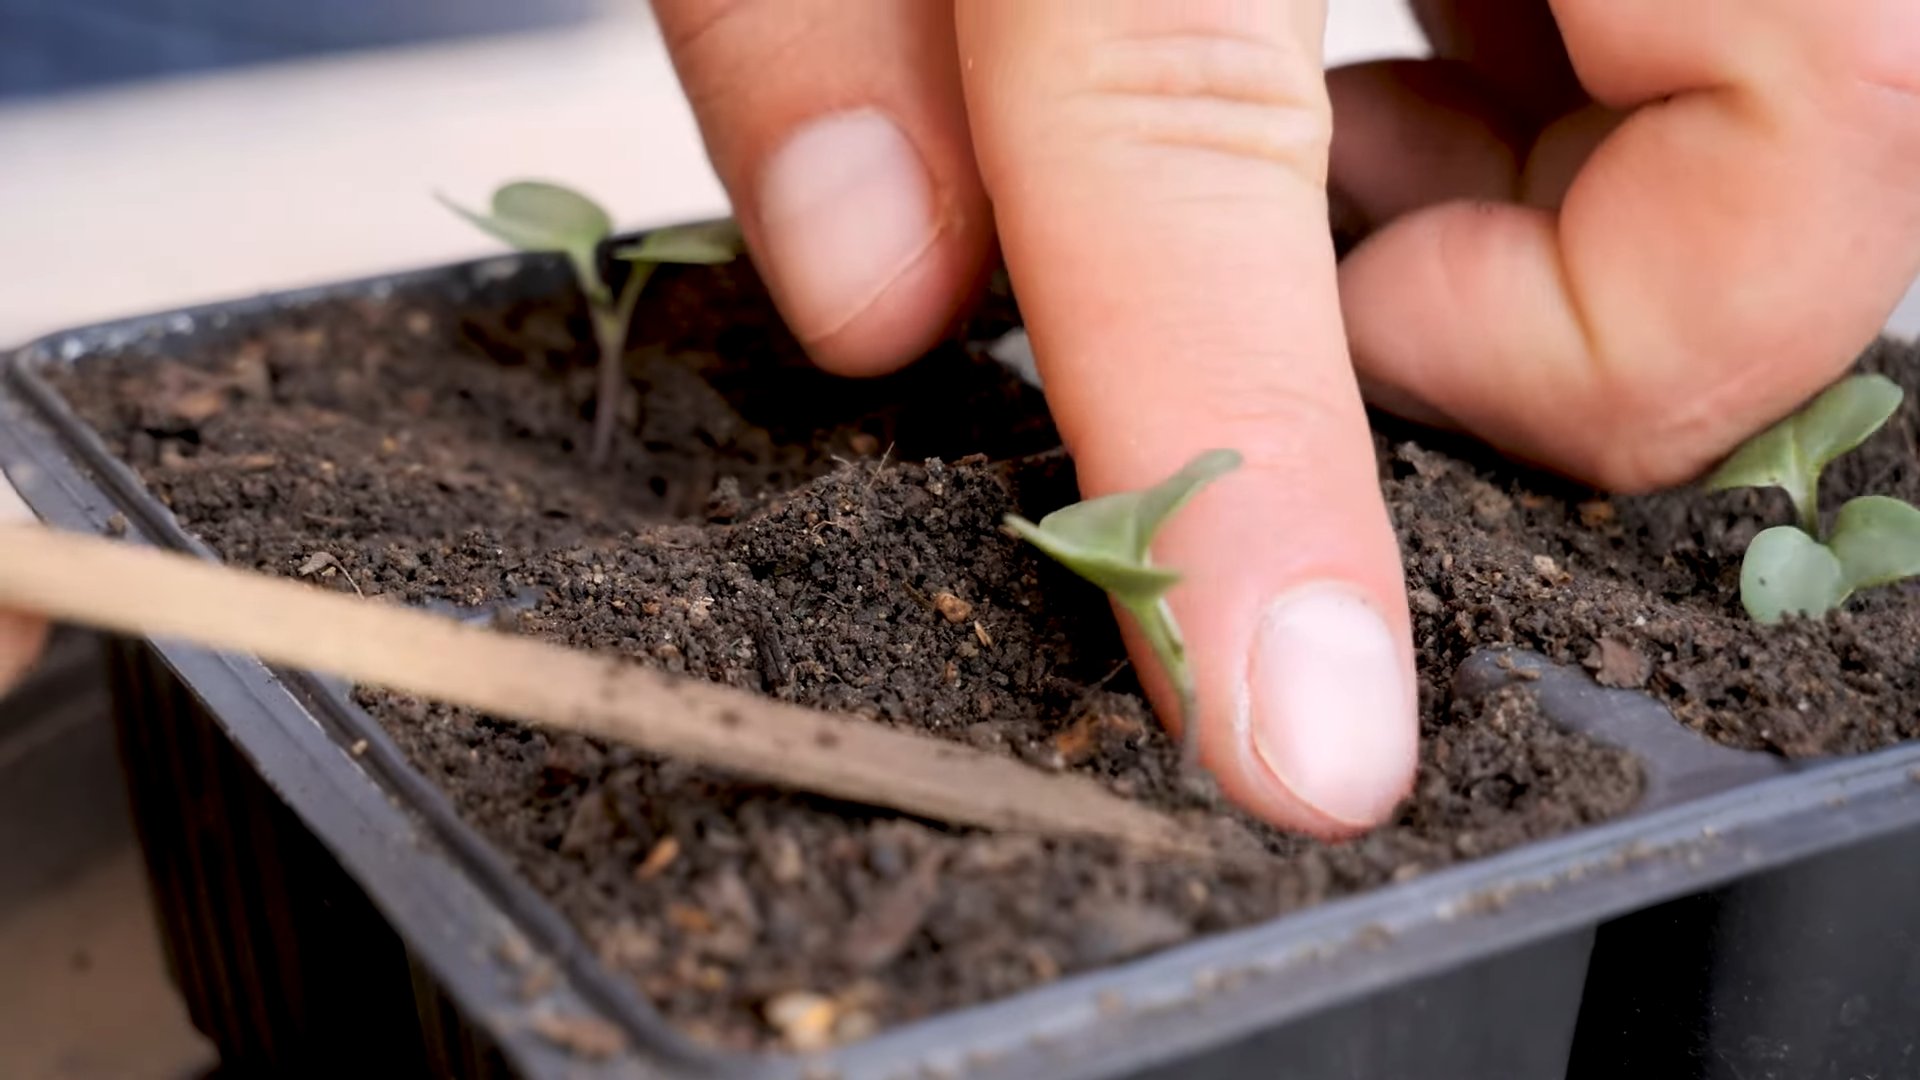
3. Sow the Seeds: Make a small indentation (about 1/4 inch deep) in the center of each cell. I use the eraser end of a pencil for this. Drop 2-3 broccoli seeds into each indentation. This increases your chances of at least one seed germinating.
4. Cover the Seeds: Gently cover the seeds with a thin layer of seed starting mix.
5. Water Again: Lightly mist the surface of the soil with your spray bottle.
6. Label Your Trays: Use your labels and permanent marker to clearly identify the broccoli variety you’ve planted in each tray. This is super important, trust me!
7. Provide Warmth: Place your seed starting trays on a heat mat (if using) and cover them with a humidity dome or plastic wrap to create a mini-greenhouse effect. This helps retain moisture and warmth, which are essential for germination.
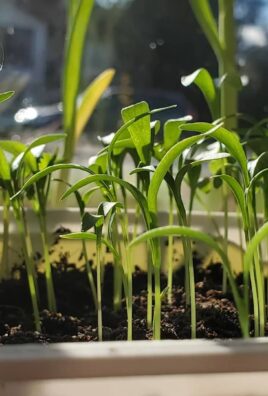
8. Place Under Grow Lights (or in a Sunny Location): If you’re using grow lights, position them a few inches above the trays. If you’re relying on natural sunlight, place the trays in a south-facing window that receives at least 6 hours of direct sunlight per day.
9. Monitor Germination: Broccoli seeds typically germinate in 5-10 days. Keep the soil consistently moist but not waterlogged. Remove the humidity dome or plastic wrap once the seedlings emerge.
10. Thin the Seedlings: Once the seedlings have developed their first true leaves (the second set of leaves that appear after the initial seed leaves), thin them to one seedling per cell. Choose the strongest, healthiest-looking seedling and gently snip off the others at the soil line with small scissors. Don’t pull them out, as this can disturb the roots of the remaining seedling.
11. Fertilize Regularly: Once the seedlings have their first true leaves, start feeding them with a diluted solution of balanced, water-soluble fertilizer every 1-2 weeks. Follow the instructions on the fertilizer package for the correct dilution rate.
12. Harden Off the Seedlings: About a week before you plan to transplant your seedlings outdoors, you’ll need to “harden them off.” This process gradually acclimates them to the outdoor environment, reducing the risk of transplant shock. Start by placing the trays outdoors in a sheltered location for a few hours each day, gradually increasing the amount of time they spend outside. Protect them from direct sunlight and strong winds during this process.
Transplanting Your Broccoli Seedlings Outdoors
Once your seedlings are about 4-6 inches tall and the danger of frost has passed (or is approaching for a fall crop), it’s time to transplant them into your garden!
1. Prepare Your Garden Bed: Choose a location that receives at least 6 hours of direct sunlight per day. Broccoli prefers well-drained soil that is rich in organic matter. Amend your soil with compost or aged manure to improve its fertility and drainage.
2. Space Your Plants: Space your broccoli plants 18-24 inches apart in rows that are 24-36 inches apart. This allows them plenty of room to grow and prevents overcrowding.
3. Dig Holes: Dig holes that are slightly larger than the root balls of your seedlings.
4. Gently Remove Seedlings: Carefully remove the seedlings from their trays or pots. Gently loosen the roots if they are tightly bound.
5. Plant the Seedlings: Place the seedlings in the holes, making sure that the top of the root ball is level with the surrounding soil.
6. Backfill with Soil: Fill the holes with soil and gently firm it around the base of the plants.
7. Water Thoroughly: Water the newly transplanted seedlings thoroughly to help them settle in.
8. Mulch: Apply a layer of mulch around the plants to help retain moisture, suppress weeds, and regulate soil temperature. Straw, wood chips, or shredded leaves are all good options.
Caring for Your Broccoli Plants
Now that your broccoli plants are in the ground, here’s how to keep them happy and healthy:
* Water Regularly: Broccoli needs consistent moisture, especially during hot, dry weather. Water deeply whenever the top inch of soil feels dry to the touch.
* Fertilize: Continue to fertilize your broccoli plants every 2-3 weeks with a balanced, water-soluble fertilizer. You can also side-dress them with compost or aged manure.
* Weed Regularly: Keep your garden bed free of weeds, as they can compete with your broccoli plants for nutrients and water.
* Pest Control: Broccoli is susceptible to several pests, including cabbage worms, aphids, and flea beetles. Inspect your plants regularly for signs of infestation and take action promptly. You can use organic pest control methods, such as insecticidal soap, neem oil, or Bacillus thuringiensis (Bt).
* Protect from Extreme Weather: If you experience extreme heat or cold, protect your broccoli plants with row covers or shade cloth.
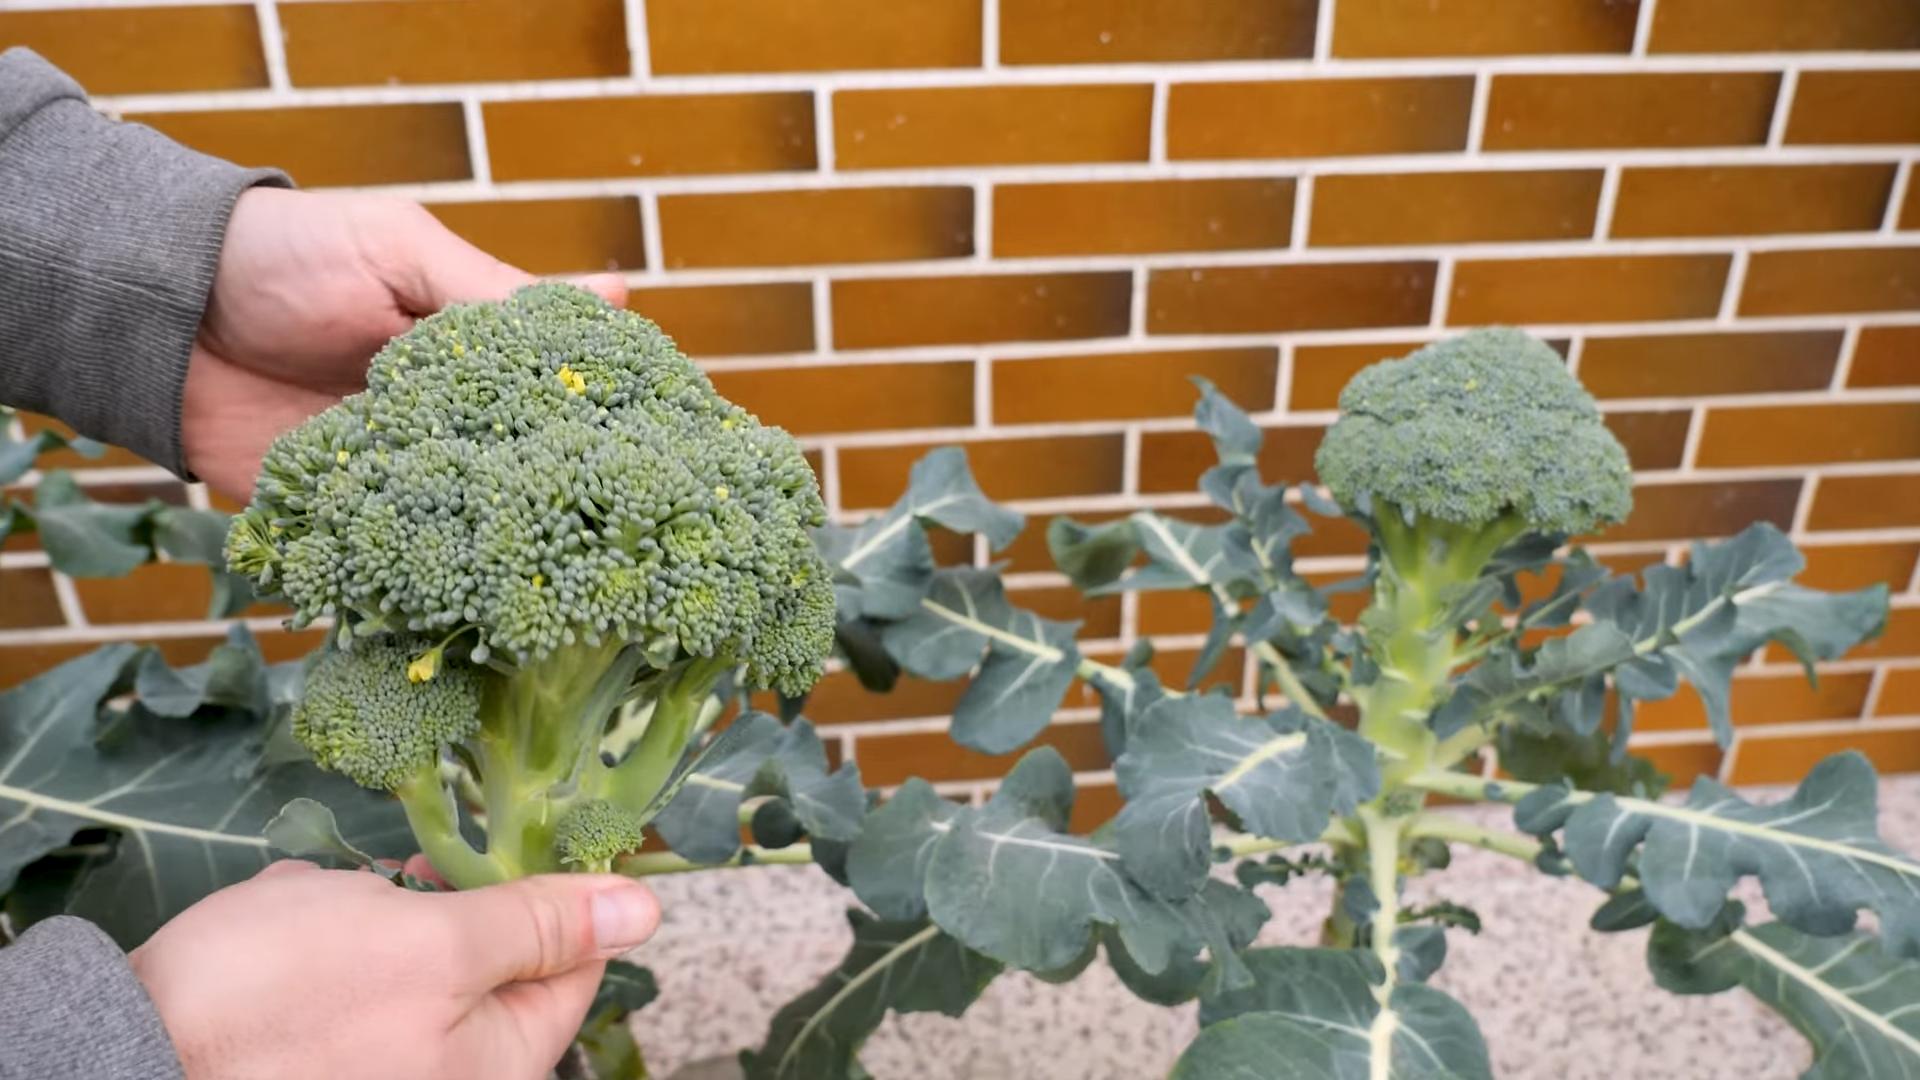
Harvesting Your Broccoli
The moment you’ve been waiting for! Broccoli is typically ready to harvest 50-70 days after transplanting, depending on the variety.
* Harvest When the Head is Firm and Tight: The main head of broccoli should be firm, tight, and dark green. The individual florets should be tightly closed.
* Cut the Head: Use a sharp knife to cut the head from the plant, leaving about 6 inches of stem.
* Encourage Side Shoots: After harvesting the main head, your broccoli plant will often produce smaller side shoots. These can be harvested as they mature.
* Harvest Regularly: Harvest your broccoli regularly to encourage continued production.
Troubleshooting
Even with the best care, you might encounter some challenges. Here are a few common problems
Conclusion
So, there you have it! Mastering the art of growing broccoli from seed isn’t just about saving money; it’s about connecting with your food on a deeper level and enjoying the unparalleled freshness of homegrown produce. We’ve walked you through each step, from selecting the right seeds and preparing your soil to nurturing your seedlings and transplanting them into your garden. The satisfaction of harvesting your own vibrant, green broccoli heads, knowing you nurtured them from tiny seeds, is truly rewarding.
But the journey doesn’t end here! Feel free to experiment with different broccoli varieties. Try sprouting broccoli for a quicker harvest, or explore colorful options like purple sprouting broccoli for a visually stunning addition to your plate. Consider companion planting strategies to deter pests naturally – marigolds and nasturtiums are excellent choices. You can also adjust the timing of your planting based on your local climate to ensure a continuous supply of fresh broccoli throughout the growing season.
Don’t be afraid to get your hands dirty and embrace the learning process. Gardening is all about experimentation and adapting to your unique environment. Even if you encounter challenges along the way, remember that every mistake is a learning opportunity. The key is to stay patient, observant, and persistent.
Growing broccoli from seed is a fantastic way to ensure you have access to fresh, nutritious vegetables, and it’s a skill that will serve you well for years to come. Plus, it’s incredibly satisfying to know exactly where your food comes from and how it was grown.
We wholeheartedly encourage you to give this DIY trick a try. Start small, perhaps with just a few seeds, and gradually expand your operation as you gain confidence. The taste of homegrown broccoli is simply unmatched, and the sense of accomplishment you’ll feel is well worth the effort.
Once you’ve harvested your first crop of homegrown broccoli, we’d love to hear about your experience! Share your tips, successes, and challenges in the comments below. Let’s build a community of passionate gardeners who are dedicated to growing their own food and enjoying the many benefits of this rewarding hobby. Your insights could inspire others to embark on their own broccoli-growing adventures. So, grab your seeds, prepare your soil, and get ready to enjoy the delicious taste of homegrown broccoli!
Frequently Asked Questions (FAQs)
Q: What are the best broccoli varieties to grow from seed?
A: The “best” variety really depends on your personal preferences and your local climate. However, some popular and reliable choices include ‘Waltham 29’ (a classic, heat-tolerant variety), ‘DiCicco’ (known for its early maturity and side shoots), ‘Calabrese’ (a widely grown, standard variety), and ‘Green Magic’ (a hybrid known for its uniform heads and disease resistance). For warmer climates, consider heat-tolerant varieties like ‘Arcadia’ or ‘Imperial’. Don’t be afraid to experiment with different varieties to find the ones that thrive in your garden and suit your taste.
Q: How long does it take to grow broccoli from seed to harvest?
A: Generally, it takes about 70 to 100 days from seed to harvest, depending on the variety and growing conditions. Starting seeds indoors can shorten the time to harvest by a few weeks. Keep in mind that sprouting broccoli varieties tend to mature faster than heading broccoli.
Q: What kind of soil is best for growing broccoli?
A: Broccoli thrives in well-drained, fertile soil that is rich in organic matter. A slightly acidic to neutral pH (between 6.0 and 7.0) is ideal. Amend your soil with compost or well-rotted manure before planting to improve its fertility and drainage. If your soil is heavy clay, consider adding sand or other amendments to improve drainage.
Q: How often should I water my broccoli plants?
A: Broccoli needs consistent moisture, especially during head formation. Water deeply and regularly, aiming for about 1-1.5 inches of water per week. Avoid overhead watering, as this can promote fungal diseases. Mulching around the plants can help retain moisture and suppress weeds.
Q: What are some common pests and diseases that affect broccoli, and how can I prevent them?
A: Common pests include cabbage worms, aphids, flea beetles, and cabbage root maggots. Diseases include clubroot, black rot, and downy mildew. To prevent these problems, practice crop rotation, use row covers to protect plants from pests, and choose disease-resistant varieties. Inspect your plants regularly for signs of pests or diseases and take action promptly. Organic pest control methods, such as insecticidal soap or neem oil, can be effective. Ensure good air circulation around your plants to prevent fungal diseases.
Q: Can I grow broccoli in containers?
A: Yes, you can grow broccoli in containers, but you’ll need to choose a large container (at least 5 gallons) with good drainage. Use a high-quality potting mix and provide regular watering and fertilization. Container-grown broccoli may require more frequent watering than plants grown in the ground. Choose a compact variety that is well-suited for container gardening.
Q: How do I know when my broccoli is ready to harvest?
A: Broccoli is ready to harvest when the head is firm, tight, and the individual florets are still tightly closed. If the florets start to open and turn yellow, it’s a sign that the broccoli is overripe. Cut the main head with a sharp knife, leaving a few inches of stem. Many broccoli varieties will produce side shoots after the main head is harvested, providing you with a second harvest.
Q: What are some tips for preventing broccoli from bolting (going to seed)?
A: Bolting is often caused by stress, such as heat, drought, or nutrient deficiencies. To prevent bolting, choose heat-tolerant varieties, provide consistent watering, and fertilize regularly. Mulching can also help keep the soil cool and moist. If you experience a sudden heat wave, provide shade for your broccoli plants.
Q: How can I store harvested broccoli?
A: Store harvested broccoli in the refrigerator for up to a week. Wrap the broccoli head loosely in a damp paper towel and place it in a plastic bag. You can also blanch and freeze broccoli for longer storage.
Q: Is growing broccoli from seed worth the effort?
A: Absolutely! While it requires some time and effort, growing broccoli from seed offers numerous benefits, including cost savings, access to a wider variety of cultivars, and the unparalleled taste of homegrown produce. Plus, it’s a rewarding and educational experience that connects you with your food and the natural world. The satisfaction of harvesting your own delicious broccoli is well worth the investment.

Leave a Comment