
Bush Beans Container Gardening: Imagine stepping onto your patio and harvesting a handful of fresh, crisp bush beans, grown right there in a container! No sprawling garden needed. Sounds dreamy, right? Well, it’s totally achievable, even if you’re short on space or time. For centuries, container gardening has allowed people to cultivate food and beauty in even the most urban environments. From ancient rooftop gardens to modern apartment balconies, the desire to connect with nature and grow our own food is deeply ingrained in us.
But let’s be honest, sometimes gardening feels intimidating. That’s where these DIY tricks and hacks come in! I’m here to show you that bush beans container gardening is not only possible but also incredibly rewarding. We’ll cover everything from choosing the right container and soil to pest control and harvesting.
Why do you need these DIY tricks? Because growing bush beans in containers can present unique challenges. Limited space, proper drainage, and adequate sunlight are all crucial factors. These hacks will help you overcome those hurdles and ensure a bountiful harvest. Plus, who doesn’t love a good DIY project that saves money and reduces your carbon footprint? So, grab your gardening gloves, and let’s get started on your container gardening adventure!
Growing Bush Beans in Containers: A Beginner’s Guide
Hey there, fellow gardening enthusiasts! I’m so excited to share my experience with growing bush beans in containers. It’s a fantastic way to enjoy fresh, homegrown beans even if you don’t have a sprawling backyard. Trust me, it’s easier than you think, and the reward of snapping those crisp, delicious beans right off the plant is totally worth it. Let’s dive in!
Choosing the Right Container and Variety
Before we get our hands dirty, let’s talk about the essentials: the container and the bean variety.
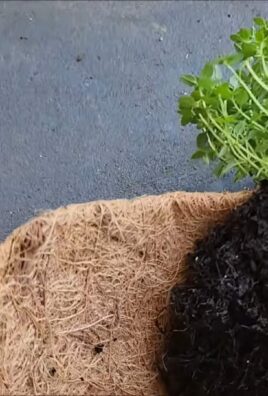
* Container Size: Bush beans don’t need a ton of space, but they do need enough room for their roots to spread. I’ve found that a container that’s at least 12 inches in diameter and 12 inches deep works perfectly. You can use plastic pots, terracotta pots, or even repurposed containers like large buckets or tubs. Just make sure whatever you choose has drainage holes! Soggy roots are a bean plant’s worst enemy.
* Drainage: I can’t stress this enough – drainage is key! If your container doesn’t have drainage holes, you’ll need to drill some. Aim for at least four or five holes, about half an inch in diameter.
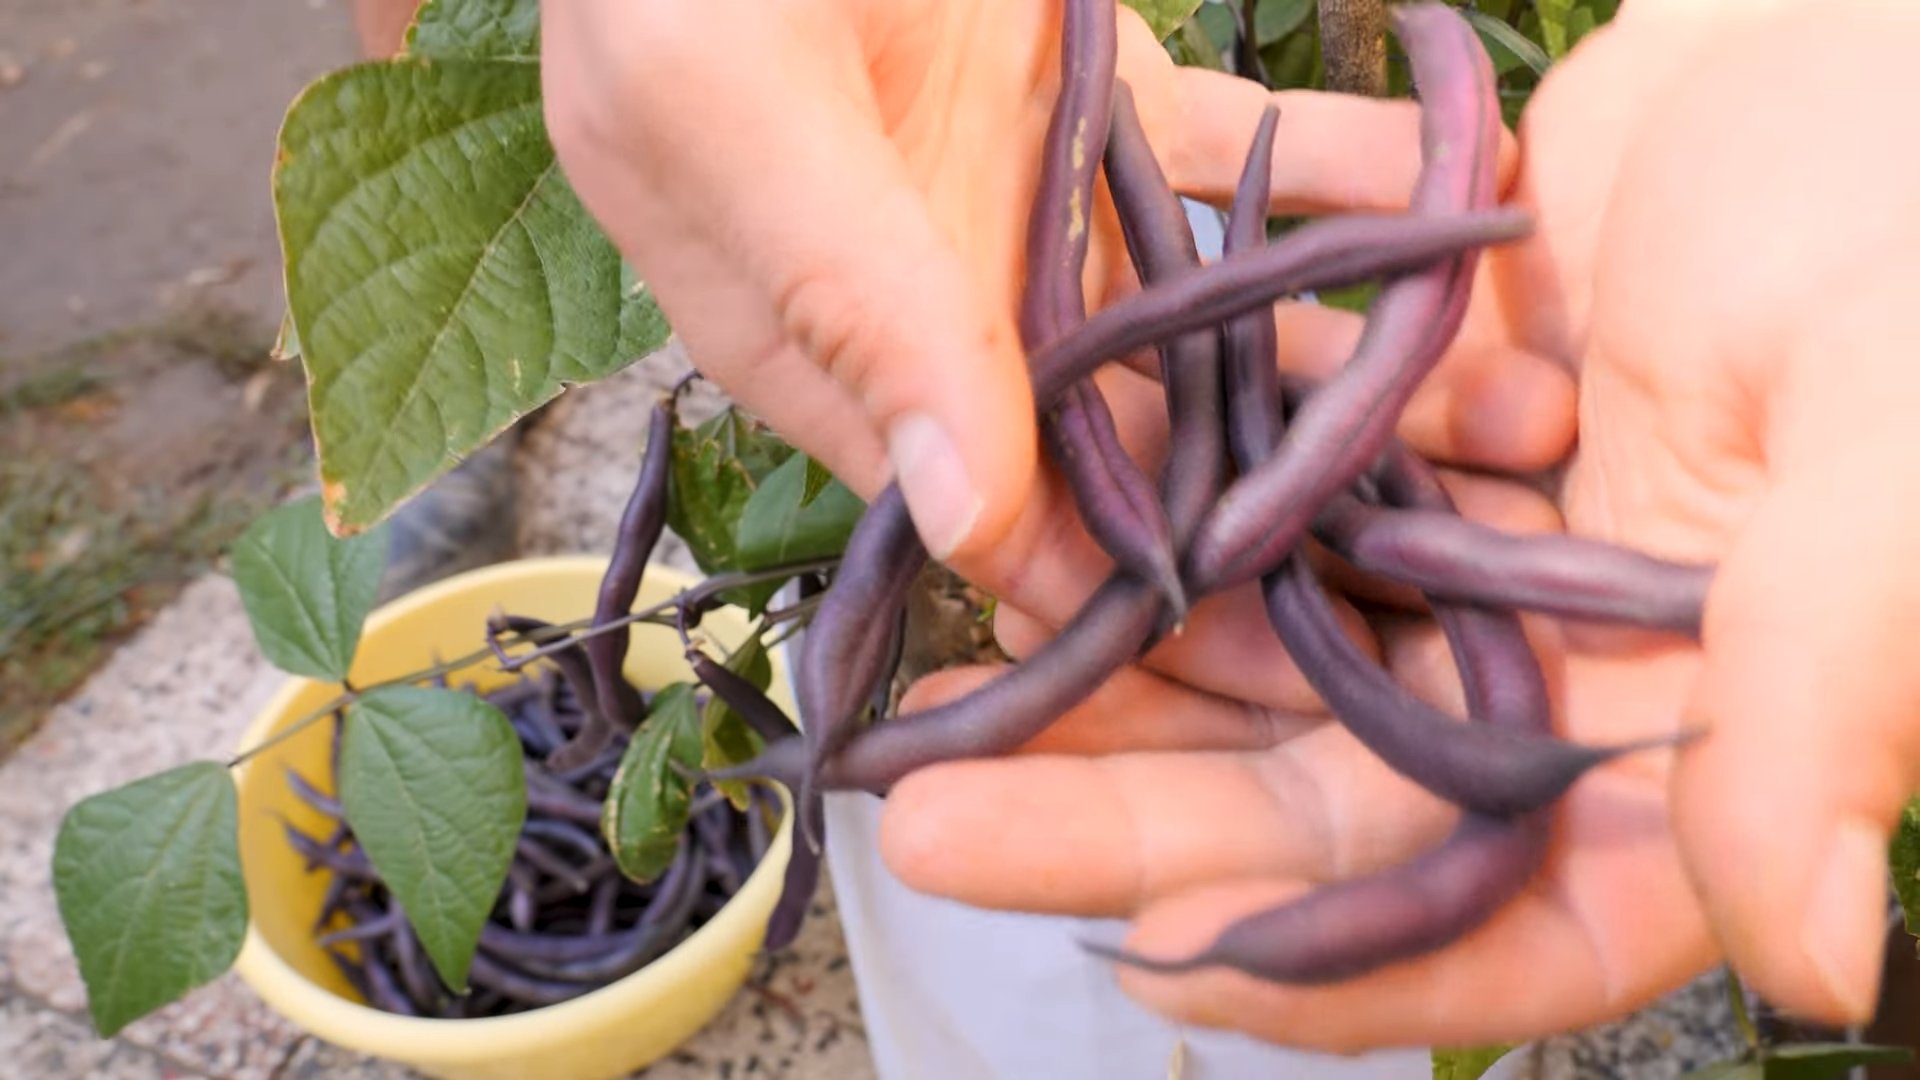
* Bush Bean Varieties: This is where the fun begins! There are tons of bush bean varieties to choose from, each with its own unique flavor and characteristics. Some of my favorites include:
* Blue Lake Bush: These are classic green beans, known for their excellent flavor and high yields. They’re also relatively disease-resistant, which is a big plus.
* Contender: As the name suggests, these beans are tough and reliable. They’re early producers and can tolerate cooler temperatures, making them a great choice for gardeners in colder climates.
* Provider: Another early-maturing variety, Provider beans are known for their stringless pods and delicious flavor.
* Golden Wax: If you’re looking for something a little different, try Golden Wax beans. They have beautiful yellow pods and a slightly sweeter flavor than green beans.
* Purple Queen: These beans add a pop of color to your garden with their vibrant purple pods. They turn green when cooked, but they’re still a fun and unique variety to grow.
Preparing the Soil and Planting
Okay, now that we’ve got our container and bean variety sorted out, let’s get down to the nitty-gritty of preparing the soil and planting our beans.
1. Choose a High-Quality Potting Mix: Don’t skimp on the soil! I always recommend using a good-quality potting mix specifically formulated for containers. Avoid using garden soil, as it can become compacted in containers and doesn’t drain well. Look for a mix that contains ingredients like peat moss, perlite, and vermiculite. These ingredients help to retain moisture while also providing good drainage.
2. Fill the Container: Fill your container with the potting mix, leaving about an inch or two of space at the top. Gently pat down the soil to remove any air pockets.
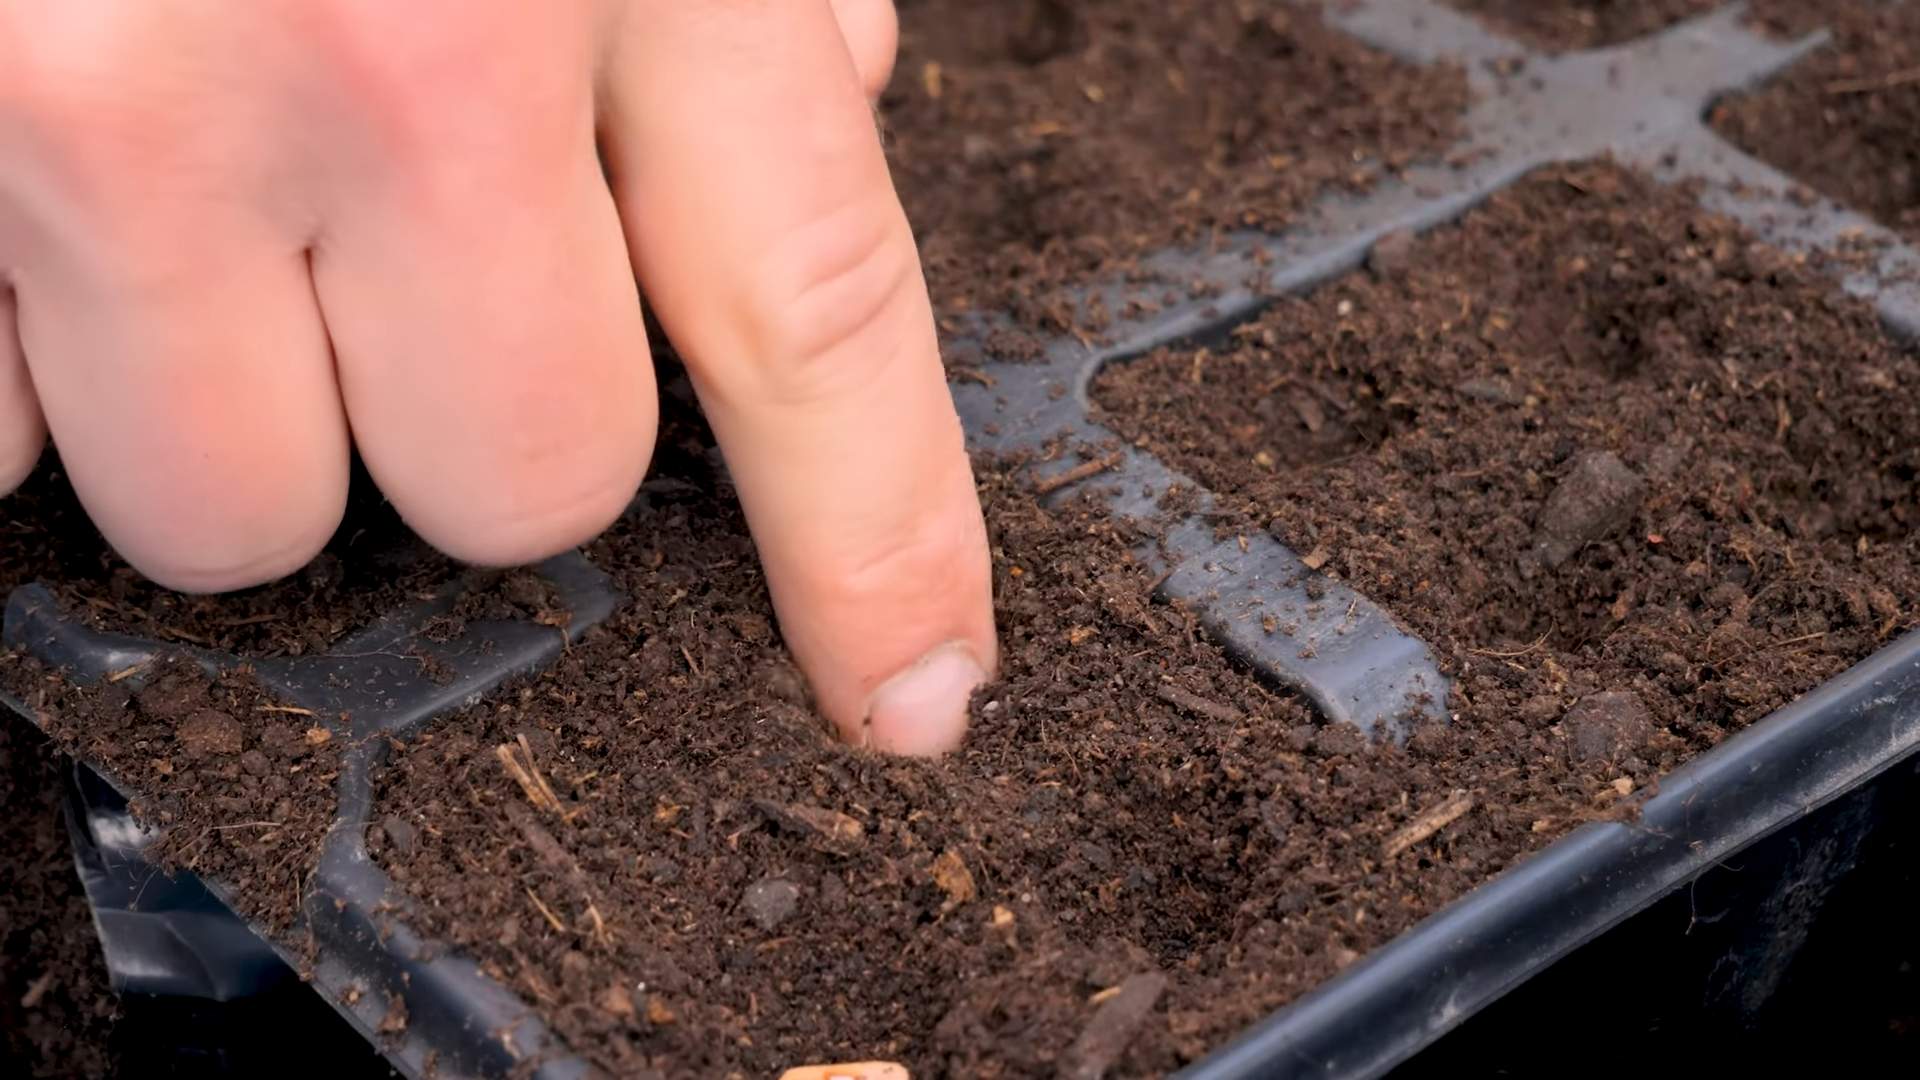
3. Sow the Seeds: Now for the exciting part – planting the beans! I usually sow the seeds about 1 inch deep and 2-3 inches apart. You can plant them in rows or scatter them evenly across the surface of the soil.
4. Water Thoroughly: After planting, water the soil thoroughly until it’s evenly moist. Be careful not to overwater, as this can cause the seeds to rot.
5. Find a Sunny Spot: Bush beans need at least 6-8 hours of sunlight per day to thrive. Place your container in a sunny spot in your garden or on your patio.
Caring for Your Bush Bean Plants
Once your beans have sprouted, it’s important to provide them with the right care to ensure a bountiful harvest.
1. Watering: Water your bean plants regularly, especially during hot, dry weather. I usually water them deeply whenever the top inch of soil feels dry to the touch. Avoid overhead watering, as this can promote fungal diseases. Instead, water at the base of the plant.
2. Fertilizing: Bush beans are relatively light feeders, but they will benefit from occasional fertilization. I like to use a balanced liquid fertilizer diluted to half strength every 2-3 weeks. You can also amend the soil with compost or aged manure before planting.
3. Weeding: Keep your container free of weeds, as they can compete with your bean plants for nutrients and water. Hand-pull any weeds that pop up.
4. Pest Control: Keep an eye out for common bean pests like aphids, bean beetles, and spider mites. If you notice any pests, you can try spraying them with insecticidal soap or neem oil. I prefer to use organic pest control methods whenever possible.
5. Support (Optional): While bush beans are generally self-supporting, they can sometimes benefit from a little extra support, especially if they’re heavily laden with pods. You can use small stakes or a tomato cage to provide support.
Harvesting Your Bush Beans
The moment we’ve all been waiting for – harvesting those delicious beans!
1. Timing is Key: Bush beans are typically ready to harvest about 50-60 days after planting. The pods should be firm, plump, and easily snap off the plant. Don’t let them get too large or they’ll become tough and stringy.
2. Harvest Regularly: Harvest your beans regularly, about every 2-3 days. This will encourage the plant to produce more beans.
3. Snapping the Pods: To harvest, simply snap the pods off the plant with your fingers. Be careful not to damage the plant.
4. Enjoy Your Harvest: Now comes the best part – enjoying your fresh, homegrown bush beans! You can eat them raw, steamed, sautéed, or added to soups and stews. They’re also great for canning or freezing.
Troubleshooting Common Problems
Even with the best care, you might encounter a few problems along the way. Here are some common issues and how to deal with them:
* Yellowing Leaves: This could be a sign of overwatering, underwatering, or nutrient deficiency. Check the soil moisture and adjust your watering accordingly. If the soil is dry, water deeply. If it’s soggy, let it dry out before watering again. You can also try fertilizing with a balanced fertilizer.
* Lack of Flowers or Pods: This could be due to insufficient sunlight, poor soil, or extreme temperatures. Make sure your plants are getting at least 6-8 hours of sunlight per day. Amend the soil with compost or aged manure to improve its fertility. If the weather is too hot or too cold, try moving your container to a more sheltered location.
* Pest Infestations: As mentioned earlier, keep an eye out for common bean pests. Treat infestations promptly with insecticidal soap or neem oil.
* Fungal Diseases: Fungal diseases can be a problem in humid conditions. To prevent fungal diseases, avoid overhead watering and ensure good air circulation around your plants. If you notice any signs of fungal disease, such as powdery mildew or rust, remove the affected leaves and spray the plant with a fungicide.
Extending the Harvest
Want to keep those beans coming? Here are a few tips for extending your harvest:
* Succession Planting: Plant a new batch of beans every 2-3 weeks to ensure a continuous harvest throughout the growing season.
* Deadheading: Remove any spent flowers or pods to encourage the plant to produce more.
* Proper Watering and Fertilizing: Keep your plants well-watered and fertilized to keep them producing.
Final Thoughts
Growing bush beans in containers is a rewarding and enjoyable experience. With a little bit of care and attention, you can enjoy a bountiful harvest of fresh, homegrown beans all season long. So, grab a container, some potting mix, and your favorite bean variety, and get ready to grow! Happy gardening!
Conclusion
So, there you have it! Growing bush beans in containers is not only achievable, but it’s also incredibly rewarding. We’ve walked through the entire process, from selecting the right container and soil to nurturing your plants and harvesting your bountiful crop. But why should you bother with this DIY project?
Simply put, **bush beans container gardening** offers a fantastic way to enjoy fresh, homegrown vegetables even if you’re short on space. Imagine stepping onto your balcony or patio and picking crisp, tender beans for your dinner – a flavor experience that far surpasses anything you can find in a grocery store. Beyond the taste, you’re also gaining control over the growing process, ensuring your beans are free from harmful pesticides and herbicides.
This method is particularly beneficial for apartment dwellers, urban gardeners, or anyone with limited yard space. It’s also a great way to introduce children to the joys of gardening and teach them about where their food comes from. Plus, the vibrant green foliage and delicate flowers of bush bean plants add a touch of natural beauty to any outdoor space.
But the benefits don’t stop there. Container gardening allows for greater control over the growing environment. You can easily move your containers to follow the sun, protect them from harsh weather, or amend the soil as needed. This flexibility can lead to higher yields and healthier plants compared to traditional in-ground gardening.
Ready to take your bush bean container gardening to the next level? Consider experimenting with different varieties of bush beans. ‘Blue Lake Bush’ is a classic choice known for its excellent flavor and productivity. ‘Contender’ is an early-maturing variety that’s perfect for shorter growing seasons. ‘Provider’ is another reliable option that’s resistant to many common bean diseases.
You can also try companion planting to enhance the growth and flavor of your bush beans. Marigolds are known to repel bean beetles, while nasturtiums attract aphids away from your bean plants. Planting herbs like rosemary or thyme nearby can also deter pests and improve the overall health of your garden.
Don’t be afraid to get creative with your container selection. While plastic pots are a practical and affordable option, terracotta pots offer better drainage and a more rustic aesthetic. You can also repurpose old buckets, tubs, or even grow bags to create unique and eco-friendly planters. Just make sure your chosen container has adequate drainage holes to prevent waterlogging.
Remember to monitor your plants regularly for signs of pests or diseases. Early detection is key to preventing major problems. If you notice any issues, address them promptly with organic pest control methods or disease-resistant varieties.
Ultimately, the success of your bush bean container garden depends on your dedication and attention to detail. But with a little effort and the right knowledge, you can enjoy a bountiful harvest of delicious, homegrown beans.
So, what are you waiting for? Grab a container, some soil, and a packet of bush bean seeds, and get started today! We’re confident that you’ll be amazed by the results.
We encourage you to share your experiences with us! Post photos of your bush bean container gardens on social media using #BushBeanContainerGardening and tag us. We’d love to see your creations and hear about your successes (and any challenges you encounter along the way). Happy gardening!
Frequently Asked Questions (FAQ)
What is the best size container for growing bush beans?
A container that is at least 12 inches in diameter and 12 inches deep is generally recommended for growing bush beans. This size provides enough space for the roots to develop properly and allows for adequate drainage. You can grow several plants in a larger container, but be sure to space them appropriately to avoid overcrowding. Overcrowding can lead to reduced yields and increased susceptibility to diseases. A good rule of thumb is to allow at least 4-6 inches between plants.
What type of soil is best for bush beans in containers?
Bush beans thrive in well-draining soil that is rich in organic matter. A good potting mix specifically formulated for vegetables is ideal. Avoid using garden soil in containers, as it can become compacted and poorly drained. You can also amend your potting mix with compost or other organic materials to improve its fertility and water-holding capacity. A slightly acidic to neutral pH (around 6.0 to 7.0) is optimal for bush bean growth.
How often should I water my bush beans in containers?
Water your bush beans regularly, especially during hot, dry weather. The soil should be kept consistently moist, but not waterlogged. Check the soil moisture by sticking your finger about an inch into the soil. If it feels dry, it’s time to water. Water deeply, allowing the water to drain out of the bottom of the container. Avoid overhead watering, as this can promote fungal diseases. Drip irrigation or soaker hoses are excellent options for providing consistent moisture to your plants.
How much sunlight do bush beans need?
Bush beans require at least 6-8 hours of direct sunlight per day to thrive. Choose a sunny location for your containers where they will receive ample sunlight. If you live in a particularly hot climate, you may need to provide some afternoon shade to prevent the plants from overheating. Insufficient sunlight can lead to leggy growth, reduced yields, and increased susceptibility to pests and diseases.
Do I need to fertilize my bush beans in containers?
Yes, bush beans benefit from regular fertilization, especially when grown in containers. Use a balanced fertilizer specifically formulated for vegetables, following the instructions on the package. You can also use organic fertilizers such as compost tea or fish emulsion. Fertilize every 2-3 weeks during the growing season to provide your plants with the nutrients they need to produce a bountiful harvest. Avoid over-fertilizing, as this can lead to excessive foliage growth at the expense of bean production.
What are some common pests and diseases that affect bush beans?
Common pests that affect bush beans include aphids, bean beetles, and spider mites. Aphids can be controlled with insecticidal soap or neem oil. Bean beetles can be handpicked or treated with Bacillus thuringiensis (Bt). Spider mites can be controlled with horticultural oil or by increasing humidity around the plants. Common diseases that affect bush beans include powdery mildew, rust, and bean mosaic virus. Powdery mildew can be prevented by providing good air circulation and avoiding overhead watering. Rust can be treated with fungicides. Bean mosaic virus is a viral disease that can be prevented by using disease-resistant varieties and controlling aphids.
When should I harvest my bush beans?
Bush beans are typically ready to harvest about 50-60 days after planting. Harvest the beans when they are young, tender, and plump. They should snap easily when bent. Regular harvesting encourages continued production. Overripe beans will become tough and stringy.
Can I grow bush beans indoors?
While it is possible to grow bush beans indoors, it can be challenging to provide them with the necessary sunlight and growing conditions. If you choose to grow them indoors, you will need to provide them with supplemental lighting, such as grow lights. You will also need to ensure that they have adequate air circulation and humidity. Indoor-grown bush beans may not produce as many beans as those grown outdoors.
Can I save seeds from my bush beans?
Yes, you can save seeds from your bush beans, but it’s important to choose open-pollinated varieties rather than hybrid varieties. Hybrid varieties may not produce true-to-type seeds. To save seeds, allow some of the beans to mature fully on the plant until they are dry and brown. Then, remove the seeds from the pods and store them in a cool, dry place.
What are some good companion plants for bush beans?
Good companion plants for bush beans include marigolds, nasturtiums, rosemary, thyme, carrots, cucumbers, and strawberries. Marigolds repel bean beetles, while nasturtiums attract aphids away from bean plants. Rosemary and thyme deter pests. Carrots and cucumbers benefit from the nitrogen that bush beans fix in the soil. Strawberries provide ground cover and help to suppress weeds. Avoid planting bush beans near onions or garlic, as they can inhibit bean growth.
Leave a Comment