
Growing radishes for beginners might seem daunting, but trust me, it’s one of the most rewarding and quickest wins you can achieve in your home garden! I remember my first attempt – a tiny, scraggly radish that tasted more like dirt than peppery goodness. But don’t let that scare you! With a few simple tricks and DIY hacks, you’ll be harvesting crisp, vibrant radishes in just a few weeks.
Radishes have a surprisingly rich history, dating back to ancient Egypt where they were a staple food. They were even used as currency at one point! Today, they’re enjoyed worldwide for their crunchy texture and zesty flavor, adding a delightful kick to salads, sandwiches, and even cooked dishes.
Why should you bother with growing radishes for beginners? Well, for starters, they’re incredibly easy to grow, even if you have limited space. Plus, knowing exactly where your food comes from and enjoying the fruits (or rather, roots!) of your labor is incredibly satisfying. In this article, I’m going to share my favorite DIY tricks and hacks that will help you cultivate a thriving radish patch, no matter your gardening experience. Get ready to impress your friends and family with your homegrown harvest!
Growing Radishes: A Beginner’s Guide to Crunchy Success
Hey there, fellow gardening enthusiasts! I’m so excited you’re thinking about growing radishes. They’re one of the easiest and fastest vegetables to grow, making them perfect for beginners and impatient gardeners like myself. Seriously, you can go from seed to salad in just a few weeks! This guide will walk you through everything you need to know to cultivate your own crop of crisp, peppery radishes.
Choosing Your Radish Variety
First things first, let’s talk about radish varieties. There’s more to radishes than just the classic red globe! Here are a few popular options:
* **Cherry Belle:** The quintessential red radish. Quick to mature and has a mild flavor.
* **French Breakfast:** Oblong shape with a red top and white bottom. Known for its delicate flavor.
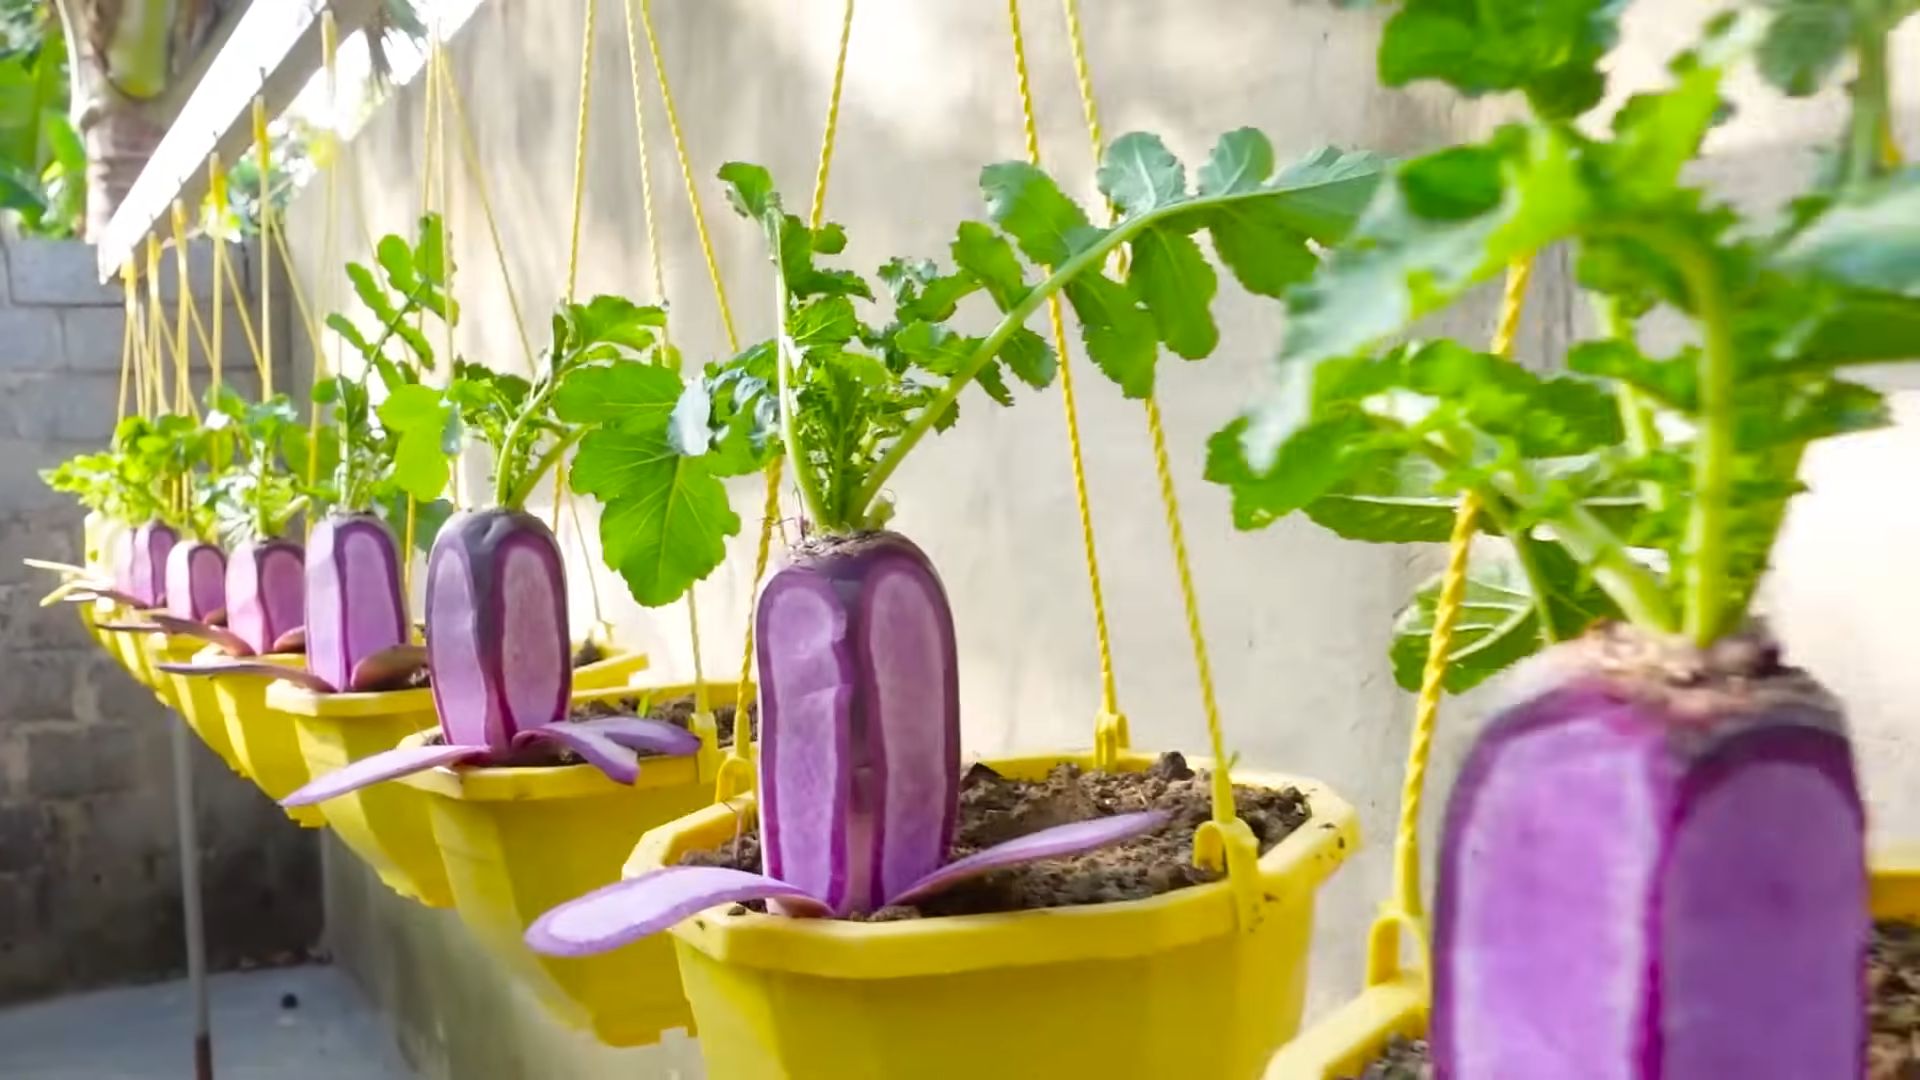
* **Easter Egg:** A mix of red, pink, purple, and white radishes. Adds a colorful touch to your garden and plate.
* **Black Spanish:** A winter radish with black skin and white flesh. Has a strong, pungent flavor and stores well.
* **Daikon:** A large, white radish often used in Asian cuisine. Milder flavor than other varieties.
I personally love growing Cherry Belle for their reliability and mildness, but I encourage you to experiment and find your favorites!
Preparing Your Radish Bed
Radishes aren’t fussy, but they do appreciate well-prepared soil. Here’s how to get your garden bed ready:
* **Sunlight:** Radishes need at least 6 hours of sunlight per day. Choose a sunny spot in your garden.
* **Soil:** Radishes prefer loose, well-drained soil. Amend heavy clay soil with compost or other organic matter to improve drainage.
* **pH:** The ideal soil pH for radishes is between 6.0 and 7.0. You can test your soil pH with a home testing kit or send a sample to your local extension office.
* **Fertilizer:** Radishes don’t need a lot of fertilizer. A light application of compost or a balanced fertilizer (10-10-10) at planting time is sufficient. Avoid high-nitrogen fertilizers, as they can promote leafy growth at the expense of root development.
Planting Your Radish Seeds
Now for the fun part – planting!
1. **Timing is Key:** Radishes are a cool-season crop, meaning they grow best in spring and fall. Plant your seeds 4-6 weeks before the last expected frost in spring or 6-8 weeks before the first expected frost in fall. You can also do succession planting, sowing a new batch of seeds every 1-2 weeks for a continuous harvest.
2. **Direct Sowing:** Radishes are best direct-sown, meaning you plant the seeds directly in the garden. They don’t transplant well.
3. **Spacing:** Sow seeds about ½ inch deep and ½-1 inch apart in rows that are 6-12 inches apart.
4. **Watering:** Gently water the soil after planting. Keep the soil consistently moist until the seeds germinate.
5. **Thinning:** Once the seedlings emerge, thin them to 1-2 inches apart. This will give the radishes enough room to develop properly. Don’t just pull them out! Gently loosen the soil around the unwanted seedlings and carefully lift them out to avoid disturbing the roots of the remaining plants. You can even transplant the thinned seedlings to another location if you’re feeling ambitious, though success isn’t always guaranteed.
Caring for Your Radishes
Radishes are relatively low-maintenance, but here are a few things to keep in mind:
* **Watering:** Keep the soil consistently moist, especially during hot weather. Radishes need about 1 inch of water per week. Irregular watering can cause the roots to crack.
* **Weeding:** Keep the garden bed free of weeds, which can compete with the radishes for nutrients and water. Gently hand-pull weeds to avoid disturbing the radish roots.
* **Pest Control:** Radishes are generally pest-resistant, but they can be susceptible to flea beetles and root maggots.
* **Flea Beetles:** These tiny beetles can chew small holes in the leaves. Cover your plants with row covers to prevent flea beetles from reaching them. You can also use insecticidal soap or neem oil to control infestations.
* **Root Maggots:** These larvae feed on the roots of radishes, causing them to become tunneled and unmarketable. Rotate your crops to avoid root maggot infestations. You can also use row covers to prevent the adult flies from laying eggs near your plants.
* **Bolting:** Radishes can bolt (go to seed) if they are exposed to hot weather or drought stress. Bolting makes the roots tough and bitter. To prevent bolting, keep the soil consistently moist and harvest your radishes promptly.
Harvesting Your Radishes
The best part! Radishes are ready to harvest in as little as 3-4 weeks, depending on the variety.
1. **Check for Size:** Gently brush away the soil around the base of the radish to check its size. Radishes are typically ready to harvest when they are about 1 inch in diameter.
2. **Pulling:** Grasp the radish leaves near the base and gently pull the radish out of the ground.
3. **Cleaning:** Wash the radishes thoroughly to remove any dirt.
4. **Storage:** Store radishes in the refrigerator in a plastic bag or container. They will keep for about a week.
Troubleshooting Common Radish Problems
Even with the best care, you might encounter a few problems along the way. Here are some common issues and how to address them:
* **Radishes are too small:** This could be due to overcrowding, lack of sunlight, or poor soil. Thin your plants, ensure they are getting enough sunlight, and amend the soil with compost.
* **Radishes are cracked:** This is usually caused by inconsistent watering. Keep the soil consistently moist, especially during hot weather.
* **Radishes are tough and bitter:** This could be due to bolting, overmaturity, or poor soil. Harvest your radishes promptly, prevent bolting by keeping the soil moist, and amend the soil with compost.
* **Radishes are hollow:** This can be caused by boron deficiency. Amend the soil with boron, following the instructions on the product label. Be careful not to over-apply boron, as it can be toxic to plants.
* **Radishes have holes in the leaves:** This is likely caused by flea beetles. Cover your plants with row covers or use insecticidal soap or neem oil to control infestations.
Enjoying Your Radish Harvest
Now that you’ve harvested your radishes, it’s time to enjoy them! Here are a few ideas:
* **Eat them raw:** Radishes are delicious eaten raw in salads, sandwiches, or as a snack.
* **Roast them:** Roasting radishes mellows their flavor and brings out their sweetness. Toss them with olive oil, salt, and pepper and roast them at 400°F (200°C) for 20-25 minutes.
* **Pickle them:** Pickled radishes are a tangy and flavorful addition to tacos, sandwiches, or salads.
* **Sauté them:** Sauté radishes with butter, garlic, and herbs for a quick and easy side dish.
* **Use the greens:** Don’t throw away the radish greens! They are edible and nutritious. Use them in salads, soups, or stir-fries.
Succession Planting for Continuous Harvest
To keep a steady supply of radishes coming, I highly recommend succession planting. This simply means planting a new batch of seeds every week or two. Here’s how I do it:
1. **Mark Your Calendar:** I set a reminder on my phone to plant more radish seeds every 10 days.
2. **Prepare a Small Area:** I don’t need a huge space for each planting. A small section of my garden bed is enough.
3. **Sow and Water:** I follow the same planting instructions as before, sowing the seeds ½ inch deep and ½-1 inch apart.
4. **Enjoy the Rewards:** By the time I’m harvesting one batch of radishes, the next batch is already well on its way!
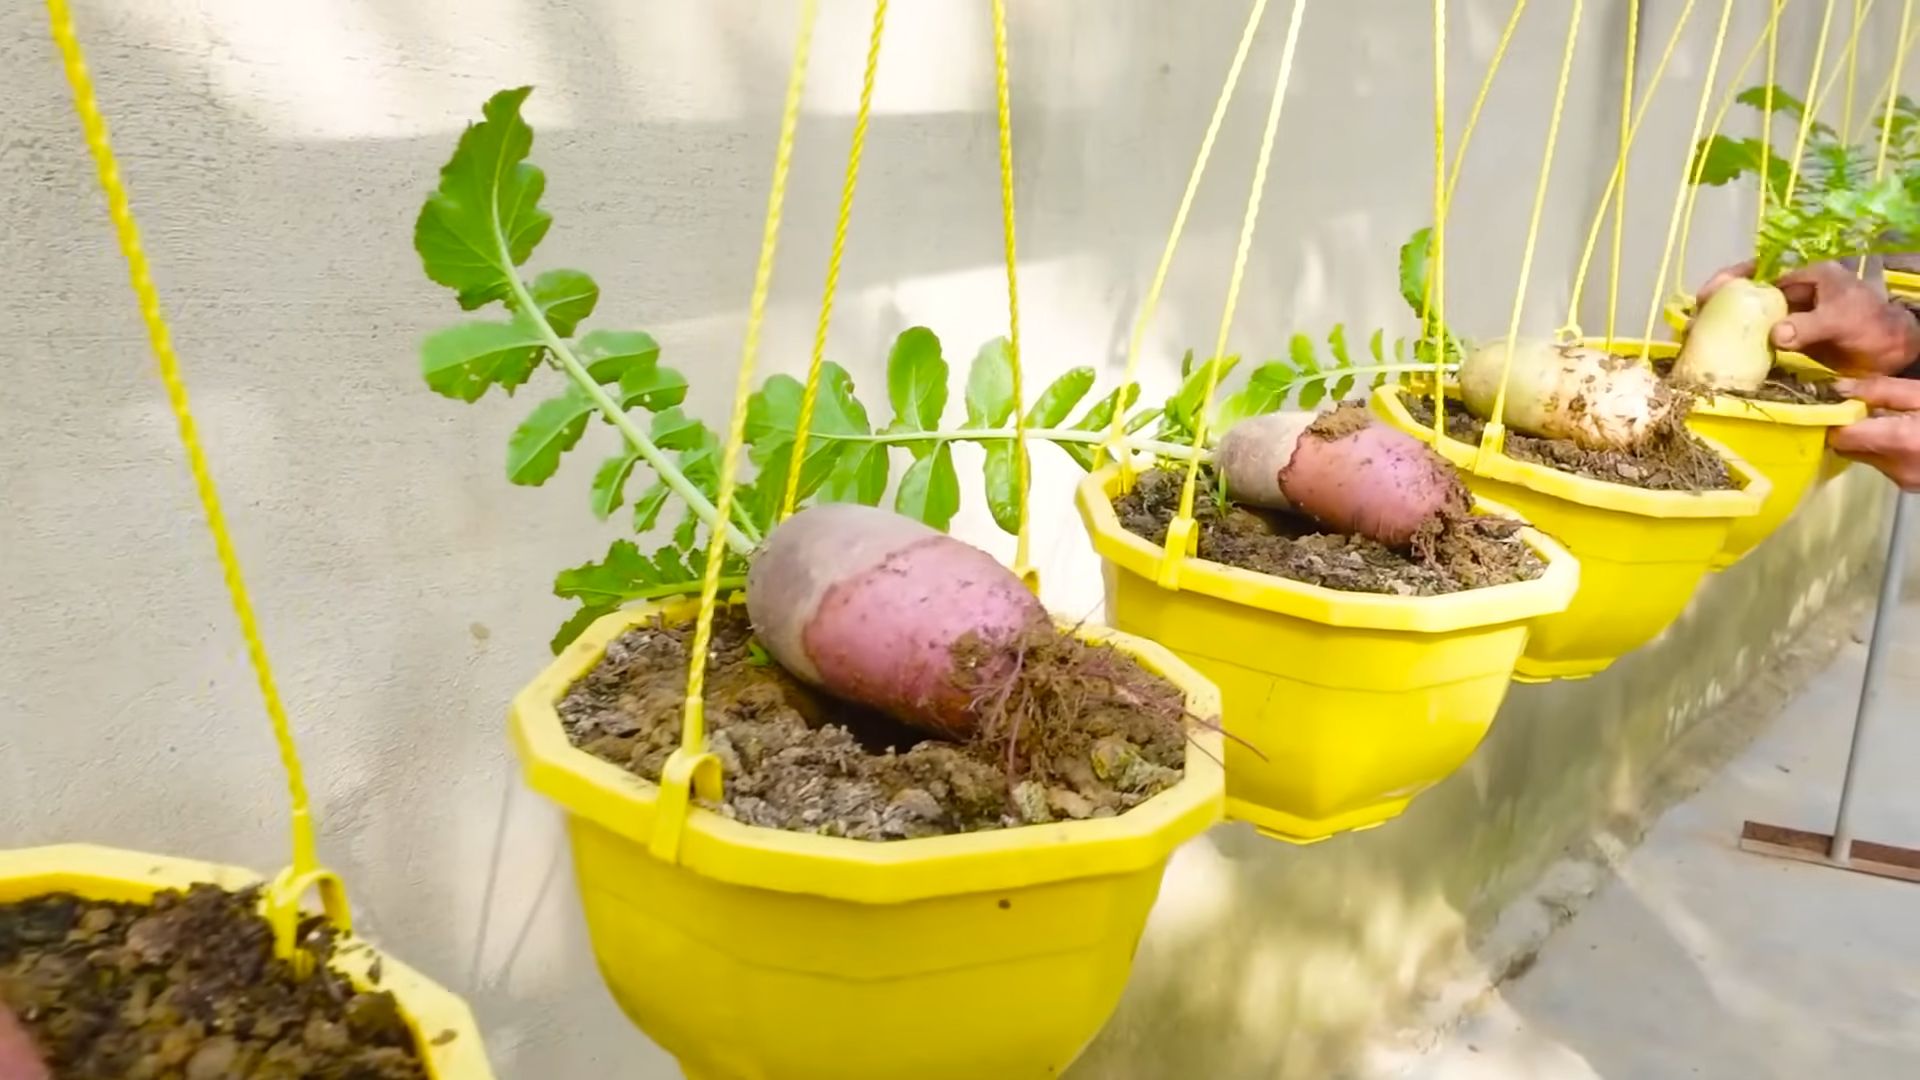
Radishes in Containers
Don’t have a garden? No problem! Radishes grow beautifully in containers.
* **Choose a Container:** Select a container that is at least 6 inches deep and has drainage holes.
* **Use Potting Mix:** Fill the container with a high-quality potting mix.
* **Planting:** Follow the same planting instructions as for garden beds, sowing seeds ½ inch deep and ½-1 inch apart.
* **Watering:** Water the container regularly, keeping the soil consistently moist.
* **Sunlight:** Place the container in a sunny location that receives at least 6 hours of sunlight per day.
Saving Radish Seeds (Advanced)
If you’re
Conclusion
So, there you have it! Growing radishes, even for absolute beginners, is not only achievable but incredibly rewarding. This DIY trick, focusing on [Specific DIY trick mentioned in the article, e.g., using coffee grounds as fertilizer], is a game-changer because it addresses common challenges like nutrient deficiencies and pest control in a natural, cost-effective way. Forget complicated gardening routines and expensive store-bought solutions; this simple addition can significantly boost your radish yield and improve their overall flavor.
Why is this a must-try? Because it’s easy, effective, and sustainable. You’re likely already generating coffee grounds, turning what would be waste into a valuable resource for your garden. The nitrogen boost from the coffee grounds encourages healthy leaf growth, while other compounds act as a natural deterrent to common radish pests. Plus, it contributes to a richer, more fertile soil, benefiting not just your radishes but your entire garden ecosystem.
But don’t stop there! Feel free to experiment with variations. For example, if you’re using coffee grounds, try different application methods. Some gardeners prefer to directly incorporate the grounds into the soil before planting, while others create a coffee ground tea to water their radishes. You could also combine this trick with other organic gardening practices, such as companion planting (carrots and radishes are great together!) or using compost to further enrich the soil.
Consider adding other amendments to your soil based on your soil test results. If your soil is particularly acidic, you might need to add lime to balance the pH. If it’s lacking in phosphorus, bone meal can be a helpful addition. Remember, healthy soil is the foundation for healthy radishes.
Another variation to consider is the timing of your planting. Radishes are cool-weather crops, so planting them in the spring or fall is ideal. However, if you live in a warmer climate, you can still grow radishes by choosing heat-tolerant varieties and providing them with some shade during the hottest part of the day.
The key is to observe your radishes closely and adjust your approach as needed. Are the leaves turning yellow? Are the roots small and underdeveloped? These are signs that something might be amiss, and you’ll need to troubleshoot to identify the problem.
We’re confident that this DIY trick will transform your radish-growing experience. It’s a simple, effective way to get bigger, tastier radishes with minimal effort. So, grab your seeds, gather your coffee grounds, and get planting!
We’re eager to hear about your results. Share your experiences, tips, and photos in the comments below. Let’s build a community of radish-growing enthusiasts and learn from each other’s successes (and even failures!). Happy gardening! Remember, successful **growing radishes** starts with a little knowledge and a lot of enthusiasm.
Frequently Asked Questions (FAQ)
Q: How often should I apply coffee grounds to my radish plants?
A: The frequency of application depends on the concentration of the coffee grounds and the needs of your soil. A general guideline is to apply a thin layer of coffee grounds around the base of your radish plants every 2-3 weeks. Avoid piling the grounds directly against the stem, as this can lead to rot. You can also brew a “coffee ground tea” by steeping used coffee grounds in water and using this to water your radishes weekly. This provides a gentler, more diluted dose of nutrients. Monitor your plants closely for any signs of over-fertilization, such as excessive leaf growth or burnt leaf tips. If you notice these signs, reduce the frequency of application.
Q: Can I use fresh coffee grounds, or do they need to be used?
A: It’s best to use used coffee grounds. Fresh coffee grounds are more acidic and can potentially burn your plants. Used coffee grounds have a more neutral pH and are less likely to cause problems. Plus, using used coffee grounds is a great way to recycle and reduce waste. Before applying used coffee grounds, make sure they have cooled completely. Hot coffee grounds can damage the roots of your radish plants.
Q: What if I don’t have coffee grounds? Are there any alternatives?
A: While coffee grounds are a great option, there are other organic fertilizers you can use to boost your radish growth. Compost is an excellent all-around soil amendment that provides a wide range of nutrients. You can also use well-rotted manure, which is rich in nitrogen. Another option is to use a commercial organic fertilizer specifically formulated for root vegetables. Be sure to follow the instructions on the package carefully. Remember to always test your soil before adding any amendments to ensure you’re addressing the specific needs of your plants.
Q: My radishes are all leaves and no root. What am I doing wrong?
A: This is a common problem with radishes, and there are several possible causes. One possibility is that the soil is too rich in nitrogen. Nitrogen promotes leafy growth, but it can inhibit root development. Try reducing the amount of nitrogen fertilizer you’re using. Another possibility is that the radishes are not getting enough sunlight. Radishes need at least 6 hours of sunlight per day to grow properly. Make sure your radishes are planted in a sunny location. Overcrowding can also lead to small roots. Thin your radish seedlings to give them enough space to grow. Finally, the soil may be too compacted. Radishes need loose, well-drained soil to develop properly. Amend your soil with compost or other organic matter to improve its drainage and aeration.
Q: How long does it take for radishes to mature?
A: Radishes are one of the fastest-growing vegetables, typically maturing in just 3-4 weeks. However, the exact time will depend on the variety of radish you’re growing and the growing conditions. Check the seed packet for specific information on the maturity time for your chosen variety. To ensure a continuous harvest, sow a new batch of radish seeds every 1-2 weeks. This is called succession planting.
Q: What are some common pests that affect radishes, and how can I control them?
A: Common radish pests include flea beetles, root maggots, and aphids. Flea beetles are small, jumping insects that chew tiny holes in the leaves. Root maggots are fly larvae that feed on the roots of radishes, causing them to become stunted and deformed. Aphids are small, sap-sucking insects that can weaken plants and spread diseases. To control these pests, you can use a variety of organic methods. Cover your radish plants with row covers to prevent pests from reaching them. Attract beneficial insects to your garden, such as ladybugs and lacewings, which prey on aphids and other pests. You can also use insecticidal soap or neem oil to control pests. For root maggots, consider using diatomaceous earth around the base of your plants.
Q: Can I grow radishes in containers?
A: Yes, radishes are well-suited for container gardening. Choose a container that is at least 6 inches deep and has drainage holes. Fill the container with a well-draining potting mix. Sow the radish seeds directly into the container, following the instructions on the seed packet. Water regularly and fertilize with a balanced organic fertilizer. Place the container in a sunny location. Container-grown radishes may need to be watered more frequently than those grown in the ground, especially during hot weather.
Q: How do I know when my radishes are ready to harvest?
A: Radishes are ready to harvest when they reach the size specified on the seed packet. Gently pull one radish from the ground to check its size. If it’s the right size, harvest the rest. Don’t let radishes get too big, as they can become woody and bitter. Harvest radishes in the morning, when they are at their freshest. After harvesting, remove the leaves and store the radishes in the refrigerator. They will keep for several days.

Leave a Comment