
Salt and Detergent Cleaning: Sounds like a science experiment, right? Well, it’s actually a super simple, incredibly effective way to tackle some of the most stubborn cleaning challenges around your home! Forget those expensive, chemical-laden cleaners – I’m going to show you how to harness the power of these everyday ingredients for a sparkling clean space.
For centuries, people have been using natural ingredients like salt for cleaning. Think about it – before the age of fancy detergents, salt was a go-to for scrubbing pots, preserving food, and even disinfecting wounds! While detergent is a more modern invention, combining it with salt creates a synergistic effect, boosting its cleaning power and tackling grime that neither ingredient could handle alone.
Why do you need this salt and detergent cleaning trick in your arsenal? Because life gets messy! From burnt-on food in your cookware to stubborn stains on your bathroom tiles, we all face cleaning challenges that seem impossible. This DIY method is not only budget-friendly and eco-conscious, but it’s also surprisingly effective. I’m excited to share these simple yet powerful techniques that will save you time, money, and a whole lot of elbow grease. Get ready to transform your cleaning routine!
DIY Power Cleaner: Salt and Detergent Magic!
Hey everyone! I’m so excited to share this super simple, yet incredibly effective, DIY cleaning hack with you. I stumbled upon this combination of salt and detergent a while back, and honestly, it’s become my go-to for tackling tough stains and grime around the house. It’s cheap, uses ingredients you probably already have, and it *really* works. Let’s get started!
What You’ll Need:
Before we dive in, let’s gather our supplies. This is a pretty straightforward recipe, so you likely have everything on hand.
* **Table Salt:** Plain old table salt is perfect. The abrasive texture is key for scrubbing away stubborn messes.
* **Dish Soap:** Any dish soap will do, but I prefer using a grease-cutting formula for extra cleaning power.
* **Spray Bottle (Optional):** If you want to create a spray cleaner for larger surfaces.
* **Mixing Bowl:** For combining the ingredients.
* **Spoon or Whisk:** To mix everything together.
* **Cleaning Cloths or Sponges:** For applying and wiping away the cleaner.
* **Gloves (Optional):** If you have sensitive skin, gloves are always a good idea.
* **Old Toothbrush (Optional):** For scrubbing grout and tight spaces.
The Science Behind the Sparkle
Okay, so why does this simple mixture work so well? It’s all about the combined power of the ingredients. The salt acts as a gentle abrasive, helping to loosen and lift dirt and grime without scratching most surfaces. The dish soap, on the other hand, is a surfactant, meaning it reduces the surface tension of water, allowing it to penetrate and dissolve grease and oily residues. Together, they create a powerful cleaning duo!
Making the Magic: Step-by-Step Instructions
Alright, let’s get down to business and make this amazing cleaner!
1. **Gather Your Ingredients:** Make sure you have all your supplies ready to go. It’s always easier to have everything within reach before you start.
2. **Choose Your Method:** You have two main options here: a paste or a spray. The paste is great for concentrated cleaning on specific stains, while the spray is better for larger surfaces. I’ll walk you through both.
* **For a Paste:**
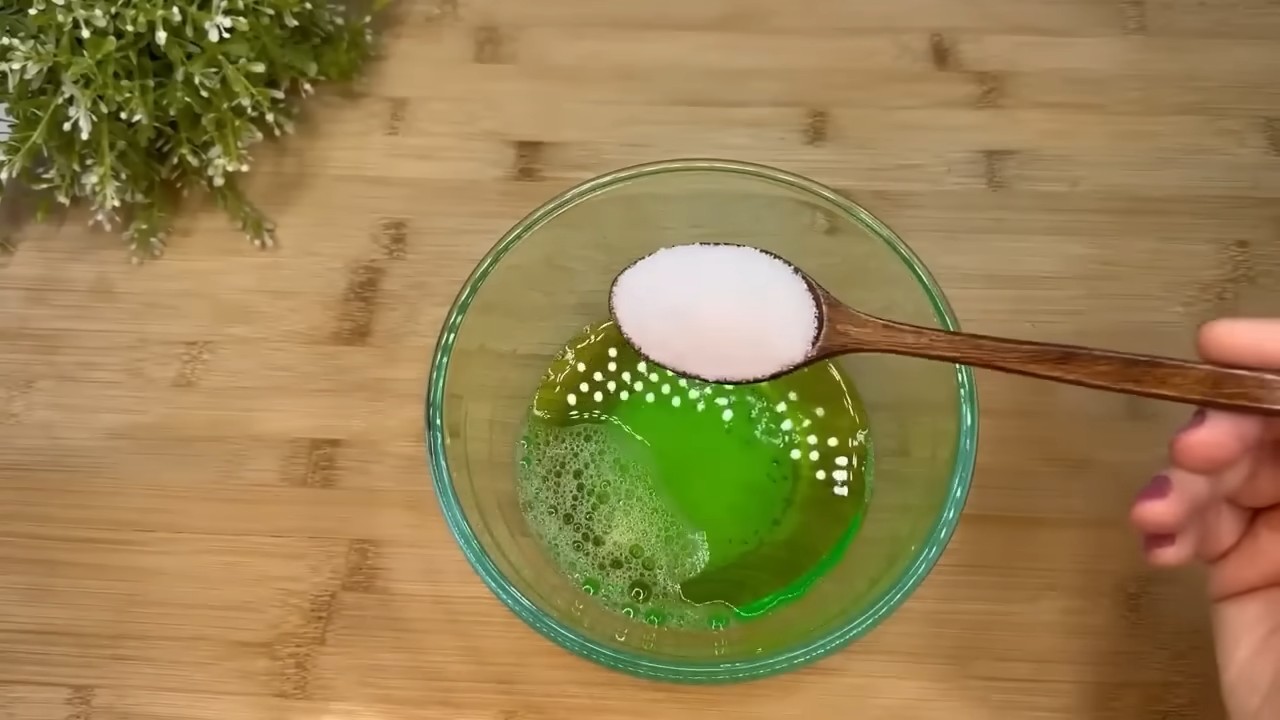
* In your mixing bowl, add about 1/2 cup of table salt.
* Slowly pour in dish soap, a little at a time, while mixing with your spoon or whisk.
* Continue adding dish soap until you achieve a thick, spreadable paste consistency. You don’t want it to be too runny. It should be thick enough to stick to surfaces.
* **For a Spray:**
* In your mixing bowl, add about 1/4 cup of table salt.
* Add about 1/4 cup of dish soap.
* Slowly add about 1 cup of warm water, mixing well to dissolve the salt.
* Stir until the salt is mostly dissolved. It’s okay if there are a few small grains remaining.
* Carefully pour the mixture into your spray bottle.
3. **Test in an Inconspicuous Area:** Before applying the cleaner to a large surface, it’s always a good idea to test it in a small, hidden area first. This will ensure that it doesn’t damage or discolor the material. Apply a small amount of the cleaner, let it sit for a minute or two, and then wipe it away. Check for any adverse reactions.
Tackling Tough Stains: Application Techniques
Now that you have your cleaner ready, let’s talk about how to use it effectively.
1. **Applying the Paste:**
* Using a cleaning cloth or sponge, scoop up a small amount of the paste.
* Apply it directly to the stain or area you want to clean.
* Gently scrub the area in a circular motion. The salt will help to loosen the grime.
* For stubborn stains, let the paste sit for a few minutes before scrubbing.
* Rinse the area thoroughly with water.
* Wipe dry with a clean cloth.
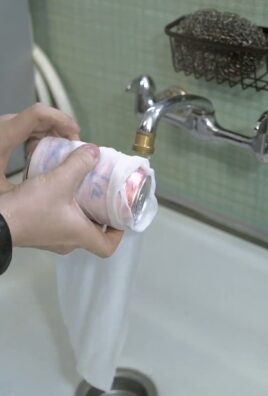
2. **Applying the Spray:**
* Spray the cleaner liberally onto the surface you want to clean.
* Let it sit for a minute or two to allow the soap to penetrate the grime.
* Wipe the surface with a cleaning cloth or sponge.
* For tough spots, scrub with a sponge or old toothbrush.
* Rinse the surface with water.
* Wipe dry with a clean cloth.
Where to Use Your DIY Cleaner: My Favorite Applications
I’ve used this cleaner all over my house, and I’m always amazed at how well it works. Here are some of my favorite applications:
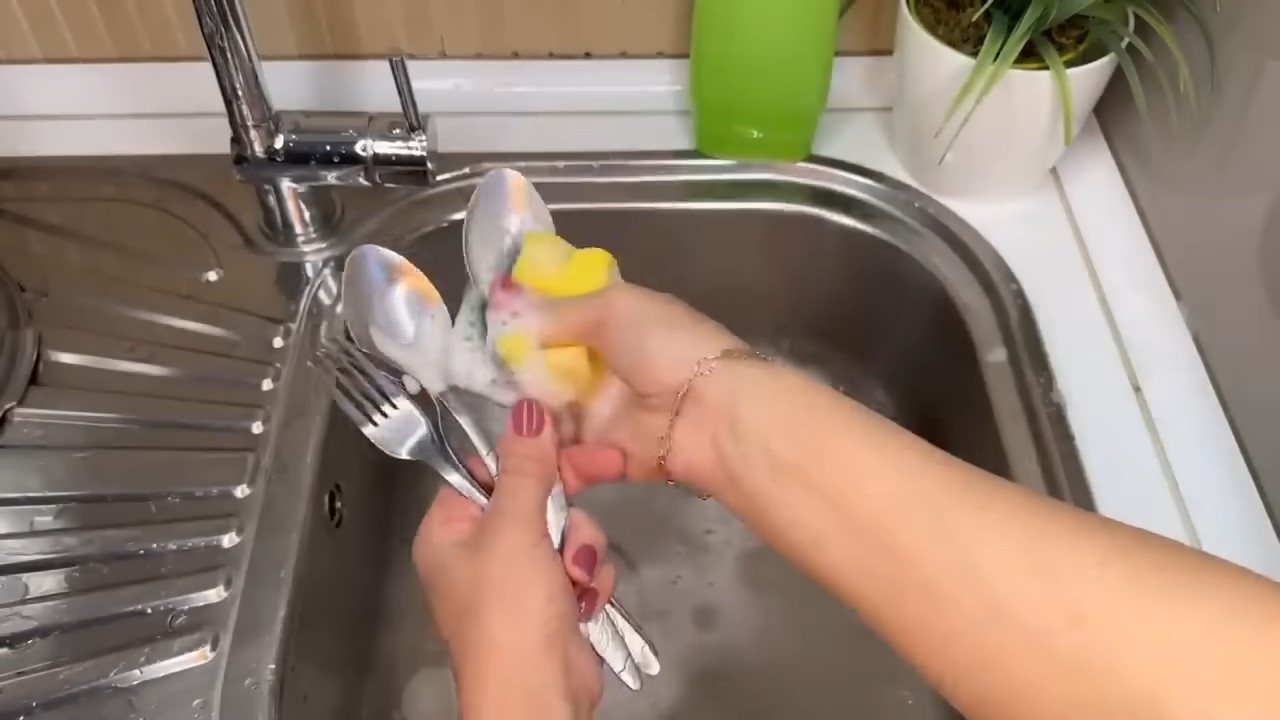
* **Kitchen Sink:** This cleaner is fantastic for removing food stains and water spots from stainless steel sinks. The salt helps to scrub away stubborn residue, leaving your sink sparkling.
* **Bathroom Tiles:** Say goodbye to soap scum and mildew! The salt and detergent combo works wonders on bathroom tiles and grout. Use an old toothbrush to get into those tight spaces.
* **Stovetop:** Burnt-on food and grease are no match for this cleaner. Apply the paste to the affected areas, let it sit for a few minutes, and then scrub away the mess.
* **Oven Door:** Cleaning the oven door can be a real pain, but this cleaner makes it much easier. Apply the paste to the glass, let it sit for a while, and then scrub with a sponge.
* **Shower Doors:** Soap scum buildup on shower doors is a common problem, but this cleaner can help. Spray the doors with the cleaner, let it sit for a few minutes, and then wipe away the grime.
* **Dirty Pots and Pans:** For pots and pans with burnt-on food, try soaking them in warm water with a little bit of the salt and detergent mixture before scrubbing.
* Cleaning Grout: The paste is perfect for cleaning grout. Apply it to the grout lines, let it sit for a few minutes, scrub with an old toothbrush, and then rinse.
* Cleaning Cutting Boards: Cutting boards can harbor bacteria, so it’s important to clean them thoroughly. This cleaner is great for removing food residue and sanitizing your cutting boards.
Important Considerations and Safety Tips
While this cleaner is generally safe to use, there are a few things to keep in mind:
* **Avoid Using on Delicate Surfaces:** While the salt is a gentle abrasive, it can still scratch delicate surfaces like polished wood, marble, or painted surfaces. Always test in an inconspicuous area first.
* **Rinse Thoroughly:** Make sure to rinse the cleaned area thoroughly with water to remove any residue from the cleaner.
* **Don’t Mix with Other Cleaners:** Never mix this cleaner with other cleaning products, especially bleach. This can create dangerous fumes.
* **Store Properly:** Store the cleaner in a cool, dry place away from children and pets.
* Wear Gloves: If you have sensitive skin, it’s always a good idea to wear gloves when using this cleaner.
* Avoid Eyes: Avoid getting the cleaner in your eyes. If contact occurs, rinse thoroughly with water.
Troubleshooting Tips
Sometimes, even the best DIY cleaners need a little tweaking. Here are a few troubleshooting tips:
* **If the Cleaner is Too Abrasive:** Reduce the amount of salt in the mixture.
* **If the Cleaner Isn’t Cleaning Well Enough:** Add a little more dish soap or let the cleaner sit on the surface for a longer period of time before scrubbing.
* **If the Salt Isn’t Dissolving:** Use warm water to help dissolve the salt. You can also try using a finer grain of salt.
* If the Spray Bottle is Clogging:** Make sure the salt is fully dissolved before pouring the mixture into the spray bottle. You can also strain the mixture through a fine-mesh sieve to remove any undissolved particles.
Variations and Add-Ins
Want to customize your cleaner even further? Here are a few ideas:
* **Add Essential Oils:** For a pleasant scent, add a few drops of your favorite essential oil, such as lemon, lavender, or tea tree oil. Tea tree oil also has antibacterial properties.
* **Add Vinegar:** For extra cleaning power, add a tablespoon or two of white vinegar to the mixture. Vinegar is a natural disinfectant and can help to remove hard water stains.
* **Add Baking Soda:** For extra scrubbing power, add a tablespoon or two of baking soda to the paste. Baking soda is a mild abrasive and can help to remove stubborn stains.
Final Thoughts
I hope you found this DIY cleaning hack helpful! I know it’s made a huge difference in my cleaning routine. It’s amazing how such simple ingredients can create such a powerful cleaner. Give it a try and let me know what you think! Happy cleaning!
Conclusion
So, there you have it! This simple yet incredibly effective DIY cleaning solution using salt and detergent is a game-changer for anyone looking to tackle stubborn stains and grime without resorting to harsh chemicals. We’ve walked you through the process, highlighting its ease of use and the remarkable results you can achieve. But why is this particular DIY trick a must-try?
Firstly, it’s incredibly cost-effective. You likely already have both ingredients – salt and detergent – sitting in your pantry and laundry room. This means you can skip expensive, specialized cleaning products and save money while achieving superior results. Secondly, it’s a more environmentally friendly option. By reducing your reliance on chemical-laden cleaners, you’re contributing to a healthier home and a cleaner planet. The abrasive nature of the salt, combined with the degreasing power of the detergent, creates a synergistic effect that lifts dirt and grime with minimal effort.
Beyond its practicality, this DIY cleaning solution is surprisingly versatile. While we’ve focused on its effectiveness on specific surfaces, don’t be afraid to experiment! For instance, you can create a paste for tougher stains on grout or tile. Simply mix the salt and detergent with a small amount of water to form a thick consistency, apply it to the affected area, let it sit for a few minutes, and then scrub gently. Another variation involves adding a few drops of essential oil, like lemon or tea tree, for a fresh, clean scent and added antibacterial properties. Remember to always test the solution on an inconspicuous area first to ensure it doesn’t damage the surface.
This salt and detergent cleaning method is truly a powerhouse for your home. It’s simple, affordable, effective, and environmentally conscious. What more could you ask for?
We wholeheartedly encourage you to give this DIY cleaning trick a try. We’re confident that you’ll be amazed by the results. Once you’ve experienced the cleaning power of salt and detergent firsthand, we’d love to hear about your experience! Share your before-and-after photos, tips, and variations in the comments below. Let’s build a community of DIY cleaning enthusiasts who are passionate about creating a cleaner, healthier home without breaking the bank. Your feedback is invaluable and will help others discover the magic of this simple yet powerful cleaning solution. So, grab your salt, grab your detergent, and get ready to transform your cleaning routine! You won’t regret it.
Frequently Asked Questions (FAQ)
What kind of salt and detergent should I use?
For the best results, use regular table salt or sea salt. Avoid using Epsom salts, as they have a different chemical composition. As for detergent, any standard dish soap or laundry detergent will work. However, for delicate surfaces, it’s best to use a mild, pH-neutral detergent to prevent damage. For heavily soiled areas, a stronger detergent might be necessary. Experiment to find the combination that works best for your specific cleaning needs.
Can I use this cleaning solution on all surfaces?
While this DIY cleaning solution is generally safe and effective, it’s not suitable for all surfaces. Avoid using it on delicate materials like polished wood, marble, or painted surfaces, as the abrasive nature of the salt can cause scratches or damage. Always test the solution on an inconspicuous area first to ensure it doesn’t discolor or harm the surface. For sensitive surfaces, consider diluting the solution with more water or using a gentler detergent.
How do I make a paste for tougher stains?
Creating a paste is simple. Mix equal parts salt and detergent in a small bowl. Gradually add a small amount of water until you achieve a thick, spreadable consistency. Apply the paste to the stained area, let it sit for 5-10 minutes, and then scrub gently with a non-abrasive sponge or cloth. Rinse thoroughly with water and dry the surface. This paste is particularly effective for removing stubborn stains from grout, tile, and oven interiors.
Is this cleaning solution safe for pets and children?
While the ingredients are generally considered safe, it’s always best to exercise caution when using any cleaning solution around pets and children. Keep the solution out of reach and ensure that the cleaned surfaces are thoroughly rinsed and dried before allowing pets or children to come into contact with them. If you’re concerned about potential sensitivities, consider using a natural detergent or adding a few drops of essential oil, like lavender, which is known for its calming properties.
How often can I use this cleaning solution?
The frequency of use depends on the surface and the level of soiling. For heavily used areas, like kitchen countertops or bathroom floors, you can use this solution once or twice a week. For less frequently used areas, like windowsills or baseboards, you can use it as needed. Avoid overusing the solution, as excessive scrubbing can damage some surfaces. Always rinse thoroughly after cleaning to remove any residue.
What are some other uses for this salt and detergent cleaning method?
Beyond the applications mentioned earlier, this DIY cleaning solution can also be used to clean:
* **Burnt pots and pans:** Soak the pot or pan in a solution of salt, detergent, and water overnight, then scrub away the burnt residue.
* **Shower doors:** Remove soap scum and water stains by spraying the solution onto the shower door and wiping it clean.
* **Sneakers:** Clean dirty sneakers by scrubbing them with a paste of salt, detergent, and water.
* **Outdoor furniture:** Remove dirt and grime from outdoor furniture by wiping it down with the solution.
Can I store the leftover cleaning solution?
It’s generally best to make a fresh batch of the cleaning solution each time you need it. However, if you have leftover solution, you can store it in a sealed container for up to a week. Be sure to label the container clearly and keep it out of reach of children and pets. Over time, the solution may lose its effectiveness, so it’s best to use it as soon as possible.
What if the salt scratches the surface I’m cleaning?
If you’re concerned about the salt scratching the surface, you can try using a finer grain of salt, like table salt, or diluting the solution with more water. You can also use a softer scrubbing tool, like a microfiber cloth or a sponge. If you’re still worried about scratching, test the solution on an inconspicuous area first or consider using a different cleaning method altogether.
Can I add vinegar to this cleaning solution?
While vinegar is a popular cleaning agent, it’s not recommended to mix it with detergent. The combination can create harmful fumes and reduce the effectiveness of both ingredients. It’s best to use vinegar and detergent separately for different cleaning tasks.
What essential oils work best with this cleaning solution?
Several essential oils can enhance the cleaning power and scent of this DIY solution. Lemon, tea tree, lavender, eucalyptus, and peppermint are all excellent choices. Lemon and tea tree have antibacterial properties, while lavender and eucalyptus have calming and refreshing scents. Peppermint can help to repel insects. Add a few drops of your favorite essential oil to the solution for a natural and fragrant cleaning experience.
Leave a Comment