
Rooftop Corn Growing Guide: Your Pathway to Urban Farming Success!
Imagine stepping onto your rooftop and being greeted by the sight of lush, green corn stalks swaying gently in the breeze. Sounds like a dream, right? Well, it doesn’t have to be! For centuries, corn has been a staple crop, deeply woven into the fabric of countless cultures, from ancient civilizations in Mesoamerica to modern-day family farms. Now, you can bring that agricultural heritage to your very own urban oasis with our comprehensive rooftop corn growing guide.
I know what you’re thinking: “Corn on a rooftop? Is that even possible?” Absolutely! With a few clever DIY tricks and hacks, you can transform your underutilized rooftop space into a thriving cornfield. In today’s world, where access to fresh, locally sourced produce is becoming increasingly important, mastering the art of rooftop corn growing offers a fantastic solution. Not only will you enjoy the satisfaction of harvesting your own delicious corn, but you’ll also contribute to a more sustainable lifestyle, reduce your carbon footprint, and impress your neighbors with your green thumb!
This guide is packed with easy-to-follow instructions, expert tips, and troubleshooting advice to ensure your rooftop corn growing adventure is a resounding success. So, grab your gardening gloves, and let’s get started on this exciting journey together!
DIY Rooftop Corn Growing: A Beginner’s Guide
Hey there, fellow gardening enthusiasts! Ever dreamt of having fresh, homegrown corn without a sprawling backyard? Well, you’re in the right place! I’m going to walk you through the exciting process of growing corn right on your rooftop. It might sound a little crazy, but trust me, it’s totally doable and incredibly rewarding. Let’s get started!
Choosing the Right Corn Variety
Before we dive into the nitty-gritty, it’s crucial to pick the right corn variety. Not all corn is created equal, especially when it comes to container gardening on a rooftop. We need to consider factors like size, maturity time, and pollination needs.
* **Dwarf Varieties:** These are your best bet. They’re bred to be shorter and more compact, making them perfect for containers. Look for varieties like ‘On Deck’, ‘Golden Bantam’, or ‘Trinity’. These typically reach a height of 4-5 feet, which is manageable for rooftop conditions.
* **Early Maturing Varieties:** Opt for varieties that mature quickly, usually within 70-90 days. This allows you to harvest your corn before the end of the growing season and avoid potential frost damage.
* **Consider Pollination:** Corn is wind-pollinated, meaning it relies on the wind to carry pollen from the tassels (male flowers) to the silks (female flowers). To ensure successful pollination, you’ll need to plant your corn in blocks rather than a single row. More on that later!
Gathering Your Supplies
Okay, now that we’ve chosen our corn variety, let’s gather the necessary supplies. This is where the fun begins!
* **Large Containers:** You’ll need containers that are at least 12-18 inches deep and wide. Corn has a robust root system, so bigger is definitely better. I recommend using durable plastic containers or even repurposed barrels. Make sure they have drainage holes!
* **High-Quality Potting Mix:** Don’t skimp on the potting mix! Use a well-draining, nutrient-rich mix specifically formulated for containers. Avoid using garden soil, as it can become compacted and doesn’t drain well in containers. I like to mix compost, peat moss, and perlite for optimal results.
* **Corn Seeds:** Of course, you’ll need corn seeds! Purchase them from a reputable source to ensure good germination rates.
* **Fertilizer:** Corn is a heavy feeder, so you’ll need a balanced fertilizer to provide the necessary nutrients. Look for a fertilizer with an NPK ratio (nitrogen, phosphorus, potassium) of around 10-10-10 or 14-14-14.
* **Watering Can or Hose:** Essential for keeping your corn plants hydrated.
* **Trowel or Shovel:** For planting and transplanting.
* **Optional: Stakes or Trellis:** Depending on the variety you choose, you might need stakes or a small trellis to support the plants, especially in windy conditions.
* **Optional: Bird Netting:** Birds love corn seeds and young seedlings, so bird netting can help protect your crop.
Step-by-Step Planting Guide
Alright, let’s get our hands dirty! Here’s a step-by-step guide to planting your corn seeds:
1. **Prepare Your Containers:** Fill your containers with the high-quality potting mix, leaving about an inch or two of space at the top.
2. **Sow the Seeds:** Plant the corn seeds about 1-2 inches deep and 4-6 inches apart. Remember to plant in blocks rather than a single row to improve pollination. A block of at least 4×4 plants is ideal.
3. **Water Thoroughly:** After planting, water the soil thoroughly until it’s evenly moist.
4. **Provide Sunlight:** Place the containers in a location that receives at least 6-8 hours of direct sunlight per day. This is crucial for corn growth.
5. **Protect from Birds:** If you’re concerned about birds, cover the containers with bird netting until the seedlings emerge.
Caring for Your Rooftop Corn
Now that your corn is planted, it’s time to provide the necessary care to ensure a bountiful harvest.
1. **Watering:** Corn needs consistent moisture, especially during hot weather. Water deeply whenever the top inch of soil feels dry to the touch. Avoid overwatering, as this can lead to root rot.
2. **Fertilizing:** As mentioned earlier, corn is a heavy feeder. Start fertilizing your plants about 2-3 weeks after they emerge. Use a balanced fertilizer according to the package instructions. You can also supplement with compost tea or other organic fertilizers. I like to fertilize every 2-3 weeks throughout the growing season.
3. **Pollination Assistance (If Needed):** If you notice that pollination is not occurring naturally (e.g., the silks are not turning brown and sticky), you can assist the process by hand-pollinating. Gently shake the tassels to release pollen and then brush the pollen onto the silks. Do this in the morning when the
Hey there, fellow gardening enthusiasts! Ever dreamt of having fresh, homegrown corn without a sprawling backyard? Well, you’re in the right place! I’m going to walk you through the exciting process of growing corn right on your rooftop. It might sound a little crazy, but trust me, it’s totally doable and incredibly rewarding. Let’s get started!
Choosing the Right Corn Variety
Before we dive into the nitty-gritty, it’s crucial to pick the right corn variety. Not all corn is created equal, especially when it comes to container gardening on a rooftop. We need to consider factors like size, maturity time, and pollination needs.
* **Dwarf Varieties:** These are your best bet. They’re bred to be shorter and more compact, making them perfect for containers. Look for varieties like ‘On Deck’, ‘Golden Bantam’, or ‘Trinity’. These typically reach a height of 4-5 feet, which is manageable for rooftop conditions.
* **Early Maturing Varieties:** Opt for varieties that mature quickly, usually within 70-90 days. This allows you to harvest your corn before the end of the growing season and avoid potential frost damage.
* **Consider Pollination:** Corn is wind-pollinated, meaning it relies on the wind to carry pollen from the tassels (male flowers) to the silks (female flowers). To ensure successful pollination, you’ll need to plant your corn in blocks rather than a single row. More on that later!
Gathering Your Supplies
Okay, now that we’ve chosen our corn variety, let’s gather the necessary supplies. This is where the fun begins!
* **Large Containers:** You’ll need containers that are at least 12-18 inches deep and wide. Corn has a robust root system, so bigger is definitely better. I recommend using durable plastic containers or even repurposed barrels. Make sure they have drainage holes!
* **High-Quality Potting Mix:** Don’t skimp on the potting mix! Use a well-draining, nutrient-rich mix specifically formulated for containers. Avoid using garden soil, as it can become compacted and doesn’t drain well in containers. I like to mix compost, peat moss, and perlite for optimal results.
* **Corn Seeds:** Of course, you’ll need corn seeds! Purchase them from a reputable source to ensure good germination rates.
* **Fertilizer:** Corn is a heavy feeder, so you’ll need a balanced fertilizer to provide the necessary nutrients. Look for a fertilizer with an NPK ratio (nitrogen, phosphorus, potassium) of around 10-10-10 or 14-14-14.
* **Watering Can or Hose:** Essential for keeping your corn plants hydrated.
* **Trowel or Shovel:** For planting and transplanting.
* **Optional: Stakes or Trellis:** Depending on the variety you choose, you might need stakes or a small trellis to support the plants, especially in windy conditions.
* **Optional: Bird Netting:** Birds love corn seeds and young seedlings, so bird netting can help protect your crop.
Step-by-Step Planting Guide
Alright, let’s get our hands dirty! Here’s a step-by-step guide to planting your corn seeds:
1. **Prepare Your Containers:** Fill your containers with the high-quality potting mix, leaving about an inch or two of space at the top.
2. **Sow the Seeds:** Plant the corn seeds about 1-2 inches deep and 4-6 inches apart. Remember to plant in blocks rather than a single row to improve pollination. A block of at least 4×4 plants is ideal.
3. **Water Thoroughly:** After planting, water the soil thoroughly until it’s evenly moist.
4. **Provide Sunlight:** Place the containers in a location that receives at least 6-8 hours of direct sunlight per day. This is crucial for corn growth.
5. **Protect from Birds:** If you’re concerned about birds, cover the containers with bird netting until the seedlings emerge.
Caring for Your Rooftop Corn
Now that your corn is planted, it’s time to provide the necessary care to ensure a bountiful harvest.
1. **Watering:** Corn needs consistent moisture, especially during hot weather. Water deeply whenever the top inch of soil feels dry to the touch. Avoid overwatering, as this can lead to root rot.
2. **Fertilizing:** As mentioned earlier, corn is a heavy feeder. Start fertilizing your plants about 2-3 weeks after they emerge. Use a balanced fertilizer according to the package instructions. You can also supplement with compost tea or other organic fertilizers. I like to fertilize every 2-3 weeks throughout the growing season.
3. **Pollination Assistance (If Needed):** If you notice that pollination is not occurring naturally (e.g., the silks are not turning brown and sticky), you can assist the process by hand-pollinating. Gently shake the tassels to release pollen and then brush the pollen onto the silks. Do this in the morning when the pollen is most active.
4. **Weed Control:** Keep the containers free of weeds, as they can compete with your corn plants for nutrients and water. Hand-pull any weeds that emerge.
5. **Pest and Disease Control:** Keep an eye out for common corn pests like corn earworms, aphids, and spider mites. You can control these pests with insecticidal soap or neem oil. Also, watch out for fungal diseases like corn smut. Ensure good air circulation and avoid overhead watering to prevent these diseases.
6. **Staking (If Needed):** As your corn plants grow taller, they may become susceptible to wind damage. If necessary, provide support by staking the plants or using a small trellis.
Harvesting Your Corn
The moment we’ve all been waiting for – harvesting! Here’s how to tell when your corn is ready to pick:
1. **Check the Silks:** The silks should be brown and dry.
2. **Feel the Ears:** Gently squeeze the ears. They should feel plump and full.
3. **Peel Back the Husk:** Carefully peel back a small portion of the husk and puncture a kernel with your fingernail. If the liquid that comes out is milky, the corn is ready to harvest. If it’s clear, it needs more time.
4. **Harvest:** To harvest, grasp the ear firmly and twist it downward. It should snap off easily from the stalk.
Troubleshooting Common Problems
Even with the best care, you might encounter some challenges along the way. Here are some common problems and how to address them:
* **Poor Germination:** If your seeds aren’t germinating, make sure the soil is warm enough (at least 60°F). Also, ensure that the soil is consistently moist but not waterlogged.
* **Yellowing Leaves:** Yellowing leaves can indicate a nutrient deficiency, especially nitrogen. Fertilize your plants with a balanced fertilizer.
* **Stunted Growth:** Stunted growth can be caused by a variety of factors, including poor soil, lack of sunlight, or pest infestations. Address the underlying cause to promote healthy growth.
* **Poor Pollination:** As mentioned earlier, you can assist pollination by hand-pollinating. Also, ensure that you’re planting your corn in blocks rather than a single row.
* **Pest Infestations:** Regularly inspect your plants for pests and take action promptly to prevent infestations from spreading.
Enjoying Your Homegrown Corn
Congratulations! You’ve successfully grown corn on your rooftop. Now it’s time to enjoy the fruits (or rather, vegetables) of your labor. Freshly harvested corn is incredibly delicious. You can grill it, boil it, roast it, or use it in your favorite recipes.
Growing corn on a rooftop might seem daunting at first, but with a little planning and effort, it’s totally achievable. I hope this guide has inspired you to give it a try. Happy gardening!

Conclusion
So, there you have it! A comprehensive guide to transforming your rooftop into a thriving cornfield. We’ve walked you through everything from selecting the right corn variety to troubleshooting common problems, all with the goal of helping you achieve a bountiful harvest right in the heart of the city.
Why is this DIY rooftop corn growing trick a must-try? Because it’s more than just growing food; it’s about connecting with nature, reducing your carbon footprint, and enjoying the unparalleled flavor of freshly picked, homegrown corn. Imagine stepping onto your rooftop, plucking a ripe ear of corn still warm from the sun, and knowing that you nurtured it from seed to table. That’s an experience you simply can’t replicate with store-bought produce.
Beyond the satisfaction of growing your own food, rooftop corn growing offers a unique opportunity to beautify your urban space. The tall, swaying stalks of corn create a miniature oasis, attracting beneficial insects and providing a welcome respite from the concrete jungle. It’s a conversation starter, a source of pride, and a testament to your resourcefulness.
But the benefits don’t stop there. By growing your own corn, you’re actively reducing your reliance on industrial agriculture, which often involves long-distance transportation and environmentally damaging practices. You’re also ensuring that you have access to fresh, healthy food, free from pesticides and other harmful chemicals.
Ready to take your rooftop garden to the next level? Consider these variations to personalize your corn-growing experience:
* **Companion Planting:** Experiment with companion plants like beans and squash, which can help improve soil health and deter pests. The “Three Sisters” method (corn, beans, and squash) is a classic example of symbiotic planting.
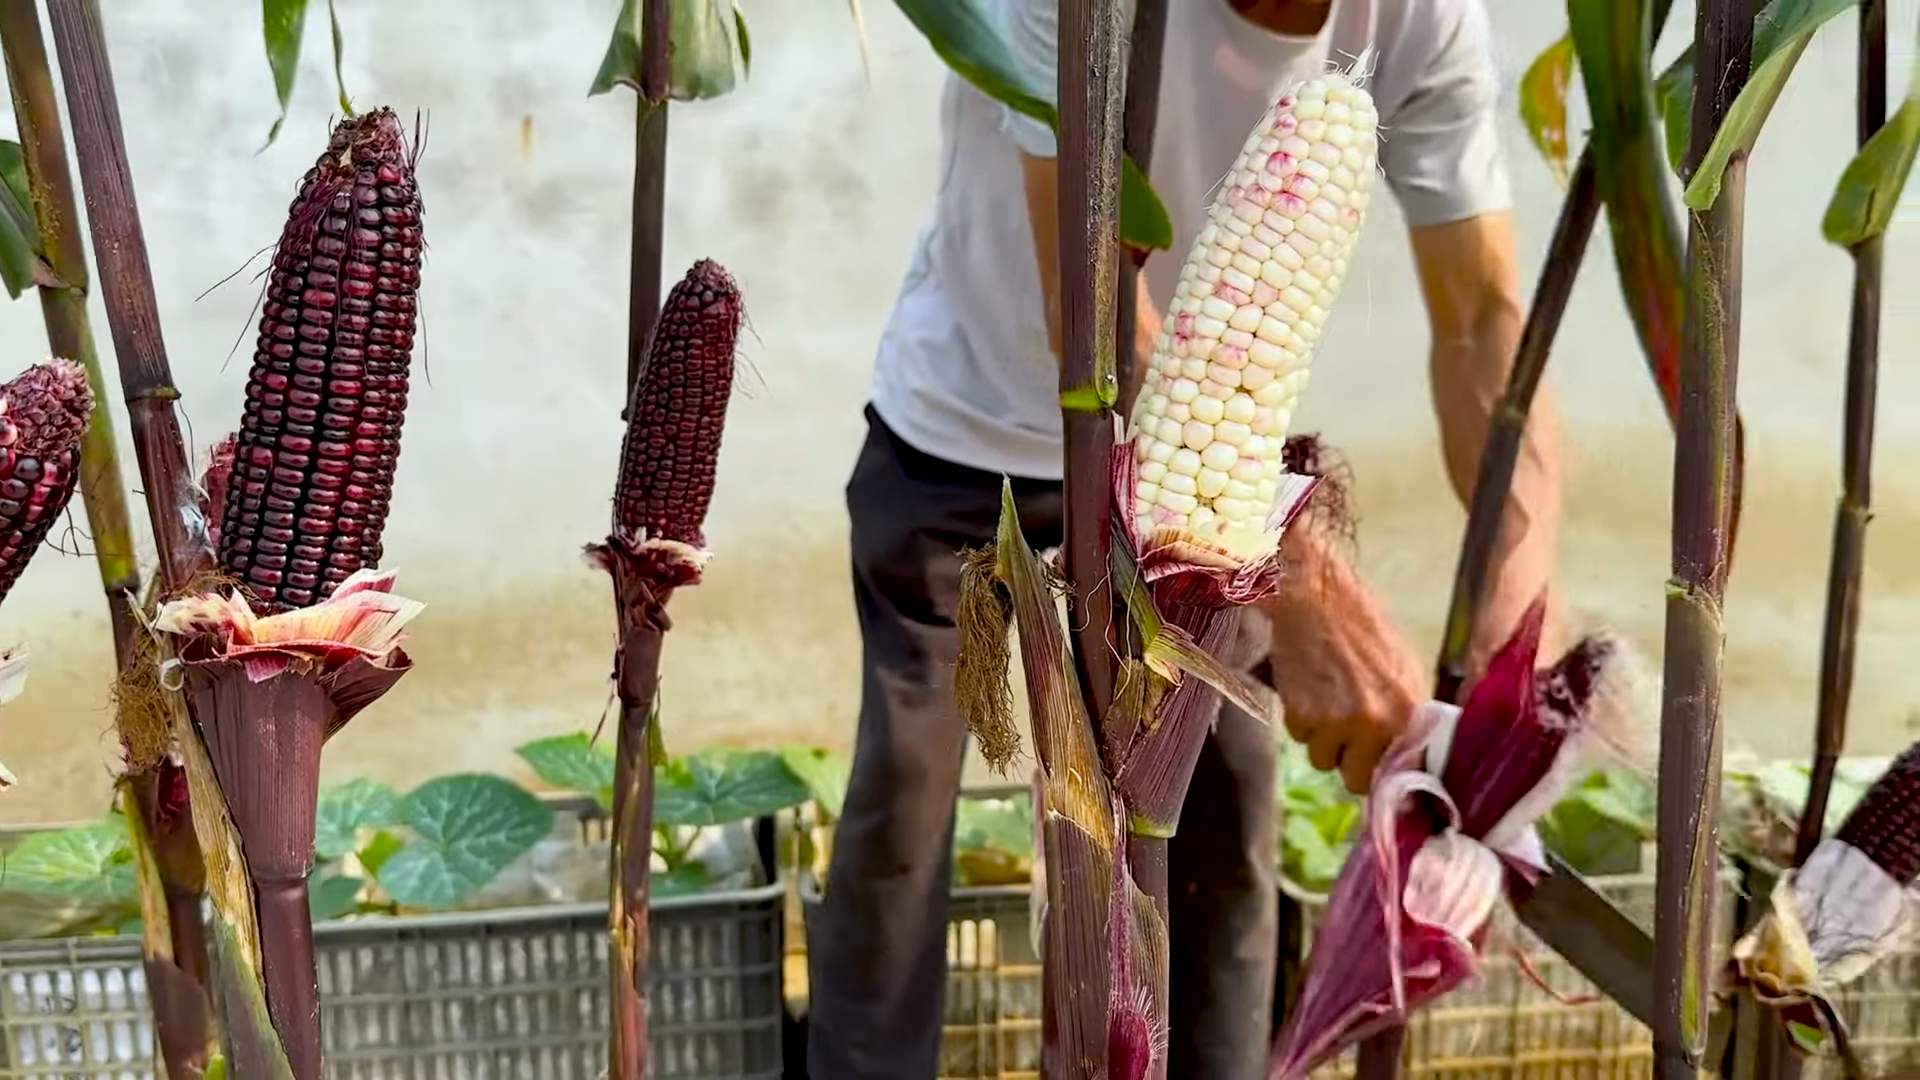
* **Heirloom Varieties:** Explore the world of heirloom corn varieties, each with its unique flavor, color, and history. From sweet corn to popcorn to ornamental corn, there’s a variety to suit every taste and purpose.
* **Vertical Growing:** If space is limited, consider using vertical growing techniques, such as trellising or stacking containers, to maximize your corn yield.
* **Succession Planting:** Plant corn in stages, a few weeks apart, to ensure a continuous harvest throughout the growing season.
We’ve provided you with the knowledge and tools you need to succeed. Now, it’s time to get your hands dirty and embark on this exciting adventure. Don’t be afraid to experiment, learn from your mistakes, and adapt your approach as needed. Remember, every rooftop is different, and what works for one gardener may not work for another.
We are confident that with a little patience and dedication, you can transform your rooftop into a corn-growing paradise. So, grab your seeds, prepare your containers, and get ready to experience the joy of harvesting your own homegrown corn.
We encourage you to try this DIY rooftop corn growing trick and share your experiences with us! Post photos of your rooftop cornfield on social media using #RooftopCorn and tag us so we can see your amazing results. We can’t wait to see what you create! Let’s build a community of urban farmers, one rooftop at a time.
Frequently Asked Questions (FAQ)
What is the best type of corn to grow on a rooftop?
The best type of corn to grow on a rooftop depends on your climate, available space, and personal preferences. However, generally, shorter varieties of sweet corn are the most suitable for container gardening. Look for varieties that mature quickly and don’t require excessive space. Some popular choices include ‘Golden Bantam,’ ‘Sugar Baby,’ and ‘On Deck.’ Consider also the size of your containers; smaller containers will necessitate smaller corn varieties. Researching the specific needs of each variety is crucial for success.
How much sunlight does rooftop corn need?
Corn requires at least 6-8 hours of direct sunlight per day to thrive. Without sufficient sunlight, the plants will become weak and spindly, and the ears of corn will be small and underdeveloped. Choose a location on your rooftop that receives ample sunlight throughout the day. If your rooftop is partially shaded, consider using reflective materials to bounce sunlight onto the plants. You can also supplement natural sunlight with grow lights if necessary, especially during periods of cloudy weather.
What size containers are needed for growing corn on a rooftop?
Corn plants need a significant amount of space for their roots to develop properly. As a general rule, use containers that are at least 12 inches in diameter and 12 inches deep. Larger containers are always better, as they provide more room for root growth and help retain moisture. You can use individual containers for each plant or group several plants together in a larger container. Make sure the containers have drainage holes to prevent waterlogging.
What type of soil is best for rooftop corn?
Corn prefers well-draining, fertile soil that is rich in organic matter. A good potting mix specifically designed for vegetables is ideal. You can also amend your own soil by adding compost, aged manure, or other organic materials. Avoid using heavy clay soil, as it can become waterlogged and inhibit root growth. The ideal soil pH for corn is between 6.0 and 7.0. You can test your soil pH using a soil testing kit and adjust it accordingly.
How often should I water my rooftop corn?
Corn plants need consistent moisture, especially during hot weather. Water deeply and regularly, ensuring that the soil remains consistently moist but not waterlogged. Check the soil moisture level daily by sticking your finger into the soil. If the top inch of soil feels dry, it’s time to water. Avoid watering the foliage, as this can promote fungal diseases. Drip irrigation or soaker hoses are excellent options for providing consistent moisture to your corn plants.
How do I pollinate corn on a rooftop?
Corn is wind-pollinated, meaning that the pollen from the tassels (male flowers) needs to be transferred to the silks (female flowers) by the wind. On a rooftop, where there may be less wind, you may need to hand-pollinate your corn plants. To do this, gently shake the tassels over the silks, or use a small paintbrush to collect pollen from the tassels and apply it to the silks. Repeat this process every day for several days to ensure that all of the silks are pollinated.
What are some common pests and diseases that affect rooftop corn?
Common pests that can affect rooftop corn include aphids, corn earworms, and spider mites. Diseases that can affect corn include rust, smut, and leaf blight. Regularly inspect your plants for signs of pests or diseases and take action promptly. You can use organic pest control methods, such as insecticidal soap or neem oil, to control pests. To prevent diseases, ensure good air circulation around your plants and avoid overwatering.
How do I know when my rooftop corn is ready to harvest?
Corn is typically ready to harvest about 20-25 days after the silks emerge. The silks will turn brown and dry, and the ears of corn will feel plump and full. To test for ripeness, peel back a portion of the husk and puncture a kernel with your fingernail. If the liquid that comes out is milky, the corn is ready to harvest. If the liquid is clear, the corn is not yet ripe. If the liquid is doughy, the corn is overripe.
Can I grow corn in containers on a balcony instead of a rooftop?
Yes, you can absolutely grow corn in containers on a balcony, provided that your balcony receives sufficient sunlight (at least 6-8 hours per day). The same principles apply to balcony corn growing as to rooftop corn growing. Choose a suitable corn variety, use appropriately sized containers, and provide adequate water and nutrients. Be mindful of the weight of the containers, as balconies have weight limits.
What are the benefits of growing corn on a rooftop or balcony?
Growing corn on a rooftop or balcony offers numerous benefits, including:
* Access to fresh, homegrown corn
* Reduced reliance on industrial agriculture
* A connection with nature
* Beautification of your urban space
* A fun and rewarding gardening experience
* Reduced carbon footprint
* Control over the use of pesticides and herbicides
* A conversation starter and a source of pride
* A way to teach children about where food comes from
How can I improve the yield of my rooftop corn crop?
To improve the yield of your rooftop corn crop, consider the following tips:
* Choose a high-yielding corn variety.
* Provide adequate sunlight, water, and nutrients.
* Hand-pollinate your corn plants to ensure proper pollination.
* Protect your plants from pests and diseases.
* Amend your soil with compost or other organic materials.
* Use larger containers to provide more room for root growth.
* Consider succession planting to extend your harvest season.
* Monitor your plants closely and address any problems promptly.
* Add fertilizer to the soil.
Can I save seeds from my rooftop corn crop for future planting?
Yes, you can save seeds from your rooftop corn crop, but it’s important to note that hybrid corn varieties may not produce true-to-type seeds. This means that the seeds may not produce plants that are identical to the parent plant. If you want to save seeds, choose an open-pollinated or heirloom corn variety. Allow the ears of corn to dry completely on the stalk before harvesting


Leave a Comment