
Grow Rainbow Chard at Home and transform your garden into a vibrant, edible masterpiece! Have you ever looked at those stunning photos of rainbow chard, with its jewel-toned stalks and lush green leaves, and thought, “I wish I could grow that!”? Well, I’m here to tell you that you absolutely can, and it’s easier than you might think!
For centuries, chard has been a staple in Mediterranean cuisine, prized not only for its nutritional value but also for its resilience and beauty. It’s a close relative of beets and spinach, sharing their earthy flavors and packed with vitamins and minerals. But rainbow chard takes it to a whole new level with its dazzling array of colors – reds, yellows, oranges, pinks, and whites – adding a touch of whimsy to any garden and plate.
In this DIY guide, I’m going to share my favorite tricks and hacks for successfully grow rainbow chard at home, even if you’re a complete beginner. We’ll cover everything from choosing the right seeds and preparing your soil to protecting your plants from pests and harvesting your colorful bounty. Why spend money on expensive, store-bought chard when you can have a constant supply of fresh, organic, and visually stunning greens right outside your door? Plus, growing your own food is incredibly rewarding and a fantastic way to connect with nature. So, grab your gardening gloves, and let’s get started!
Growing Rainbow Chard: A Colorful Guide for Your Garden
Hey there, fellow gardening enthusiasts! Today, I’m super excited to share my experience and guide you through growing your very own rainbow chard. It’s not only incredibly rewarding to harvest your own food, but rainbow chard adds a vibrant splash of color to your garden and your plate. Trust me, even if you’re a beginner, you can totally nail this!
Why Rainbow Chard?
Before we dive in, let’s talk about why rainbow chard is such a fantastic choice:
* Beauty and the Beet: The stalks come in a dazzling array of colors – red, yellow, orange, pink, and white – making it a visual treat.
* Nutrient Powerhouse: It’s packed with vitamins A, C, and K, as well as fiber and antioxidants. Basically, it’s a superfood in disguise!
* Easy to Grow: Chard is relatively low-maintenance and can tolerate a range of conditions.
* Long Harvest: You can harvest leaves continuously over a long period, providing a steady supply of fresh greens.
* Versatile in the Kitchen: Use it in salads, soups, stir-fries, or as a side dish. The possibilities are endless!
Getting Started: What You’ll Need
Okay, let’s gather our supplies. Here’s what you’ll need to get your rainbow chard journey underway:
* Rainbow Chard Seeds: You can find these at most garden centers or online. Make sure to choose a reputable supplier for good germination rates.
* Seed Starting Trays or Small Pots: If you’re starting indoors.
* Seed Starting Mix: A light, well-draining mix specifically designed for seedlings.
* Potting Soil: For transplanting into larger containers or directly into the garden.
* Garden Trowel: For planting and transplanting.
* Watering Can or Hose with a Gentle Spray Nozzle: For watering your seedlings and plants.
* Fertilizer (Optional): A balanced, all-purpose fertilizer can help boost growth.
* Gardening Gloves: To keep your hands clean and protected.
* Location: A spot in your garden that gets at least 6 hours of sunlight per day. Chard can tolerate some shade, especially in hotter climates.
Phase 1: Starting Your Seeds (Indoors or Outdoors)
You have two options here: starting your seeds indoors or directly sowing them in your garden. I personally prefer starting indoors because it gives the seedlings a head start and protects them from harsh weather.
Starting Seeds Indoors:
1. Prepare Your Seed Starting Trays: Fill your seed starting trays or small pots with seed starting mix. Gently press down the soil to create a firm surface.
2. Sow the Seeds: Plant 2-3 seeds per cell or pot, about ½ inch deep. Chard seeds can sometimes have lower germination rates, so planting multiple seeds increases your chances of success.
3. Water Gently: Water the soil thoroughly but gently, using a watering can or spray bottle. Avoid overwatering, which can lead to damping off (a fungal disease that kills seedlings).
4. Provide Warmth and Light: Place the trays in a warm location (around 70-75°F) and provide plenty of light. A sunny windowsill works well, or you can use grow lights. If using a windowsill, rotate the trays regularly to prevent the seedlings from leaning towards the light.
5. Keep the Soil Moist: Check the soil moisture daily and water as needed to keep it consistently moist but not soggy.
6. Thin the Seedlings: Once the seedlings have emerged and have a couple of true leaves (the second set of leaves), thin them out by snipping off the weaker seedlings at the soil line, leaving only one strong seedling per cell or pot.
Direct Sowing Outdoors:
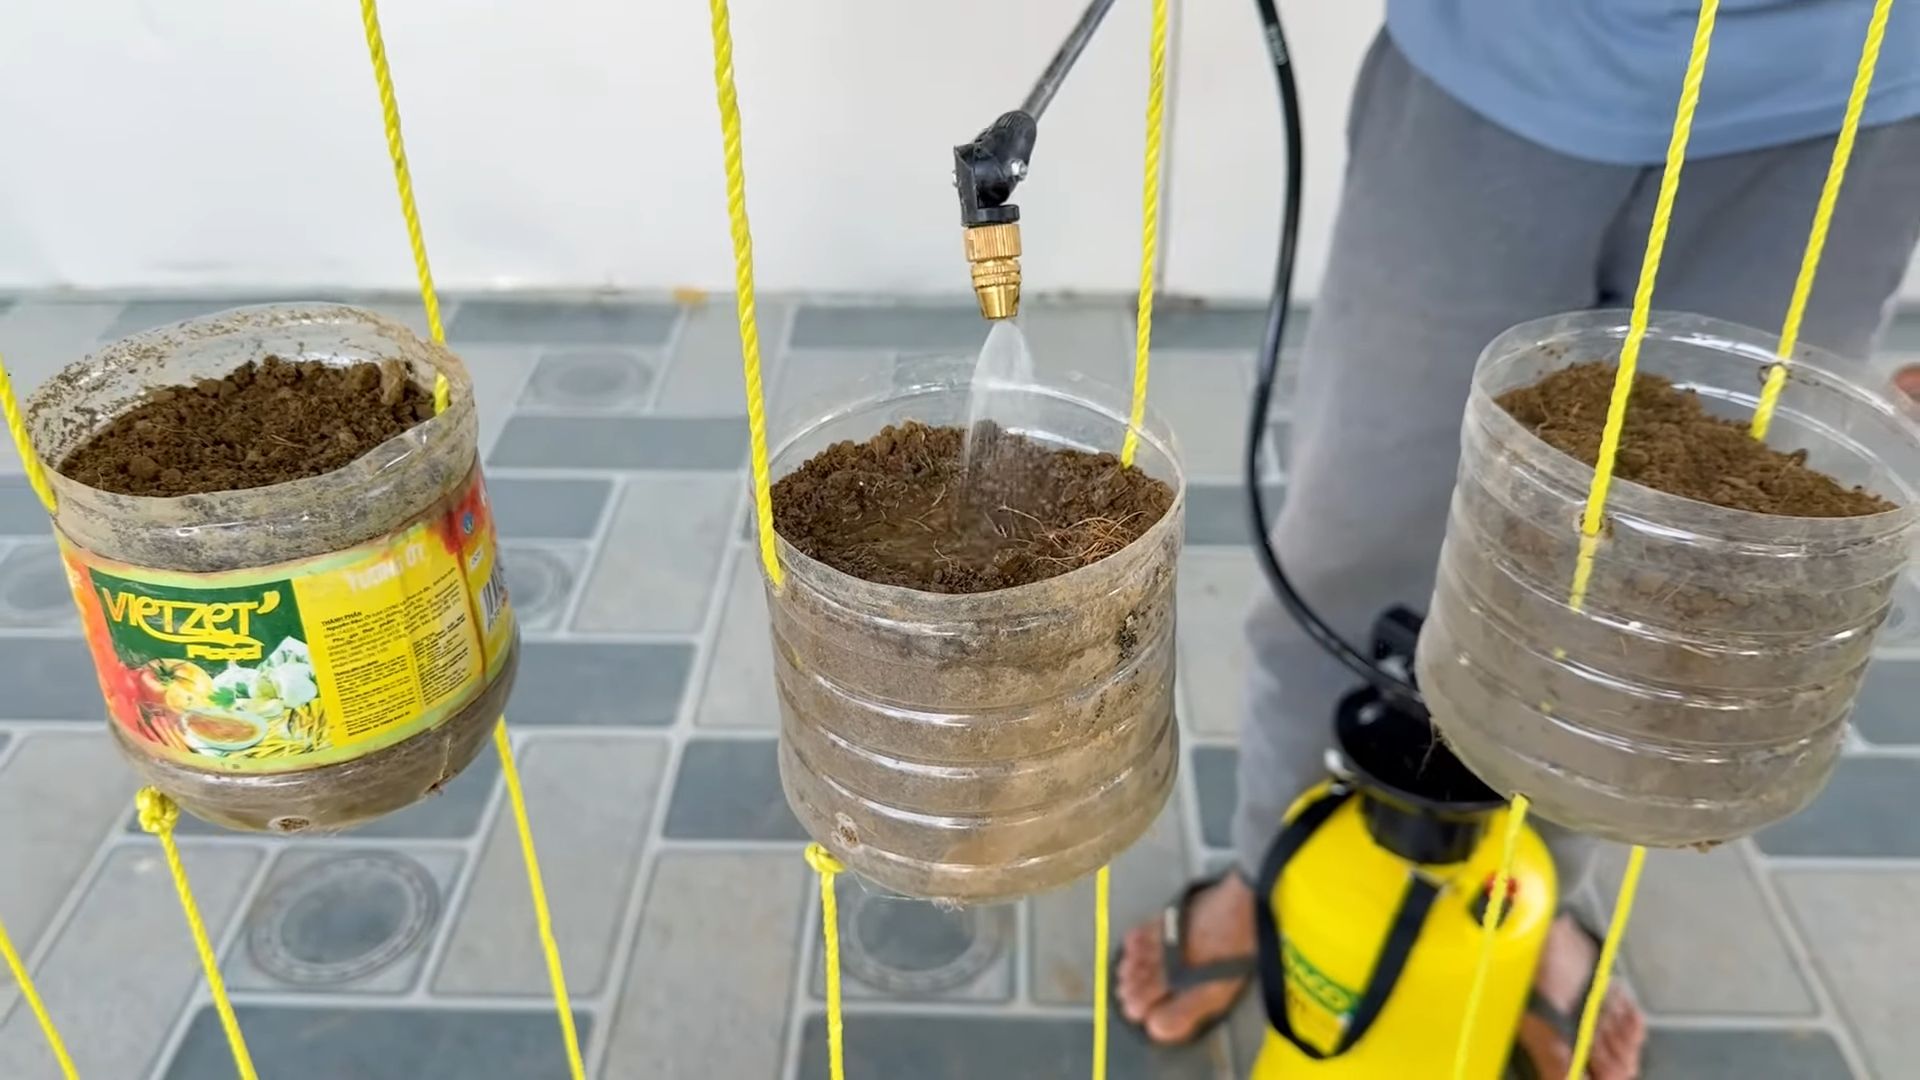
1. Prepare the Soil: Choose a sunny spot in your garden and prepare the soil by removing any weeds, rocks, and debris. Amend the soil with compost or well-rotted manure to improve drainage and fertility.
2. Sow the Seeds: Sow the seeds directly into the soil, about ½ inch deep and 1-2 inches apart.
3. Water Gently: Water the soil thoroughly but gently.
4. Keep the Soil Moist: Keep the soil consistently moist until the seedlings emerge.
5. Thin the Seedlings: Once the seedlings have emerged and are a few inches tall, thin them out to about 6-12 inches apart.
Phase 2: Transplanting Your Seedlings (If Starting Indoors)
Once your seedlings have developed several sets of true leaves and are a few inches tall, it’s time to transplant them into your garden or larger containers.
1. Harden Off the Seedlings: Before transplanting, you need to “harden off” the seedlings to acclimate them to outdoor conditions. This involves gradually exposing them to sunlight, wind, and cooler temperatures over a period of 7-10 days. Start by placing the seedlings outdoors in a sheltered location for a few hours each day, gradually increasing the amount of time they spend outdoors.
2. Prepare the Planting Site: Choose a sunny spot in your garden and prepare the soil as described above for direct sowing.
3. Dig Holes: Dig holes that are slightly larger than the root balls of the seedlings, spacing them about 6-12 inches apart.
4. Gently Remove the Seedlings: Carefully remove the seedlings from their trays or pots, being careful not to damage the roots.
5. Plant the Seedlings: Place the seedlings in the holes and gently backfill with soil, firming it around the base of the plants.
6. Water Thoroughly: Water the seedlings thoroughly after transplanting.
Phase 3: Caring for Your Rainbow Chard
Now that your rainbow chard is planted, it’s time to provide the care it needs to thrive.
1. Watering: Water your chard regularly, especially during dry periods. Aim to keep the soil consistently moist but not waterlogged.
2. Fertilizing: Chard is a heavy feeder, so it benefits from regular fertilization. You can use a balanced, all-purpose fertilizer or side-dress with compost or well-rotted manure.
3. Weeding: Keep the area around your chard free of weeds, which can compete for nutrients and water.
4. Mulching: Apply a layer of mulch around your chard plants to help retain moisture, suppress weeds, and regulate soil temperature.
5. Pest Control: Chard is generally pest-resistant, but it can be susceptible to aphids, slugs, and snails. Inspect your plants regularly and take action if you notice any pests. You can handpick pests, use insecticidal soap, or apply diatomaceous earth.
6. Bolting: In hot weather, chard may bolt (go to seed). This can make the leaves bitter. To prevent bolting, provide shade during the hottest part of the day and water regularly. If your chard does bolt, you can still harvest the leaves, but they may not taste as good.
Phase 4: Harvesting Your Rainbow Chard
The best part! You can start harvesting your rainbow chard leaves once they are about 6 inches long.
1. Harvest Outer Leaves: Harvest the outer leaves first, leaving the inner leaves to continue growing.
2. Cut at the Base: Cut the leaves at the base of the plant, using a sharp knife or scissors.
3. Regular Harvesting Encourages Growth: Regular harvesting encourages the plant to produce more leaves.
4. Enjoy Your Harvest: Wash the leaves thoroughly and use them in your favorite recipes.
Troubleshooting Tips
Even with the best care, you might encounter some challenges. Here are a few common issues and how to address them:
* Yellowing Leaves: This could be a sign of nutrient deficiency. Try fertilizing with a balanced fertilizer.
* Holes in Leaves: This could be caused by slugs or snails. Try using slug bait or handpicking the pests.
* Wilting Leaves: This could be a sign of underwatering or overwatering. Check the soil moisture and adjust your watering accordingly.
* Bolting: As mentioned earlier, bolting can be caused by hot weather. Provide shade and water regularly to prevent bolting.
Enjoying Your Rainbow Chard
Rainbow chard is incredibly versatile in the kitchen. Here are a few ideas for using your harvest:
* Salads: Add chopped raw chard leaves to salads for a pop of color and nutrients.
* Sautéed: Sauté chard leaves with garlic and olive oil for a simple and delicious side dish.
* Soups and Stews: Add chopped chard leaves to soups and st
Conclusion
So, there you have it! Growing your own rainbow chard at home is not only surprisingly simple, but it’s also incredibly rewarding. Imagine stepping out into your garden and harvesting vibrant, jewel-toned leaves for your next salad, stir-fry, or side dish. Forget those wilted, overpriced bunches at the grocery store – with a little effort, you can have a constant supply of fresh, organic rainbow chard right at your fingertips.
This DIY trick is a must-try for several reasons. First, it’s cost-effective. Seeds are inexpensive, and once established, your chard plants will continue to produce for months, even years, depending on your climate. Second, it’s healthier. You control the growing environment, ensuring that your chard is free from harmful pesticides and herbicides. Third, it’s incredibly satisfying. There’s something truly special about nurturing a plant from seed to harvest and then enjoying the fruits (or rather, vegetables!) of your labor.
But the best part? The versatility! While we’ve focused on the basics, don’t be afraid to experiment. Try different varieties of rainbow chard to discover your favorite flavor profiles. Some have milder tastes, while others offer a slightly more earthy or bitter note. You can also adjust the growing conditions to influence the size and texture of the leaves. For example, providing more shade can result in more tender leaves, while more sunlight can intensify the colors.
Consider companion planting to further enhance your rainbow chard garden. Plant basil or marigolds nearby to deter pests, or add some nitrogen-fixing legumes like beans or peas to enrich the soil. You can even grow rainbow chard in containers on your balcony or patio if you don’t have a traditional garden space. The possibilities are endless!
We’ve shown you how easy it is to grow rainbow chard at home, and now it’s your turn to give it a try. Don’t be intimidated if you’re a beginner gardener. Rainbow chard is a forgiving plant that can tolerate a wide range of conditions. Just follow our simple steps, and you’ll be well on your way to enjoying a bountiful harvest.
We’re confident that you’ll love the experience of growing your own rainbow chard. It’s a fun, rewarding, and delicious way to connect with nature and enjoy fresh, healthy food. So, grab some seeds, get your hands dirty, and prepare to be amazed by the beauty and bounty of your own rainbow chard garden.
And most importantly, we want to hear about your experience! Share your photos, tips, and stories with us in the comments below. What varieties did you try? What challenges did you face? What successes did you celebrate? Let’s create a community of rainbow chard enthusiasts and inspire others to discover the joy of growing their own food. Happy gardening!
Frequently Asked Questions (FAQ)
What is the best time of year to plant rainbow chard?
The best time to plant rainbow chard depends on your climate. In cooler climates, you can start seeds indoors 4-6 weeks before the last expected frost and transplant them outdoors after the danger of frost has passed. In warmer climates, you can sow seeds directly into the garden in early spring or late summer for a fall harvest. Rainbow chard can tolerate light frost, so it can often be grown as a winter crop in mild climates.
How much sunlight does rainbow chard need?
Rainbow chard thrives in full sun, which means at least 6 hours of direct sunlight per day. However, in hotter climates, it can benefit from some afternoon shade to prevent the leaves from scorching. If you’re growing rainbow chard indoors, make sure to provide it with plenty of bright, indirect light.
What kind of soil is best for rainbow chard?
Rainbow chard prefers well-drained soil that is rich in organic matter. Before planting, amend the soil with compost or well-rotted manure to improve its fertility and drainage. A slightly acidic to neutral soil pH (6.0-7.0) is ideal.
How often should I water rainbow chard?
Water rainbow chard regularly, especially during dry periods. Aim to keep the soil consistently moist but not waterlogged. Water deeply at the base of the plants to encourage strong root growth. Mulching around the plants can help to retain moisture and suppress weeds.
How do I fertilize rainbow chard?
Rainbow chard is a heavy feeder, so it benefits from regular fertilization. You can use a balanced organic fertilizer or side-dress the plants with compost or well-rotted manure every few weeks. Avoid over-fertilizing, as this can lead to excessive leaf growth and reduced flavor.
What are some common pests and diseases that affect rainbow chard?
Common pests that can affect rainbow chard include aphids, flea beetles, and leaf miners. You can control these pests with insecticidal soap, neem oil, or by handpicking them off the plants. Diseases that can affect rainbow chard include powdery mildew and leaf spot. To prevent these diseases, ensure good air circulation around the plants and avoid overhead watering.
How do I harvest rainbow chard?
You can begin harvesting rainbow chard leaves when they are about 6-8 inches long. Harvest the outer leaves first, leaving the inner leaves to continue growing. You can harvest rainbow chard continuously throughout the growing season.
Can I eat the stems of rainbow chard?
Yes, the stems of rainbow chard are edible and delicious! They have a slightly different texture and flavor than the leaves, but they can be cooked in the same way. Try sautéing them with garlic and olive oil, or adding them to soups and stews.
How do I store rainbow chard?
To store rainbow chard, wash the leaves and stems thoroughly and pat them dry. Wrap them in a damp paper towel and store them in a plastic bag in the refrigerator. Rainbow chard will keep for up to a week.
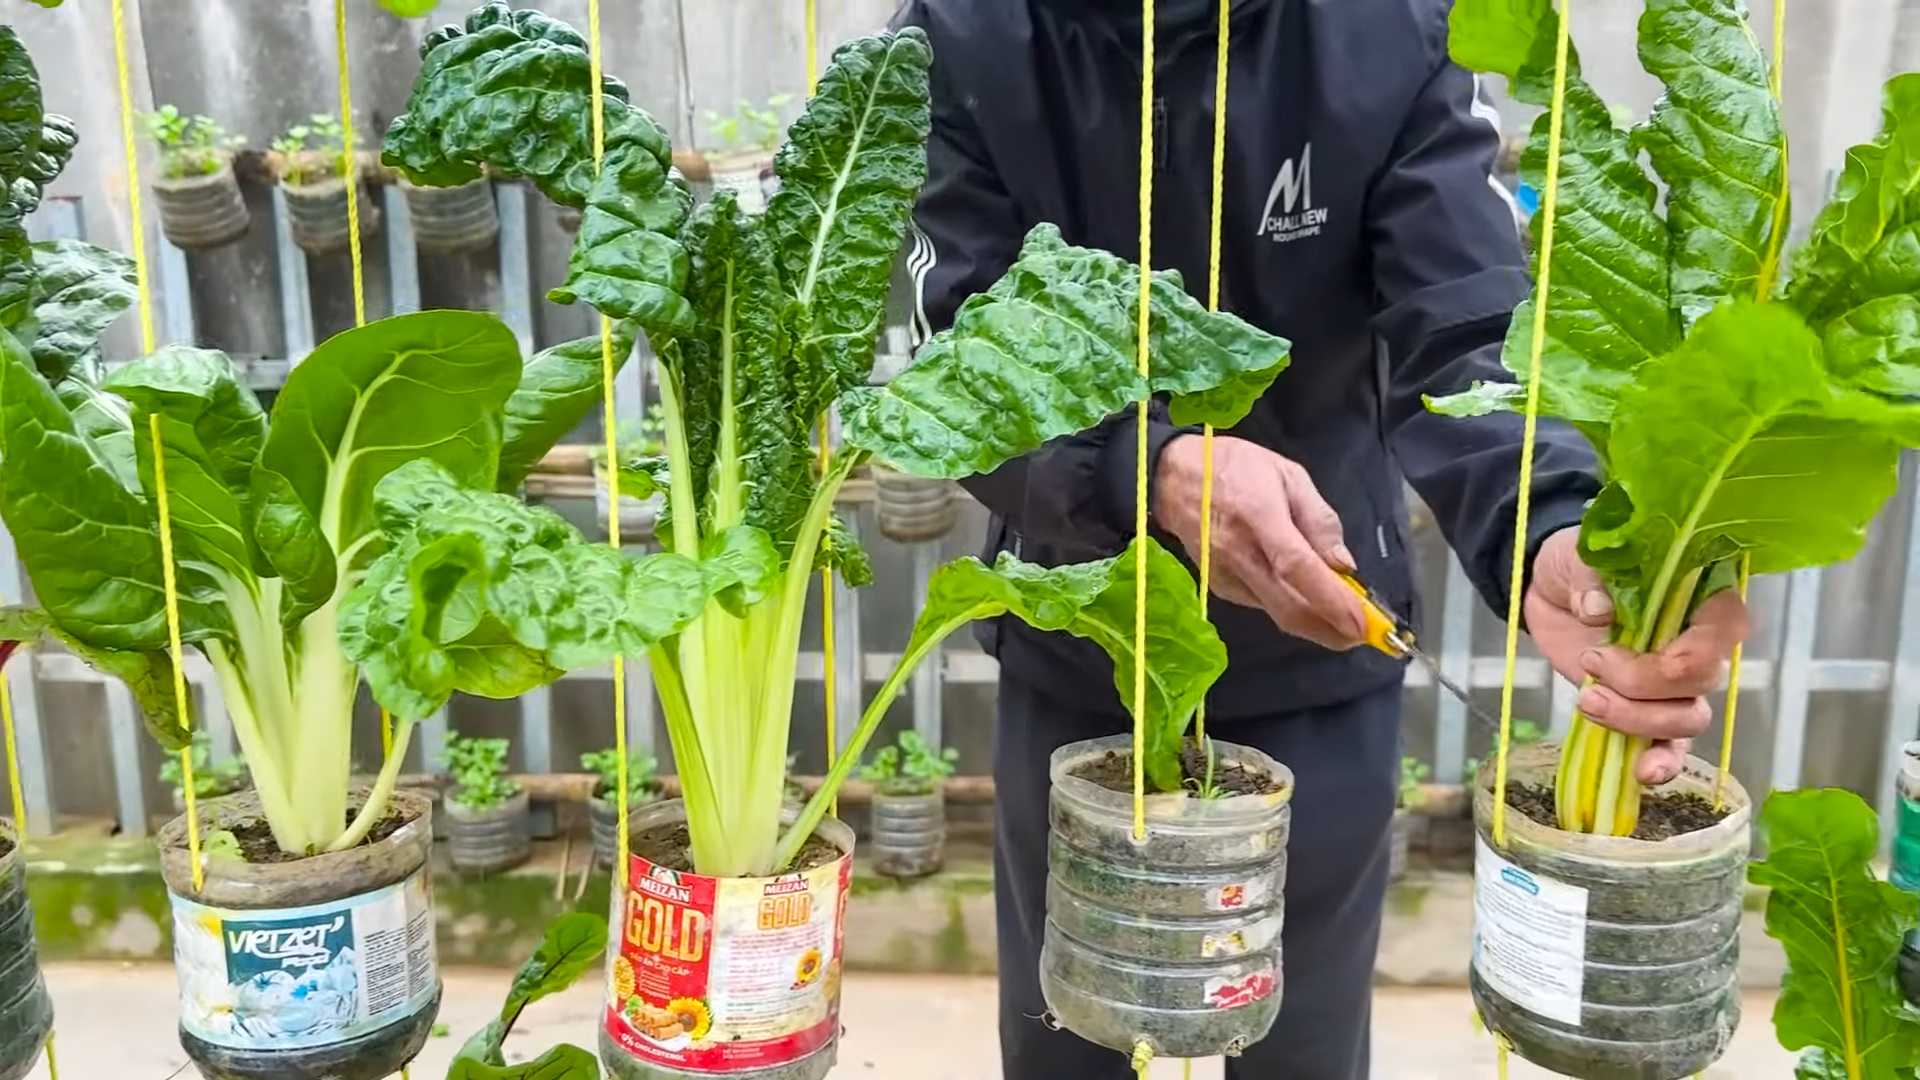
Can I grow rainbow chard in containers?
Yes, rainbow chard can be grown successfully in containers. Choose a container that is at least 12 inches deep and wide, and fill it with a well-draining potting mix. Make sure the container has drainage holes to prevent waterlogging. Place the container in a sunny location and water regularly.
Is rainbow chard nutritious?
Yes, rainbow chard is a highly nutritious vegetable. It is an excellent source of vitamins A, C, and K, as well as minerals like potassium, magnesium, and iron. It is also a good source of fiber and antioxidants. Incorporating rainbow chard into your diet can help to improve your overall health and well-being.
What are some ways to use rainbow chard in cooking?
Rainbow chard is a versatile vegetable that can be used in a variety of dishes. It can be eaten raw in salads, sautéed with garlic and olive oil, added to soups and stews, or used as a filling for quiches and omelets. The stems can also be cooked separately and used in stir-fries or side dishes. Get creative and experiment with different recipes to discover your favorite ways to enjoy rainbow chard.
Leave a Comment