
Honeyberry Harvest Garden Tour: Ever dreamt of strolling through your backyard, basket in hand, overflowing with sweet, juicy berries you grew yourself? I know I have! And let me tell you, that dream can become a delicious reality, even if you don’t have acres of land. This isn’t just about growing berries; it’s about creating a sustainable, rewarding connection with nature, right outside your door.
For centuries, cultivating your own food has been a cornerstone of self-sufficiency and a celebration of the seasons. From ancient kitchen gardens to modern-day urban farms, the desire to nurture and harvest has been deeply ingrained in our human spirit. And while the idea of a bountiful harvest might seem daunting, especially when it comes to unique fruits like honeyberries, I’m here to show you that it’s totally achievable with a few clever DIY tricks and hacks.
Why do you need these tips? Because let’s face it, store-bought berries can be expensive and often lack the vibrant flavor of homegrown goodness. Plus, there’s nothing quite like the satisfaction of knowing exactly where your food comes from and the joy of sharing your harvest with friends and family. So, join me on this Honeyberry Harvest Garden Tour, and let’s unlock the secrets to a thriving berry patch, one DIY project at a time!
DIY Honeyberry Trellis: Maximize Your Harvest and Garden Space!
Hey fellow gardeners! I’m so excited to share this project with you. If you’re like me and love growing honeyberries (also known as haskaps), you know they can get a bit unruly. They tend to sprawl, making harvesting a challenge and taking up valuable garden real estate. That’s why I decided to build a simple, yet effective, trellis system to keep my honeyberries happy, healthy, and producing tons of delicious berries! This DIY trellis is budget-friendly, easy to customize, and will make a huge difference in your honeyberry harvest.
Why Trellis Honeyberries?
Before we dive into the how-to, let’s quickly chat about why trellising honeyberries is a great idea:
* Improved Air Circulation: Trellising opens up the plant, allowing for better airflow. This helps prevent fungal diseases that can plague honeyberries, especially in humid climates.
* Easier Harvesting: No more bending and reaching through tangled branches! A trellis lifts the berries, making them much easier to pick. Trust me, your back will thank you.
* Increased Sunlight Exposure: By spreading out the branches, more sunlight reaches the berries, leading to better ripening and sweeter fruit.
* Space Saving: Trellising allows you to grow honeyberries in a smaller footprint, perfect for those of us with limited garden space.
* Aesthetically Pleasing: Let’s be honest, a well-trellised honeyberry bush looks fantastic! It adds structure and visual interest to your garden.
Materials You’ll Need
Okay, let’s gather our supplies. This trellis is designed to be simple and affordable, so you probably already have some of these items on hand.
* Wooden Posts: I used four 4×4 treated lumber posts, each 6 feet long. The length will depend on the mature size of your honeyberry variety. Make sure they are pressure treated to withstand the elements.
* Horizontal Supports: I opted for 1×2 untreated lumber for the horizontal supports. You’ll need enough to create several layers of support. The length will depend on the desired width of your trellis. I used eight 8-foot pieces.
* Screws: Exterior-grade wood screws are essential. I used 2.5-inch screws for attaching the horizontal supports to the posts.
* Staple Gun and Staples: For attaching the wire mesh.
* Wire Mesh: I used galvanized wire mesh with 2-inch openings. This provides excellent support for the branches and allows for easy harvesting. You’ll need enough to cover the entire trellis frame.
* Measuring Tape: Accurate measurements are key to a successful project.
* Pencil or Marker: For marking cut lines and screw locations.
* Drill with Drill Bits: For pre-drilling screw holes and driving screws.
* Saw: To cut the lumber to the desired lengths. A circular saw or hand saw will work.
* Level: To ensure the posts are plumb and the horizontal supports are level.
* Post Hole Digger or Shovel: For digging the holes for the posts.
* Gloves: To protect your hands.
* Safety Glasses: Always wear safety glasses when working with power tools.
* Optional: Wood Stain or Paint: To protect and beautify the trellis.
Step-by-Step Instructions
Alright, let’s get building!
Phase 1: Preparing the Posts and Horizontal Supports
1. Cut the Horizontal Supports: Decide on the width of your trellis. I wanted mine to be about 4 feet wide, so I cut my 1×2 lumber into 4-foot lengths. You’ll need to cut all eight pieces to the same length.
2. Treat the Cut Ends: If you’re using pressure-treated lumber for the posts, the cut ends are no longer protected. Apply a wood preservative to the cut ends to prevent rot.
3. Sand the Lumber: Lightly sand all the lumber to remove any splinters or rough edges. This will make the trellis safer to handle and give it a smoother finish.
4. Stain or Paint (Optional): If you want to stain or paint your trellis, now is the time to do it. Apply a coat of primer first, followed by two coats of your chosen stain or paint. Let it dry completely before moving on to the next step. I chose a natural wood stain to blend in with my garden.
Phase 2: Setting the Posts
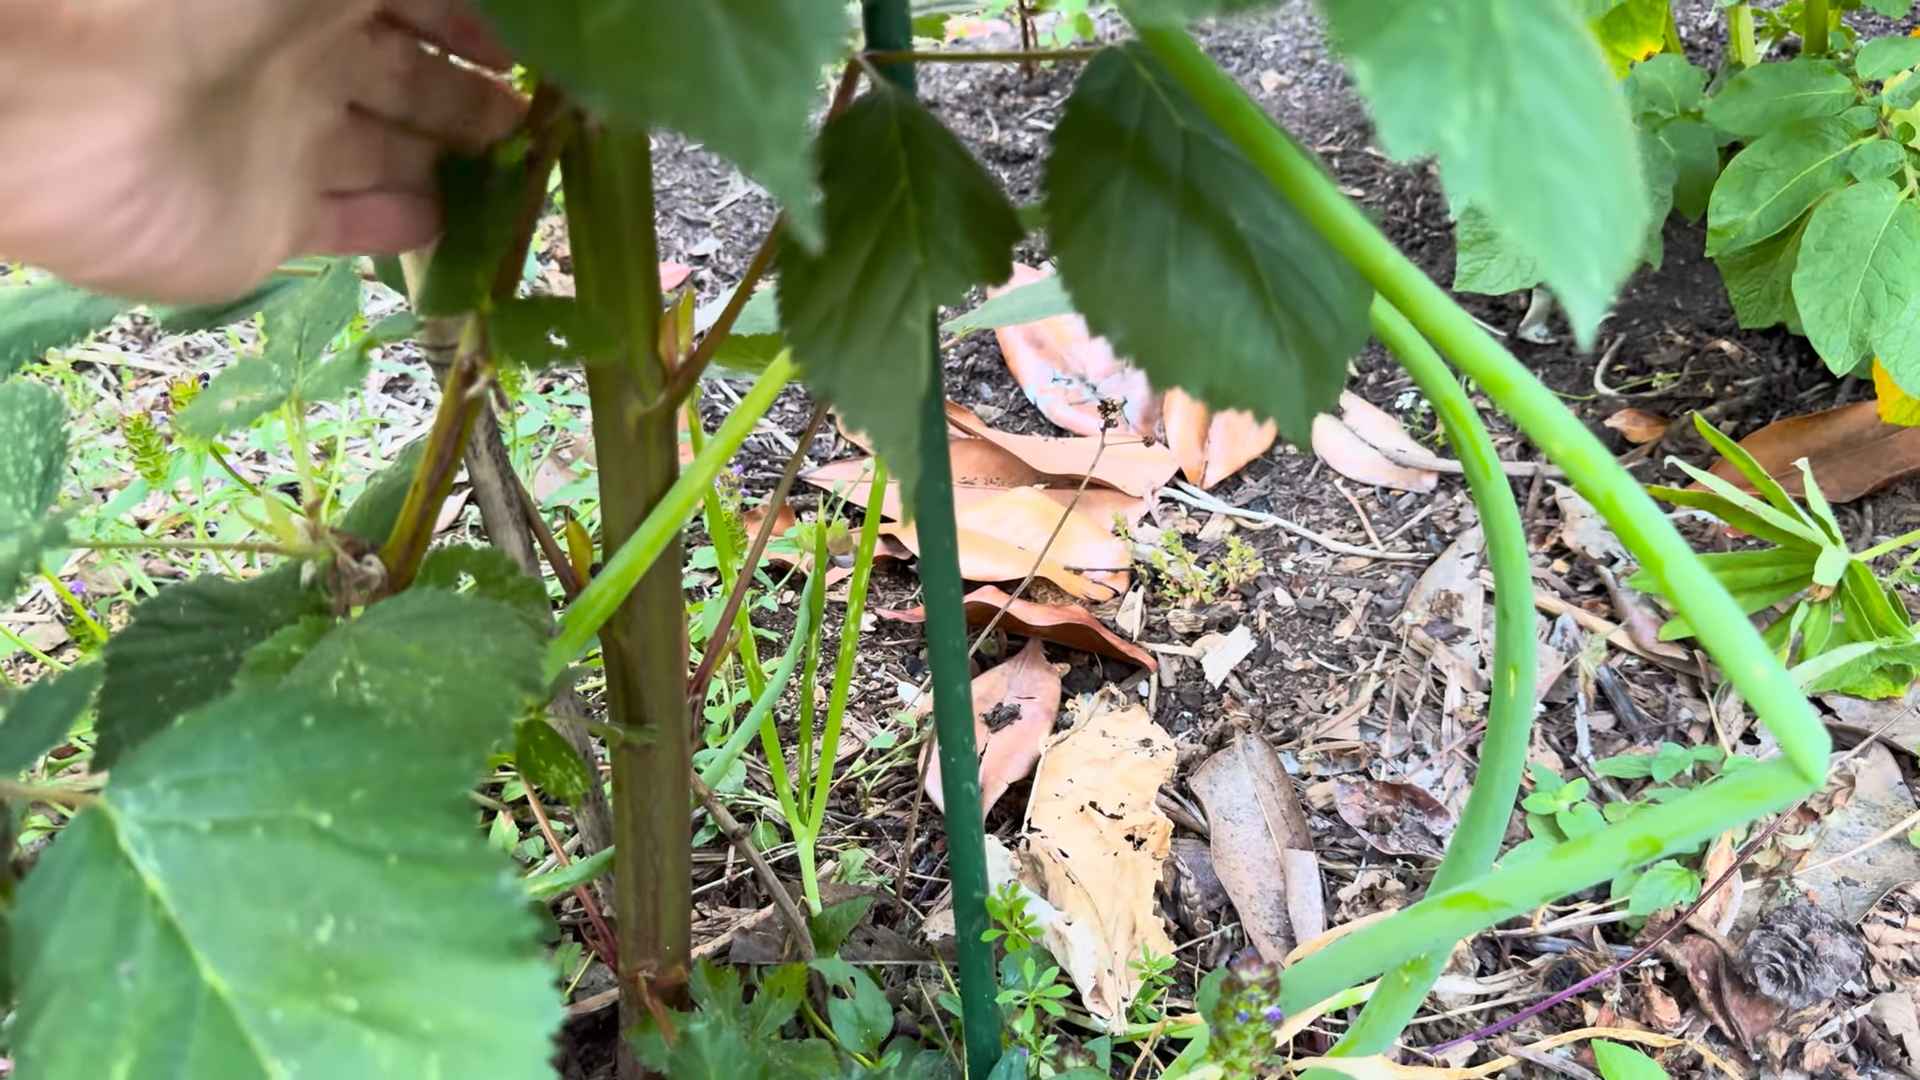
1. Mark the Post Locations: Determine the location of your trellis and mark the positions of the four posts. The posts should form a rectangle, with the honeyberry bush in the center. Make sure you have enough space around the bush for it to grow.
2. Dig the Post Holes: Use a post hole digger or shovel to dig the holes for the posts. The holes should be deep enough to bury at least 2 feet of the posts. This will provide adequate support for the trellis. I made mine 2.5 feet deep.
3. Position the Posts: Place the posts in the holes, making sure they are plumb (perfectly vertical). Use a level to check the plumbness.
4. Secure the Posts: Backfill the holes with soil, tamping it down firmly around the posts. You can also use concrete to secure the posts, but I found that soil was sufficient for my needs.
5. Check for Level: Double-check that the posts are still plumb and level after backfilling the holes. Adjust as needed.
Phase 3: Attaching the Horizontal Supports
1. Determine Support Spacing: Decide how far apart you want the horizontal supports to be. I spaced mine about 12 inches apart, starting about 1 foot from the ground. This provides ample support for the honeyberry branches.
2. Mark Screw Locations: Use a measuring tape and pencil to mark the locations of the screws on the posts. Make sure the marks are aligned on all four posts.
3. Pre-Drill Screw Holes: Pre-drilling screw holes will prevent the wood from splitting when you drive in the screws. Use a drill bit that is slightly smaller than the diameter of the screws.
4. Attach the Horizontal Supports: Position the horizontal supports against the posts, aligning them with the pre-drilled holes. Use the wood screws to attach the supports to the posts. Make sure the supports are level as you attach them.
5. Repeat for All Supports: Repeat steps 1-4 for all the horizontal supports. You should now have a sturdy frame for your trellis.
Phase 4: Attaching the Wire Mesh
1. Measure and Cut the Wire Mesh: Measure the dimensions of the trellis frame and cut the wire mesh to fit. Use wire cutters to cut the mesh. Be careful, as the cut edges can be sharp.
2. Attach the Wire Mesh: Use a staple gun to attach the wire mesh to the trellis frame. Start at one corner and work your way around, stapling the mesh to the posts and horizontal supports. Make sure the mesh is taut and secure.
3. Trim Excess Mesh: Use wire cutters to trim any excess wire mesh.
4. Inspect for Sharp Edges: Carefully inspect the trellis for any sharp edges or loose staples. Use pliers to bend over any sharp edges and hammer in any loose staples.
Final Touches and Planting
1. Reinforce if Needed: If you feel the trellis needs additional support, you can add diagonal braces to the corners.
2. Plant Your Honeyberry: If you haven’t already, plant your honeyberry bush in the center of the trellis.
3. Train the Branches: As the honeyberry bush grows, gently train the branches to grow along the wire mesh. Use plant ties or twine to secure the branches if needed.
4. Water and Fertilize: Water and fertilize your honeyberry bush regularly to promote healthy growth and abundant fruit production.
Tips and Tricks
* Choose the Right Honeyberry Variety: Some honeyberry varieties are more compact than others. Choose a variety that is well-suited to trellising.
* Consider the Mature Size: Make sure the trellis is large enough to accommodate the mature size of your honeyberry bush.
* Use Quality Materials: Investing in quality materials will ensure that your trellis lasts for many years.
* Protect the Wood: Applying a wood preservative or stain will help protect the wood from the elements and extend the life of your trellis.
* Monitor for Pests and Diseases: Regularly inspect your honeyberry bush for pests and diseases. Take action promptly to prevent problems from spreading.
* Prune Regularly: Prune your honeyberry bush regularly to maintain its shape and promote fruit production.
* Be Patient: It may take a few years for your honeyberry bush
Conclusion
So, there you have it! Transforming your honeyberry harvest into a delicious and shelf-stable jam is not only achievable but incredibly rewarding. This DIY honeyberry jam recipe is a must-try for several compelling reasons. First and foremost, it allows you to savor the unique and tangy-sweet flavor of your homegrown honeyberries long after the harvest season has ended. Store-bought jams simply can’t compare to the vibrant taste and freshness you get from using your own berries.
Beyond the superior flavor, making your own honeyberry jam gives you complete control over the ingredients. You can adjust the sweetness to your liking, opting for less sugar or using natural sweeteners like agave or maple syrup. You can also avoid artificial preservatives and additives that are often found in commercially produced jams. This is especially important for those with dietary restrictions or a preference for natural foods.
Furthermore, this process is incredibly satisfying. There’s something deeply gratifying about taking the fruits of your labor – literally – and transforming them into something delicious and useful. It connects you to the food you eat in a way that buying a jar from the store never could.
Don’t be afraid to experiment with variations! Try adding a touch of lemon zest or juice for a brighter flavor. A pinch of cinnamon or cardamom can add warmth and complexity. For a more adventurous twist, consider incorporating other complementary fruits like raspberries or blueberries. You could even add a splash of your favorite liqueur, such as Grand Marnier or Kirsch, for an extra layer of flavor.
Ultimately, this DIY honeyberry jam recipe is more than just a way to preserve your harvest; it’s an opportunity to connect with nature, express your creativity, and enjoy the unparalleled taste of homemade goodness. We encourage you to give it a try and experience the joy of creating your own delicious honeyberry jam.
Once you’ve made your first batch, we’d love to hear about your experience! Share your photos, tips, and variations in the comments below. Let’s build a community of honeyberry jam enthusiasts and inspire others to embrace the joys of DIY food preservation. Happy jamming!
Frequently Asked Questions (FAQ)
What are honeyberries, and what do they taste like?
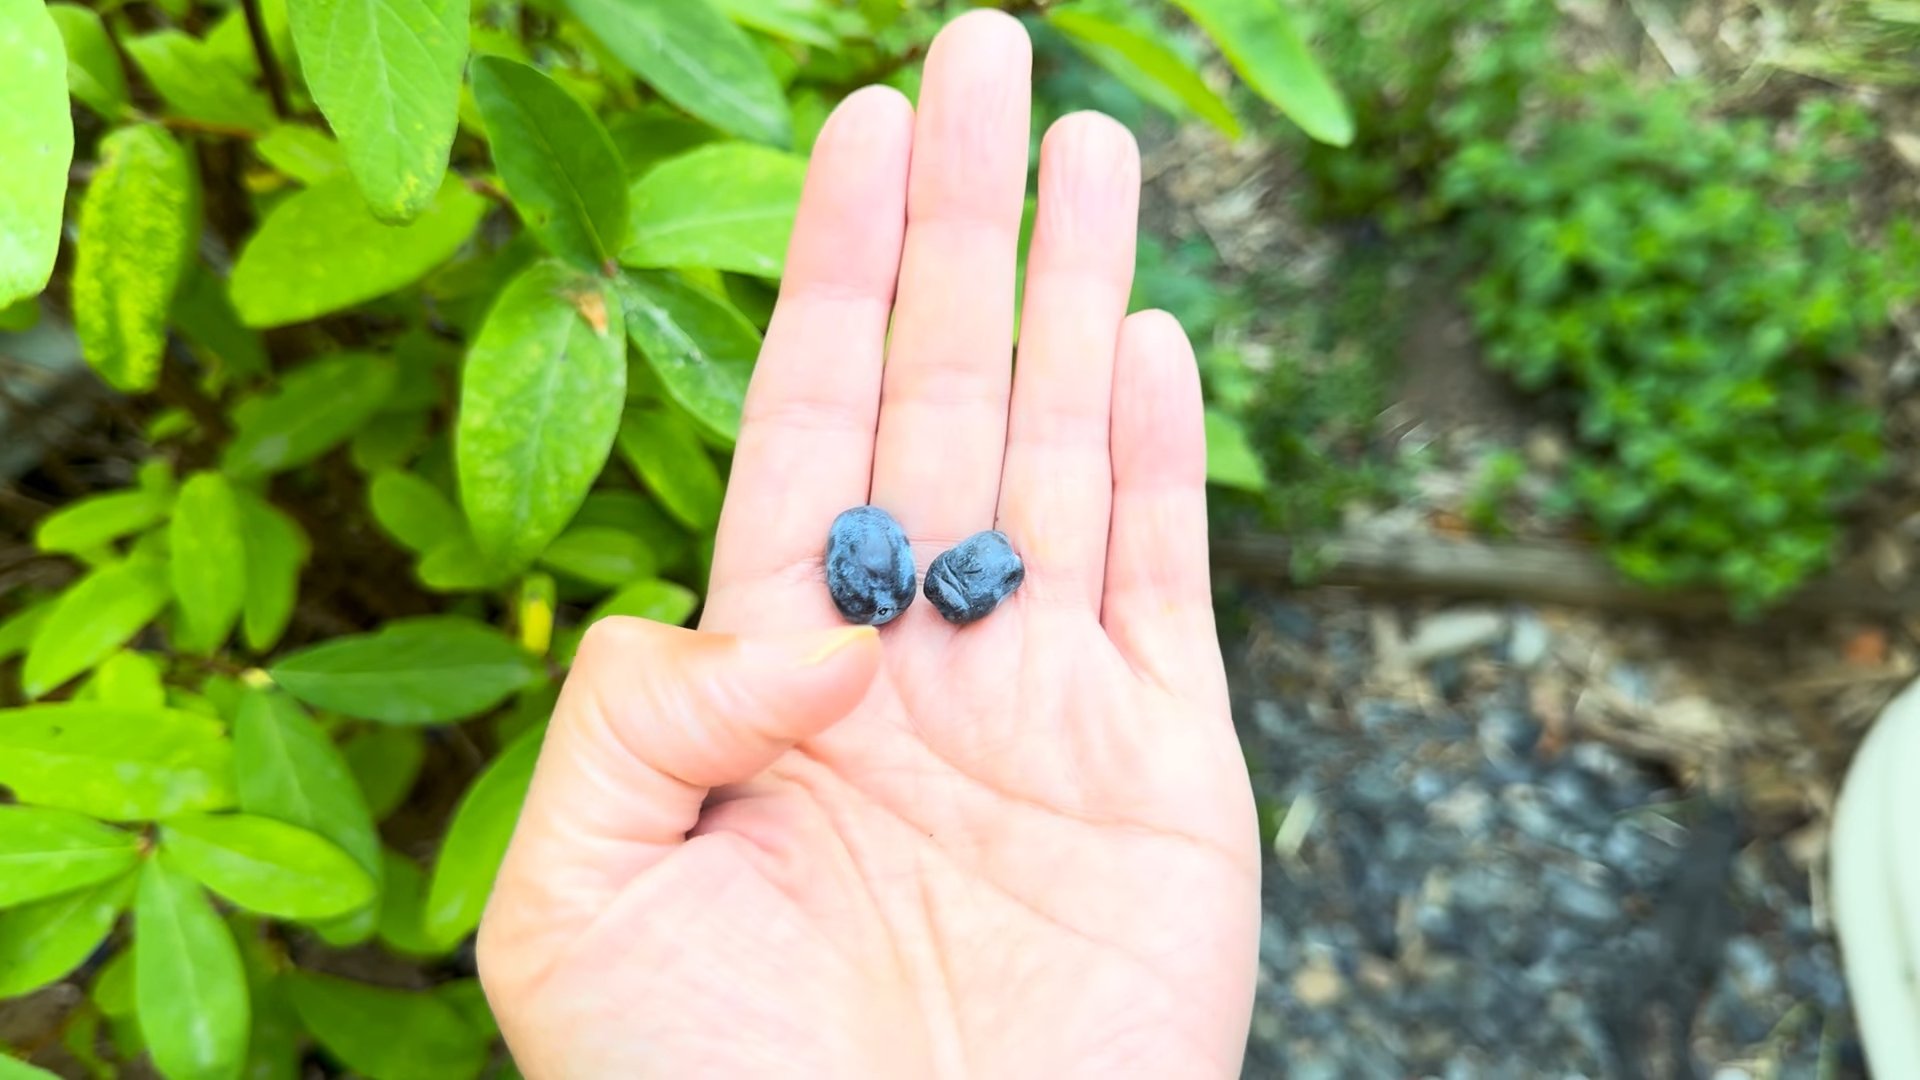
Honeyberries, also known as Haskap berries, are elongated, dark blue berries that ripen earlier than most other berries, typically in late spring or early summer. They are native to colder climates and are becoming increasingly popular among home gardeners. The taste of honeyberries is often described as a combination of blueberry, raspberry, and black currant, with a slightly tangy or tart undertone. The flavor can vary depending on the variety and ripeness of the berry.
Can I use frozen honeyberries for this jam recipe?
Yes, absolutely! Frozen honeyberries work perfectly well for making jam. In fact, using frozen berries can sometimes be advantageous as the freezing process helps to break down the cell walls, releasing more pectin and resulting in a thicker jam. Just be sure to thaw the berries slightly before using them in the recipe. You don’t need to thaw them completely; just enough so that they are no longer rock solid.
How do I know when the jam is ready?
There are several ways to test the doneness of your honeyberry jam. One common method is the “saucer test.” Place a small saucer in the freezer before you start making the jam. When you think the jam is nearing completion, spoon a small amount onto the cold saucer and return it to the freezer for about a minute. Then, push the jam with your finger. If it wrinkles or forms a skin, it’s ready. If it’s still runny, continue cooking the jam for a few more minutes and test again. Another method is to use a candy thermometer. The jam is ready when it reaches 220°F (104°C).
What kind of pectin should I use?
You can use either powdered pectin or liquid pectin for this honeyberry jam recipe. If using powdered pectin, add it to the honeyberries before adding the sugar. If using liquid pectin, add it after the sugar has dissolved and the mixture is boiling vigorously. Be sure to follow the instructions on the pectin package, as different brands may have slightly different recommendations. Some honeyberry varieties are naturally high in pectin, so you may be able to make jam without adding any additional pectin. However, adding pectin will help ensure a consistent and reliable set.
How long will the honeyberry jam last?
Properly canned honeyberry jam can last for up to two years in a cool, dark place. Once opened, the jam should be stored in the refrigerator and consumed within a few weeks. It’s crucial to follow proper canning procedures to ensure the safety and longevity of your jam. This includes using sterilized jars and lids, processing the jars in a boiling water bath for the recommended time, and checking the seals to ensure they are airtight.
Can I reduce the amount of sugar in the recipe?
Yes, you can reduce the amount of sugar in the recipe, but it’s important to understand that sugar plays a role in both the flavor and preservation of the jam. Reducing the sugar too much can result in a jam that is too tart, has a shorter shelf life, or doesn’t set properly. If you want to reduce the sugar, consider using a low-sugar pectin or adding a natural sweetener like honey or maple syrup. However, be aware that these sweeteners can alter the flavor of the jam. Start by reducing the sugar by a small amount and taste as you go, adjusting to your preference.
What if my jam doesn’t set?
If your honeyberry jam doesn’t set, don’t panic! There are a few things you can try. One option is to recook the jam with additional pectin. For every 4 cups of unset jam, mix 1/4 cup of sugar with 1 tablespoon of powdered pectin. Bring the jam back to a boil and cook for a few minutes, stirring constantly, until it thickens. Another option is to use the unset jam as a sauce for ice cream, pancakes, or waffles. It will still be delicious, even if it’s not a traditional jam consistency.
Can I use other fruits in combination with honeyberries?
Absolutely! Honeyberries pair well with a variety of other fruits, such as raspberries, blueberries, strawberries, and even rhubarb. Experimenting with different combinations can create unique and delicious flavor profiles. When adding other fruits, be sure to adjust the sugar and pectin accordingly, as different fruits have different levels of natural sweetness and pectin content.
What are some creative ways to use honeyberry jam?
Beyond the classic toast and biscuits, honeyberry jam can be used in a variety of creative ways. Try using it as a glaze for roasted meats or vegetables, as a filling for pastries or cakes, or as a topping for yogurt or oatmeal. You can also stir it into cocktails or use it to make a delicious vinaigrette for salads. The possibilities are endless!
Where can I find honeyberries to make this jam?
Honeyberries are becoming increasingly available at local farmers’ markets and nurseries. You can also order honeyberry plants online and grow your own! If you don’t have access to fresh honeyberries, you may be able to find frozen honeyberries at specialty grocery stores or online retailers. Growing your own is the best way to ensure a steady supply of these delicious and nutritious berries.

Leave a Comment