
Growing Water Spinach in Containers: Unlock the secrets to a thriving, delicious, and space-saving garden! Have you ever dreamed of harvesting fresh, vibrant greens right from your balcony or patio? I’m here to tell you, it’s absolutely possible, even if you’re short on space! This DIY guide is your passport to cultivating your very own water spinach bounty, no sprawling garden required.
Water spinach, also known as Ong Choy or Kang Kong, has a rich history, deeply rooted in Asian cuisine. For centuries, it’s been a staple in stir-fries, soups, and salads, prized for its mild, slightly sweet flavor and impressive nutritional value. Imagine adding that fresh, homegrown goodness to your next meal!
But why should you bother with growing water spinach in containers? Well, for starters, it’s incredibly rewarding! There’s nothing quite like the satisfaction of nurturing a plant from seed to harvest. Plus, in today’s world, knowing where your food comes from is more important than ever. With this DIY trick, you can control the quality of your produce, avoid harmful pesticides, and enjoy the freshest possible greens. More importantly, this guide will help you save money and reduce trips to the grocery store. So, let’s dive in and discover how easy it is to bring the taste of Asia to your own backyard (or balcony!).
Growing Water Spinach in Containers: A Beginner’s Guide
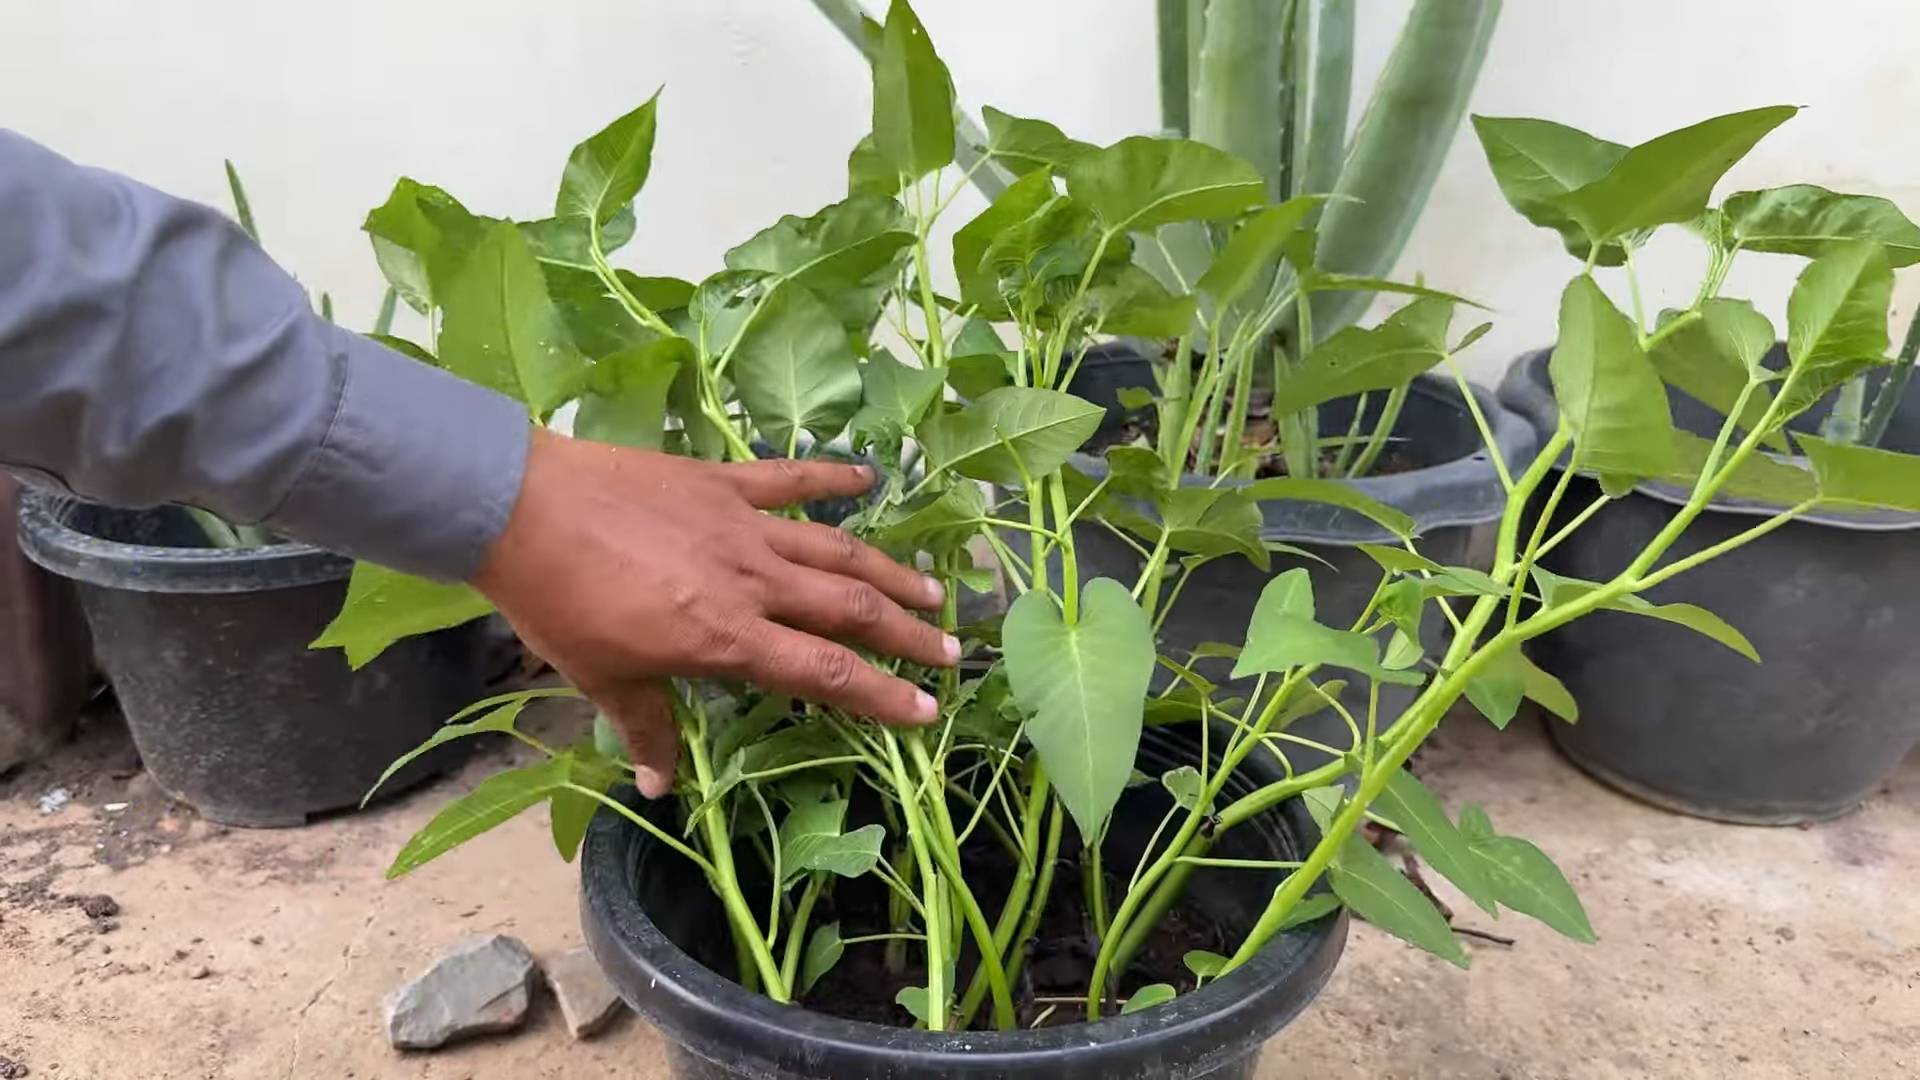
Hey there, fellow gardening enthusiasts! I’m so excited to share my experience with growing water spinach (also known as Ong Choy or Kang Kong) in containers. It’s surprisingly easy, even if you don’t have a huge garden. This leafy green is packed with nutrients and has a delicious, slightly nutty flavor. Plus, it grows super fast, so you’ll be harvesting fresh greens in no time! Let’s dive in!
What You’ll Need
Before we get started, let’s gather all the necessary supplies. Trust me, having everything ready beforehand will make the whole process much smoother.
* Water Spinach Seeds: You can find these online or at your local Asian grocery store. Look for varieties specifically suited for container gardening if possible.
* Containers: I recommend using containers that are at least 12 inches deep and wide. Water spinach loves water, so a container with good drainage is essential, but we’ll also be keeping it consistently moist. Plastic tubs, large pots, or even repurposed buckets work great!
* Potting Mix: Use a high-quality potting mix that retains moisture well. Avoid using garden soil, as it can compact in containers and hinder drainage. I like to mix in some compost for added nutrients.
* Water: Obviously! You’ll need plenty of water to keep your water spinach happy.
* Fertilizer (Optional): A balanced liquid fertilizer or compost tea can help boost growth, but it’s not strictly necessary.
* Sunlight: Water spinach needs at least 6 hours of sunlight per day. Choose a sunny spot on your balcony, patio, or even indoors near a bright window.
* Gardening Gloves: To keep your hands clean and protected.
* Watering Can or Hose: For easy watering.
* Scissors or Pruning Shears: For harvesting.
Preparing Your Containers
This step is crucial for ensuring your water spinach has a healthy start.
1. Clean Your Containers: If you’re using old containers, wash them thoroughly with soap and water to remove any dirt or debris.
2. Ensure Proper Drainage: Make sure your containers have drainage holes at the bottom. If not, drill a few holes to prevent waterlogging.
3. Add Potting Mix: Fill your containers with the potting mix, leaving about an inch or two of space at the top.
4. Moisten the Soil: Water the potting mix thoroughly until it’s evenly moist but not soggy.
Sowing the Seeds
Now comes the fun part – planting the seeds!
1. Sow the Seeds: Sprinkle the water spinach seeds evenly over the surface of the potting mix. You can also sow them in rows if you prefer.
2. Cover the Seeds: Lightly cover the seeds with a thin layer of potting mix (about ¼ inch).
3. Water Gently: Water the seeds gently using a watering can or spray bottle to avoid disturbing them.
4. Keep Moist: Keep the soil consistently moist by watering regularly. You can also cover the containers with plastic wrap to create a humid environment, but be sure to remove it once the seeds start to germinate.
Caring for Your Water Spinach
This is where the magic happens! Consistent care is key to a bountiful harvest.
1. Sunlight: Place your containers in a sunny location where they’ll receive at least 6 hours of sunlight per day. If you’re growing indoors, use grow lights to supplement natural light.
2. Watering: Water spinach loves water, so keep the soil consistently moist. Water deeply whenever the top inch of soil feels dry to the touch. In hot weather, you may need to water daily or even twice a day.
3. Fertilizing (Optional): If you want to boost growth, fertilize your water spinach every 2-3 weeks with a balanced liquid fertilizer or compost tea. Follow the instructions on the fertilizer packaging.
4. Weeding: Keep an eye out for weeds and remove them promptly to prevent them from competing with your water spinach for nutrients and water.
5. Pest Control: Water spinach is generally pest-resistant, but you may occasionally encounter aphids or other common garden pests. You can control these pests by spraying them with insecticidal soap or neem oil.
Harvesting Your Water Spinach
The best part! You can start harvesting your water spinach about 4-6 weeks after planting.
1. Harvesting Technique: Use scissors or pruning shears to cut the stems about 6 inches above the soil line. This will encourage new growth and allow you to harvest multiple times.
2. Harvest Regularly: Harvest your water spinach regularly to keep it producing new growth. The more you harvest, the more it will grow!
3. Storage: Store your harvested water spinach in the refrigerator for up to a week. Wrap it in a damp paper towel and place it in a plastic bag to keep it fresh.
Troubleshooting
Even with the best care, you might encounter a few challenges along the way. Here are some common problems and how to fix them:
* Yellowing Leaves: This could be a sign of overwatering, underwatering, or nutrient deficiency. Check the soil moisture and adjust your watering accordingly. If the soil is consistently moist, you may be overwatering. If the soil is dry, you need to water more frequently. You can also try fertilizing your water spinach with a balanced liquid fertilizer.
* Slow Growth: This could be due to insufficient sunlight, poor soil, or lack of nutrients. Make sure your water spinach is getting enough sunlight and that the soil is well-draining and nutrient-rich. You can also try fertilizing your water spinach with a balanced liquid fertilizer.
* Pests: Aphids, spider mites, and other pests can sometimes attack water spinach. Inspect your plants regularly for signs of pests and treat them with insecticidal soap or neem oil if necessary.
Tips for Success
Here are a few extra tips to help you grow the best water spinach possible:
* Soak Seeds Before Planting: Soaking the seeds in water for 24 hours before planting can improve germination rates.
* Succession Planting: Plant new seeds every few weeks to ensure a continuous harvest throughout the growing season.
* Provide Support: As your water spinach grows, it may need some support to prevent the stems from breaking. You can use stakes or a trellis to provide support.
* Experiment with Varieties: There are many different varieties of water spinach available, so experiment with different ones to find your favorite.
* Enjoy Your Harvest: Water spinach is delicious in stir-fries, soups, salads, and more. Get creative and experiment with different recipes!
Growing Water Spinach in Water (Hydroponically)
Did you know you can also grow water spinach directly in water? It’s a fun and easy way to grow this vegetable without any soil!
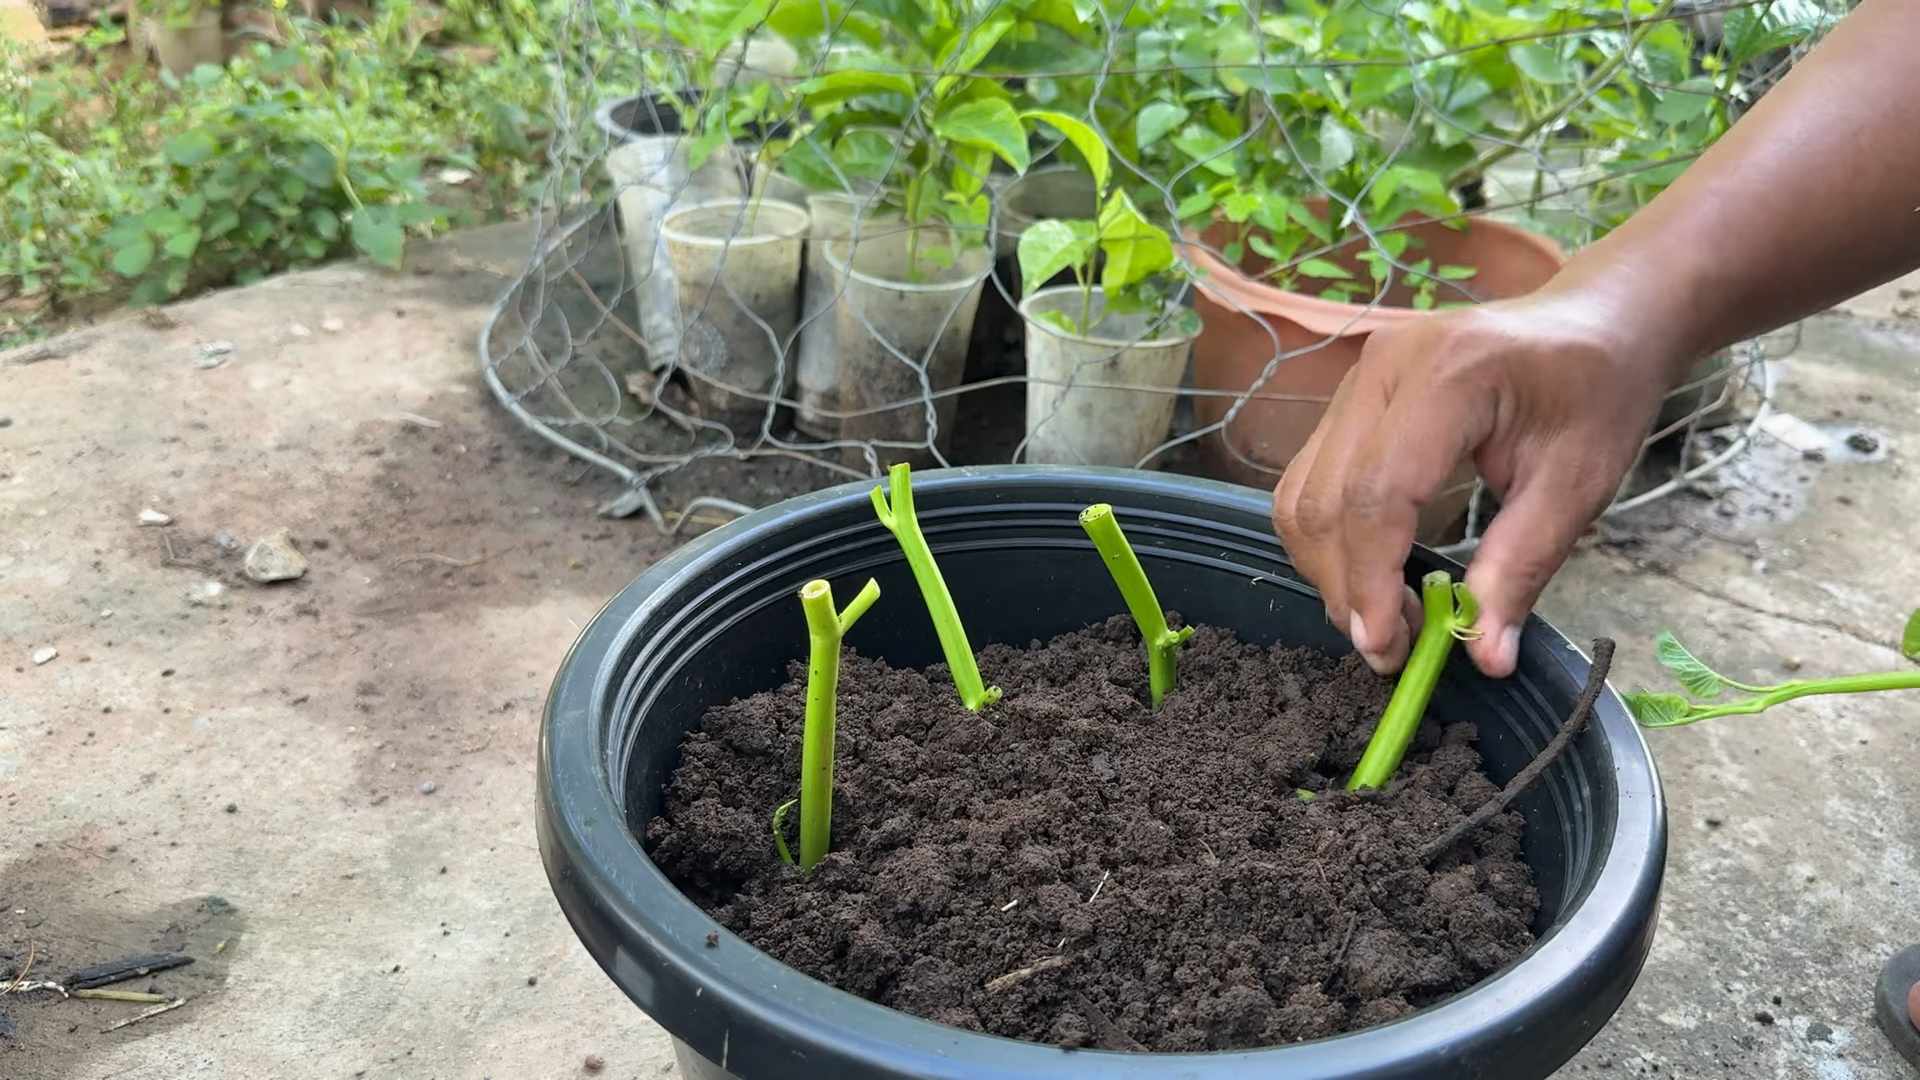
1. Prepare Your Cuttings: Take cuttings from mature water spinach plants, about 6-8 inches long. Remove the lower leaves, leaving only a few leaves at the top.
2. Rooting the Cuttings: Place the cuttings in a jar or glass filled with water. Make sure the lower nodes (where the leaves were removed) are submerged in water.
3. Change the Water Regularly: Change the water every 1-2 days to prevent algae growth and keep the water fresh.
4. Wait for Roots to Develop: In a few days, you should start to see roots developing from the nodes.
5. Transfer to a Larger Container: Once the roots are a few inches long, you can transfer the cuttings to a larger container filled with water.
6. Add Nutrients: Add a hydroponic nutrient solution to the water to provide the plants with the nutrients they need to grow. Follow the instructions on the nutrient solution packaging.
7. Provide Sunlight: Place the container in a sunny location where it will receive at least 6 hours of sunlight per day.
8. Maintain Water Level: Keep the water level consistent by adding water as needed.
9. Harvest Regularly: You can start harvesting your water spinach once it reaches a desired size. Cut the stems above the water line to encourage new growth.
Different Ways to Enjoy Your Harvest
Now that you’ve successfully grown your own water spinach, let’s talk about how to enjoy it! This versatile vegetable can be used in a variety of dishes.
* Stir-fries: Water spinach is a classic ingredient in stir-fries. Simply stir-fry it with garlic, ginger, and your favorite sauce.
* Soups: Add water spinach to soups for a nutritious and flavorful boost.
* Salads: Use young, tender water spinach leaves in salads.
* Steamed: Steam water spinach and serve it with a dipping sauce.
* Boiled: Boil water spinach and serve it
Conclusion
So, there you have it! Growing water spinach in containers is not only achievable but also incredibly rewarding. We’ve walked through the simple steps, highlighting the ease and accessibility of this DIY project. Why is this a must-try? Because it offers fresh, delicious, and nutritious greens right at your fingertips, regardless of your garden size. Imagine stepping out onto your balcony or patio and harvesting vibrant, crisp water spinach for your stir-fries, soups, or salads. The satisfaction of knowing you cultivated these greens yourself is unparalleled.
Beyond the convenience, growing your own water spinach allows you to control the growing environment, ensuring your vegetables are free from harmful pesticides and herbicides. You know exactly what goes into your food, promoting a healthier lifestyle for you and your family. Plus, it’s a fantastic way to reduce your carbon footprint by minimizing your reliance on commercially grown produce that travels long distances.
But the benefits don’t stop there! This DIY project is also incredibly versatile. Feel free to experiment with different container sizes and materials. While we recommended plastic tubs, you can also use galvanized steel containers, large ceramic pots, or even repurposed items like old bathtubs or kiddie pools. Just ensure they have adequate drainage (or that you’re prepared to manage the water level carefully).
Consider exploring different varieties of water spinach. While the most common type is the green-stemmed variety, you can also find white-stemmed and purple-stemmed cultivars, each offering a slightly different flavor profile and visual appeal. Experiment with different fertilizers to see what works best for your growing conditions. Organic options like compost tea or fish emulsion are excellent choices for promoting healthy growth.
For those living in cooler climates, you can extend the growing season by starting your water spinach indoors under grow lights. This will give your plants a head start before transplanting them outdoors once the weather warms up. You can also use a greenhouse or cold frame to protect your plants from frost and extend the harvest period.
Don’t be afraid to get creative with your setup. You can even create a mini-aquaponic system by integrating your water spinach with a small fish tank. The fish waste will provide nutrients for the plants, while the plants will help filter the water for the fish. It’s a win-win situation!
Ultimately, the key to success with this DIY trick is to provide your water spinach with plenty of sunlight, water, and nutrients. Monitor your plants regularly for any signs of pests or diseases and take action promptly to prevent problems from escalating.
We are confident that you’ll find growing water spinach in containers to be a rewarding and enjoyable experience. So, grab your containers, seeds, and get ready to embark on this exciting gardening adventure. We encourage you to try this DIY trick and share your experiences with us! Post photos of your thriving water spinach plants on social media using #DIYWaterSpinach and tag us so we can see your amazing results. We can’t wait to see what you create! Let’s cultivate a community of home gardeners who are passionate about growing their own food. Happy growing!
Frequently Asked Questions (FAQ)
What exactly is water spinach, and what does it taste like?
Water spinach, also known as ong choy, morning glory, or kangkong, is a semi-aquatic leafy green vegetable popular in Southeast Asian cuisine. It has long, hollow stems and arrow-shaped leaves. The taste is mild and slightly sweet, similar to spinach but with a nuttier undertone. It’s often described as having a refreshing, slightly crunchy texture when cooked properly.
How much sunlight does water spinach need when grown in containers?
Water spinach thrives in full sun, requiring at least 6-8 hours of direct sunlight per day. If you don’t have a spot that receives full sun, aim for the sunniest location possible. Insufficient sunlight can lead to leggy growth and reduced yields. If you are growing indoors, supplement with grow lights to ensure adequate light exposure.
What kind of soil is best for growing water spinach in containers?
While wa
So, there you have it! Growing water spinach in containers is not only achievable but also incredibly rewarding. We’ve walked through the simple steps, highlighting the ease and accessibility of this DIY project. Why is this a must-try? Because it offers fresh, delicious, and nutritious greens right at your fingertips, regardless of your garden size. Imagine stepping out onto your balcony or patio and harvesting vibrant, crisp water spinach for your stir-fries, soups, or salads. The satisfaction of knowing you cultivated these greens yourself is unparalleled.
Beyond the convenience, growing your own water spinach allows you to control the growing environment, ensuring your vegetables are free from harmful pesticides and herbicides. You know exactly what goes into your food, promoting a healthier lifestyle for you and your family. Plus, it’s a fantastic way to reduce your carbon footprint by minimizing your reliance on commercially grown produce that travels long distances.
But the benefits don’t stop there! This DIY project is also incredibly versatile. Feel free to experiment with different container sizes and materials. While we recommended plastic tubs, you can also use galvanized steel containers, large ceramic pots, or even repurposed items like old bathtubs or kiddie pools. Just ensure they have adequate drainage (or that you’re prepared to manage the water level carefully).
Consider exploring different varieties of water spinach. While the most common type is the green-stemmed variety, you can also find white-stemmed and purple-stemmed cultivars, each offering a slightly different flavor profile and visual appeal. Experiment with different fertilizers to see what works best for your growing conditions. Organic options like compost tea or fish emulsion are excellent choices for promoting healthy growth.
For those living in cooler climates, you can extend the growing season by starting your water spinach indoors under grow lights. This will give your plants a head start before transplanting them outdoors once the weather warms up. You can also use a greenhouse or cold frame to protect your plants from frost and extend the harvest period.
Don’t be afraid to get creative with your setup. You can even create a mini-aquaponic system by integrating your water spinach with a small fish tank. The fish waste will provide nutrients for the plants, while the plants will help filter the water for the fish. It’s a win-win situation!
Ultimately, the key to success with this DIY trick is to provide your water spinach with plenty of sunlight, water, and nutrients. Monitor your plants regularly for any signs of pests or diseases and take action promptly to prevent problems from escalating.
We are confident that you’ll find growing water spinach in containers to be a rewarding and enjoyable experience. So, grab your containers, seeds, and get ready to embark on this exciting gardening adventure. We encourage you to try this DIY trick and share your experiences with us! Post photos of your thriving water spinach plants on social media using #DIYWaterSpinach and tag us so we can see your amazing results. We can’t wait to see what you create! Let’s cultivate a community of home gardeners who are passionate about growing their own food. Happy growing!
Frequently Asked Questions (FAQ)
What exactly is water spinach, and what does it taste like?
Water spinach, also known as ong choy, morning glory, or kangkong, is a semi-aquatic leafy green vegetable popular in Southeast Asian cuisine. It has long, hollow stems and arrow-shaped leaves. The taste is mild and slightly sweet, similar to spinach but with a nuttier undertone. It’s often described as having a refreshing, slightly crunchy texture when cooked properly.
How much sunlight does water spinach need when grown in containers?
Water spinach thrives in full sun, requiring at least 6-8 hours of direct sunlight per day. If you don’t have a spot that receives full sun, aim for the sunniest location possible. Insufficient sunlight can lead to leggy growth and reduced yields. If you are growing indoors, supplement with grow lights to ensure adequate light exposure.
What kind of soil is best for growing water spinach in containers?
While water spinach can tolerate a variety of soil types, it prefers a rich, well-draining soil that is high in organic matter. A good mix would be equal parts of potting soil, compost, and perlite or vermiculite. The compost provides nutrients, while the perlite or vermiculite improves drainage and aeration. Avoid using heavy clay soils, as they can become waterlogged and inhibit root growth.
How often should I water my container-grown water spinach?
Water spinach is a water-loving plant, so it needs consistent moisture. Water deeply and frequently, especially during hot and dry weather. The soil should always be moist but not waterlogged. Check the soil moisture daily by sticking your finger into the soil. If the top inch feels dry, it’s time to water. You may need to water daily or even twice a day during peak summer months.
What kind of fertilizer should I use for water spinach?
Water spinach is a heavy feeder, so it benefits from regular fertilization. Use a balanced fertilizer with an NPK ratio of 10-10-10 or 20-20-20. You can also use organic fertilizers like compost tea, fish emulsion, or seaweed extract. Apply fertilizer every 2-3 weeks, following the instructions on the product label. Avoid over-fertilizing, as this can lead to excessive vegetative growth and reduced yields.
How do I harvest water spinach, and when should I start harvesting?
You can start harvesting water spinach about 4-6 weeks after planting, when the stems are about 6-8 inches long. To harvest, simply cut the stems a few inches above the soil line. The plant will continue to produce new shoots, allowing for multiple harvests. Harvest regularly to encourage continued growth and prevent the plants from becoming too leggy.
Are there any common pests or diseases that affect water spinach?
Water spinach is generally resistant to pests and diseases, but it can be susceptible to aphids, spider mites, and whiteflies. These pests can be controlled with insecticidal soap or neem oil. Fungal diseases like powdery mildew can also occur, especially in humid conditions. Improve air circulation and avoid overhead watering to prevent fungal problems.
Can I grow water spinach indoors?
Yes, you can grow water spinach indoors, but you’ll need to provide adequate light and humidity. Place the container near a sunny window or use grow lights to supplement natural light. Maintain a humidity level of around 60-70% by misting the plants regularly or using a humidifier.
Is water spinach safe to eat?
Yes, water spinach is safe to eat when grown properly. However, it’s important to source your seeds from a reputable supplier and avoid growing water spinach in contaminated water or soil. Water spinach can accumulate heavy metals from the environment, so it’s essential to ensure that your growing conditions are clean and safe. Always wash the leaves thoroughly before eating.
How do I store harvested water spinach?
Store harvested water spinach in the refrigerator in a plastic bag or container. It will stay fresh for about 3-5 days. To prolong its shelf life, you can wrap the stems in a damp paper towel before storing them in the refrigerator. Avoid storing water spinach near ethylene-producing fruits like bananas and apples, as this can cause it to spoil more quickly.


Leave a Comment