
Grow celery at home? Absolutely! Imagine plucking crisp, juicy celery stalks straight from your own backyard, ready to be crunched in a salad or dipped in peanut butter. Forget those limp, store-bought bunches – we’re talking about vibrant, flavorful celery grown with your own two hands. This isn’t just about saving money; it’s about connecting with nature and enjoying the unparalleled taste of homegrown goodness.
Celery, with its refreshing crunch, has been cultivated for centuries. Originating in the Mediterranean, it was initially valued more for its medicinal properties than its culinary uses. Over time, it evolved into the crisp, edible vegetable we know and love. But let’s be honest, buying celery can be a gamble. Sometimes it’s perfect, other times it’s stringy and bitter. That’s where the magic of DIY comes in!
In this article, I’m going to share some simple, yet effective, home gardening tricks and DIY hacks that will empower you to grow celery at home successfully, even if you’re a complete beginner. We’ll cover everything from choosing the right variety to troubleshooting common problems. So, ditch the grocery store celery and get ready to embark on a rewarding gardening adventure. Trust me, once you taste homegrown celery, you’ll never go back!

Growing Celery From Kitchen Scraps: A Beginner’s Guide
Hey there, fellow gardening enthusiasts! Ever wondered if you could regrow that celery stalk you’re about to toss in the compost? Well, guess what? You absolutely can! Growing celery from kitchen scraps is a super rewarding and surprisingly easy DIY project. Not only does it save you money, but it’s also a fantastic way to reduce food waste and enjoy fresh, homegrown celery. Let’s dive in!
What You’ll Need
Before we get started, let’s gather our supplies. This is a pretty low-key project, so you probably already have most of these things lying around:
* A celery stalk base (about 2 inches from the bottom, with the roots intact if possible).
* A shallow dish or bowl.
* Water (tap water is fine).
* A sunny windowsill or well-lit area.
* Potting soil.
* A pot or container (at least 6 inches in diameter).
* A spray bottle (optional, but helpful for misting).
Phase 1: Rooting Your Celery Base
This is where the magic begins! We’re going to coax those little roots to start growing again.
1. Prepare the Celery Base: Carefully cut off the celery stalk about 2 inches from the bottom. Try to keep the base intact, and if there are any tiny roots still attached, even better! Don’t worry if there aren’t any visible roots; they’ll grow.
2. Place in Water: Fill your shallow dish or bowl with about an inch of water. Place the celery base cut-side up in the water. Make sure the water level is high enough to cover the bottom of the base, but not so high that it submerges the entire thing. We want the top part to stay dry to prevent rotting.
3. Find a Sunny Spot: Place the dish with the celery base on a sunny windowsill or in a well-lit area. Celery loves sunlight, so the more light it gets, the better it will grow.
4. Change the Water Regularly: This is crucial! Change the water every 1-2 days to keep it fresh and prevent bacteria from growing. You’ll start to see new roots sprouting from the bottom of the base within a few days to a week. You might also notice some new growth from the center of the celery base.
5. Be Patient: Root growth can vary depending on the celery stalk and environmental conditions. Don’t get discouraged if you don’t see roots immediately. Just keep changing the water and providing sunlight, and they’ll eventually appear.
Phase 2: Planting Your Rooted Celery
Once your celery base has developed a good network of roots (about an inch or two long), it’s time to move it to a pot with soil.
1. Prepare the Pot: Fill your pot or container with potting soil. Make sure the pot has drainage holes to prevent waterlogging. Celery prefers well-draining soil, so avoid using heavy clay soil.
2. Create a Hole: Use your finger or a small trowel to create a hole in the center of the pot, large enough to accommodate the celery base and its roots.
3. Carefully Transplant: Gently remove the celery base from the water and carefully place it in the hole. Make sure the roots are spread out and not bunched together.
4. Cover with Soil: Fill the hole with soil, gently pressing down around the base of the celery to secure it in place. Leave the top of the celery base exposed.
5. Water Thoroughly: Water the soil thoroughly until water drains out of the drainage holes. This will help settle the soil and provide the celery with the moisture it needs to get started.
Phase 3: Caring for Your Growing Celery
Now that your celery is planted, it’s time to provide it with the care it needs to thrive.
1. Sunlight: Celery needs at least 6 hours of sunlight per day. Place your pot in a sunny location, such as a windowsill or balcony. If you don’t have enough natural light, you can supplement with a grow light.
2. Watering: Keep the soil consistently moist, but not waterlogged. Water when the top inch of soil feels dry to the touch. Avoid overwatering, as this can lead to root rot. A good rule of thumb is to water deeply every few days, depending on the weather and the size of your pot.
3. Fertilizing: Celery is a heavy feeder, meaning it needs a lot of nutrients to grow properly. Fertilize your celery every 2-3 weeks with a balanced liquid fertilizer. Follow the instructions on the fertilizer package for proper dilution. You can also use organic fertilizers like compost tea or fish emulsion.
4. Misting: Celery prefers humid conditions. Mist the leaves with water every day or two to increase humidity, especially if you live in a dry climate. A spray bottle works great for this.
5. Pest Control: Keep an eye out for pests such as aphids, spider mites, and slugs. If you notice any pests, treat them with an appropriate insecticide or organic pest control method. Neem oil is a great organic option for controlling many common garden pests.
6. Blanching (Optional): Blanching celery stalks makes them more tender and less bitter. To blanch your celery, about two weeks before harvesting, wrap the stalks with newspaper or cardboard, leaving the top leaves exposed. This will block sunlight from reaching the stalks, causing them to turn white and become more tender.
Harvesting Your Celery
After a few months of care, your celery should be ready to harvest!
1. When to Harvest: You can harvest your celery when the stalks are at least 6-8 inches long and thick enough to eat. The exact time will depend on the variety of celery and your growing conditions.
2. How to Harvest: You can harvest individual stalks as needed, or you can harvest the entire plant at once. To harvest individual stalks, simply cut them off at the base with a sharp knife. To harvest the entire plant, cut it off at the base, leaving about an inch of the roots in the soil. This will allow the plant to regrow and produce more celery.
3. Enjoy Your Harvest: Wash your harvested celery thoroughly and enjoy it in salads, soups, stews, or as a healthy snack. You can also use the leaves to add flavor to your dishes.
Troubleshooting
Even with the best care, you might encounter some challenges while growing celery. Here are a few common problems and how to fix them:
* Yellowing Leaves: This can be caused by overwatering, underwatering, or nutrient deficiencies. Check the soil moisture and adjust your watering schedule accordingly. Fertilize your celery with a balanced fertilizer to provide it with the nutrients it needs.
* Stunted Growth: This can be caused by lack of sunlight, poor soil, or pests. Make sure your celery is getting enough sunlight and that the soil is well-draining and fertile. Check for pests and treat them accordingly.
* Bitter Taste: This can be caused by lack of water or sunlight. Make sure your celery is getting enough water and sunlight. Blanching the stalks can also help reduce bitterness.
* Root Rot: This is caused by overwatering. Make sure your pot has drainage holes and avoid overwatering. If you suspect root rot, remove the affected plant from the pot and trim away any rotten roots. Repot the plant in fresh soil.
Tips for Success
Here are a few extra tips to help you succeed in growing celery from kitchen scraps:
* Start with a Healthy Celery Stalk: Choose a celery stalk that is firm, crisp, and free from blemishes. The fresher the stalk, the better the chances of success.
* Use Good Quality Potting Soil: Use a well-draining potting soil that is rich in nutrients. Avoid using heavy clay soil, as this can lead to waterlogging.
* Provide Adequate Sunlight: Celery needs at least 6 hours of sunlight per day. If you don’t have enough natural light, supplement with a grow light.
* Water Regularly: Keep the soil consistently moist, but not waterlogged. Water when the top inch of soil feels dry to the touch.
* Fertilize Regularly: Celery is a heavy feeder and needs a lot of nutrients to grow properly. Fertilize your celery every 2-3 weeks with a balanced liquid fertilizer.
* Be Patient: Growing celery from kitchen scraps takes time and patience. Don’t get discouraged if you don’t see results immediately. Just keep providing your celery with the care it needs, and you’ll eventually be rewarded with fresh, homegrown celery.
Growing celery from kitchen scraps is a fun and rewarding project that anyone can do. With a little bit of care and attention, you can enjoy fresh, homegrown celery without having to buy it from the store. So, go ahead and give it a try! You might be surprised at how easy it is to grow
Conclusion
So, there you have it! Growing celery at home, while it might seem like a task best left to professional farmers, is surprisingly achievable and incredibly rewarding. We’ve walked you through the process, from rescuing that celery base from the compost bin to nurturing it into a thriving, crunchy stalk. Why is this DIY trick a must-try? Because it’s more than just saving money on groceries; it’s about connecting with your food, reducing waste, and experiencing the satisfaction of cultivating something delicious with your own two hands.
Think about it: store-bought celery often travels long distances, losing freshness and flavor along the way. By growing your own, you’re guaranteed the freshest, most flavorful celery possible, ready to add a crisp bite to your salads, soups, and snacks. Plus, you’re actively participating in a sustainable practice by regrowing something that would otherwise be discarded.
But the benefits don’t stop there. Growing celery at home is also a fantastic learning experience, especially for children. It teaches them about the life cycle of plants, the importance of nurturing, and the joy of harvesting their own food. It’s a hands-on science lesson that’s both educational and fun.
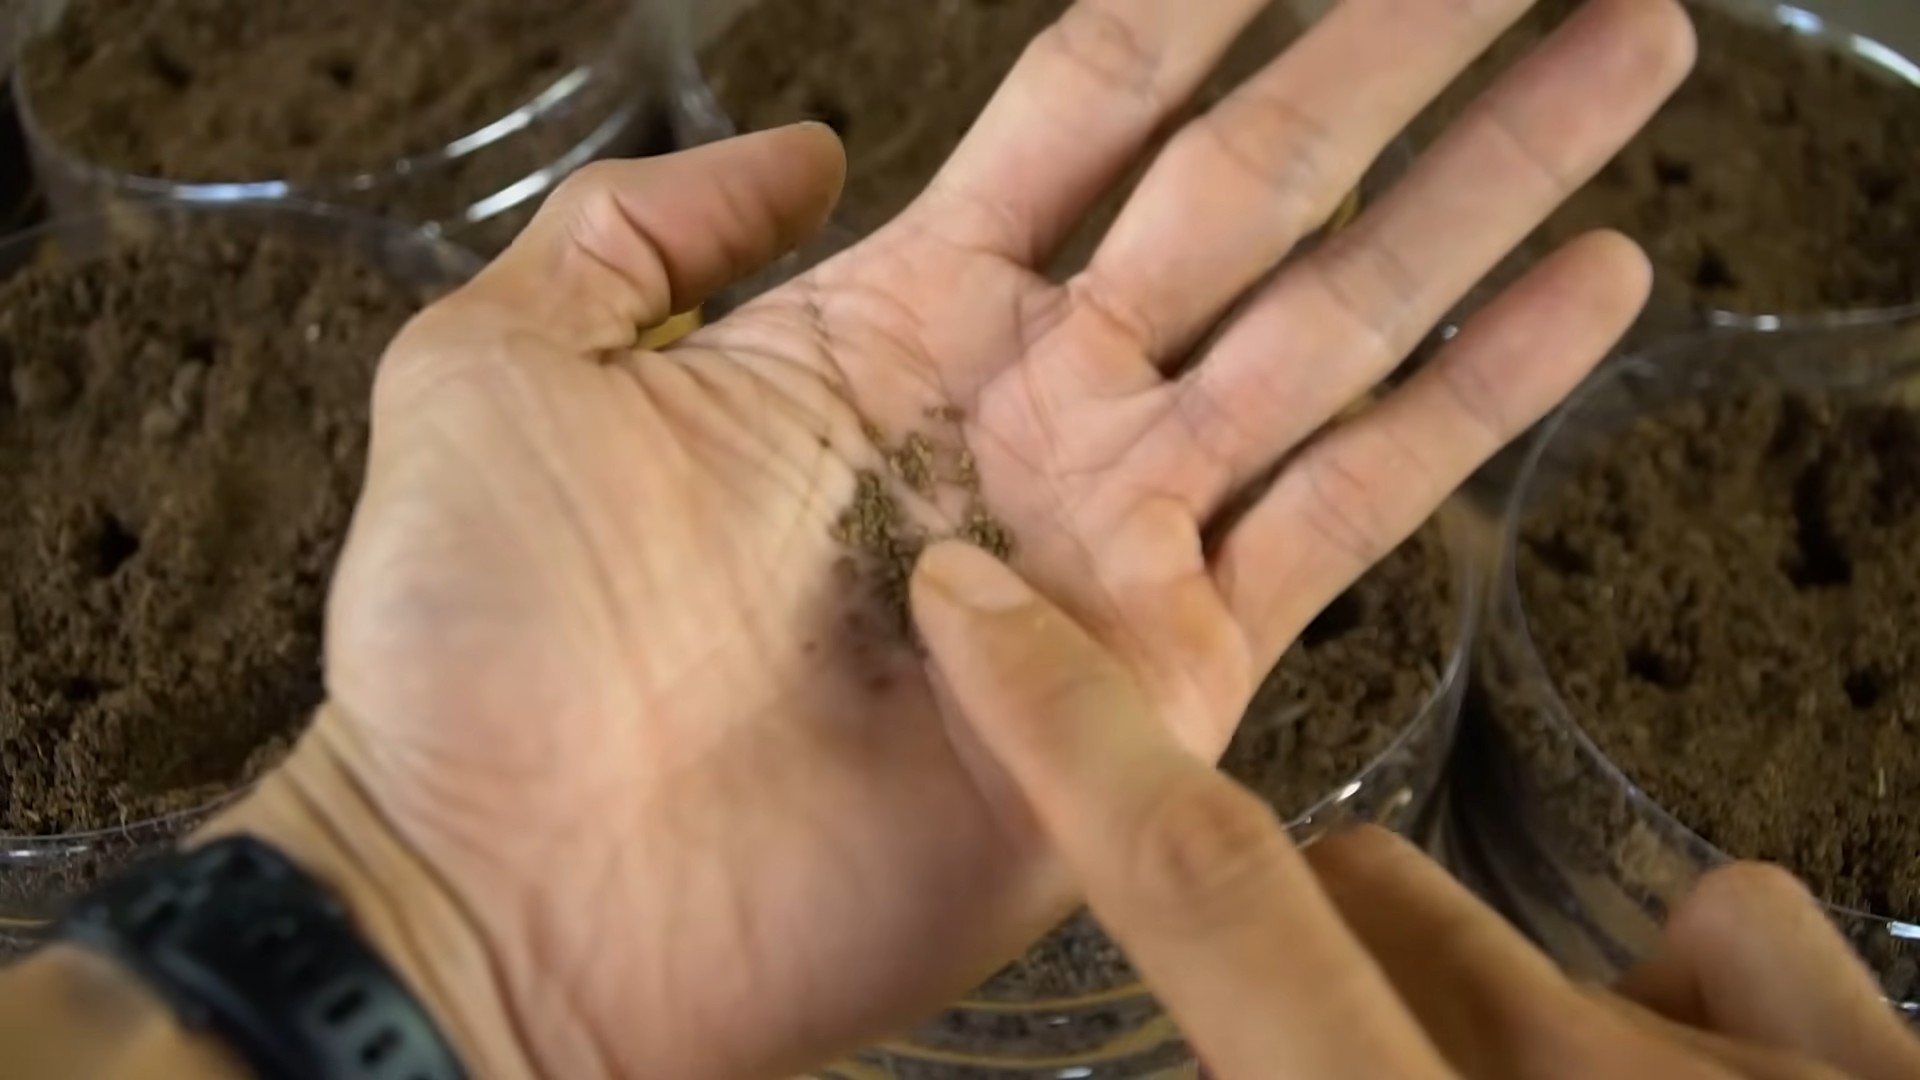
Now, let’s talk about variations. While we’ve focused on regrowing celery from the base, you can also experiment with growing it from seeds. This method requires a bit more patience and attention, but it allows you to choose from a wider variety of celery types, including different colors and flavors. Consider trying ‘Golden Self-Blanching’ celery for a milder, sweeter taste, or ‘Redventure’ for a vibrant addition to your garden.
Another variation involves adjusting the growing conditions to suit your climate. If you live in a particularly hot or sunny area, provide your celery with some afternoon shade to prevent it from bolting (going to seed prematurely). Conversely, if you live in a cooler climate, you might need to start your celery indoors to give it a head start.
Don’t be afraid to experiment with different soil types and fertilizers to see what works best for your celery. Some gardeners swear by adding compost tea to their watering routine, while others prefer using a balanced organic fertilizer. The key is to observe your plants closely and adjust your approach as needed.
Ultimately, the best way to learn is by doing. So, grab that celery base, follow our simple steps, and embark on your own celery-growing adventure. We’re confident that you’ll be amazed by the results. And remember, even if you encounter a few bumps along the way, don’t give up! Gardening is a journey, not a destination.
We encourage you to try this DIY trick and share your experience with us. Post photos of your celery plants on social media using #HomeGrownCelery and tell us about your successes and challenges. We’d love to hear your tips and tricks for growing the perfect celery at home. Let’s create a community of home gardeners who are passionate about sustainable living and delicious food. This is a great way to ensure you always have fresh celery on hand.
Frequently Asked Questions (FAQ)
1. How long does it take to grow celery from a base?
The time it takes to grow celery from a base can vary depending on several factors, including the climate, the amount of sunlight, and the quality of the soil. Generally, you can expect to see new growth within a week or two of planting the base in water. After that, it will take several weeks to a few months for the celery to mature enough to harvest. Be patient and consistent with watering and fertilizing, and you’ll be rewarded with a bountiful harvest. Remember that regrowing from a base will not produce a full head of celery like you buy in the store, but rather stalks that are usable for cooking and flavoring.
2. What kind of soil is best for growing celery?
Celery thrives in rich, well-drained soil that is high in organic matter. A good soil mix should retain moisture but also allow for adequate drainage to prevent root rot. Amend your soil with compost, well-rotted manure, or other organic materials to improve its fertility and drainage. A slightly acidic to neutral soil pH (around 6.0 to 7.0) is ideal for celery growth. You can test your soil pH using a soil testing kit and adjust it accordingly with lime or sulfur.
3. How much sunlight does celery need?
Celery needs at least six hours of sunlight per day to grow properly. However, in hot climates, it can benefit from some afternoon shade to prevent bolting. If you’re growing celery indoors, place it near a sunny window or use grow lights to provide adequate illumination. Rotate the plant regularly to ensure that all sides receive equal amounts of light.
4. How often should I water my celery plants?
Celery needs consistent moisture to thrive. Water your plants deeply and regularly, especially during hot, dry weather. Aim to keep the soil consistently moist but not waterlogged. Check the soil moisture level regularly by sticking your finger into the soil. If the top inch of soil feels dry, it’s time to water. Mulching around the plants can help retain moisture and suppress weeds.
5. What are some common pests and diseases that affect celery?
Celery can be susceptible to several pests and diseases, including aphids, celery leaf tiers, carrot weevils, early blight, and late blight. Regularly inspect your plants for signs of infestation or disease. If you spot any problems, take action immediately to prevent them from spreading. Use organic pest control methods, such as insecticidal soap or neem oil, to control aphids and other pests. Ensure good air circulation around your plants to prevent fungal diseases. Remove any infected leaves or plants promptly to prevent the disease from spreading.
6. Can I grow celery indoors year-round?
Yes, you can grow celery indoors year-round, provided you have the right conditions. Choose a sunny location or use grow lights to provide adequate illumination. Maintain a consistent temperature and humidity level. Water your plants regularly and fertilize them as needed. Be sure to choose a pot that is large enough to accommodate the celery’s root system.
7. How do I know when my celery is ready to harvest?
Celery is ready to harvest when the stalks are at least 6-8 inches long and have reached the desired thickness. The stalks should be firm and crisp, not limp or wilted. You can harvest individual stalks as needed or harvest the entire plant at once. To harvest, simply cut the stalks at the base of the plant with a sharp knife.
8. Can I freeze celery for later use?
Yes, you can freeze celery for later use. To freeze celery, wash and chop it into small pieces. Blanch the celery in boiling water for 2-3 minutes, then transfer it to an ice bath to stop the cooking process. Drain the celery well and spread it out on a baking sheet lined with parchment paper. Freeze the celery for several hours, or until it is solid. Then, transfer the frozen celery to a freezer bag or container. Frozen celery can be stored in the freezer for up to 12 months. Keep in mind that frozen celery will be softer than fresh celery, so it’s best used in soups, stews, and other cooked dishes.
9. My celery is bolting (going to seed). What can I do?
Bolting, or premature flowering, can occur when celery is exposed to stress, such as hot weather or inconsistent watering. Once celery bolts, the stalks become bitter and tough. To prevent bolting, provide your celery with consistent moisture, afternoon shade, and protection from extreme temperatures. If your celery does bolt, you can still harvest the leaves and use them as a flavoring in soups and stews. You can also collect the seeds for planting next year.
10. Is growing celery from a base as nutritious as growing it from seed?
While the exact nutritional content may vary slightly, growing celery from a base provides essentially the same nutritional benefits as growing it from seed. Celery is a good source of vitamins A, C, and K, as well as folate and potassium. It’s also low in calories and high in fiber. Whether you grow it from a base or from seed, celery is a healthy and delicious addition to your diet.

Leave a Comment