
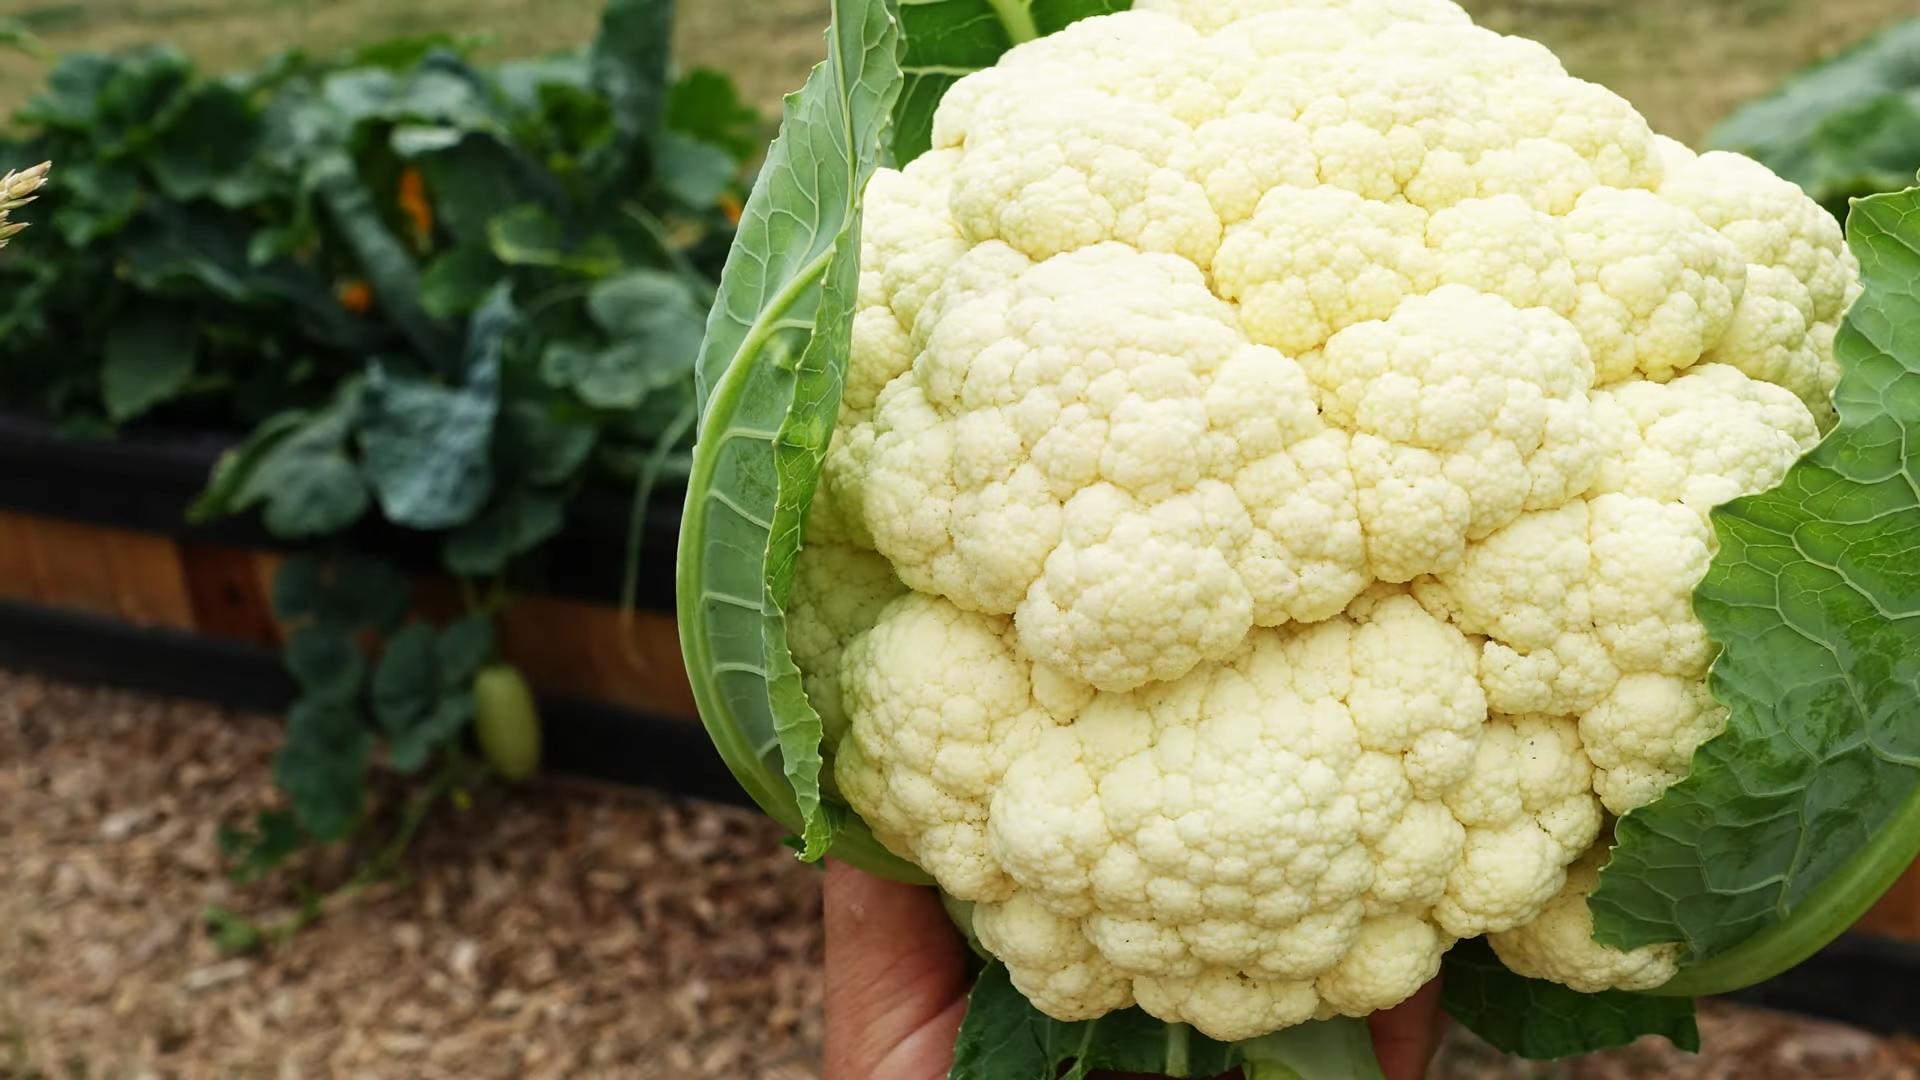
Cauliflower gardening for beginners at home might seem daunting, but trust me, it’s more rewarding than you think! Imagine harvesting your own crisp, white cauliflower head, knowing you nurtured it from a tiny seedling right in your backyard. That’s the magic of home gardening, and it’s totally achievable, even if you’re just starting out.
For centuries, cauliflower has been a staple in diets around the world, with roots tracing back to the Mediterranean. From simple steamed sides to elaborate gratins, this versatile vegetable has graced tables for generations. But why rely solely on store-bought cauliflower when you can cultivate your own, bursting with freshness and flavor?
Let’s face it, grocery store produce can be expensive and sometimes lacks that vibrant, just-picked taste. Plus, there’s something incredibly satisfying about growing your own food. This DIY guide is packed with simple tricks and hacks to help you navigate the world of cauliflower gardening for beginners at home. I’ll share my tried-and-true methods for everything from choosing the right variety to protecting your precious plants from pests. So, grab your gardening gloves, and let’s get started on your cauliflower-growing adventure!
Growing Cauliflower at Home: A Beginner’s Guide
Okay, so you want to grow cauliflower? Awesome! It might seem a little intimidating at first, but trust me, with a little patience and the right know-how, you can totally rock this. I’m going to walk you through everything you need to know to get started, from choosing the right variety to harvesting your own delicious cauliflower heads. Let’s get our hands dirty!
Choosing Your Cauliflower Variety
Before we even think about planting, we need to pick the right cauliflower variety. This is important because different varieties have different maturity times and are better suited for different climates. Here’s a quick rundown of some popular choices:
* Snowball Y Improved: This is a classic, reliable variety that’s great for beginners. It matures relatively quickly (around 50-60 days) and produces nice, compact white heads.
* Early White Hybrid: As the name suggests, this one is early! It’s another good choice for beginners, maturing in about 50 days.
* Graffiti: Want something a little more exciting? Graffiti cauliflower produces vibrant purple heads! It takes a bit longer to mature (around 75 days), but the color is worth it.
* Cheddar: This variety produces orange heads and has a slightly milder flavor than white cauliflower. It matures in about 68 days.
* Romanesco: If you’re feeling adventurous, try Romanesco! It has a unique, fractal-like appearance and a nutty flavor. It takes around 75-80 days to mature.
Pro Tip: Check your local climate and growing season before choosing a variety. Your local garden center can also give you recommendations based on what grows well in your area.
Starting Your Cauliflower Seeds (or Buying Transplants)
You have two main options here: starting your own seeds indoors or buying transplants from a nursery. Starting seeds gives you more control over the process, but it requires a bit more time and effort. Buying transplants is quicker and easier, but you’ll have less choice in terms of variety.
Starting Seeds Indoors
If you’re going the seed route, here’s what you need to do:
1. Gather Your Supplies: You’ll need seed starting trays or small pots, seed starting mix (not regular potting soil!), cauliflower seeds, a spray bottle, and a grow light (optional, but highly recommended).
2. Sow the Seeds: Fill your trays or pots with seed starting mix. Moisten the mix with the spray bottle. Sow 2-3 seeds per cell or pot, about ¼ inch deep.
3. Keep Them Moist: Gently water the seeds with the spray bottle to keep the soil consistently moist, but not soggy.
4. Provide Light: Place the trays or pots under a grow light or in a sunny window. If using a window, rotate the trays regularly to prevent the seedlings from leaning towards the light.
5. Thin the Seedlings: Once the seedlings have their first true leaves (the second set of leaves that appear after the initial seed leaves), thin them to one seedling per cell or pot. Snip off the weaker seedlings at the soil line with scissors.
6. Harden Off the Seedlings: About a week before you plan to transplant them outdoors, you need to “harden off” the seedlings. This means gradually exposing them to outdoor conditions to help them adjust. Start by placing them outside for an hour or two each day, gradually increasing the amount of time they spend outdoors. Protect them from direct sunlight and strong winds.
Buying Transplants
If you’re buying transplants, look for healthy plants with sturdy stems and green leaves. Avoid plants that are yellowed, wilted, or have signs of pests or diseases.
Preparing Your Garden Bed
Cauliflower needs a sunny spot with well-drained soil. It also prefers slightly acidic soil with a pH between 6.0 and 7.0.
1. Choose a Sunny Location: Cauliflower needs at least 6 hours of sunlight per day.
2. Prepare the Soil: Dig a hole that is twice as wide as the root ball of the transplant and just as deep. Amend the soil with compost or well-rotted manure to improve drainage and fertility. This is super important! Cauliflower are heavy feeders.
3. Check the Soil pH: Use a soil testing kit to check the pH. If the soil is too alkaline, you can add sulfur to lower the pH. If it’s too acidic, you can add lime to raise the pH.
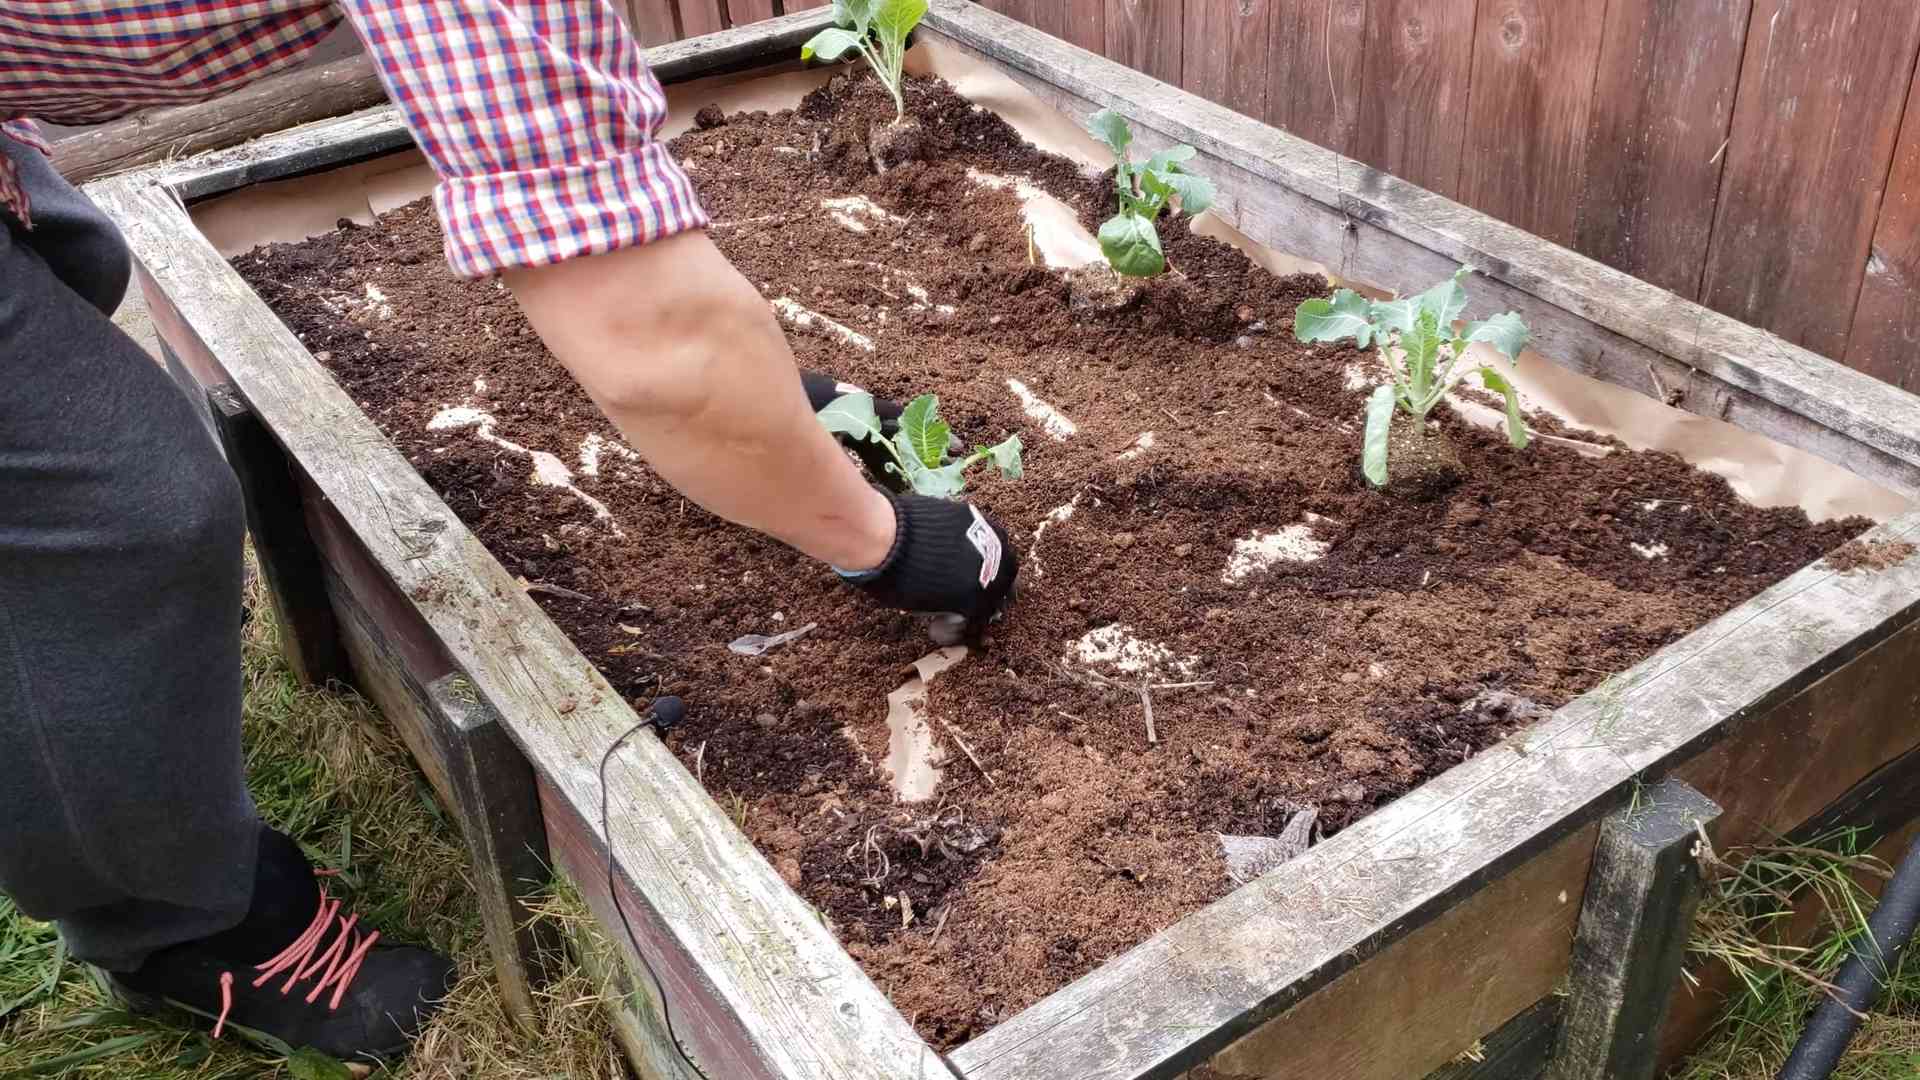
Transplanting Your Cauliflower
Whether you started your own seeds or bought transplants, the transplanting process is the same.
1. Water the Seedlings/Transplants: Before transplanting, water the seedlings or transplants thoroughly.
2. Dig the Holes: Dig holes in your prepared garden bed, spacing them about 18-24 inches apart.
3. Remove the Seedlings/Transplants: Gently remove the seedlings or transplants from their trays or pots. If the roots are pot-bound (tightly circling the pot), gently loosen them before planting.
4. Plant the Seedlings/Transplants: Place the seedlings or transplants in the holes, making sure the top of the root ball is level with the soil surface.
5. Fill the Holes: Fill the holes with soil and gently firm the soil around the plants.
6. Water Thoroughly: Water the newly transplanted cauliflower thoroughly.
Caring for Your Cauliflower Plants
Now that your cauliflower is in the ground, it’s time to give it some TLC.
1. Watering: Cauliflower needs consistent moisture, especially during head formation. Water deeply whenever the top inch of soil feels dry. Avoid overhead watering, as this can lead to fungal diseases.
2. Fertilizing: Cauliflower is a heavy feeder, so you’ll need to fertilize it regularly. Use a balanced fertilizer (like 10-10-10) every 2-3 weeks. You can also side-dress with compost or well-rotted manure.
3. Weeding: Keep the area around your cauliflower plants free of weeds. Weeds compete with cauliflower for nutrients and water.
4. Pest Control: Cauliflower is susceptible to several pests, including cabbage worms, aphids, and flea beetles. Inspect your plants regularly for signs of pests and take action promptly. You can use insecticidal soap, neem oil, or Bacillus thuringiensis (Bt) to control these pests.
5. Blanching (for White Varieties): If you’re growing a white cauliflower variety, you’ll need to blanch the head to keep it white. When the head is about 2-3 inches in diameter, fold the outer leaves over the head and secure them with clothespins or rubber bands. This will protect the head from sunlight and prevent it from turning yellow.
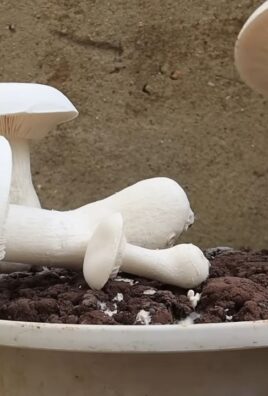
Harvesting Your Cauliflower
Harvest time! This is the moment you’ve been waiting for.
1. Check for Maturity: Cauliflower is ready to harvest when the head is firm, compact, and about 6-8 inches in diameter (depending on the variety).
2. Cut the Head: Use a sharp knife to cut the head from the plant, leaving a few leaves attached to protect the head.
3. Store the Cauliflower: Store the cauliflower in the refrigerator for up to a week.
Troubleshooting Common Problems
Even with the best care, you might encounter some problems along the way. Here are a few common issues and how to deal with them:
* Buttoning: This is when the cauliflower head forms prematurely and remains small. It’s often caused by stress, such as lack of water or nutrients. Make sure your plants are getting enough water and fertilizer.
* Ricey Heads: This is when the cauliflower head has a loose, grainy texture. It’s often caused by hot weather. Choose heat-tolerant varieties and provide shade during the hottest part of the day.
* Yellowing Heads: This is usually caused by exposure to sunlight. Blanching the heads will prevent them from turning yellow.
* Pest Infestations: As mentioned earlier, cauliflower is susceptible to several pests. Inspect your plants regularly and take action promptly.
Extra Tips for Success
* Succession Planting: Plant cauliflower seeds or transplants every 2-3 weeks to extend your harvest season.
* Companion Planting: Plant cauliflower with companion plants like rosemary, thyme, and sage to deter pests.
* Crop Rotation: Don’t plant cauliflower in the same spot year after year. Rotate your crops to prevent soilborne diseases.
Growing cauliflower at home can be a rewarding experience. With a little planning and effort, you can enjoy fresh, delicious cauliflower from your own garden. Don’t be afraid to experiment and learn from your mistakes. Happy gardening!
Conclusion
So, there you have it! Mastering the art of growing your own cauliflower at home, even as a complete beginner, is not only achievable but incredibly rewarding. This DIY trick, focusing on [specific aspect of the trick mentioned in the main article, e.g., soil preparation, pest control, watering schedule], is a game-changer for anyone looking to cultivate healthy, vibrant cauliflower heads without breaking the bank or relying on harsh chemicals.
Why is this a must-try? Because it simplifies the entire process. It takes the guesswork out of [mention the specific problem the trick solves, e.g., nutrient deficiencies, pest infestations, inconsistent growth]. Imagine harvesting your own perfectly formed, creamy white cauliflower, knowing you nurtured it from seed to table with your own two hands and a little bit of ingenuity. The taste difference alone is worth the effort – homegrown cauliflower boasts a freshness and subtle sweetness that store-bought varieties simply can’t match.
But the benefits extend beyond just flavor. Growing your own cauliflower connects you to the food you eat, fostering a deeper appreciation for the natural world. It’s also a fantastic way to reduce your carbon footprint by minimizing transportation and packaging waste. Plus, it’s a surprisingly therapeutic activity, offering a welcome escape from the stresses of daily life.
Looking to experiment? Consider these variations:
* **Companion Planting:** Plant marigolds around your cauliflower to deter pests naturally. Their vibrant blooms add a splash of color to your garden while providing a valuable service.
* **Soil Amendments:** If your soil is particularly poor, try incorporating composted manure or bone meal to boost nutrient levels. These organic amendments will provide a slow-release source of essential minerals for your cauliflower plants.
* **Different Varieties:** Don’t be afraid to explore different cauliflower varieties! From the classic white to vibrant purple and green cultivars, there’s a cauliflower out there to suit every taste and garden. Romanesco broccoli, with its fractal florets, is a particularly stunning and delicious option.
* **Succession Planting:** To enjoy a continuous harvest, plant cauliflower seeds every few weeks. This will ensure a steady supply of fresh cauliflower throughout the growing season.
We’re confident that this DIY trick will transform your cauliflower gardening experience. It’s simple, effective, and yields impressive results. So, grab your gardening gloves, prepare your soil, and get ready to embark on a rewarding journey of homegrown cauliflower goodness.
Now, we want to hear from you! Give this DIY trick a try and share your experiences in the comments below. What challenges did you face? What successes did you celebrate? Your feedback will help other beginner gardeners learn and grow alongside you. Let’s cultivate a community of thriving cauliflower growers! Remember, even the most experienced gardeners started somewhere. Don’t be afraid to experiment, learn from your mistakes, and most importantly, have fun! Happy gardening!
Frequently Asked Questions (FAQ)
Q: I’m a complete beginner. Is growing cauliflower really that easy?
A: Absolutely! While cauliflower can seem intimidating, this DIY trick simplifies the process significantly. The key is to start with good soil, provide consistent watering, and protect your plants from pests. This guide breaks down each step into manageable tasks, making it accessible even for novice gardeners. Don’t be afraid to experiment and learn as you go. Remember, every gardener starts somewhere!
Q: What kind of soil is best for growing cauliflower?
A: Cauliflower thrives in well-drained, fertile soil that is rich in organic matter. A slightly acidic to neutral pH (between 6.0 and 7.0) is ideal. Before planting, amend your soil with compost, aged manure, or other organic materials to improve drainage and nutrient content. If your soil is heavy clay, consider adding sand or perlite to improve drainage. A soil test can help you determine the specific nutrient deficiencies in your soil and guide your amendment choices.
Q: How often should I water my cauliflower plants?
A: Consistent watering is crucial for healthy cauliflower growth. Aim to keep the soil consistently moist, but not waterlogged. Water deeply whenever the top inch of soil feels dry to the touch. During hot, dry weather, you may need to water more frequently. Mulching around your plants can help retain moisture and reduce the need for frequent watering. Avoid overhead watering, as this can increase the risk of fungal diseases.
Q: What are some common pests that attack cauliflower, and how can I control them?
A: Common cauliflower pests include cabbage worms, aphids, and flea beetles. To control these pests naturally, consider using row covers to protect your plants, handpicking pests off the leaves, or spraying with insecticidal soap or neem oil. Companion planting with herbs like rosemary and thyme can also help deter pests. Regularly inspect your plants for signs of infestation and take action promptly to prevent widespread damage.
Q: How do I know when my cauliflower is ready to harvest?
A: Cauliflower is ready to harvest when the head is firm, compact, and reaches the desired size (typically 6-8 inches in diameter). The florets should be tightly closed and not starting to separate. Use a sharp knife to cut the head from the plant, leaving a few leaves attached to protect the head. Harvest your cauliflower on a cool, dry day to prevent spoilage.
Q: Can I grow cauliflower in containers?
A: Yes, you can grow cauliflower in containers, but you’ll need to choose a large container (at least 5 gallons) to accommodate the plant’s root system. Use a high-quality potting mix and ensure the container has good drainage. Water and fertilize your container-grown cauliflower regularly, as the soil in containers tends to dry out more quickly than soil in the ground. Choose a sunny location for your container-grown cauliflower.
Q: What are some signs of nutrient deficiencies in cauliflower plants?
A: Nutrient deficiencies can manifest in various ways, such as yellowing leaves (nitrogen deficiency), purple leaves (phosphorus deficiency), or stunted growth (potassium deficiency). A soil test can help you identify specific nutrient deficiencies and guide your fertilization strategy. Use a balanced fertilizer or amend your soil with organic materials to provide your cauliflower plants with the nutrients they need to thrive.
Q: How can I prevent my cauliflower head from turning yellow?
A: To prevent your cauliflower head from turning yellow, blanch it by tying the outer leaves together over the developing head when it reaches about 3 inches in diameter. This will protect the head from sunlight and keep it white. Check the head regularly and adjust the leaves as needed. You can also choose self-blanching varieties of cauliflower that naturally curl their leaves over the head.
Q: What if my cauliflower plant bolts (goes to seed) before the head forms?
A: Bolting is often caused by stress, such as extreme temperatures or inconsistent watering. Once a cauliflower plant bolts, it will not produce a marketable head. To prevent bolting, choose bolt-resistant varieties, provide consistent watering, and protect your plants from extreme temperatures. If your plant does bolt, you can still harvest the leaves and flowers for use in salads or stir-fries.
Q: Can I save seeds from my cauliflower plants?
A: Saving seeds from cauliflower can be challenging, as cauliflower is a biennial plant, meaning it typically takes two years to produce seeds. Additionally, cauliflower is often cross-pollinated, so the seeds may not produce plants that are true to type. If you’re interested in saving seeds, choose an open-pollinated variety and isolate your plants from other brassicas to prevent cross-pollination. Allow the plants to overwinter and flower in the second year, then harvest the seeds when they are dry and mature.
Leave a Comment