
Growing Chili at Home can seem daunting, but trust me, it’s one of the most rewarding gardening experiences you can have! Imagine plucking fiery, vibrant chilies straight from your own backyard to spice up your favorite dishes. Forget those bland, store-bought peppers – we’re talking about homegrown flavor explosions!
Chilies have a rich history, dating back thousands of years in South America, where they were not only a culinary staple but also held medicinal and even spiritual significance. From ancient Aztec rituals to the vibrant street food of modern Mexico, chilies have always been a symbol of passion and zest for life. And now, you can bring that same passion into your own home.
Why should you learn these DIY tricks for growing chili at home? Well, for starters, it’s incredibly satisfying to nurture a plant from seed to harvest. Plus, you have complete control over what goes into your chilies – no harmful pesticides or mystery ingredients! But more importantly, growing your own chilies allows you to experiment with different varieties, from mild and sweet to scorching hot, tailoring your harvest to your exact taste preferences. I’m going to share some simple, effective DIY tricks and hacks that will have you harvesting a bumper crop of chilies in no time, even if you’re a complete beginner. Get ready to turn up the heat in your garden and your kitchen!

Growing Fiery Chili Peppers at Home: A DIY Guide
Okay, chili lovers, gather ’round! I’m going to walk you through everything you need to know to grow your own chili peppers right at home. Trust me, there’s nothing quite like the satisfaction of harvesting your own spicy bounty. We’ll cover everything from seed starting to pest control, so you’ll be a chili-growing pro in no time!
Choosing Your Chili Variety
First things first, you need to decide what kind of heat you’re after. Chili peppers come in a huge range of flavors and spice levels, from mild bell peppers to scorching habaneros. Here’s a quick rundown of some popular choices:
- Bell Peppers: (0 SHU) These are the sweethearts of the pepper world, perfect for stuffing or adding a mild flavor to dishes.
- Poblano Peppers: (1,000-2,000 SHU) Mildly spicy with a rich, earthy flavor. Great for making chili rellenos.
- Jalapeño Peppers: (2,500-8,000 SHU) A classic choice, offering a good kick without being overwhelming. Perfect for salsas and pickling.
- Serrano Peppers: (10,000-25,000 SHU) Hotter than jalapeños, with a bright, grassy flavor. Use sparingly!
- Cayenne Peppers: (30,000-50,000 SHU) These are the peppers you often see dried and ground into chili powder. They pack a punch!
- Habanero Peppers: (100,000-350,000 SHU) Proceed with caution! Habaneros are seriously hot and have a fruity, floral flavor.
- Scotch Bonnet Peppers: (100,000-350,000 SHU) Similar in heat to habaneros, with a slightly sweeter, more complex flavor.
- Ghost Peppers (Bhut Jolokia): (800,000-1,041,427 SHU) Now we’re getting into the extreme heat territory. Handle with care!
- Carolina Reaper: (1,500,000-2,200,000 SHU) The current world record holder for the hottest pepper. Only for the truly brave!
Consider your climate, too. Some peppers need a longer growing season than others. If you live in a colder area, you might want to start your seeds indoors earlier.
Starting Your Chili Seeds Indoors
Starting your seeds indoors gives you a head start on the growing season, especially if you live in a cooler climate. Here’s how I do it:
Materials You’ll Need:
- Chili pepper seeds
- Seed starting trays or small pots
- Seed starting mix (a light, sterile soil mix)
- Spray bottle
- Heat mat (optional, but helpful)
- Grow light (optional, but recommended)
- Clear plastic dome or plastic wrap
Step-by-Step Instructions:
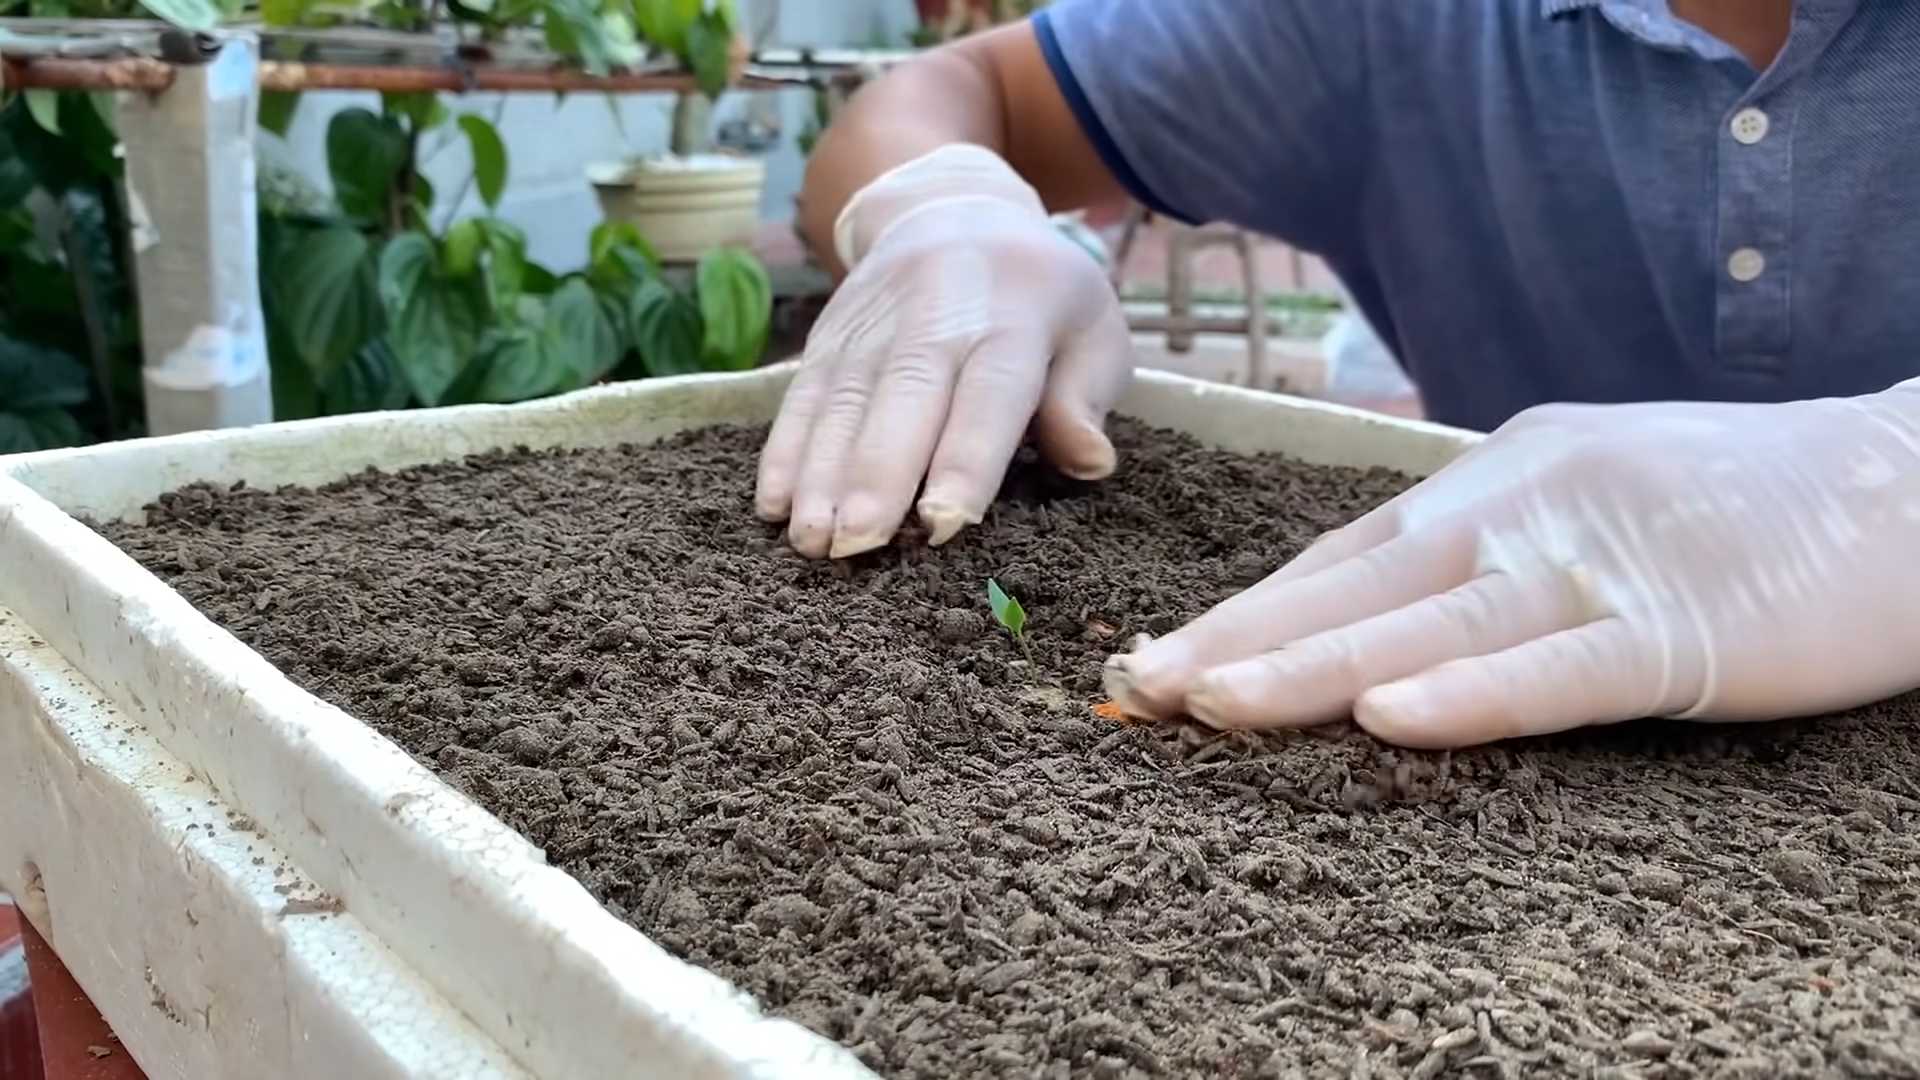
- Prepare Your Seed Starting Trays: Fill your seed starting trays or small pots with seed starting mix. Gently tap the trays to settle the soil.
- Sow Your Seeds: Make a small indentation (about ¼ inch deep) in the center of each cell or pot. Place 1-2 seeds in each indentation.
- Cover the Seeds: Gently cover the seeds with seed starting mix.
- Water the Seeds: Use a spray bottle to lightly mist the soil. You want to moisten the soil without overwatering it.
- Create a Humid Environment: Cover the seed starting trays with a clear plastic dome or plastic wrap. This will help to retain moisture and create a humid environment that’s ideal for germination.
- Provide Warmth: Place the seed starting trays on a heat mat, if you have one. Chili pepper seeds germinate best in warm temperatures (around 80-85°F). If you don’t have a heat mat, place the trays in a warm location, such as on top of your refrigerator.
- Provide Light: Place the seed starting trays under a grow light, if you have one. If you don’t have a grow light, place the trays in a sunny window. However, be aware that seedlings grown in a window may become leggy (tall and spindly) due to insufficient light.
- Monitor Moisture Levels: Check the soil moisture levels daily. If the soil feels dry to the touch, mist it with a spray bottle. Avoid overwatering, as this can lead to fungal diseases.
- Wait for Germination: Chili pepper seeds can take anywhere from 7 to 21 days to germinate, depending on the variety and growing conditions. Be patient!
- Remove the Dome: Once the seedlings emerge, remove the plastic dome or plastic wrap.
- Thin the Seedlings: If you planted more than one seed per cell or pot, thin the seedlings to one per cell or pot. Choose the strongest, healthiest seedling and snip off the others at the soil line.
- Care for the Seedlings: Continue to provide the seedlings with warmth, light, and moisture. Water them when the soil feels dry to the touch.
- Fertilize the Seedlings: Once the seedlings have developed their first set of true leaves (the leaves that look like miniature versions of the adult leaves), you can start to fertilize them with a diluted liquid fertilizer. Follow the instructions on the fertilizer label.
Transplanting Your Chili Seedlings Outdoors
Once the danger of frost has passed and the soil has warmed up, it’s time to transplant your chili seedlings outdoors.
Hardening Off Your Seedlings:
Before transplanting your seedlings outdoors, you need to “harden them off.” This process gradually acclimates the seedlings to the outdoor environment, preventing them from being shocked by the sudden change in temperature, sunlight, and wind.
- Start Slowly: Begin by placing the seedlings outdoors in a sheltered location (such as a porch or patio) for just a few hours each day.
- Increase Exposure Gradually: Gradually increase the amount of time the seedlings spend outdoors each day, exposing them to more sunlight and wind.
- Monitor the Seedlings: Watch the seedlings closely for signs of stress, such as wilting or sunburn. If you see any signs of stress, bring the seedlings back indoors or provide them with shade.
- Harden Off for a Week: Harden off the seedlings for about a week before transplanting them outdoors.
Choosing a Location:
Chili peppers need plenty of sunlight (at least 6-8 hours per day) and well-drained soil. Choose a location that meets these requirements.
Preparing the Soil:
Before transplanting your seedlings, prepare the soil by amending it with compost or other organic matter. This will improve drainage and provide the plants with essential nutrients.
Transplanting Instructions:
- Dig Holes: Dig holes that are slightly larger than the root balls of the seedlings. Space the holes about 18-24 inches apart.
- Remove Seedlings from Pots: Gently remove the seedlings from their pots, being careful not to damage the roots.
- Place Seedlings in Holes: Place the seedlings in the holes, making sure that the top of the root ball is level with the surrounding soil.
- Fill Holes with Soil: Fill the holes with soil, gently firming it around the seedlings.
- Water Thoroughly: Water the seedlings thoroughly after transplanting.
- Mulch: Apply a layer of mulch around the plants to help retain moisture and suppress weeds.
Caring for Your Chili Plants
Once your chili plants are in the ground, it’s important to provide them with proper care to ensure a bountiful harvest.
Watering:
Water your chili plants regularly, especially during hot, dry weather. Water deeply, allowing the soil to dry out slightly between waterings. Avoid overwatering, as this can lead to root rot.
Fertilizing:
Fertilize your chili plants every 2-3 weeks with a balanced fertilizer. Follow the instructions on the fertilizer label. You can also side-dress your plants with compost or other organic matter.
Pruning:
Pruning your chili plants can help to improve air circulation and encourage bushier growth. Remove any dead or yellowing leaves. You can also pinch off the tips of the branches to encourage the plants to branch out.
Pest and Disease Control:
Chili plants can be susceptible to a variety of
Conclusion
So, there you have it! Growing chili at home isn’t just a fun gardening project; it’s a gateway to a world of flavor, freshness, and fiery satisfaction. We’ve walked you through the simple steps, from selecting the right seeds to nurturing your plants to a bountiful harvest. But why is this DIY trick a must-try? Because it puts you in complete control. You dictate the growing conditions, ensuring your chilies are free from unwanted chemicals and bursting with natural goodness. You choose the variety, tailoring your harvest to your specific heat preferences and culinary needs. And perhaps most importantly, you experience the unparalleled joy of nurturing something from seed to table.
Imagine the satisfaction of adding your own homegrown habaneros to a spicy salsa, or sprinkling freshly dried cayenne pepper onto your favorite dish. The possibilities are endless!
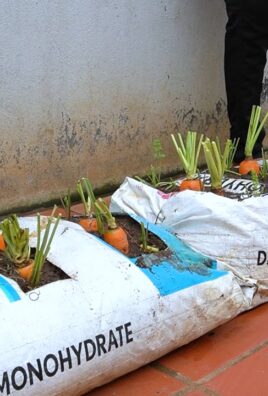
But don’t stop there! Experiment with different varieties of chili peppers. Try growing milder varieties like Anaheim or Poblano alongside the fiery Scotch Bonnets or Ghost Peppers. Consider companion planting – basil, tomatoes, and carrots are all excellent companions for chili plants, helping to deter pests and improve growth. You can also explore different growing mediums, from traditional soil to hydroponics, to find what works best for your environment and preferences.
For those with limited space, container gardening is an excellent option. Choose a pot that’s at least 12 inches in diameter and ensure it has good drainage. You can even grow chili peppers indoors with the help of grow lights.
And for those who want to preserve their harvest, there are numerous options. Drying, pickling, freezing, and making chili oil are all great ways to extend the life of your homegrown chilies and enjoy their flavor year-round.
We’ve given you the tools and the knowledge; now it’s time to get your hands dirty! Don’t be afraid to experiment, learn from your mistakes, and most importantly, have fun. Growing chili at home is a rewarding experience that will transform your cooking and your connection to the food you eat.
We encourage you to embark on this exciting journey and share your experiences with us. Post photos of your chili plants, share your favorite recipes, and let us know what you’ve learned along the way. Together, we can create a community of chili-loving gardeners and inspire others to discover the joys of growing their own food. So, grab your seeds, prepare your soil, and get ready to experience the fiery thrill of homegrown chilies! Let’s cultivate a world of flavor, one chili pepper at a time.
Frequently Asked Questions (FAQ)
What are the best chili varieties for beginners?
For those new to growing chili at home, starting with easier-to-manage varieties is highly recommended. Anaheim peppers are mild and versatile, perfect for stuffing or roasting. Poblano peppers offer a slightly more intense flavor with a manageable heat level, ideal for making chili rellenos. Jalapeños are a classic choice, known for their moderate heat and wide range of culinary applications. These varieties are generally more forgiving and less susceptible to common problems, making them a great starting point for novice chili growers. Remember to research the specific needs of each variety, as some may require slightly different growing conditions.
How often should I water my chili plants?
Watering frequency depends on several factors, including the climate, soil type, and size of the plant. As a general rule, chili plants need consistent moisture but should not be waterlogged. Check the soil moisture by sticking your finger about an inch deep into the soil. If it feels dry, it’s time to water. Water deeply, allowing the water to drain out of the bottom of the pot. Avoid watering the leaves, as this can promote fungal diseases. During hot, dry weather, you may need to water daily, while in cooler, wetter conditions, you may only need to water every few days. Overwatering is a common mistake that can lead to root rot, so it’s always better to err on the side of underwatering.
What kind of fertilizer should I use for my chili plants?
Chili plants benefit from regular fertilization, especially during the growing season. A balanced fertilizer with an NPK ratio (nitrogen, phosphorus, potassium) of 10-10-10 or 14-14-14 is a good starting point. Nitrogen promotes leafy growth, phosphorus supports root development and flowering, and potassium enhances fruit production. You can also use a fertilizer specifically formulated for tomatoes or peppers, as these plants have similar nutrient requirements. Apply the fertilizer according to the package instructions, typically every 2-4 weeks. Avoid over-fertilizing, as this can burn the roots and damage the plant. Organic options like compost tea or fish emulsion are also excellent choices for providing nutrients to your chili plants.
How do I protect my chili plants from pests and diseases?
Pests and diseases can be a challenge when growing chili at home, but there are several steps you can take to protect your plants. Regularly inspect your plants for signs of pests like aphids, spider mites, and whiteflies. If you spot any pests, you can try washing them off with a strong stream of water or using insecticidal soap. Neem oil is another effective organic option for controlling pests. To prevent fungal diseases, ensure good air circulation around your plants and avoid overwatering. Remove any diseased leaves or branches promptly. Companion planting with herbs like basil and marigolds can also help deter pests.
When is the best time to harvest my chili peppers?
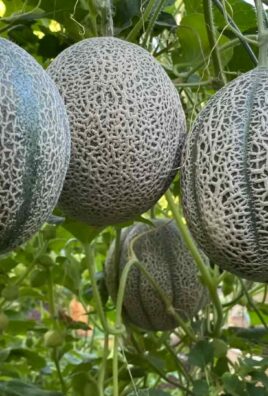
The best time to harvest your chili peppers depends on the variety and your desired level of heat. Most chili peppers will change color as they ripen, typically from green to red, yellow, or orange. The color change is a good indicator that the pepper is ready to harvest. However, some people prefer to harvest green chili peppers for a milder flavor. To harvest, simply cut the pepper from the plant using pruning shears or scissors, leaving a small stem attached. Handle the peppers carefully to avoid bruising them. Remember to wear gloves when handling hot chili peppers, as the capsaicin (the compound that makes them spicy) can irritate your skin.
Can I grow chili peppers indoors?
Yes, you can absolutely grow chili peppers indoors, especially if you live in a climate with short growing seasons. To grow chili peppers indoors, you’ll need a sunny location or grow lights. Chili peppers need at least 6-8 hours of sunlight per day to thrive. If you don’t have enough natural light, you can use grow lights to supplement. Choose a pot that’s at least 12 inches in diameter and ensure it has good drainage. Use a well-draining potting mix and water regularly, allowing the soil to dry out slightly between waterings. Fertilize your plants every 2-4 weeks with a balanced fertilizer. With proper care, you can enjoy a bountiful harvest of chili peppers even indoors.
How do I dry my chili peppers?
Drying chili peppers is a great way to preserve them and enjoy their flavor year-round. There are several methods you can use to dry chili peppers. One method is to string the peppers together using a needle and thread and hang them in a dry, well-ventilated area. Another method is to use a dehydrator, which will dry the peppers quickly and evenly. You can also dry chili peppers in the oven on a low temperature (around 170°F or 77°C) for several hours. The peppers are dry when they are brittle and snap easily. Store the dried peppers in an airtight container in a cool, dark place.
Leave a Comment