
Grow Angled Luffa at Home and unlock the secrets to cultivating your own natural sponges! Have you ever imagined strolling into your backyard and harvesting a fresh, sustainable sponge, ready for your bath or kitchen? It sounds like a dream, right? Well, it’s a dream within reach, and I’m here to guide you through the surprisingly simple process of growing angled luffa right in your own garden.
The luffa, also known as the sponge gourd, boasts a rich history, particularly in Asian cultures where it’s been cultivated for centuries. Beyond its practical use as a cleaning tool, it’s also been valued for its medicinal properties and even culinary applications. Imagine the satisfaction of using something you’ve nurtured from seed to sponge!
In today’s world, where sustainability and eco-consciousness are more important than ever, growing your own luffa offers a fantastic alternative to synthetic sponges. Not only are you reducing your plastic consumption, but you’re also engaging in a rewarding and educational gardening experience. Plus, let’s be honest, who wouldn’t want to impress their friends with a homegrown sponge? This DIY guide will provide you with all the tips and tricks you need to successfully grow angled luffa at home, from seed selection to harvesting and curing your very own natural sponges. Let’s get started!

Grow Your Own Angled Luffa Sponges: A Step-by-Step Guide
Hey there, fellow gardening enthusiasts! Have you ever thought about growing your own sponges? I know, it sounds a little crazy, but it’s totally possible with angled luffa (also known as Chinese okra or ridge gourd)! Not only is it a fun and rewarding project, but you’ll also end up with a sustainable and natural cleaning tool. Plus, the young luffa fruits are delicious in stir-fries and curries. Let’s dive into how you can grow your own angled luffa at home.
Choosing the Right Variety and Starting Seeds
Before we get our hands dirty, let’s talk about choosing the right luffa variety and getting those seeds started.
* Variety Selection: While there are different types of luffa, we’re focusing on the angled luffa (Luffa acutangula). It’s known for its distinct ridges and is generally easier to grow than the smooth luffa (Luffa aegyptiaca). Make sure you purchase seeds specifically labeled as “angled luffa” or “Chinese okra.”
* Seed Starting Time: Luffa has a long growing season (around 150-200 days), so starting seeds indoors is crucial, especially if you live in a cooler climate. I usually start mine about 6-8 weeks before the last expected frost.
* Seed Starting Supplies: You’ll need seed starting trays or small pots, seed starting mix (a light and well-draining soil), a heat mat (optional, but helpful), and a grow light (also optional, but provides consistent light).
Now, let’s get those seeds germinating!
1. Soaking the Seeds: Luffa seeds have a tough outer shell, so soaking them helps speed up germination. I like to soak them in warm water for 24-48 hours. You’ll notice they swell up a bit – that’s a good sign!
2. Planting the Seeds: Fill your seed starting trays or pots with seed starting mix. Make a small hole (about 1/2 inch deep) in the center of each cell or pot. Place one seed in each hole and gently cover it with soil.
3. Watering and Warmth: Water the soil gently until it’s moist but not soggy. Place the trays or pots on a heat mat (if using) and cover them with a humidity dome or plastic wrap to create a greenhouse effect. This helps retain moisture and warmth, which are essential for germination.
4. Providing Light: Once the seeds germinate (usually within 7-14 days), remove the humidity dome or plastic wrap and place the seedlings under a grow light or in a sunny window. If using a grow light, keep it a few inches above the seedlings and adjust as they grow.
5. Thinning (If Necessary): If more than one seedling emerges in a cell or pot, thin them out by snipping off the weaker ones at the soil level. You want to leave only one strong seedling per cell or pot.
Preparing the Garden Bed and Transplanting Seedlings
Once your seedlings have developed a few sets of true leaves and the weather has warmed up, it’s time to prepare the garden bed and transplant them outdoors.
* Choosing the Right Location: Luffa plants need plenty of sunshine (at least 6-8 hours per day) and well-drained soil. Choose a location that meets these requirements.
* Soil Preparation: Luffa plants are heavy feeders, so it’s important to amend the soil with plenty of organic matter, such as compost or well-rotted manure. This will improve drainage, fertility, and water retention. I usually dig in a generous amount of compost a few weeks before transplanting.
* Building a Strong Trellis: Luffa vines can grow up to 30 feet long, so they need a sturdy trellis to climb on. You can use a fence, an arbor, or build your own trellis using wood, bamboo, or metal. Make sure the trellis is strong enough to support the weight of the mature vines and fruits. I prefer using a heavy-duty cattle panel arched between two sturdy posts.
Now, let’s get those seedlings into the ground!
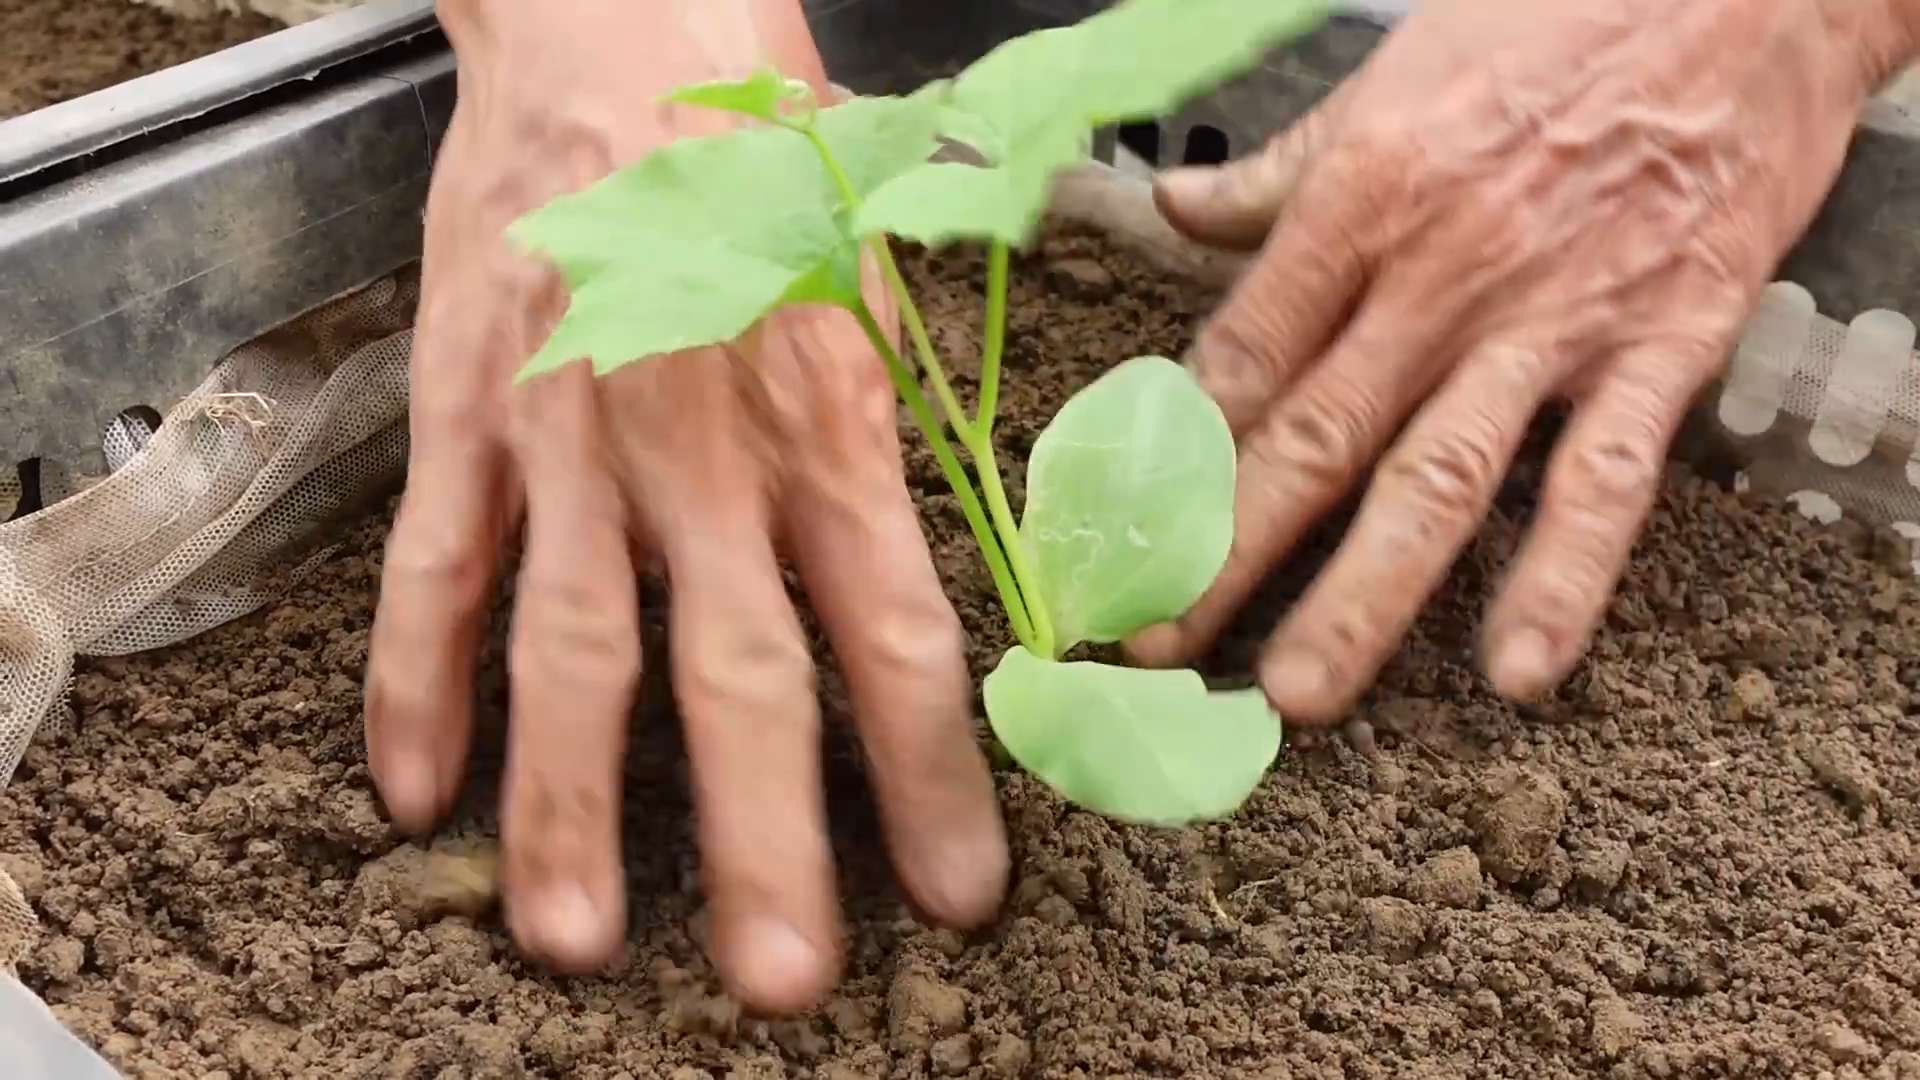
1. Hardening Off: Before transplanting, you need to “harden off” the seedlings to acclimate them to outdoor conditions. This involves gradually exposing them to sunlight, wind, and cooler temperatures over a period of 7-10 days. Start by placing them outdoors for a few hours each day, gradually increasing the amount of time they spend outside.
2. Transplanting: Once the seedlings are hardened off, it’s time to transplant them into the garden bed. Dig a hole that’s slightly larger than the root ball of the seedling. Gently remove the seedling from its pot and place it in the hole. Backfill with soil and water thoroughly.
3. Spacing: Space the luffa plants about 2-3 feet apart along the trellis. This will give them enough room to grow and spread out.
4. Mulching: Apply a layer of mulch around the base of the plants to help retain moisture, suppress weeds, and regulate soil temperature. I like to use straw or wood chips.
Caring for Your Luffa Plants
Now that your luffa plants are in the ground, it’s time to provide them with the care they need to thrive.
* Watering: Luffa plants need consistent watering, especially during hot and dry weather. Water deeply and regularly, making sure the soil stays moist but not waterlogged. I usually water them every few days, or more often if the weather is particularly hot.
* Fertilizing: As heavy feeders, luffa plants benefit from regular fertilization. I like to use a balanced organic fertilizer every few weeks. You can also side-dress them with compost or well-rotted manure.
* Pruning: Pruning can help improve air circulation and encourage fruit production. Remove any yellowing or diseased leaves. You can also prune the vines to control their growth and prevent them from becoming too crowded. I usually prune off any side shoots that don’t have flowers or fruits.
* Pest and Disease Control: Luffa plants are generally resistant to pests and diseases, but they can be susceptible to certain problems, such as squash bugs, aphids, and powdery mildew. Inspect your plants regularly for any signs of trouble and take action promptly. I prefer using organic pest control methods, such as insecticidal soap or neem oil. For powdery mildew, improve air circulation and apply a fungicide if necessary.
* Pollination: Luffa plants have separate male and female flowers. The female flowers have a small luffa fruit behind them. Sometimes, pollination can be an issue, especially if there aren’t many bees or other pollinators in your area. If you notice that the female flowers are dropping off without producing fruit, you may need to hand-pollinate them. To do this, use a small paintbrush to transfer pollen from the male flowers to the female flowers.
Harvesting and Processing Your Luffa Sponges
The most exciting part! Harvesting and processing your own luffa sponges.
* Harvesting Time: The best time to harvest luffa for sponges is when the fruits are fully mature and the skin has turned brown and dry. The fruits should feel lightweight and the seeds should rattle inside. It usually takes about 4-6 months from planting to harvest.
* Harvesting Technique: Use pruning shears or a sharp knife to cut the luffa fruits from the vine. Leave a few inches of stem attached to the fruit.
* Peeling the Luffa: This can be a bit messy, so I recommend doing it outdoors or in a well-ventilated area. There are a few ways to peel the luffa:
1. Soaking Method: Soak the luffa fruits in water for a few days to soften the skin. Then, use your hands or a scrub brush to peel off the skin.
2. Dry Peeling Method: If the skin is dry enough, you can try peeling it off without soaking. Use your hands or a knife to carefully peel away the skin. Be careful not to damage the sponge inside.
* Removing the Seeds: Once the skin is removed, shake out the seeds. You can save these seeds for planting next year.
* Washing and Drying: Wash the luffa sponges thoroughly with water to remove any remaining pulp or debris. You can use a mild soap if desired. Then, hang them up to dry in a sunny and well-ventilated area. Make sure they are completely dry before storing them.
* Bleaching (Optional): If you want to lighten the color of your luffa sponges, you can soak them in a diluted bleach solution for a few hours. Rinse them thoroughly with water and dry them completely. I personally prefer to keep mine natural.
* Cutting and Shaping: Once the luffa sponges are dry,
Conclusion
So, there you have it! Growing your own angled luffa at home is not just a gardening project; it’s an investment in sustainable living, a journey of discovery, and a rewarding experience that culminates in a truly unique and useful product. Forget those mass-produced, often chemically treated sponges from the store. With a little patience and care, you can cultivate your own supply of natural, exfoliating goodness right in your backyard.
Why is this DIY trick a must-try? Because it connects you to the source of your everyday items, reduces your reliance on commercially produced goods, and offers a tangible sense of accomplishment. Imagine the satisfaction of gifting a homegrown luffa to a friend, knowing you nurtured it from seed to sponge. Think of the conversations it will spark, the knowledge you’ll share, and the positive impact you’ll have on the environment.
But the benefits don’t stop there. Growing angled luffa allows you to control the entire process, ensuring that your sponges are free from harmful chemicals and pesticides. You can choose the perfect time to harvest, resulting in luffas with the ideal texture and size for your needs. Plus, the luffa plant itself is a beautiful addition to any garden, with its vibrant green vines and delicate yellow flowers.
Ready to take your luffa growing to the next level? Consider these variations and suggestions:
* Vertical Gardening: Angled luffa vines love to climb! Train them up trellises, fences, or even pergolas to create a stunning vertical display. This also maximizes space in smaller gardens.
* Companion Planting: Plant basil, marigolds, or nasturtiums near your luffa vines to deter pests and attract beneficial insects.
* Seed Saving: Once your luffas are fully mature, save the seeds for future planting. This ensures a continuous supply of luffa sponges year after year.
* Luffa Crafts: Don’t limit yourself to just sponges! Use dried luffa to create unique bath mats, soap dishes, or even decorative items. The possibilities are endless.
* Experiment with Varieties: While this guide focuses on angled luffa, there are other luffa varieties to explore. Experiment with different types to find your favorite.
We encourage you to embark on this exciting gardening adventure and discover the joys of growing angled luffa at home. It’s a project that’s both rewarding and sustainable, offering a unique connection to nature and a tangible product you can be proud of.
Don’t just take our word for it! Try it yourself and share your experience with us. We’d love to hear your tips, tricks, and success stories. Post photos of your luffa plants and finished sponges on social media using #HomegrownLuffa and inspire others to join the movement. Let’s cultivate a community of luffa lovers and spread the word about this amazing DIY trick!
Frequently Asked Questions (FAQ)
What is angled luffa and how is it different from other types of luffa?
Angled luffa (Luffa acutangula), also known as Chinese okra or ridged gourd, is a type of gourd vine cultivated for its edible young fruits and its mature, fibrous skeleton, which is used as a natural sponge. It differs from smooth luffa (Luffa aegyptiaca) in its appearance. Angled luffa has prominent ridges running along its length, while smooth luffa has a smoother, more cylindrical shape. The texture of the dried sponge is also slightly different, with angled luffa often being a bit coarser. Both types are excellent for exfoliating and cleaning.
How long does it take to grow angled luffa from seed to harvest?
The time it takes to grow angled luffa from seed to harvest depends on several factors, including climate, soil conditions, and the specific variety. Generally, it takes about 120-150 days from planting the seeds to harvesting mature luffa sponges. You can harvest young fruits for consumption much earlier, typically around 60-70 days after planting.
What are the best growing conditions for angled luffa?
Angled luffa thrives in warm, sunny locations with well-drained soil. It requires at least 6-8 hours of direct sunlight per day. The ideal soil pH is between 6.0 and 7.5. The plant also needs a sturdy support structure, such as a trellis or fence, as the vines can grow quite long and heavy. Consistent watering is essential, especially during hot and dry periods.
How do I prepare the soil for planting angled luffa?
Before planting, amend the soil with plenty of organic matter, such as compost or well-rotted manure. This will improve drainage, fertility, and water retention. Loosen the soil to a depth of at least 12 inches to allow for good root development. You can also add a slow-release fertilizer to provide essential nutrients throughout the growing season.
When is the best time to plant angled luffa seeds?
Angled luffa is a warm-season crop and should be planted after the last frost when the soil temperature has warmed to at least 70°F (21°C). In cooler climates, you can start the seeds indoors 4-6 weeks before the last frost and transplant the seedlings outdoors once the weather is favorable.
How do I harvest angled luffa for sponges?
Harvest angled luffa for sponges when the fruits are fully mature and the skin has turned brown and dry. The luffa should feel lightweight and the seeds should rattle inside. To harvest, simply cut the luffa from the vine, leaving a few inches of stem attached.
How do I process angled luffa to make sponges?
After harvesting, soak the luffa in water for a few days to loosen the skin. Once the skin is soft, peel it off by hand. Rinse the luffa thoroughly to remove any remaining pulp and seeds. You can then dry the luffa in the sun or in a well-ventilated area. Once dry, the luffa is ready to use as a sponge.
How do I store angled luffa sponges?
Store dried angled luffa sponges in a cool, dry place. Avoid storing them in humid environments, as this can lead to mold growth. Before using a stored luffa, rinse it thoroughly with water.
Are there any pests or diseases that affect angled luffa?
Angled luffa can be susceptible to certain pests and diseases, such as squash bugs, cucumber beetles, and powdery mildew. To prevent these problems, practice good garden hygiene, such as removing weeds and debris, and provide adequate air circulation. You can also use organic pest control methods, such as insecticidal soap or neem oil, to manage infestations.
Can I eat angled luffa?
Yes, young angled luffa fruits are edible and can be used in various culinary dishes. They have a mild, slightly sweet flavor and a tender texture. You can stir-fry, steam, or add them to soups and stews. However, mature luffa fruits are too fibrous to eat.
How can I save seeds from my angled luffa plants?
To save seeds from your angled luffa plants, allow a few fruits to fully mature on the vine. Once the fruits are dry and brown, harvest them and extract the seeds. Spread the seeds out on a paper towel to dry completely. Store the dried seeds in an airtight container in a cool, dark place.
What are some creative uses for angled luffa besides sponges?
Besides sponges, angled luffa can be used for a variety of other purposes. You can use it to make bath mats, soap dishes, exfoliating gloves, and even decorative items. The fibrous texture of the luffa makes it ideal for scrubbing and exfoliating. You can also use the dried luffa fibers as a natural packing material.


Leave a Comment