
Growing chili peppers can seem intimidating, but trust me, with a few clever tricks and a little DIY spirit, you can transform your backyard (or even your balcony!) into a fiery fiesta of flavor. I remember my grandmother, a true gardening guru, always had a thriving chili pepper patch. She swore by a few secret techniques passed down through generations, and now I’m excited to share some of those time-tested tips, along with some modern hacks, to help you cultivate your own bumper crop.
For centuries, chili peppers have been more than just a spice; they’ve been a vital part of cultures around the globe. From adding warmth to ancient Mesoamerican dishes to becoming a staple in Asian cuisine, these vibrant fruits have a rich and fascinating history. But let’s be honest, buying chili peppers at the store can be expensive, and you never quite know what you’re getting. Plus, there’s something incredibly satisfying about harvesting your own homegrown peppers, knowing exactly where they came from and how they were nurtured.
That’s where these DIY tricks come in! Whether you’re a seasoned gardener or a complete beginner, I’m going to show you simple, effective ways to maximize your yield and growing chili peppers successfully. We’ll cover everything from seed starting and soil preparation to pest control and harvesting, all with a focus on easy-to-implement DIY solutions. Get ready to unleash your inner gardener and enjoy the delicious rewards of your own chili pepper harvest!
DIY Concrete Countertops: A Step-by-Step Guide
Hey there, fellow DIY enthusiasts! I’m so excited to share one of my favorite home improvement projects with you: creating your own concrete countertops. It might seem intimidating, but trust me, with a little patience and these detailed instructions, you can achieve a stunning, modern look for your kitchen or bathroom without breaking the bank. Let’s get started!
Materials You’ll Need
Before we dive in, let’s gather all the necessary materials. This will save you time and frustration later on.
* Concrete Mix: I recommend a high-strength concrete mix specifically designed for countertops. Look for one with fiber reinforcement to minimize cracking. You’ll need to calculate the amount based on the dimensions of your countertop. A good rule of thumb is to estimate a little extra, just in case.
* Melamine Boards: These will form the mold for your countertop. I usually go for ¾-inch thick melamine for sturdiness.
* Screws: Use screws to assemble the melamine mold. I prefer 1 ¼-inch screws.
* Silicone Caulk: This is crucial for sealing the seams of the mold and preventing concrete from leaking out. Choose a paintable silicone caulk.
* Reinforcement: You can use wire mesh, rebar, or fiberglass reinforcement to strengthen the concrete. I personally prefer wire mesh for smaller countertops and rebar for larger ones.
* Concrete Sealer: A good quality concrete sealer is essential to protect your countertop from stains and water damage. Choose a food-safe sealer if you’re using the countertop in your kitchen.
* Concrete Pigment (Optional): If you want to add color to your countertop, you’ll need concrete pigment. Follow the manufacturer’s instructions for the correct amount to add.
* Mixing Tools: You’ll need a concrete mixer (rent one if you don’t have one), a wheelbarrow or large mixing tub, a shovel, and a mixing paddle.
* Finishing Tools: These include a trowel, a concrete float, sandpaper (various grits), and a concrete grinder (optional, but highly recommended for a smooth finish).
* Safety Gear: Always wear safety glasses, gloves, and a dust mask when working with concrete.
* Release Agent: A concrete release agent will help you remove the countertop from the mold once it’s cured. You can use a commercial release agent or even vegetable oil.
* Measuring Tape: For accurate measurements of your mold.
* Level: To ensure your mold is perfectly level.
* Saw: To cut the melamine boards to the correct size.
* Drill: To screw the melamine boards together.
* Clamps: To hold the melamine boards in place while you’re screwing them together.
Phase 1: Building the Mold
This is arguably the most important step, as the mold will determine the shape and size of your countertop. Take your time and be precise!
1. Measure and Cut the Melamine: Carefully measure the dimensions of your desired countertop. Remember to account for any overhangs or special features. Cut the melamine boards to the correct size using a saw. I always double-check my measurements before cutting!
2. Assemble the Mold: Assemble the melamine boards to form a box. The bottom of the mold will be the top surface of your countertop, so make sure it’s smooth and free of imperfections. Use screws to secure the boards together.
3. Reinforce the Corners: Add extra screws to the corners of the mold to reinforce them. This will prevent the mold from bowing or breaking under the weight of the concrete.
4. Seal the Seams: Apply a generous bead of silicone caulk to all the seams of the mold, both inside and outside. Smooth the caulk with your finger to create a watertight seal. This is crucial to prevent concrete from leaking out and creating a messy situation. Let the caulk dry completely before moving on to the next step.
5. Apply Release Agent: Apply a thin, even coat of concrete release agent to the inside of the mold. This will make it easier to remove the countertop once it’s cured. If you’re using vegetable oil, apply it sparingly with a brush or cloth.
6. Level the Mold: Place the mold on a level surface. Use shims if necessary to ensure that the mold is perfectly level. This is important for creating a countertop with a consistent thickness.
Phase 2: Mixing and Pouring the Concrete
Now for the fun part! Mixing and pouring the concrete can be a bit messy, so be prepared.
1. Mix the Concrete: Follow the manufacturer’s instructions for mixing the concrete. Add water gradually until you achieve a thick, but pourable consistency. If you’re adding pigment, mix it in with the water before adding it to the concrete. I always mix in small batches to ensure even color distribution.
2. Pour the First Layer: Pour a layer of concrete into the mold, about halfway up. Use a trowel or float to spread the concrete evenly and eliminate any air pockets.
3. Add Reinforcement: Place the wire mesh or rebar into the concrete. Make sure the reinforcement is completely embedded in the concrete. This will add strength and prevent cracking.
4. Pour the Second Layer: Pour the remaining concrete into the mold, filling it to the top. Again, use a trowel or float to spread the concrete evenly and eliminate any air pockets.
5. Vibrate the Concrete: Use a rubber mallet or a concrete vibrator to vibrate the concrete. This will help to remove any remaining air pockets and consolidate the concrete. I usually tap the sides of the mold with the mallet.
6. Screed the Surface: Use a screed board to level the surface of the concrete. A screed board is simply a straight piece of wood or metal that you drag across the top of the mold to remove excess concrete and create a level surface.
7. Trowel the Surface: Use a trowel to smooth the surface of the concrete. This will help to create a smooth, even finish. I like to use a steel trowel for a very smooth finish.
8. Cure the Concrete: Cover the mold with plastic sheeting to prevent the concrete from drying out too quickly. This will help to prevent cracking. Let the concrete cure for at least 7 days. I usually wait 10 days for optimal strength.
Phase 3: Finishing the Countertop
This is where you’ll transform your rough concrete slab into a beautiful, polished countertop.
1. Remove from the Mold: Carefully remove the countertop from the mold. You may need to use a hammer and chisel to gently pry the mold apart. Be careful not to damage the countertop.
2. Grind the Surface: Use a concrete grinder to grind the surface of the countertop. Start with a coarse grit and gradually work your way up to a finer grit. This will remove any imperfections and create a smooth, even surface. This step can be dusty, so be sure to wear a dust mask.
3. Sand the Surface: Use sandpaper to sand the surface of the countertop. Start with a coarse grit and gradually work your way up to a finer grit. This will further smooth the surface and prepare it for sealing.
4. Clean the Surface: Thoroughly clean the surface of the countertop to remove any dust or debris.
5. Apply Sealer: Apply a concrete sealer to the countertop. Follow the manufacturer’s instructions for application. Apply multiple coats for maximum protection. I usually apply at least three coats.
6. Let the Sealer Cure: Let the sealer cure completely before using the countertop. This may take several days.
7. Install the Countertop: Install the countertop in your kitchen or bathroom. Use construction adhesive to secure the countertop to the cabinets.
Tips and Tricks
* Practice Makes Perfect: Consider making a small practice piece before tackling the full-sized countertop. This will give you a chance to experiment with the concrete mix and finishing techniques.
* Control the Environment: Concrete cures best in a controlled environment. Avoid pouring concrete in extreme temperatures or direct sunlight.
* Be Patient: Don’t rush the process. Each step is important for creating a high-quality countertop.
* Consider Adding Inlays: You can add decorative inlays to your countertop, such as glass, stones, or metal.
* Experiment with Colors: Don’t be afraid to experiment with different concrete pigments to create a unique look.
* Seal Regularly: Reapply concrete sealer every year or two to maintain the protection of your countertop.
* Don’t be afraid to get creative! This is your project, so make it your own.
I hope this guide has inspired you to create your own concrete countertops. It’s a rewarding project that will add a touch of modern elegance to your home. Good luck, and happy DIY-ing!

Conclusion
So, there you have it! Mastering the art of growing chili peppers at home is not only achievable but incredibly rewarding. We’ve explored a simple yet effective DIY trick that can significantly boost your pepper production, ensuring a bountiful harvest of fiery goodness. This isn’t just about saving a few dollars; it’s about connecting with your food, understanding the growing process, and enjoying the unparalleled satisfaction of nurturing something from seed to table.
This DIY trick, focusing on optimizing soil conditions and providing the right nutrients at the right time, is a game-changer for chili pepper enthusiasts of all levels. Whether you’re a seasoned gardener or a complete beginner, this method is accessible and adaptable to your specific needs and environment. The beauty of this approach lies in its simplicity and the tangible results it delivers. Imagine the pride you’ll feel when you harvest your first batch of vibrant, flavorful chili peppers, knowing that you played an active role in their creation.
But don’t stop there! Experimentation is key to unlocking the full potential of your chili pepper garden. Consider trying different variations of this DIY trick to see what works best for your specific climate and pepper varieties. For example, you could explore different types of organic fertilizers or adjust the watering schedule based on your local weather conditions. Perhaps you’ll discover a unique combination that yields even more impressive results.
Variations to Consider:
* Compost Tea Boost: Supplement your regular watering with a weekly dose of compost tea. This provides a rich source of beneficial microbes and nutrients that can further enhance plant growth and pepper production.
* Epsom Salt Solution: A diluted Epsom salt solution (1 tablespoon per gallon of water) can provide magnesium, which is essential for chlorophyll production and overall plant health. Apply this solution every few weeks.
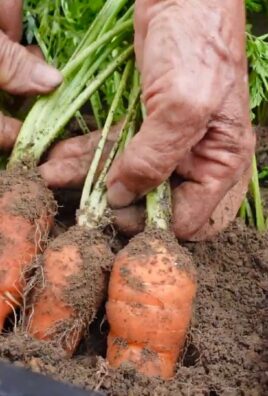
* Companion Planting: Introduce companion plants like basil, marigolds, or carrots to your chili pepper garden. These plants can help deter pests, attract beneficial insects, and improve soil health.
* DIY Pepper Spray: Use some of your harvested peppers to create a natural pest repellent. Blend peppers with water and a little soap, then strain and spray on affected plants.
We wholeheartedly encourage you to try this DIY trick for growing chili peppers and witness the difference it can make. It’s a small investment of time and effort that yields a significant return in terms of flavor, satisfaction, and a deeper connection with the natural world.
Once you’ve given it a try, we’d love to hear about your experience! Share your results, tips, and variations in the comments below. Let’s build a community of chili pepper enthusiasts who are passionate about growing their own delicious and spicy peppers. Your insights could inspire others to embark on their own chili pepper growing journey. So, get your hands dirty, embrace the challenge, and prepare to be amazed by the power of this simple DIY trick! Happy growing!
Frequently Asked Questions (FAQ)
What exactly is the DIY trick you’re referring to?
The DIY trick focuses on creating an optimal growing environment for chili peppers by improving soil conditions and providing targeted nutrients. This typically involves amending the soil with organic matter like compost or well-rotted manure, ensuring proper drainage, and using a balanced fertilizer specifically formulated for peppers. The key is to provide the plants with the right nutrients at each stage of their growth, from seedling to fruiting. It also involves consistent monitoring for pests and diseases and addressing them with organic solutions.
What kind of soil is best for growing chili peppers?
Chili peppers thrive in well-draining, fertile soil with a slightly acidic to neutral pH (around 6.0 to 7.0). A loamy soil is ideal, as it provides a good balance of drainage and water retention. Avoid heavy clay soils, as they can become waterlogged and suffocate the roots. Amending your soil with organic matter like compost, aged manure, or peat moss will improve its structure, drainage, and nutrient content. You can also use raised beds or containers filled with a high-quality potting mix specifically designed for vegetables.
How often should I water my chili pepper plants?
Watering frequency depends on several factors, including the climate, soil type, and the size of your plants. Generally, chili peppers need consistent moisture, but they don’t like to be waterlogged. Water deeply when the top inch of soil feels dry to the touch. Avoid overhead watering, as this can promote fungal diseases. Instead, water at the base of the plant. During hot, dry weather, you may need to water more frequently. Mulching around the plants can help retain moisture and suppress weeds.
What kind of fertilizer should I use for chili peppers?
A balanced fertilizer with a slightly higher phosphorus content is ideal for chili peppers. Look for a fertilizer with an NPK ratio (nitrogen, phosphorus, potassium) of around 5-10-5 or 10-15-10. Phosphorus is essential for root development and flowering, which are crucial for pepper production. You can also use organic fertilizers like bone meal, fish emulsion, or compost tea. Avoid over-fertilizing, as this can lead to excessive foliage growth at the expense of pepper production. Follow the instructions on the fertilizer label carefully.
How do I protect my chili pepper plants from pests and diseases?
Prevention is key when it comes to pests and diseases. Start by choosing disease-resistant varieties of chili peppers. Inspect your plants regularly for signs of pests or diseases. Common pests include aphids, spider mites, and whiteflies. You can control these pests with insecticidal soap, neem oil, or by introducing beneficial insects like ladybugs. Fungal diseases like powdery mildew and blossom end rot can be prevented by ensuring good air circulation, avoiding overhead watering, and providing adequate calcium to the plants.
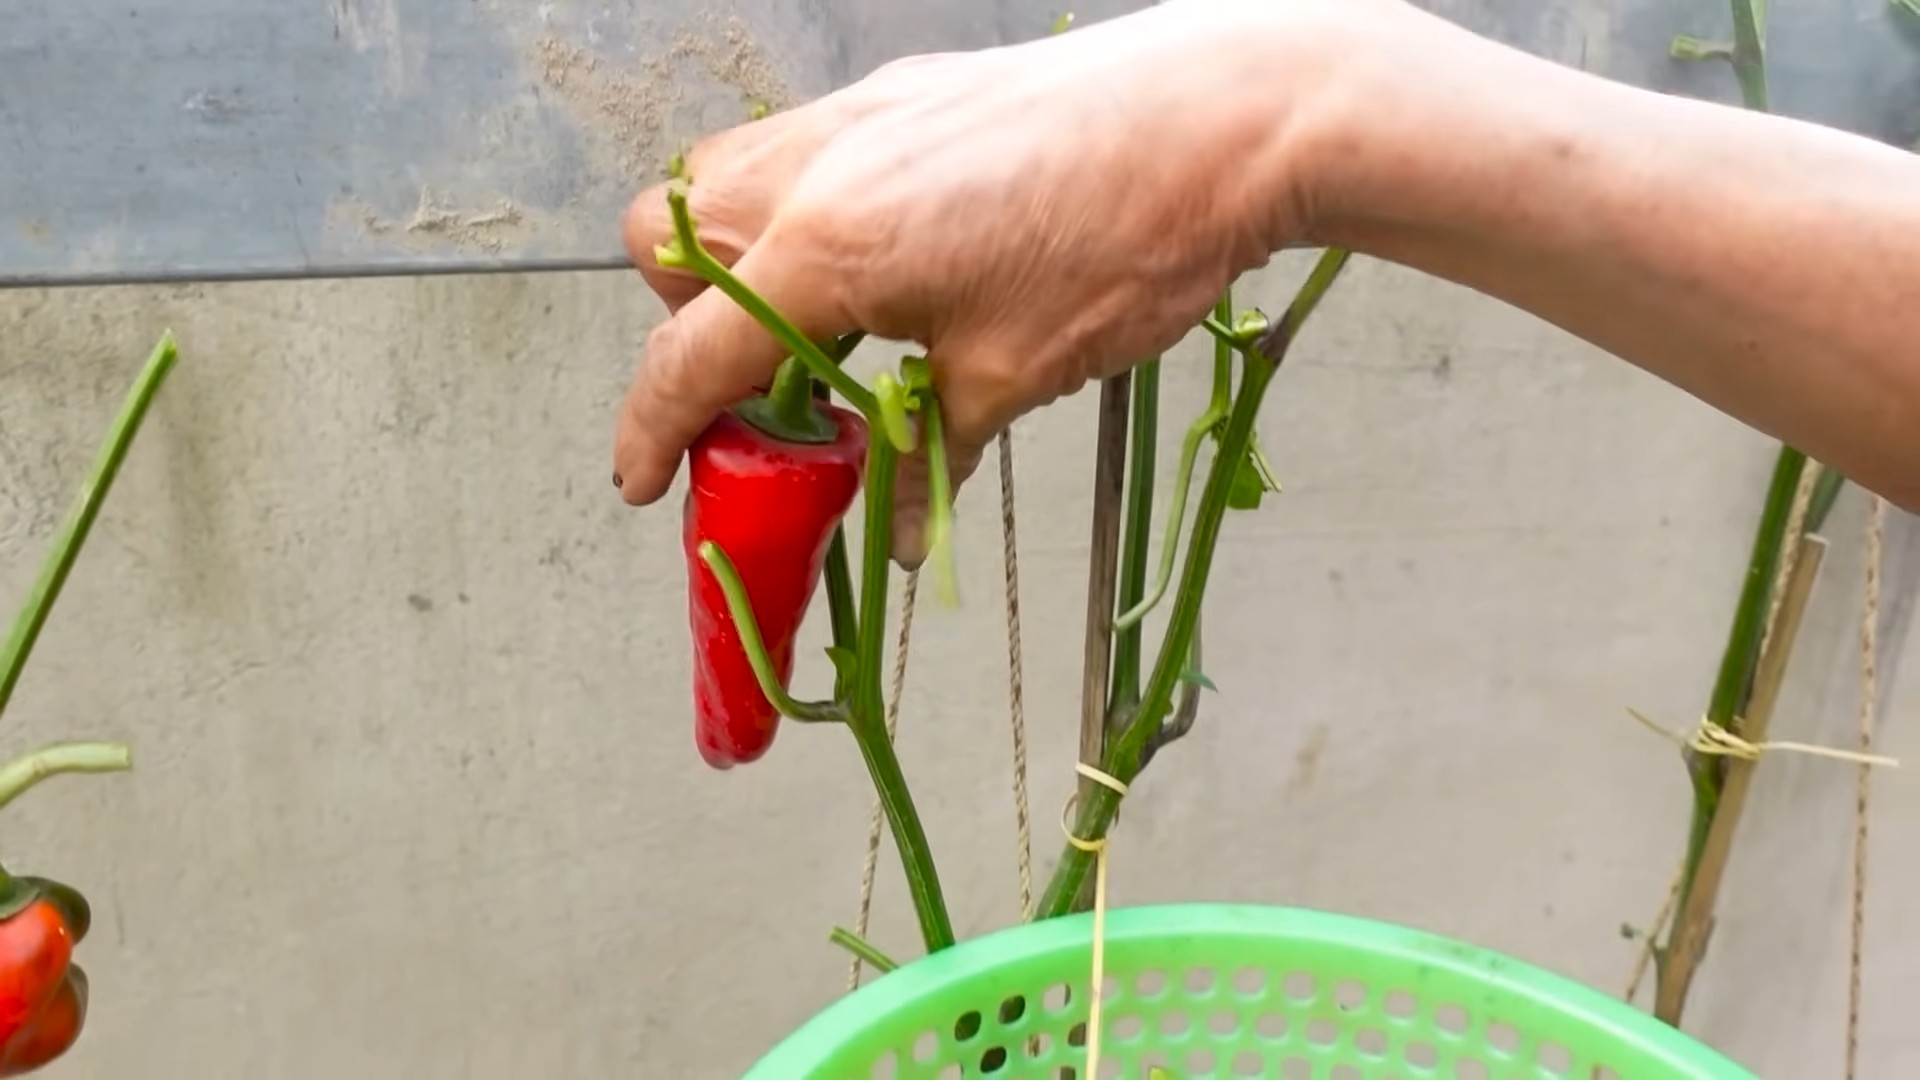
When is the best time to harvest chili peppers?
The best time to harvest chili peppers depends on the variety and your desired level of heat. Most chili peppers will change color as they ripen, typically from green to red, yellow, or orange. You can harvest them at any stage of ripeness, but the flavor and heat will intensify as they mature. Use pruning shears or scissors to cut the peppers from the plant, leaving a small stem attached. Handle the peppers with care, as some varieties can be very hot.
Can I grow chili peppers in containers?
Yes, chili peppers are well-suited for container gardening. Choose a container that is at least 12 inches in diameter and has good drainage holes. Use a high-quality potting mix specifically designed for vegetables. Place the container in a sunny location that receives at least 6-8 hours of direct sunlight per day. Water regularly and fertilize as needed. Container-grown chili peppers may require more frequent watering and fertilization than those grown in the ground.
How do I overwinter my chili pepper plants?
In colder climates, you can overwinter your chili pepper plants indoors to enjoy them for another season. Before the first frost, prune the plants back to about 6-8 inches tall. Dig them up carefully and pot them in containers filled with fresh potting mix. Place the containers in a sunny window or under grow lights. Water sparingly and fertilize occasionally. In the spring, gradually acclimate the plants to outdoor conditions before transplanting them back into the garden.
Leave a Comment