
Growing pineapples at home might sound like an exotic dream reserved for tropical climates, but I’m here to tell you it’s absolutely achievable, even if you’re miles away from Hawaii! Forget those expensive supermarket pineapples – imagine plucking a sweet, juicy, homegrown pineapple straight from your own garden or even your windowsill.
For centuries, the pineapple has been a symbol of hospitality and luxury. Originating in South America, it was a prized possession, carefully cultivated and presented as a sign of welcome and friendship. Now, you can bring that same sense of tropical abundance and welcoming spirit into your own home.
Why should you try growing pineapples at home? Well, besides the sheer satisfaction of nurturing a plant from start to finish, you’ll also enjoy a fruit that’s bursting with flavor and packed with vitamins. Plus, it’s a fantastic conversation starter! In this article, I’ll share my favorite DIY tricks and hacks to help you successfully cultivate your own pineapple plant, regardless of your gardening experience. We’ll cover everything from selecting the perfect pineapple top to troubleshooting common issues, ensuring you’re well on your way to enjoying a taste of the tropics right in your own backyard. Let’s get started!
Ananas selber ziehen: Ein tropischer Traum für dein Zuhause
Hey Leute! Habt ihr euch jemals gefragt, wie es wäre, eure eigene Ananas zu züchten? Ich habe es ausprobiert und es ist einfacher als ihr denkt! Es braucht zwar etwas Geduld, aber das Ergebnis ist unglaublich befriedigend – und super lecker! Hier zeige ich euch, wie ihr das ganz einfach zu Hause hinbekommt.
Was du brauchst:
* Eine reife Ananas (am besten eine, die im Laden schon etwas länger lag und deren Blätter noch grün und fest sind)
* Ein scharfes Messer
* Einen Topf (ca. 15-20 cm Durchmesser)
* Anzuchterde oder eine Mischung aus Blumenerde und Sand
* Wasser
* Optional: Bewurzelungspulver
* Optional: Eine durchsichtige Plastiktüte oder ein Mini-Gewächshaus
Die Vorbereitung: Die Ananas-Krone vorbereiten
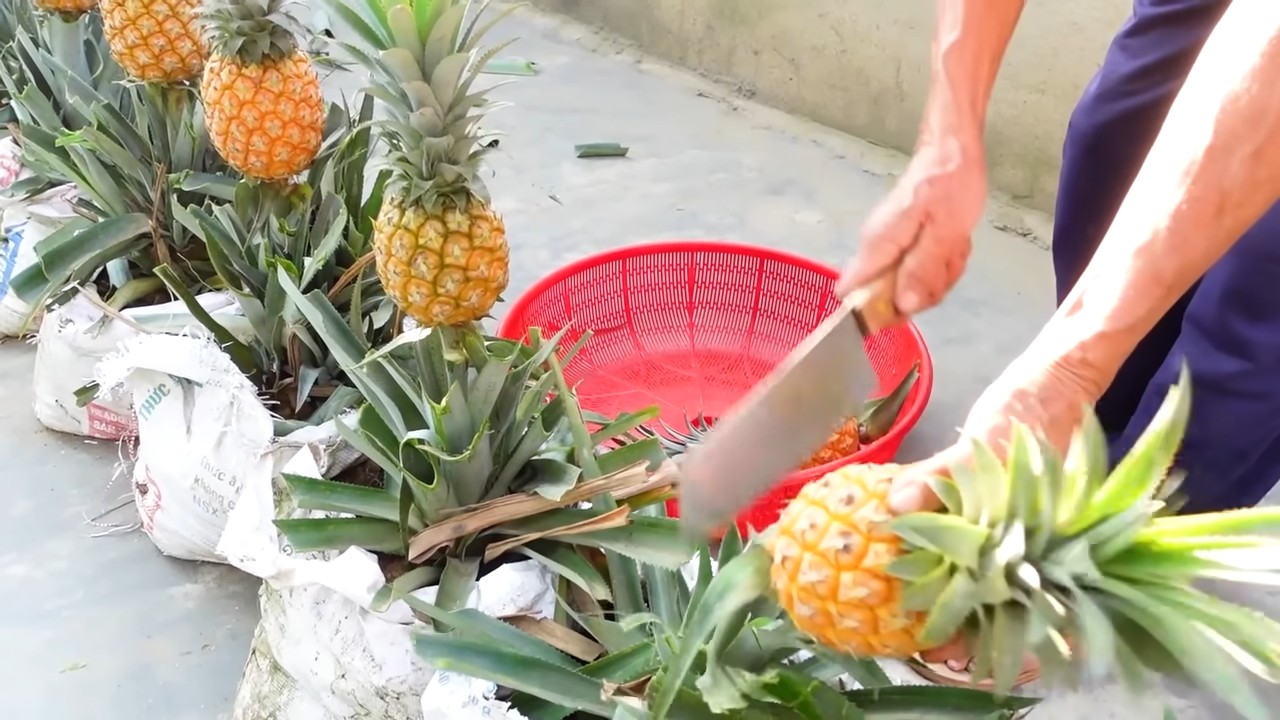
1. Die Krone abtrennen: Das ist der wichtigste Schritt! Nehmt euer scharfes Messer und schneidet die Krone der Ananas vorsichtig ab. Achtet darauf, dass ihr etwa 2-3 cm Fruchtfleisch an der Krone lasst. Keine Sorge, wenn etwas Fruchtfleisch dran bleibt, das entfernen wir später.
2. Fruchtfleisch entfernen: Jetzt kommt der etwas kniffligere Teil. Das Fruchtfleisch, das noch an der Krone hängt, muss entfernt werden, da es sonst faulen kann. Ihr könnt es entweder vorsichtig mit dem Messer abschneiden oder es mit den Fingern abziehen. Seid dabei aber vorsichtig, um die Wurzelansätze nicht zu beschädigen. Die sehen aus wie kleine braune Punkte am unteren Ende der Krone.
3. Die unteren Blätter entfernen: Entfernt die untersten Blätter der Ananas-Krone. So legt ihr die Wurzelansätze frei und gebt der Pflanze die Möglichkeit, neue Wurzeln zu bilden. Zieht einfach die untersten Blätter vorsichtig nach unten ab. Ihr solltet etwa 2-3 cm des Stiels freilegen.
4. Trocknen lassen (optional): Lasst die Ananas-Krone nun für 1-2 Tage an einem trockenen und luftigen Ort trocknen. Das hilft, die Schnittfläche zu versiegeln und das Risiko von Fäulnis zu minimieren. Ich habe das manchmal gemacht und manchmal nicht, und beides hat funktioniert. Aber es schadet definitiv nicht!
Die Bewurzelung: Zwei Methoden zur Auswahl
Es gibt zwei Hauptmethoden, um die Ananas-Krone zu bewurzeln: im Wasser oder direkt in der Erde. Ich habe beide ausprobiert und beide funktionieren gut. Hier sind die Anleitungen:
Methode 1: Bewurzelung im Wasser
1. Vorbereitung: Nehmt ein Glas oder eine Tasse und füllt es mit Wasser. Achtet darauf, dass das Wasser sauber ist.
2. Die Krone ins Wasser stellen: Stellt die Ananas-Krone so ins Wasser, dass nur der untere Teil des Stiels (wo ihr die Blätter entfernt habt) im Wasser ist. Die Blätter sollten nicht im Wasser sein, da sie sonst faulen können.
3. Standort: Stellt das Glas an einen hellen, aber nicht direkten Sonnenplatz. Direkte Sonne kann die Blätter verbrennen.
4. Wasserwechsel: Wechselt das Wasser alle 2-3 Tage, um es sauber zu halten und das Wachstum von Algen zu verhindern.
5. Geduld: Jetzt heißt es warten! Nach etwa 3-8 Wochen sollten sich die ersten Wurzeln bilden. Ihr werdet kleine weiße Wurzeln sehen, die aus dem Stiel wachsen.
Methode 2: Direkte Bewurzelung in der Erde
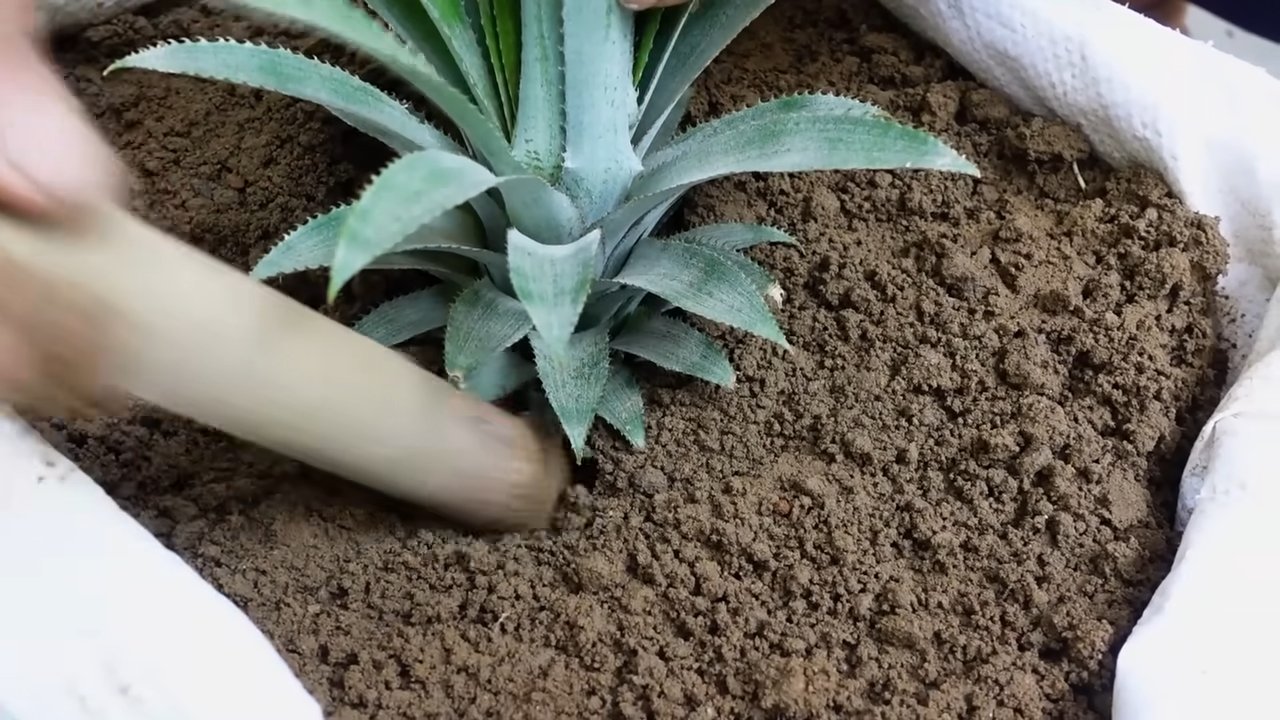
1. Topf vorbereiten: Füllt euren Topf mit Anzuchterde oder einer Mischung aus Blumenerde und Sand. Die Erde sollte locker und gut durchlässig sein.
2. Pflanzen: Macht ein kleines Loch in die Erde und setzt die Ananas-Krone hinein. Achtet darauf, dass die unteren Blätter knapp über der Erde sind.
3. Andrücken: Drückt die Erde leicht an, um die Krone zu stabilisieren.
4. Gießen: Gießt die Erde vorsichtig an, sodass sie feucht, aber nicht nass ist.
5. Standort: Stellt den Topf an einen hellen, aber nicht direkten Sonnenplatz.
6. Feuchtigkeit: Um die Luftfeuchtigkeit zu erhöhen, könnt ihr eine durchsichtige Plastiktüte oder ein Mini-Gewächshaus über den Topf stülpen. Das hilft der Ananas, schneller Wurzeln zu bilden. Achtet aber darauf, die Tüte regelmäßig zu lüften, um Schimmelbildung zu vermeiden.
7. Geduld: Auch hier heißt es wieder warten! Es kann einige Wochen dauern, bis sich Wurzeln bilden. Ihr könnt vorsichtig an der Krone ziehen, um zu prüfen, ob sie fest im Boden sitzt. Wenn sie sich leicht herausziehen lässt, hat sie noch keine Wurzeln gebildet.
Das Einpflanzen: Endlich in die Erde!
Sobald die Ananas-Krone Wurzeln gebildet hat (egal welche Methode ihr verwendet habt), ist es Zeit, sie in einen größeren Topf umzupflanzen.
1. Topf vorbereiten: Wählt einen Topf, der etwas größer ist als der vorherige (ca. 20-25 cm Durchmesser). Füllt den Topf mit einer Mischung aus Blumenerde, Sand und etwas Kompost. Ananas mögen gut durchlässige Erde.
2. Umpflanzen: Macht ein Loch in die Erde und setzt die Ananas-Pflanze vorsichtig hinein. Achtet darauf, die Wurzeln nicht zu beschädigen.
3. Andrücken: Drückt die Erde leicht an, um die Pflanze zu stabilisieren.
4. Gießen: Gießt die Erde gründlich an, sodass sie feucht, aber nicht nass ist.
Die Pflege: So bleibt deine Ananas glücklich
1. Standort: Ananas lieben Sonne! Stellt eure Pflanze an einen sonnigen Standort, am besten ein Südfenster. Im Sommer könnt ihr sie auch nach draußen stellen, aber achtet darauf, sie vor starkem Regen und Wind zu schützen.
2. Gießen: Gießt eure Ananas regelmäßig, aber nicht zu viel. Die Erde sollte immer leicht feucht sein, aber nicht nass. Lasst die oberste Schicht der Erde zwischen den Wassergaben antrocknen. Im Winter braucht die Pflanze weniger Wasser.
3. Düngen: Düngt eure Ananas während der Wachstumsperiode (Frühling und Sommer) alle 2-4 Wochen mit einem Flüssigdünger für Zimmerpflanzen.
4. Luftfeuchtigkeit: Ananas mögen eine hohe Luftfeuchtigkeit. Ihr könnt die Luftfeuchtigkeit erhöhen, indem ihr die Pflanze regelmäßig mit Wasser besprüht oder sie in der Nähe einer Wasserschale aufstellt.
5. Überwintern: Im Winter braucht die Ananas einen kühlen, aber hellen Standort. Reduziert die Wassergaben und düngt die Pflanze nicht.
Die Blüte und Frucht: Geduld zahlt sich aus
Es kann 2-3 Jahre dauern, bis eure Ananas blüht und Früchte trägt. Das ist eine lange Zeit, aber es lohnt sich!
1. Blüte anregen (optional): Wenn ihr die Blüte anregen wollt, könnt ihr einen Apfel in eine Plastiktüte zusammen mit der Ananas-Pflanze legen. Der Apfel gibt Ethylen ab, ein Gas, das die Blüte fördern kann. Lasst den Apfel für etwa eine Woche in der Tüte und lüftet die Tüte regelmäßig.
2. Die Blüte: Wenn die Ananas blüht, erscheinen kleine violette Blüten in der Mitte der Pflanze.
3. Die Frucht: Nach der Blüte beginnt sich die Frucht zu entwickeln. Es dauert mehrere Monate, bis die Ananas reif ist.
4. Ernten: Die Ananas ist reif, wenn sie eine goldgelbe Farbe hat und einen süßen Duft verströmt. Schneidet die Frucht mit einem scharfen Messer ab.
Probleme und Lösungen: Was tun, wenn etwas schief geht?
* Gelbe Blätter: Gelbe Blätter können ein Zeichen für zu viel Wasser, zu wenig Licht oder Nährstoffmangel sein. Überprüft eure Gießgewohnheiten, den Standort und düngt die Pflanze gegebenenfalls.
* Bra
Conclusion
So, there you have it! Growing pineapples at home, while requiring patience, is an incredibly rewarding experience. It’s more than just a fun gardening project; it’s a chance to connect with nature, learn about the life cycle of a fascinating fruit, and ultimately, enjoy the sweet taste of success – literally!
Why is this DIY trick a must-try? Because it transforms a simple pineapple top, often discarded as waste, into a thriving plant that can eventually yield its own delicious fruit. Think about it: you’re reducing food waste, engaging in sustainable gardening, and creating a conversation starter all in one go. Plus, imagine the bragging rights when you serve a pineapple you grew yourself!
But the benefits extend beyond the novelty. Store-bought pineapples, while readily available, often lack the intense sweetness and flavor of a homegrown variety. When you grow your own, you control the growing conditions, ensuring optimal ripeness and flavor development. You also avoid the pesticides and chemicals that may be used in commercial farming.
Don’t be intimidated by the perceived difficulty. While it does require some time and attention, growing pineapples at home is surprisingly straightforward. With the right preparation, a sunny location, and consistent care, you’ll be well on your way to harvesting your own tropical treat.
Ready to take your pineapple growing to the next level? Consider these variations and suggestions:
* Experiment with different pineapple varieties: While the Smooth Cayenne is the most common, explore other varieties like the Red Spanish or the Sugarloaf for unique flavors and textures.
* Use a rooting hormone: While not essential, dipping the base of the pineapple top in a rooting hormone can help speed up the rooting process.
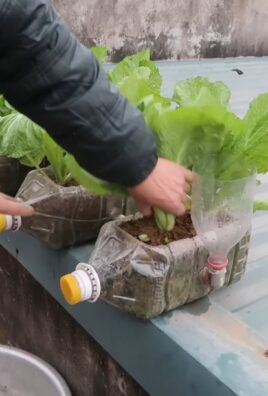
* Try hydroponics: For a more advanced approach, consider growing your pineapple hydroponically. This method can be particularly effective in areas with poor soil.
* Companion planting: Plant basil or marigolds near your pineapple to deter pests and attract beneficial insects.
* Protect from frost: If you live in an area with cold winters, be sure to bring your pineapple plant indoors or provide adequate frost protection.
We encourage you to embark on this exciting gardening adventure. Don’t be afraid to experiment, learn from your mistakes, and most importantly, have fun! Once you’ve harvested your first homegrown pineapple, you’ll understand why this DIY trick is so worthwhile.
We’d love to hear about your experiences growing pineapples at home! Share your tips, tricks, and photos in the comments below. Let’s create a community of pineapple enthusiasts and inspire others to try this rewarding project. What are you waiting for? Grab a pineapple, and let’s get growing! Remember, patience is key, but the sweet reward of a homegrown pineapple is well worth the wait. This DIY project is a fantastic way to learn about plant propagation and enjoy the fruits (literally!) of your labor.
Frequently Asked Questions (FAQ)
How long does it take to grow a pineapple from a top?
Growing a pineapple from a top is a patience-testing process. Generally, it takes anywhere from 2 to 3 years for a pineapple plant grown from a top to produce its first fruit. The exact timeframe depends on several factors, including the variety of pineapple, the climate, the amount of sunlight the plant receives, and the overall care provided. Don’t be discouraged if it takes longer than expected; consistent care and attention will eventually lead to a successful harvest. Remember to fertilize regularly and protect the plant from extreme temperatures.
What kind of soil is best for growing pineapples?
Pineapples thrive in well-draining, slightly acidic soil. A sandy loam soil is ideal, as it allows for good drainage and aeration. You can also create a suitable potting mix by combining equal parts of potting soil, perlite, and sand. Avoid heavy clay soils, as they can retain too much moisture and lead to root rot. The pH level of the soil should be between 5.5 and 6.5 for optimal growth. Adding organic matter, such as compost or well-rotted manure, can improve soil fertility and drainage.
How much sunlight do pineapples need?
Pineapples are sun-loving plants and require at least 6 to 8 hours of direct sunlight per day to thrive. Inadequate sunlight can result in slow growth, poor fruit production, and a leggy appearance. If you’re growing your pineapple indoors, place it near a sunny window or supplement with a grow light. When growing outdoors, choose a location that receives full sun throughout the day. Be mindful of providing some shade during the hottest part of the afternoon in extremely hot climates to prevent sunburn.
How often should I water my pineapple plant?
Water your pineapple plant regularly, but avoid overwatering. The soil should be kept consistently moist, but not soggy. Allow the top inch of soil to dry out between waterings. During the warmer months, you may need to water more frequently than during the cooler months. Check the soil moisture regularly and adjust your watering schedule accordingly. Ensure that the pot has adequate drainage holes to prevent water from accumulating at the bottom.
How do I know when my pineapple is ripe?
Determining when a pineapple is ripe can be tricky, but there are several indicators to look for. The most obvious sign is a change in color. A ripe pineapple will typically turn from green to yellow or golden-orange. The base of the fruit will often ripen first, so check for color changes there. Another indicator is the aroma. A ripe pineapple will have a sweet, fragrant smell, especially near the base. You can also gently tug on one of the leaves near the top of the fruit. If it comes out easily, the pineapple is likely ripe. Finally, a ripe pineapple will feel slightly soft to the touch, but not mushy.
What are common pests and diseases that affect pineapple plants?
Pineapple plants can be susceptible to various pests and diseases. Common pests include mealybugs, scale insects, and spider mites. These pests can suck the sap from the plant, causing stunted growth and yellowing leaves. Control them by wiping them off with a damp cloth or using insecticidal soap. Root rot is a common disease that can occur if the soil is too wet. Prevent root rot by ensuring good drainage and avoiding overwatering. Other diseases include heart rot and fruit rot, which can be caused by fungal infections. Treat these diseases with appropriate fungicides. Regular inspection of your pineapple plant can help you identify and address any pest or disease problems early on.
Can I grow a pineapple indoors?
Yes, you can absolutely grow a pineapple indoors, especially if you live in a climate with cold winters. To successfully grow a pineapple indoors, provide it with plenty of bright, indirect sunlight. A south-facing window is ideal. Supplement with a grow light if necessary. Use a well-draining potting mix and water regularly, allowing the top inch of soil to dry out between waterings. Maintain a warm temperature and high humidity. You can increase humidity by misting the plant regularly or placing it on a pebble tray filled with water. Fertilize regularly with a balanced fertilizer. Be patient, as it may take several years for your indoor pineapple plant to produce fruit.
What fertilizer should I use for my pineapple plant?
Pineapples benefit from regular fertilization. Use a balanced fertilizer with an NPK ratio of 10-10-10 or 14-14-14. Apply the fertilizer every 2-3 months during the growing season (spring and summer). Follow the instructions on the fertilizer label for the correct dosage. You can also use a liquid fertilizer diluted to half strength and apply it more frequently. Avoid over-fertilizing, as this can damage the plant. In addition to a balanced fertilizer, you can also supplement with micronutrients, such as iron and magnesium, to promote healthy growth.
How do I encourage my pineapple plant to flower and fruit?
Encouraging a pineapple plant to flower and fruit can be a bit of a challenge, but there are several techniques you can try. One common method is to expose the plant to ethylene gas. You can do this by placing a ripe apple or banana near the plant and covering it with a plastic bag for a few days. The ripening fruit will release ethylene gas, which can stimulate flowering. Another method is to use a calcium carbide solution. Dissolve a small amount of calcium carbide in water and pour it into the center of the plant. Be careful when handling calcium carbide, as it can be irritating to the skin and eyes. Ensure the plant receives adequate sunlight, water, and fertilizer, as these factors also play a role in flowering and fruiting.

Leave a Comment