
Grow Healthy Kohlrabi Backyard: Ever dreamt of strolling into your backyard and harvesting crisp, juicy kohlrabi, bursting with flavor? I know I have! It’s more than just a vegetable; it’s a culinary adventure waiting to happen, right in your own outdoor space. But let’s be honest, sometimes getting those quirky, bulbous veggies to thrive can feel like a bit of a mystery.
Kohlrabi, with its German roots (“kohl” meaning cabbage and “rabi” meaning turnip), has been a garden staple in Europe for centuries. It’s a testament to resourceful gardening, offering both the bulb and the leaves as edible delights. But why should you bother with this unusual vegetable? Well, besides its unique taste and versatility in the kitchen, growing your own kohlrabi allows you to control the growing process, ensuring you have access to fresh, organic produce free from harmful pesticides. Plus, there’s nothing quite like the satisfaction of nurturing a plant from seed to table!
That’s where this DIY guide comes in! I’m going to share some of my favorite, tried-and-true tricks and hacks to help you grow healthy kohlrabi backyard, even if you’re a beginner gardener. We’ll cover everything from soil preparation and seed starting to pest control and harvesting, ensuring you have a bountiful kohlrabi crop to enjoy. So, grab your gardening gloves, and let’s get started on this exciting journey to kohlrabi success!
Kohlrabi im eigenen Garten anbauen: So geht’s!
Ich liebe Kohlrabi! Der knackige, leicht süßliche Geschmack ist einfach unschlagbar, egal ob roh im Salat, gedünstet als Beilage oder sogar gefüllt. Und das Beste: Kohlrabi lässt sich super einfach im eigenen Garten anbauen. Ich zeige dir, wie du mit ein paar einfachen Schritten eine reiche Ernte erzielen kannst.
Die Vorbereitung: Der richtige Standort und Boden
Bevor wir loslegen, ist die richtige Vorbereitung das A und O. Kohlrabi ist zwar nicht besonders anspruchsvoll, aber ein paar Dinge solltest du beachten, damit er sich wohlfühlt und prächtig wächst.
* Der Standort: Kohlrabi liebt die Sonne! Wähle einen sonnigen bis halbschattigen Platz in deinem Garten. Mindestens sechs Stunden Sonne am Tag sind ideal.
* Der Boden: Der Boden sollte locker, humos und gut durchlässig sein. Kohlrabi mag keine Staunässe. Ein leicht lehmiger Boden ist perfekt, aber auch sandige Böden können mit etwas Kompost verbessert werden.
* Der pH-Wert: Der ideale pH-Wert für Kohlrabi liegt zwischen 6,0 und 7,5. Du kannst den pH-Wert deines Bodens mit einem Testkit aus dem Gartenfachhandel überprüfen und gegebenenfalls mit Kalk oder Schwefel anpassen.
* Die Fruchtfolge: Achte auf eine gute Fruchtfolge. Kohlrabi gehört zur Familie der Kreuzblütler und sollte nicht jedes Jahr am selben Platz angebaut werden. Eine Anbaupause von drei bis vier Jahren ist empfehlenswert, um Krankheiten und Schädlinge zu vermeiden. Gute Vorfrüchte sind beispielsweise Erbsen, Bohnen oder Kartoffeln.
Aussaat und Anzucht: Der Grundstein für eine reiche Ernte
Es gibt zwei Möglichkeiten, Kohlrabi anzubauen: Direkt im Freiland aussäen oder Jungpflanzen vorziehen. Ich bevorzuge die Voranzucht, da sie mir mehr Kontrolle über den Anbau gibt und die Erntezeit verlängert.
* Der Zeitpunkt: Für die Voranzucht beginnst du etwa vier bis sechs Wochen vor dem letzten Frost. In der Regel ist das im März oder April. Für die Direktsaat im Freiland wartest du, bis der Boden sich erwärmt hat, etwa ab Mitte April oder Anfang Mai.
* Die Aussaat: Fülle kleine Anzuchttöpfe oder eine Anzuchtschale mit Anzuchterde. Säe die Samen etwa 1 cm tief aus und bedecke sie leicht mit Erde. Gieße die Erde vorsichtig an, sodass sie feucht, aber nicht nass ist.
* Die Anzucht: Stelle die Anzuchttöpfe an einen hellen und warmen Ort. Die ideale Keimtemperatur liegt zwischen 18 und 22 Grad Celsius. Halte die Erde feucht, aber vermeide Staunässe. Nach etwa einer Woche sollten die ersten Keimlinge erscheinen.
* Das Pikieren: Sobald die Keimlinge ihre ersten richtigen Blätter gebildet haben, kannst du sie pikieren. Das bedeutet, dass du die kleinen Pflänzchen vorsichtig aus der Anzuchtschale nimmst und in einzelne Töpfe umpflanzt. Achte darauf, die Wurzeln nicht zu beschädigen.
* Die Abhärtung: Bevor du die Jungpflanzen ins Freiland setzt, solltest du sie abhärten. Das bedeutet, dass du sie für ein paar Tage tagsüber ins Freie stellst, damit sie sich an die Sonne und die Temperaturen gewöhnen können.
Das Auspflanzen: Ab ins Beet!
Sobald die Jungpflanzen kräftig genug sind und keine Frostgefahr mehr besteht, können sie ins Freiland gepflanzt werden.
* Der Zeitpunkt: In der Regel ist das ab Mitte Mai der Fall. Achte aber auf die Wettervorhersage und warte lieber noch ein paar Tage, wenn es noch einmal kalt werden soll.
* Der Pflanzabstand: Der Pflanzabstand sollte etwa 25 bis 30 cm zwischen den Pflanzen und 30 bis 40 cm zwischen den Reihen betragen. So haben die Kohlrabis genügend Platz zum Wachsen.
* Das Pflanzen: Hebe mit einer kleinen Schaufel Pflanzlöcher aus, die etwas größer sind als die Wurzelballen der Jungpflanzen. Setze die Pflanzen vorsichtig in die Löcher und fülle sie mit Erde auf. Drücke die Erde leicht an und gieße die Pflanzen gut an.
* Der Schutz: Gerade junge Kohlrabipflanzen sind anfällig für Schädlinge wie Erdflöhe oder Kohlweißlinge. Du kannst sie mit einem Insektenschutznetz schützen.
Die Pflege: Gießen, Düngen, Hacken
Nach dem Auspflanzen ist die richtige Pflege entscheidend für eine reiche Ernte.
* Das Gießen: Kohlrabi braucht regelmäßig Wasser, besonders in trockenen Perioden. Gieße am besten morgens oder abends, damit das Wasser nicht so schnell verdunstet. Vermeide Staunässe.
* Das Düngen: Kohlrabi ist ein Starkzehrer und braucht ausreichend Nährstoffe. Dünge die Pflanzen regelmäßig mit einem organischen Dünger, beispielsweise Kompost, Hornspäne oder Gemüsedünger. Ich dünge meine Kohlrabis alle zwei bis drei Wochen.
* Das Hacken: Hacke den Boden regelmäßig, um ihn locker zu halten und Unkraut zu entfernen. Das Hacken fördert auch die Belüftung des Bodens.
* Das Mulchen: Mulche den Boden um die Kohlrabipflanzen mit Stroh, Rasenschnitt oder Laub. Das Mulchen hält den Boden feucht, unterdrückt Unkraut und schützt die Pflanzen vor Spritzwasser.
Schädlinge und Krankheiten: Was tun, wenn’s brenzlig wird?
Auch Kohlrabi ist nicht vor Schädlingen und Krankheiten gefeit. Hier sind die häufigsten Probleme und wie du sie bekämpfen kannst:
* Erdflöhe: Erdflöhe sind kleine, springende Käfer, die Löcher in die Blätter fressen. Du kannst sie mit einem Insektenschutznetz fernhalten oder mit natürlichen Mitteln wie Neemöl bekämpfen.
* Kohlweißlinge: Kohlweißlinge legen ihre Eier auf die Blätter des Kohlrabis. Die Raupen fressen dann die Blätter kahl. Sammle die Raupen ab oder bekämpfe sie mit Bacillus thuringiensis, einem biologischen Insektizid.
* Kohlhernie: Kohlhernie ist eine Pilzkrankheit, die die Wurzeln befällt und zu Wachstumsstörungen führt. Achte auf eine gute Fruchtfolge und vermeide Staunässe. Befallene Pflanzen solltest du entfernen und im Hausmüll entsorgen.
* Falscher Mehltau: Falscher Mehltau ist eine Pilzkrankheit, die sich durch gelbliche Flecken auf den Blättern äußert. Sorge für eine gute Belüftung der Pflanzen und vermeide Staunässe. Du kannst die Pflanzen mit einem Fungizid behandeln.
Die Ernte: Endlich genießen!
Nach etwa acht bis zehn Wochen kannst du deinen Kohlrabi ernten.
* Der Zeitpunkt: Der ideale Zeitpunkt für die Ernte ist, wenn die Knollen etwa faustgroß sind. Sie sollten noch zart und saftig sein. Wenn du zu lange wartest, können sie holzig werden.
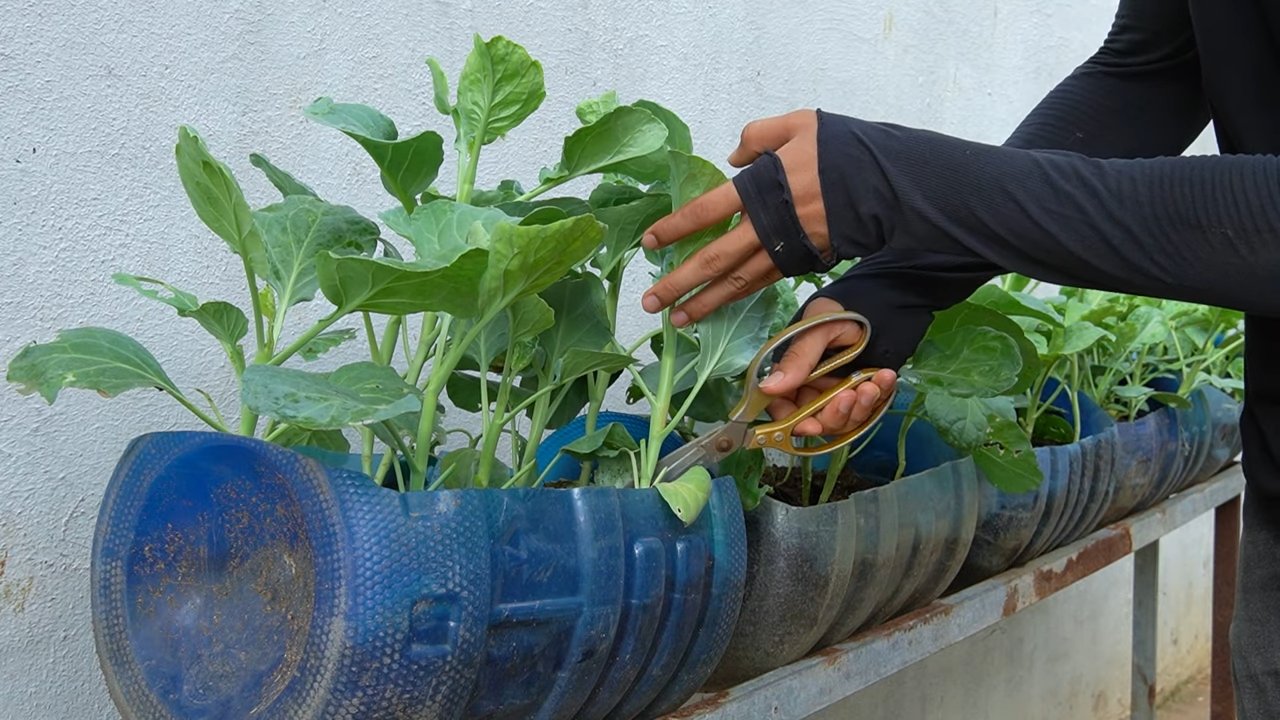
* Die Ernte: Schneide die Knollen mit einem scharfen Messer knapp über dem Boden ab. Entferne die Blätter und lagere die Knollen im Kühlschrank.
* Die Lagerung: Kohlrabi hält sich im Kühlschrank etwa ein bis zwei Wochen. Du kannst ihn auch einfrieren, nachdem du ihn blanchiert hast.
Sortenempfehlungen: Welche Kohlrabisorten sind die besten?
Es gibt viele verschiedene Kohlrabisorten, die sich in Farbe, Größe und Geschmack unterscheiden. Hier sind ein paar meiner Favoriten:
* ‘Delikatess Weiß’: Eine klassische, weiße Sorte mit einem milden Geschmack.
* ‘Superschmelz’: Eine sehr große, weiße Sorte, die auch bei später Ernte nicht holzig wird.
* ‘Blauer Delikatess’: Eine blaue Sorte mit einem leicht süßlichen Geschmack.
* ‘Lanro’: Eine frühe, weiße Sorte, die sich gut für den Anbau im Frühjahr eignet.
* ‘Konan’: Eine robuste, weiße Sorte, die auch mit schwierigen Bedingungen zurechtkommt.
Ich hoffe, diese Anleitung hilft dir dabei, deinen eigenen Kohlrabi erfolgreich anzubauen. Viel Spaß beim Gärtnern und guten

Conclusion
So, there you have it! Mastering the art of growing healthy kohlrabi in your own backyard is not only achievable but also incredibly rewarding. We’ve explored the essential steps, from selecting the right variety and preparing the soil to providing optimal care and warding off potential pests and diseases. But why is this DIY approach a must-try?
Firstly, growing your own kohlrabi guarantees freshness and flavor that you simply can’t replicate with store-bought produce. Imagine the crisp, slightly sweet taste of a kohlrabi bulb harvested just moments before it graces your plate. The difference is truly remarkable. Secondly, you have complete control over the growing process, ensuring that your kohlrabi is free from harmful pesticides and chemicals. This is especially important for those who prioritize organic and sustainable gardening practices. Finally, growing kohlrabi is a fantastic way to connect with nature, learn about the life cycle of plants, and enjoy the satisfaction of nurturing something from seed to harvest.
But the journey doesn’t end here! Feel free to experiment with different kohlrabi varieties to discover your personal favorite. Consider trying ‘Early White Vienna’ for its mild flavor or ‘Purple Vienna’ for its striking color and slightly more robust taste. You can also explore different planting techniques, such as succession planting, to extend your harvest season and enjoy a continuous supply of fresh kohlrabi.
Don’t be afraid to get creative in the kitchen, too! Kohlrabi can be enjoyed raw in salads, slaws, or as a crunchy snack with your favorite dip. It can also be cooked in a variety of ways, such as steaming, roasting, stir-frying, or even adding it to soups and stews. The possibilities are endless!
We wholeheartedly encourage you to embark on this exciting gardening adventure and experience the joy of growing your own healthy kohlrabi. It’s a simple, sustainable, and incredibly satisfying way to enhance your culinary experiences and connect with the natural world.
Now, we want to hear from you! Have you tried growing kohlrabi before? What are your favorite tips and tricks? Share your experiences, successes, and even your challenges in the comments below. Let’s create a vibrant community of kohlrabi enthusiasts and learn from each other. Your insights could inspire others to take the plunge and discover the wonders of homegrown kohlrabi. So, grab your gardening gloves, prepare your soil, and get ready to enjoy the delicious rewards of your labor. Happy gardening!
Frequently Asked Questions (FAQ)
What is the best time to plant kohlrabi?
The best time to plant kohlrabi depends on your climate. In cooler regions, you can start seeds indoors 4-6 weeks before the last expected frost and transplant them outdoors a few weeks after the frost has passed. For warmer climates, you can plant kohlrabi in the fall for a winter harvest. Generally, kohlrabi prefers cooler temperatures, so avoid planting during the hottest months of the year. Aim for soil temperatures between 60°F and 70°F for optimal germination.
How much sunlight does kohlrabi need?
Kohlrabi thrives in full sun, requiring at least 6 hours of direct sunlight per day. Insufficient sunlight can lead to leggy growth and smaller bulbs. If you live in a particularly hot climate, providing some afternoon shade can help prevent the plants from bolting (going to seed prematurely).
What kind of soil is best for growing kohlrabi?
Kohlrabi prefers well-drained, fertile soil that is rich in organic matter. Amend your soil with compost or well-rotted manure before planting to improve drainage and nutrient content. A slightly acidic to neutral soil pH of 6.0 to 7.5 is ideal. Conduct a soil test to determine your soil’s pH and nutrient levels, and adjust accordingly.
How often should I water kohlrabi?
Kohlrabi needs consistent moisture to develop plump, juicy bulbs. Water deeply and regularly, especially during dry periods. Aim for about 1 inch of water per week. Avoid overwatering, as this can lead to root rot. Mulching around the plants can help retain moisture and suppress weeds.
What are some common pests and diseases that affect kohlrabi?
Common pests that can affect kohlrabi include cabbage worms, aphids, flea beetles, and cabbage root maggots. Diseases include clubroot, black rot, and downy mildew. Regularly inspect your plants for signs of pests or diseases and take appropriate action. Companion planting with herbs like rosemary or thyme can help deter pests. Using row covers can also protect your plants from insect infestations. For diseases, ensure good air circulation and avoid overhead watering.
How do I know when kohlrabi is ready to harvest?
Kohlrabi is typically ready to harvest when the bulbs are about 2-3 inches in diameter. Check the seed packet for the specific maturity date of your variety. The bulbs should be firm and smooth. Don’t let them grow too large, as they can become tough and woody. To harvest, simply cut the bulb from the stem just above the soil line.
Can I eat the leaves of kohlrabi?
Yes, the leaves of kohlrabi are edible and nutritious! They can be cooked like spinach or kale. Choose young, tender leaves for the best flavor. Older leaves may be tougher and more bitter.
How do I store kohlrabi after harvesting?
Store kohlrabi bulbs in the refrigerator for up to several weeks. Remove the leaves before storing, as they can draw moisture from the bulb. Place the bulbs in a plastic bag or container to prevent them from drying out.
Can I grow kohlrabi in containers?
Yes, kohlrabi can be successfully grown in containers. Choose a container that is at least 12 inches deep and wide to allow ample room for root development. Use a high-quality potting mix and ensure good drainage. Water regularly and fertilize as needed.
What are some creative ways to use kohlrabi in cooking?
Kohlrabi is a versatile vegetable that can be used in a variety of dishes. Try it raw in salads or slaws, grated into fritters, roasted with other vegetables, or added to soups and stews. You can also pickle kohlrabi for a tangy treat. The possibilities are endless! Experiment with different flavors and textures to discover your favorite ways to enjoy this unique vegetable.


Leave a Comment