
Growing Collard Greens Easily is simpler than you might think! Have you ever dreamed of stepping into your backyard and harvesting your own vibrant, nutrient-packed greens? Imagine the satisfaction of serving a delicious, home-grown collard green dish to your family, knowing exactly where your food came from and how it was grown. Well, that dream can become a reality, even if you don’t have a sprawling farm.
Collard greens have a rich history, deeply rooted in Southern American cuisine and culture. They’re more than just a vegetable; they’re a symbol of resilience, resourcefulness, and community. For generations, families have relied on collard greens as a staple, passing down recipes and growing techniques from one generation to the next.
But why should you bother with growing your own? In today’s world, where convenience often trumps quality, knowing how to grow collard greens easily offers a refreshing alternative. You’ll not only save money on grocery bills, but you’ll also enjoy fresher, more flavorful greens that are free from harmful pesticides. Plus, gardening is a fantastic way to relieve stress, connect with nature, and get some much-needed Vitamin D. So, let’s dive into some simple DIY tricks and hacks that will have you harvesting your own bountiful crop of collard greens in no time!
Kohl Anbauen: Dein Einfacher DIY-Leitfaden für den Garten
Hallo Gartenfreunde! Ich bin total begeistert, euch heute zu zeigen, wie ihr ganz einfach Kohl in eurem eigenen Garten anbauen könnt. Kohl ist nicht nur super gesund, sondern auch unglaublich vielseitig in der Küche. Und das Beste daran? Es ist gar nicht so schwer, wie man vielleicht denkt! Also, krempeln wir die Ärmel hoch und legen los!
Was du für den Kohl-Anbau brauchst
Bevor wir loslegen, hier eine Liste mit allem, was du brauchst:
* Kohl-Samen oder Jungpflanzen: Du kannst entweder mit Samen starten oder dir bereits vorgezogene Jungpflanzen kaufen. Ich persönlich finde Jungpflanzen am Anfang einfacher, aber beides funktioniert super.
* Gute Erde: Kohl braucht nährstoffreiche, gut durchlässige Erde. Kompost ist dein bester Freund!
* Gartenwerkzeug: Eine Schaufel, eine Harke und eventuell ein Pflanzholz.
* Gießkanne oder Gartenschlauch: Kohl braucht regelmäßige Bewässerung.
* Mulch: Stroh oder Grasschnitt helfen, die Feuchtigkeit im Boden zu halten und Unkraut zu unterdrücken.
* Schutz vor Schädlingen: Ein Netz oder Vlies schützt deine Pflanzen vor hungrigen Raupen und anderen Schädlingen.
* Dünger: Organischer Dünger oder Komposttee sind ideal, um deine Pflanzen mit zusätzlichen Nährstoffen zu versorgen.
Die Vorbereitung: Der Schlüssel zum Erfolg
Die richtige Vorbereitung ist das A und O für einen erfolgreichen Kohl-Anbau. Hier sind die Schritte, die du beachten solltest:
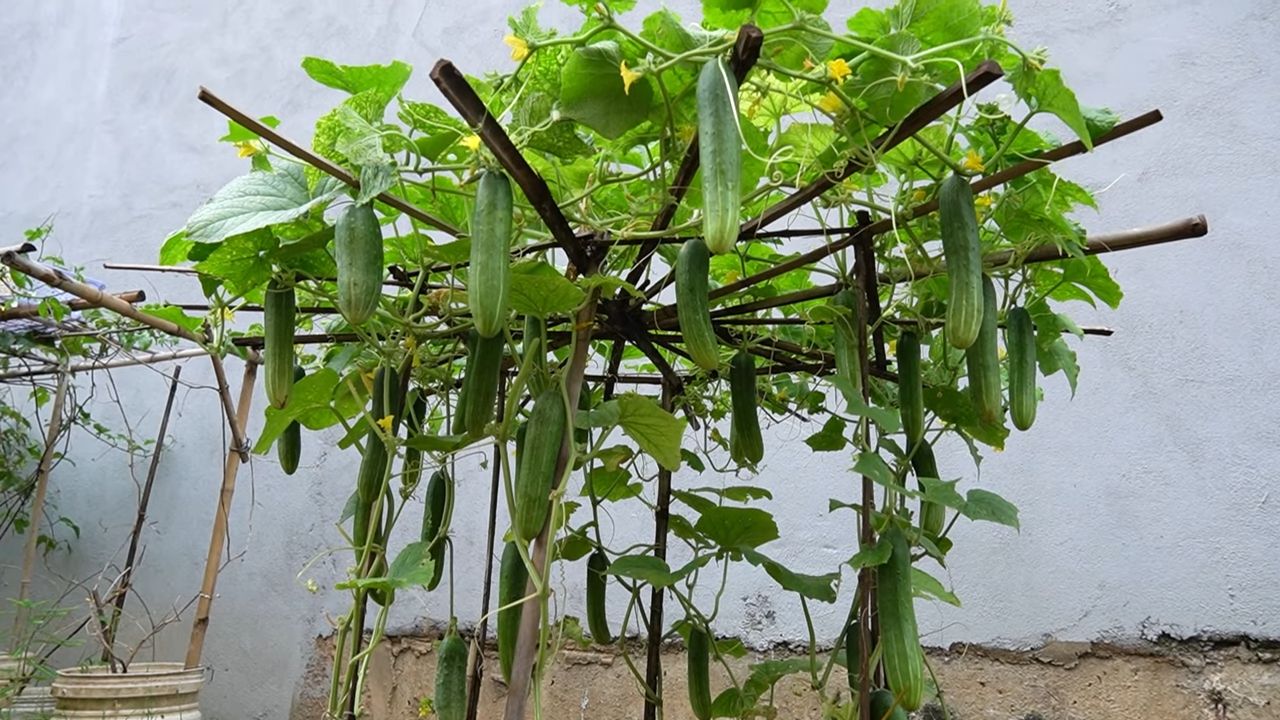
1. Den richtigen Standort wählen: Kohl liebt die Sonne! Wähle einen Standort in deinem Garten, der mindestens sechs Stunden Sonnenlicht pro Tag bekommt.
2. Den Boden vorbereiten: Lockere den Boden mit einer Schaufel auf und entferne Steine und Unkraut. Arbeite reichlich Kompost oder gut verrotteten Mist ein, um den Boden mit Nährstoffen anzureichern.
3. Den pH-Wert überprüfen: Kohl bevorzugt einen leicht sauren bis neutralen pH-Wert (zwischen 6,0 und 7,0). Du kannst den pH-Wert mit einem Bodentest-Kit überprüfen und gegebenenfalls mit Kalk anpassen.
Aussaat oder Pflanzung: Der Start in die Kohl-Saison
Jetzt geht es ans Eingemachte! Hier zeige ich dir, wie du entweder mit Samen startest oder Jungpflanzen setzt.
Aussaat von Kohl-Samen
1. Aussaatzeitpunkt: Kohl kann entweder im Frühjahr (für eine Sommerernte) oder im Spätsommer (für eine Winterernte) ausgesät werden. Beachte die Angaben auf der Samenpackung für die optimalen Aussaatzeiten in deiner Region.
2. Aussaat im Haus (optional): Du kannst die Samen auch im Haus vorziehen, um den Pflanzen einen Vorsprung zu verschaffen. Säe die Samen in kleine Töpfe oder Anzuchtschalen mit Anzuchterde. Halte die Erde feucht und stelle die Töpfe an einen hellen Ort.
3. Direktsaat im Freien: Wenn du die Samen direkt ins Freie säen möchtest, bereite den Boden wie oben beschrieben vor. Säe die Samen etwa 1 cm tief und mit einem Abstand von etwa 5 cm zueinander.
4. Bewässerung: Gieße die Samen vorsichtig an, damit sie nicht weggespült werden. Halte die Erde feucht, bis die Samen keimen.
5. Vereinzeln: Sobald die Sämlinge groß genug sind, vereinzele sie, sodass sie genügend Platz zum Wachsen haben.
Pflanzung von Kohl-Jungpflanzen
1. Pflanzzeitpunkt: Pflanze die Jungpflanzen, sobald die Frostgefahr vorüber ist.
2. Pflanzabstand: Halte einen Abstand von etwa 45-60 cm zwischen den Pflanzen ein, damit sie genügend Platz zum Wachsen haben.
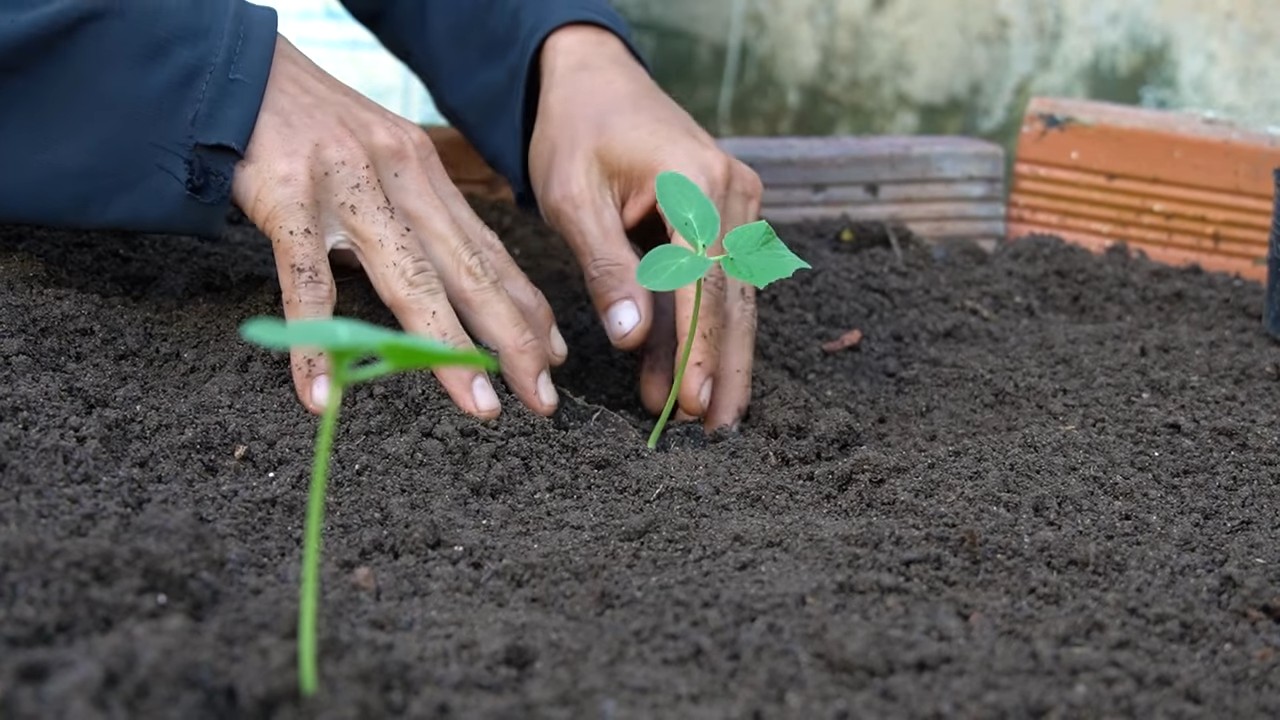
3. Pflanzlöcher ausheben: Grabe Löcher, die etwas größer sind als die Wurzelballen der Jungpflanzen.
4. Pflanzen einsetzen: Setze die Jungpflanzen in die Löcher und fülle sie mit Erde auf. Drücke die Erde leicht an.
5. Bewässerung: Gieße die Pflanzen gründlich an.
6. Mulchen: Bringe eine Schicht Mulch um die Pflanzen herum auf, um die Feuchtigkeit im Boden zu halten und Unkraut zu unterdrücken.
Die Pflege: Damit dein Kohl prächtig gedeiht
Die Pflege ist entscheidend, damit dein Kohl gesund und kräftig wächst. Hier sind die wichtigsten Punkte:
1. Bewässerung: Kohl braucht regelmäßige Bewässerung, besonders während trockener Perioden. Achte darauf, dass der Boden immer feucht, aber nicht nass ist.
2. Düngung: Dünge deine Kohlpflanzen regelmäßig mit organischem Dünger oder Komposttee. Beginne etwa zwei Wochen nach der Pflanzung und wiederhole die Düngung alle paar Wochen.
3. Unkrautbekämpfung: Halte den Bereich um deine Kohlpflanzen frei von Unkraut. Unkraut konkurriert mit den Pflanzen um Nährstoffe und Wasser.
4. Schädlingsbekämpfung: Kohl ist anfällig für verschiedene Schädlinge, wie zum Beispiel Kohlweißlinge, Erdflöhe und Blattläuse. Kontrolliere deine Pflanzen regelmäßig auf Schädlinge und ergreife gegebenenfalls Maßnahmen. Ein Netz oder Vlies kann helfen, die Pflanzen vor Schädlingen zu schützen. Bei Befall kannst du auch biologische Schädlingsbekämpfungsmittel einsetzen.
5. Krankheitsbekämpfung: Kohl kann auch von verschiedenen Krankheiten befallen werden, wie zum Beispiel Kohlhernie oder Falscher Mehltau. Achte auf Anzeichen von Krankheiten und ergreife gegebenenfalls Maßnahmen. Eine gute Belüftung und ein gesunder Boden können helfen, Krankheiten vorzubeugen.
Schutz vor Schädlingen: Deine Kohl-Beschützer
Schädlinge können einem den ganzen Spaß am Gärtnern verderben. Aber keine Sorge, ich habe ein paar Tipps, wie du deine Kohlpflanzen schützen kannst:
* Netze und Vliese: Das ist die einfachste und effektivste Methode, um Kohlweißlinge und andere Schädlinge fernzuhalten.
* Nützlinge fördern: Marienkäfer, Florfliegen und Schlupfwespen sind natürliche Feinde von Blattläusen und anderen Schädlingen. Fördere diese Nützlinge in deinem Garten, indem du ihnen Unterschlupf und Nahrung bietest.
* Biologische Schädlingsbekämpfungsmittel: Bacillus thuringiensis (Bt) ist ein biologisches Insektizid, das gegen Kohlweißlingsraupen wirksam ist. Neemöl ist ein weiteres biologisches Schädlingsbekämpfungsmittel, das gegen eine Vielzahl von Schädlingen wirkt.
* Regelmäßige Kontrolle: Kontrolliere deine Pflanzen regelmäßig auf Schädlinge und entferne sie gegebenenfalls von Hand.
Erntezeit: Die Früchte deiner Arbeit
Endlich ist es soweit! Die Erntezeit ist der schönste Teil des Kohl-Anbaus.
1. Erntezeitpunkt: Kohl kann geerntet werden, sobald die Köpfe fest und kompakt sind. Die Erntezeit hängt von der Sorte und dem Aussaatzeitpunkt ab.
2. Erntemethode: Schneide den Kohlkopf mit einem scharfen Messer oder einer Gartenschere ab. Lasse einige Blätter am Strunk stehen, damit der Kohl länger frisch bleibt.
3. Lagerung: Kohl kann im Kühlschrank oder in einem kühlen, dunklen Keller gelagert werden. Wickle den Kohl in ein feuchtes Tuch, um ihn vor dem Austrocknen zu schützen.
Sortenvielfalt: Welcher Kohl darf es sein?
Es gibt unzählige Kohlsorten, jede mit ihrem eigenen Geschmack und Aussehen. Hier sind ein paar meiner Favoriten:
* Weißkohl: Der Klassiker für Sauerkraut und Krautsalat.
* Rotkohl: Perfekt für deftige Wintergerichte.
* Spitzkohl: Zarter und milder im Geschmack als Weißkohl.
* Grünkohl: Ein echtes Superfood, reich an Vitaminen und Mineralstoffen.
* Rosenkohl: Kleine, grüne Köpfe, die geröstet oder gedünstet werden können.
Conclusion
So, there you have it! Growing collard greens easily doesn’t have to be a daunting task reserved for seasoned gardeners. With a little preparation, the right techniques, and a dash of patience, you can cultivate your own thriving patch of these nutrient-rich greens right in your backyard or even in containers on your balcony.
This DIY approach isn’t just about saving money; it’s about connecting with your food, understanding its journey from seed to table, and enjoying the unparalleled flavor of freshly harvested, homegrown produce. Store-bought collard greens simply can’t compare to the vibrant taste and satisfying crunch of those you’ve nurtured yourself.
Beyond the basic method outlined, feel free to experiment and personalize your collard green growing experience. Consider these variations:
* Succession Planting: Plant new seeds every few weeks to ensure a continuous harvest throughout the growing season. This prevents you from being overwhelmed with a massive harvest all at once.
* Companion Planting: Plant collard greens alongside beneficial companions like dill, chamomile, or rosemary. These herbs can help deter pests and attract beneficial insects, creating a healthier and more balanced garden ecosystem.
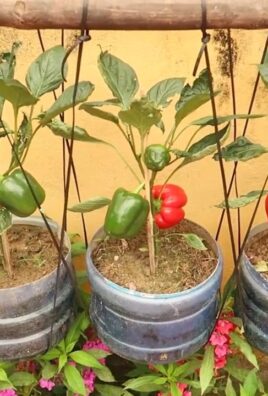
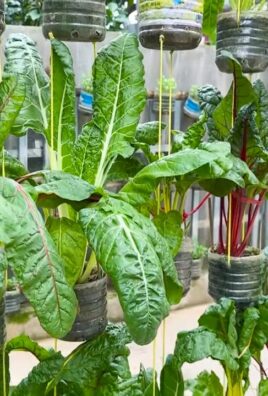
* Container Gardening: If you’re short on space, don’t despair! Collard greens thrive in large containers. Just ensure they have adequate drainage and are placed in a sunny location. Choose a container that is at least 12 inches deep and wide to accommodate their root system.
* Different Varieties: Explore the diverse world of collard green varieties. From the classic ‘Georgia Southern’ to the tender ‘Top Bunch’ and the slightly sweeter ‘Vates,’ each variety offers a unique flavor profile and texture. Experiment to find your personal favorite.
* Soil Amendments: While we emphasized the importance of well-draining soil, consider enriching it further with compost tea or worm castings. These natural amendments provide a boost of nutrients and beneficial microbes, promoting vigorous growth and healthier plants.
Growing your own collard greens is a rewarding experience that offers numerous benefits, from fresh, healthy food to a deeper connection with nature. It’s a sustainable practice that reduces your reliance on commercially grown produce and allows you to control the quality of your food.
Don’t be afraid to get your hands dirty and embrace the learning process. Gardening is a journey, and every mistake is an opportunity to learn and improve. We encourage you to try this DIY trick for growing collard greens easily. We are confident that you’ll be amazed by the results.
Once you’ve harvested your first batch of homegrown collard greens, we’d love to hear about your experience! Share your tips, successes, and challenges in the comments below. Let’s create a community of collard green enthusiasts and learn from each other. Happy gardening!
Frequently Asked Questions (FAQ)
Q: How long does it take for collard greens to grow from seed to harvest?
A: Generally, collard greens take about 55 to 75 days to mature from seed to harvest. However, this timeframe can vary depending on the variety, growing conditions, and climate. Warmer temperatures tend to accelerate growth, while cooler temperatures may slow it down. You can start harvesting outer leaves as soon as they reach a usable size, even before the entire plant is fully mature. This “cut-and-come-again” method allows for a continuous harvest over an extended period.
Q: What are the most common pests and diseases that affect collard greens, and how can I prevent or control them?
A: Collard greens are susceptible to several pests and diseases, including aphids, cabbage worms, flea beetles, and fungal diseases like downy mildew and black rot. Prevention is key! Here are some strategies:
* Crop Rotation: Avoid planting collard greens in the same location year after year. Rotating crops helps break the life cycle of pests and diseases that may be present in the soil.
* Companion Planting: As mentioned earlier, planting beneficial herbs like dill, chamomile, and rosemary can help deter pests.
* Row Covers: Use row covers to physically protect your collard greens from pests. These lightweight fabrics allow sunlight and water to reach the plants while preventing insects from accessing them.
* Handpicking: Regularly inspect your plants for pests and handpick them off as soon as you spot them. This is particularly effective for larger pests like cabbage worms.
* Insecticidal Soap or Neem Oil: If pest infestations become severe, consider using insecticidal soap or neem oil. These are relatively safe and effective options for controlling many common garden pests. Always follow the instructions on the product label carefully.
* Good Air Circulation: Ensure good air circulation around your plants to prevent fungal diseases. Space plants adequately and avoid overhead watering, which can create a humid environment that encourages fungal growth.
* Disease-Resistant Varieties: Choose disease-resistant varieties of collard greens whenever possible.
Q: How often should I water my collard greens?
A: Collard greens need consistent moisture to thrive. Water deeply and regularly, especially during hot, dry weather. Aim to keep the soil consistently moist but not waterlogged. A good rule of thumb is to water when the top inch of soil feels dry to the touch. Mulching around your plants can help retain moisture and reduce the need for frequent watering. The frequency of watering will depend on factors such as soil type, climate, and the size of your plants.
Q: What kind of fertilizer should I use for collard greens?
A: Collard greens are heavy feeders and benefit from regular fertilization. A balanced fertilizer with a ratio of 10-10-10 or 14-14-14 is a good option. You can also use organic fertilizers like compost, aged manure, or fish emulsion. Apply fertilizer according to the instructions on the product label. Side-dressing with fertilizer every few weeks can help provide a continuous supply of nutrients. Avoid over-fertilizing, as this can lead to excessive foliage growth at the expense of root development.
Q: Can I grow collard greens in partial shade?
A: While collard greens prefer full sun (at least 6 hours of direct sunlight per day), they can tolerate partial shade, especially in hotter climates. However, plants grown in partial shade may not produce as many leaves or grow as vigorously as those grown in full sun. If you’re growing collard greens in partial shade, try to choose a location that receives morning sun, as this will help dry the leaves and reduce the risk of fungal diseases.
Q: How do I know when my collard greens are ready to harvest?
A: Collard greens are ready to harvest when the leaves are a good size (typically 8-10 inches long) and a deep green color. The leaves should be firm and crisp, not wilted or yellowed. You can harvest individual leaves as needed, starting with the outer leaves. Alternatively, you can harvest the entire plant at once. To harvest individual leaves, simply snap them off at the base of the plant. To harvest the entire plant, cut it off at the base with a sharp knife.
Q: Can I freeze collard greens for later use?
A: Yes, collard greens can be frozen for later use. To freeze them, wash and chop the leaves, then blanch them in boiling water for 2-3 minutes. This helps preserve their color and flavor. After blanching, immediately plunge the leaves into ice water to stop the cooking process. Drain the leaves thoroughly and pack them into freezer bags or containers. Remove as much air as possible before sealing. Frozen collard greens can be stored in the freezer for up to 8-12 months.
Q: Are there any health benefits to eating collard greens?
A: Absolutely! Collard greens are packed with nutrients and offer numerous health benefits. They are an excellent source of vitamins A, C, and K, as well as folate, calcium, and fiber. Collard greens are also rich in antioxidants, which help protect against cell damage. Studies have shown that consuming collard greens may help lower cholesterol, reduce the risk of certain cancers, and improve bone health.

Leave a Comment