
Cabbage garden for housewives – that’s right, let’s dive into the wonderful world of growing your own crisp, delicious cabbages right in your backyard! Forget those bland, store-bought heads; imagine serving up a vibrant, homegrown cabbage in your next family meal. I know, it sounds idyllic, doesn’t it?
For centuries, cabbage has been a staple in diets across the globe, from sauerkraut in Germany to kimchi in Korea. It’s a humble vegetable with a rich history, often associated with resourcefulness and self-sufficiency. Think about it – our grandmothers and great-grandmothers likely had their own little cabbage patches, providing fresh, nutritious food for their families. And now, you can too!
But let’s be honest, gardening can sometimes feel overwhelming, especially with busy schedules. That’s where these DIY tricks and hacks come in. I’m going to share some simple, effective methods to help you cultivate a thriving cabbage garden for housewives, even if you’re a complete beginner. We’ll cover everything from choosing the right varieties to pest control, ensuring you have a bountiful harvest. Why spend extra money at the grocery store when you can grow your own fresh, organic cabbages? Let’s get started and transform your garden into a cabbage haven!
Dein eigener kleiner Kohl-Garten: Ein DIY-Projekt für Hausfrauen (und alle anderen!)
Hallo ihr Lieben! Habt ihr Lust, eure eigenen, frischen Kohlköpfe zu ernten? Es ist einfacher, als ihr denkt, und ich zeige euch, wie ihr mit ein paar einfachen Schritten euren eigenen kleinen Kohl-Garten anlegen könnt. Keine Angst, auch wenn ihr keinen riesigen Garten habt, ist das möglich! Wir können das Ganze auch im Hochbeet oder sogar in Töpfen auf dem Balkon umsetzen. Los geht’s!
Was du für deinen Kohl-Garten brauchst:
* Kohl-Samen oder Jungpflanzen: Je nachdem, wie schnell ihr ernten wollt. Samen brauchen etwas länger, Jungpflanzen sind schneller erntereif. Beliebte Sorten sind Weißkohl, Rotkohl, Grünkohl, Wirsing und Rosenkohl.
* Anzuchterde (optional): Wenn ihr die Samen selbst vorziehen wollt.
* Gartenerde: Am besten eine nährstoffreiche, humose Erde.
* Kompost oder organischen Dünger: Kohl ist ein Starkzehrer und braucht viele Nährstoffe.
* Gießkanne oder Gartenschlauch: Zum regelmäßigen Gießen.
* Gartenwerkzeug: Spaten, Harke, Pflanzkelle.
* Schneckenkorn (optional): Kohl ist leider sehr beliebt bei Schnecken.
* Pflanzstäbe oder Rankhilfen (optional): Für hohe Kohlsorten wie Grünkohl.
* Vlies oder Netz (optional): Zum Schutz vor Schädlingen wie Kohlweißlingen.
Schritt-für-Schritt-Anleitung: Kohl anbauen leicht gemacht
1. Die Vorbereitung: Der richtige Standort und die Bodenvorbereitung
1. Wähle den richtigen Standort: Kohl braucht viel Sonne! Mindestens 6 Stunden direkte Sonneneinstrahlung pro Tag sind ideal. Ein halbschattiger Standort ist auch möglich, aber die Ernte wird dann etwas geringer ausfallen.
2. Bereite den Boden vor: Kohl liebt einen lockeren, gut durchlässigen und nährstoffreichen Boden. Entferne Unkraut, Steine und Wurzeln. Lockere den Boden mit einem Spaten auf und arbeite Kompost oder organischen Dünger ein. Das verbessert die Bodenstruktur und versorgt den Kohl mit wichtigen Nährstoffen. Ich persönlich schwöre auf gut abgelagerten Kompost!
3. Boden-pH-Wert prüfen (optional): Kohl bevorzugt einen leicht sauren bis neutralen pH-Wert (zwischen 6,0 und 7,0). Du kannst den pH-Wert mit einem Bodentest-Kit aus dem Gartencenter überprüfen und gegebenenfalls mit Kalk oder Schwefel anpassen.
2. Die Aussaat oder das Pflanzen: Samen oder Jungpflanzen?
1. Aussaat (optional): Wenn du deine Kohlpflanzen selbst vorziehen möchtest, beginne etwa 6-8 Wochen vor dem letzten Frost mit der Aussaat im Haus. Fülle Anzuchtschalen oder kleine Töpfe mit Anzuchterde und säe die Samen etwa 1 cm tief. Halte die Erde feucht, aber nicht nass. Stelle die Schalen an einen hellen, warmen Ort. Sobald die Sämlinge groß genug sind, kannst du sie in größere Töpfe pikieren.
2. Pflanzen: Wenn du Jungpflanzen gekauft hast, kannst du sie direkt ins Beet pflanzen, sobald die Frostgefahr vorüber ist. Hebe ein Loch aus, das etwas größer ist als der Wurzelballen der Pflanze. Setze die Pflanze hinein und fülle das Loch mit Erde auf. Drücke die Erde leicht an und gieße die Pflanze gut.
3. Pflanzabstand: Achte auf den richtigen Pflanzabstand! Je nach Kohlsorte variiert der Abstand. Als Faustregel gilt:
* Weißkohl, Rotkohl, Wirsing: 50-60 cm zwischen den Pflanzen und 60-70 cm zwischen den Reihen.
* Grünkohl: 40-50 cm zwischen den Pflanzen und 50-60 cm zwischen den Reihen.
* Rosenkohl: 60-70 cm zwischen den Pflanzen und 70-80 cm zwischen den Reihen.
4. Gießen: Gieße die Pflanzen nach dem Pflanzen gut an.
3. Die Pflege: Gießen, Düngen und Schädlingsbekämpfung
1. Gießen: Kohl braucht regelmäßig Wasser, besonders während trockener Perioden. Gieße am besten morgens, damit die Blätter bis zum Abend abtrocknen können. Vermeide Staunässe, da dies zu Wurzelfäule führen kann.
2. Düngen: Kohl ist ein Starkzehrer und braucht regelmäßige Düngergaben. Dünge etwa alle 2-3 Wochen mit einem organischen Dünger oder Kompost. Du kannst auch einen speziellen Kohldünger verwenden.
3. Schädlingsbekämpfung: Kohl ist leider anfällig für verschiedene Schädlinge wie Kohlweißlinge, Kohlfliegen, Erdflöhe und Schnecken.
* Kohlweißlinge: Die Raupen des Kohlweißlings fressen die Blätter des Kohls. Du kannst sie absammeln oder ein Vlies oder Netz über die Pflanzen spannen, um die Falter am Eierlegen zu hindern.
* Kohlfliegen: Die Larven der Kohlfliege fressen an den Wurzeln des Kohls. Du kannst die Pflanzen mit einem Netz schützen oder Nematoden (Fadenwürmer) einsetzen, die die Larven bekämpfen.
* Erdflöhe: Erdflöhe fressen kleine Löcher in die Blätter des Kohls. Du kannst die Pflanzen mit einem Vlies schützen oder sie regelmäßig mit Wasser besprühen.
* Schnecken: Schnecken lieben Kohl! Du kannst Schneckenkorn streuen oder Schneckenzäune aufstellen, um die Pflanzen zu schützen. Ich persönlich sammle sie am liebsten abends ab.
4. Unkraut jäten: Halte das Beet unkrautfrei, damit der Kohl genügend Nährstoffe und Wasser bekommt.
4. Die Ernte: Wann ist der Kohl reif?
1. Erntezeitpunkt: Der Erntezeitpunkt hängt von der Kohlsorte und dem Zeitpunkt der Aussaat oder Pflanzung ab.
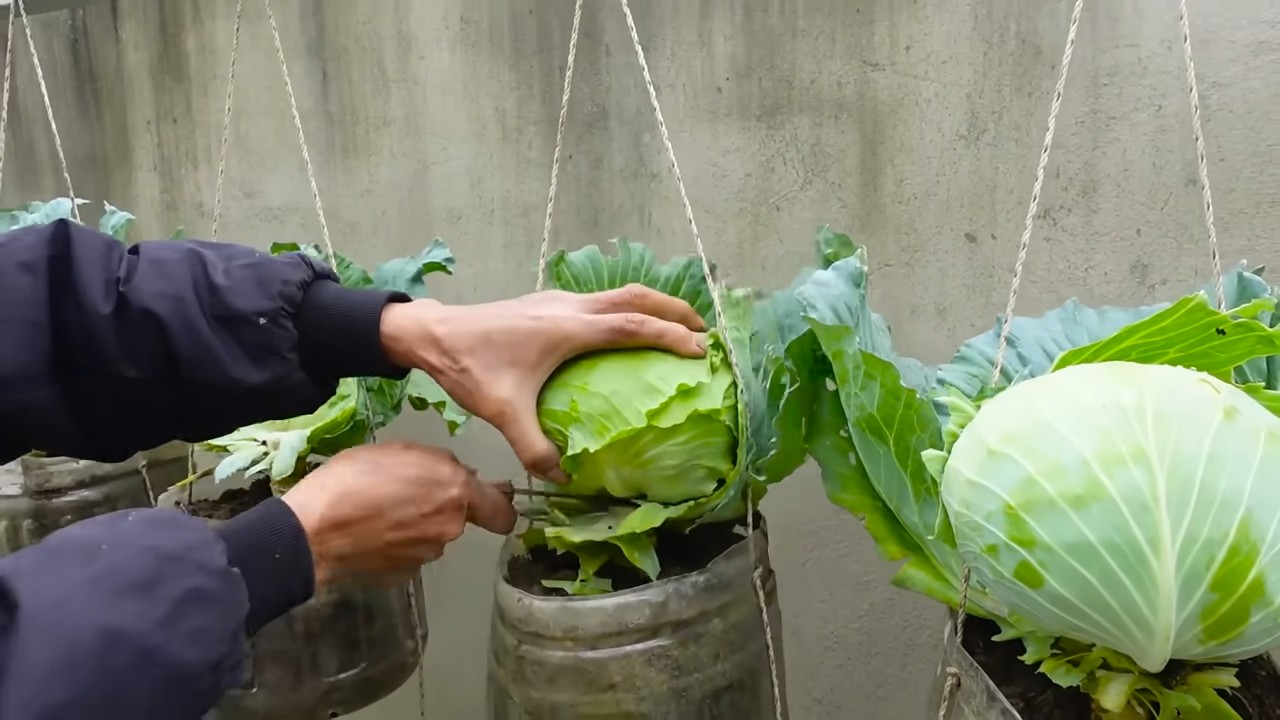
* Weißkohl, Rotkohl, Wirsing: Die Köpfe sind erntereif, wenn sie fest und geschlossen sind. Drücke leicht auf den Kopf. Wenn er sich fest anfühlt, ist er reif.
* Grünkohl: Grünkohl kann geerntet werden, sobald die Blätter groß genug sind. Ernte die äußeren Blätter zuerst.
* Rosenkohl: Die Röschen sind erntereif, wenn sie fest und geschlossen sind. Ernte die unteren Röschen zuerst.
2. Erntemethode: Schneide den Kohlkopf mit einem scharfen Messer oder einer Gartenschere ab. Lasse einige Blätter am Strunk stehen, um die Lagerfähigkeit zu verbessern.
3. Lagerung: Kohl kann im Kühlschrank oder im kühlen Keller gelagert werden. Wickle den Kohlkopf in Frischhaltefolie oder ein feuchtes Tuch, um ihn vor dem Austrocknen zu schützen.
Zusätzliche Tipps und Tricks für deinen Kohl-Garten
* Fruchtfolge beachten: Baue Kohl nicht jedes Jahr am selben Standort an, um Krankheiten und Schädlingen vorzubeugen. Wechsle den Standort alle 2-3 Jahre.
* Mischkultur: Pflanze Kohl in Mischkultur mit anderen Pflanzen, die ihn vor Schädlingen schützen oder seine Nährstoffversorgung verbessern. Gute Nachbarn für Kohl sind z.B. Ringelblumen, Tagetes, Kamille, Dill, Salbei und Thymian.
* Hochbeet oder Töpfe: Wenn du keinen Garten hast, kannst du Kohl auch im Hochbeet oder in Töpfen auf dem Balkon anbauen. Achte darauf, dass die Töpfe groß genug sind und eine gute Drainage haben.
* Kohl im Winter: Einige Kohlsorten wie Grünkohl und Rosenkohl sind winterhart und können auch im Winter geerntet werden.
* Kohl selber vermehren: Du kannst Kohl auch selber vermehren, indem du die Samen aus den reifen Schoten gewinnst.
Ich hoffe, diese Anleitung hilft dir dabei, deinen eigenen kleinen Kohl-Garten anzulegen. Es ist wirklich ein toll

Conclusion
So, there you have it! Transforming your backyard into a thriving cabbage garden is not just a whimsical dream for seasoned farmers. It’s an achievable reality for any housewife, regardless of prior gardening experience. This DIY approach, tailored for the everyday home gardener, offers a multitude of benefits that extend far beyond simply having fresh cabbage at your fingertips.
Think about it: you’re reducing your reliance on grocery stores, minimizing your carbon footprint by consuming locally grown produce, and ensuring that your family is enjoying the freshest, most nutritious cabbage possible. Store-bought cabbage, while convenient, often lacks the vibrant flavor and crisp texture of homegrown varieties. Plus, you have complete control over the growing process, eliminating the worry of harmful pesticides or herbicides.
But the advantages don’t stop there. Gardening is a fantastic stress reliever. The simple act of nurturing plants, feeling the soil between your fingers, and witnessing the miracle of growth can be incredibly therapeutic. A cabbage garden can become your personal sanctuary, a place to escape the demands of daily life and reconnect with nature.
And let’s not forget the educational aspect. Gardening is a wonderful way to teach children about where their food comes from, the importance of healthy eating, and the wonders of the natural world. Involving them in the process, from planting seeds to harvesting the mature cabbage heads, will foster a sense of responsibility and appreciation for the environment.
Ready to take your cabbage garden to the next level? Consider experimenting with different varieties of cabbage. From the classic green cabbage to the vibrant red cabbage and the delicately flavored Savoy cabbage, there’s a whole world of cabbage to explore. You can also try companion planting. Marigolds, for example, are known to deter pests, while dill can attract beneficial insects.
Another variation to consider is succession planting. By planting new cabbage seedlings every few weeks, you can ensure a continuous harvest throughout the growing season. This way, you’ll always have fresh cabbage on hand for your favorite recipes.
Don’t be intimidated by the prospect of starting a cabbage garden. It’s a relatively low-maintenance crop, especially when you follow the simple steps outlined in this guide. With a little bit of planning, preparation, and care, you can create a flourishing cabbage patch that will provide you and your family with delicious, nutritious cabbage for months to come.
We wholeheartedly encourage you to give this DIY cabbage garden trick a try. It’s a rewarding experience that will not only enhance your culinary creations but also enrich your life in countless other ways. And most importantly, please share your experiences with us! We’d love to hear about your successes, your challenges, and any tips or tricks you’ve discovered along the way. Your feedback will help us improve this guide and inspire other housewives to embark on their own cabbage gardening adventures. So, grab your gardening gloves, get your hands dirty, and start growing your own delicious, healthy cabbage today! Let’s cultivate a community of thriving cabbage gardeners, one backyard at a time.
Frequently Asked Questions (FAQ)
What are the best cabbage varieties for a beginner gardener?
For beginners, we recommend starting with varieties that are known for their ease of growth and resilience. ‘Early Jersey Wakefield’ is a great choice for early harvests, as it matures quickly. ‘Golden Acre’ is another reliable option, producing medium-sized heads that are perfect for salads and coleslaw. ‘Danish Ballhead’ is a good choice for storage, as it keeps well over the winter. These varieties are generally less susceptible to common cabbage pests and diseases, making them ideal for novice gardeners. Remember to check your local climate and growing conditions to choose varieties that are well-suited to your area.
How much space does each cabbage plant need?
Cabbage plants need adequate space to develop properly. Generally, allow 18 to 24 inches between plants in a row and 24 to 36 inches between rows. This spacing allows for good air circulation, which helps prevent fungal diseases. If you’re growing smaller varieties, you can get away with slightly closer spacing. However, overcrowding can lead to smaller heads and increased susceptibility to pests and diseases. When transplanting seedlings, be sure to give them enough room to spread their roots and grow to their full potential.
What are the most common pests and diseases that affect cabbage, and how can I prevent them?
Cabbage is susceptible to several pests and diseases, including cabbage worms, cabbage loopers, aphids, flea beetles, and clubroot. To prevent these problems, start by choosing disease-resistant varieties. Crop rotation is also crucial; avoid planting cabbage in the same spot year after year. Cover your plants with row covers to protect them from pests. Regularly inspect your plants for signs of infestation or disease and take action promptly. For cabbage worms and loopers, handpicking them off the plants or using Bacillus thuringiensis (Bt), a natural insecticide, can be effective. For aphids, a strong spray of water or insecticidal soap can help. To prevent clubroot, ensure your soil is well-drained and has a pH of 6.5 to 7.0.
How often should I water my cabbage plants?
Cabbage plants need consistent moisture, especially during head formation. Water deeply and regularly, aiming for about 1 to 1.5 inches of water per week. Check the soil moisture regularly and water when the top inch feels dry. Avoid overhead watering, as this can promote fungal diseases. Instead, water at the base of the plants. Mulching around the plants can help retain moisture and suppress weeds. During hot, dry weather, you may need to water more frequently.
When is the best time to harvest cabbage?
Cabbage is ready to harvest when the heads are firm and solid to the touch. The exact timing will depend on the variety and growing conditions. Generally, early varieties mature in about 60 to 70 days, while later varieties may take 80 to 100 days. Check the seed packet or plant tag for specific maturity dates. To harvest, use a sharp knife to cut the head from the stem, leaving a few outer leaves intact.
Can I grow cabbage in containers?
Yes, you can successfully grow cabbage in containers, especially if you have limited space. Choose a large container, at least 12 inches in diameter, with good drainage. Use a high-quality potting mix and provide regular watering and fertilization. Container-grown cabbage may need more frequent watering than those grown in the ground. Choose smaller varieties that are well-suited to container gardening.
What kind of fertilizer should I use for cabbage?
Cabbage is a heavy feeder and benefits from regular fertilization. Before planting, amend the soil with compost or well-rotted manure. During the growing season, fertilize every 2 to 3 weeks with a balanced fertilizer, such as 10-10-10 or 14-14-14. Alternatively, you can use a fertilizer specifically formulated for vegetables. Follow the instructions on the fertilizer label. Avoid over-fertilizing, as this can lead to excessive leaf growth and smaller heads.
How do I store harvested cabbage?
To store cabbage, remove any loose outer leaves and wrap the head in plastic wrap. Store it in the refrigerator crisper drawer. Cabbage can typically be stored for several weeks, or even months, if kept properly. For longer storage, you can also ferment cabbage into sauerkraut or kimchi.
Is it possible to grow cabbage in the fall or winter?
Yes, you can grow cabbage in the fall or winter in many regions, especially those with mild climates. Fall-planted cabbage can be harvested in late fall or early winter. Choose varieties that are cold-hardy and mature quickly. Protect your plants from frost with row covers or mulch. In colder climates, you may need to grow cabbage in a greenhouse or cold frame.
What are some creative ways to use homegrown cabbage?
Beyond the classic coleslaw and sauerkraut, there are countless ways to enjoy homegrown cabbage. Try shredding it and adding it to stir-fries, soups, or stews. Cabbage rolls are a delicious and comforting dish. You can also grill or roast cabbage wedges for a simple and flavorful side dish. Cabbage juice is a nutritious and refreshing beverage. Get creative and experiment with different recipes to discover your favorite ways to use your homegrown cabbage.
Leave a Comment