
Growing onions easy trick – that’s what we’re diving into today! Have you ever dreamt of pulling plump, juicy onions straight from your own backyard? Imagine the satisfaction of using homegrown ingredients in your favorite recipes, knowing exactly where they came from and how they were grown. It’s a feeling that connects us to the earth and to generations past.
Onions have a rich history, dating back thousands of years. Ancient Egyptians revered them, even using them in burial rituals! Throughout history, onions have been valued not only for their culinary uses but also for their medicinal properties. Today, they remain a staple in cuisines worldwide, adding depth and flavor to countless dishes.
But let’s be honest, sometimes growing onions can feel a little…challenging. That’s where this growing onions easy trick comes in! Many gardeners struggle with getting the right size, dealing with pests, or simply knowing when to harvest. This DIY guide will equip you with a simple, effective method to bypass common pitfalls and achieve a bountiful onion harvest, even if you’re a complete beginner. I’m excited to share my favorite tips and tricks to make growing onions a breeze. Let’s get started!
Zwiebeln ziehen leicht gemacht: Mein DIY-Trick für eine reiche Ernte
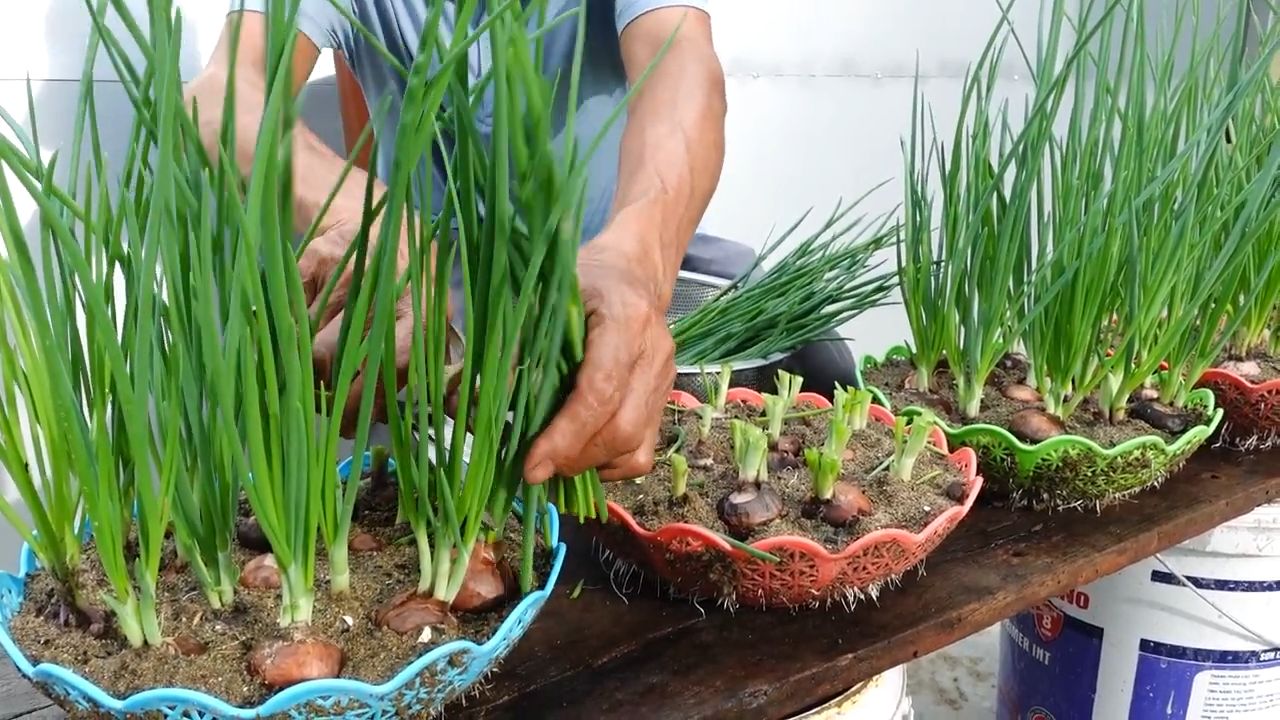
Ich liebe es, frische Zutaten aus meinem eigenen Garten zu verwenden. Und Zwiebeln? Die sind ein absolutes Muss in meiner Küche! Aber Zwiebeln aus Samen zu ziehen kann ganz schön knifflig sein. Deshalb möchte ich euch heute meinen einfachen DIY-Trick zeigen, wie ihr mit minimalem Aufwand eine reiche Zwiebelernte erzielen könnt. Das Geheimnis liegt in der Verwendung von Zwiebelstecklingen!
Was sind Zwiebelstecklinge und warum sind sie so toll?
Zwiebelstecklinge sind kleine, junge Zwiebeln, die bereits vorgezogen wurden. Sie sind sozusagen der “Turbo” für eure Zwiebelzucht. Hier sind die Vorteile:
* Schneller Ernteerfolg: Im Vergleich zur Aussaat von Zwiebelsamen dauert es deutlich kürzer, bis ihr eure eigenen Zwiebeln ernten könnt.
* Einfache Handhabung: Zwiebelstecklinge sind robust und einfach zu pflanzen, auch für Gartenanfänger.
* Weniger Ausfälle: Die Stecklinge sind bereits kräftig und widerstandsfähig, was die Wahrscheinlichkeit von Ausfällen reduziert.
* Gleichmäßige Größe: Ihr erhaltet in der Regel Zwiebeln von gleichmäßiger Größe, was die Lagerung erleichtert.
* Ideal für kleine Gärten: Auch wenn ihr nur wenig Platz habt, könnt ihr mit Zwiebelstecklingen eine ordentliche Ernte erzielen.
Was ihr für diesen DIY-Trick braucht
Bevor wir loslegen, hier eine Liste der Dinge, die ihr benötigt:
* Zwiebelstecklinge: Diese bekommt ihr im Frühjahr in Gartencentern oder online. Achtet auf gesunde, kräftige Stecklinge ohne Anzeichen von Krankheiten oder Schädlingsbefall. Verschiedene Sorten sind verfügbar, wählt die, die euch am besten schmeckt und für eure Region geeignet ist.
* Gartenwerkzeug: Eine kleine Schaufel oder Pflanzkelle, um die Löcher für die Stecklinge zu graben.
* Gartenerde: Am besten eine lockere, humusreiche Erde. Wenn euer Gartenboden sehr lehmig ist, könnt ihr ihn mit Kompost oder Sand verbessern.
* Kompost oder organischer Dünger: Um die Zwiebeln mit ausreichend Nährstoffen zu versorgen.
* Gießkanne: Zum Bewässern der frisch gepflanzten Stecklinge.
* (Optional) Mulch: Mulch hilft, die Feuchtigkeit im Boden zu halten und Unkraut zu unterdrücken. Stroh, Rasenschnitt oder Holzhackschnitzel eignen sich gut.
Schritt-für-Schritt-Anleitung: Zwiebeln pflanzen mit Stecklingen
Jetzt geht’s ans Eingemachte! Hier ist meine detaillierte Anleitung, wie ihr eure Zwiebelstecklinge erfolgreich pflanzt:
1. Vorbereitung des Bodens
1. Wählt den richtigen Standort: Zwiebeln lieben die Sonne! Sucht euch einen sonnigen Platz in eurem Garten aus, der mindestens 6 Stunden Sonnenlicht pro Tag bekommt.
2. Lockert den Boden auf: Mit einer Schaufel oder Grabegabel lockert ihr den Boden gründlich auf. Entfernt dabei Steine, Wurzeln und Unkraut.
3. Verbessert die Bodenqualität: Mischt Kompost oder organischen Dünger unter die Erde. Das sorgt für eine gute Nährstoffversorgung der Zwiebeln.
4. Ebnet die Oberfläche: Harkt die Oberfläche glatt, damit die Stecklinge gleichmäßig gepflanzt werden können.
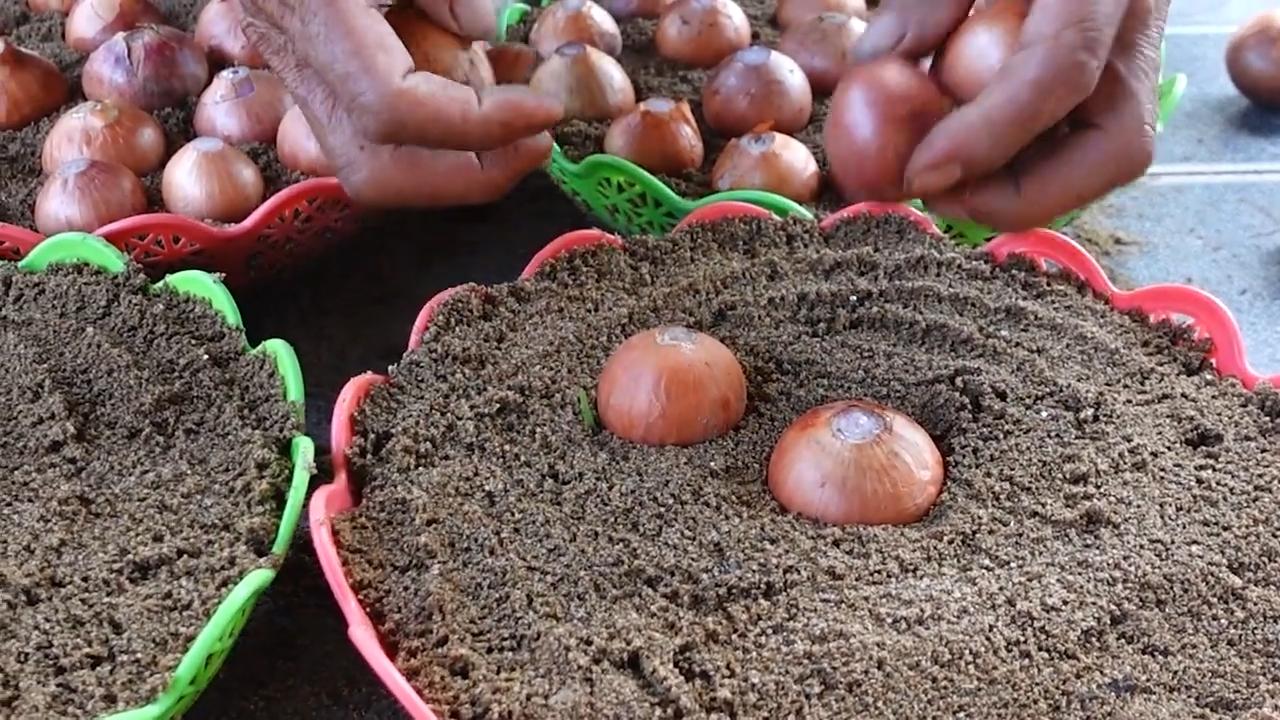
2. Das Pflanzen der Zwiebelstecklinge
1. Abstand halten: Pflanzt die Stecklinge in Reihen mit einem Abstand von etwa 10-15 cm zwischen den einzelnen Zwiebeln und 20-30 cm zwischen den Reihen. So haben die Zwiebeln genügend Platz zum Wachsen.
2. Löcher graben: Grabt mit der Pflanzkelle kleine Löcher, die tief genug sind, um die Wurzeln der Stecklinge aufzunehmen.
3. Stecklinge einsetzen: Setzt die Stecklinge vorsichtig in die Löcher. Achtet darauf, dass die Wurzeln nach unten zeigen und der Hals der Zwiebel (der Übergang zwischen Wurzeln und Grün) knapp unter der Erdoberfläche liegt.
4. Löcher füllen: Füllt die Löcher mit Erde und drückt sie leicht an.
5. Gießen nicht vergessen: Gießt die frisch gepflanzten Stecklinge gründlich an. Das hilft den Wurzeln, sich schnell im Boden zu verankern.
3. Pflege der Zwiebeln während der Wachstumsphase
1. Regelmäßig gießen: Zwiebeln brauchen ausreichend Wasser, besonders während trockener Perioden. Gießt regelmäßig, aber vermeidet Staunässe.
2. Unkraut entfernen: Haltet das Beet unkrautfrei. Unkraut konkurriert mit den Zwiebeln um Nährstoffe und Wasser.
3. Düngen: Düngt die Zwiebeln während der Wachstumsphase ein- bis zweimal mit einem organischen Dünger.
4. Mulchen (optional): Bringt eine Schicht Mulch um die Zwiebeln aus. Das hilft, die Feuchtigkeit im Boden zu halten, Unkraut zu unterdrücken und den Boden zu schützen.
5. Schädlinge und Krankheiten beobachten: Achtet auf Anzeichen von Schädlingen oder Krankheiten. Bei Bedarf könnt ihr biologische Schädlingsbekämpfungsmittel einsetzen.
4. Die Ernte
1. Der richtige Zeitpunkt: Die Zwiebeln sind erntereif, wenn das Laub gelb wird und umknickt.
2. Zwiebeln aus der Erde holen: Lockert die Erde um die Zwiebeln herum mit einer Grabegabel auf und zieht sie vorsichtig aus der Erde.
3. Trocknen lassen: Lasst die Zwiebeln einige Tage an einem trockenen, luftigen Ort trocknen. Das hilft, sie haltbar zu machen.
4. Lagern: Lagert die getrockneten Zwiebeln an einem kühlen, trockenen und dunklen Ort.
Häufige Fehler vermeiden
Hier sind ein paar häufige Fehler, die ihr vermeiden solltet, um eine erfolgreiche Zwiebelernte zu erzielen:
* Zu tiefes Pflanzen: Wenn ihr die Stecklinge zu tief pflanzt, können sie faulen. Achtet darauf, dass der Hals der Zwiebel knapp unter der Erdoberfläche liegt.
* Zu wenig Wasser: Zwiebeln brauchen ausreichend Wasser, besonders während trockener Perioden.
* Zu viel Dünger: Zu viel Dünger kann zu übermäßigem Wachstum des Laubs führen, aber zu Lasten der Zwiebelbildung.
* Unkraut vernachlässigen: Unkraut konkurriert mit den Zwiebeln um Nährstoffe und Wasser.
* Falsche Lagerung: Wenn ihr die Zwiebeln nicht richtig trocknet und lagert, können sie faulen.
Zusätzliche Tipps für eine noch bessere Ernte
* Fruchtfolge beachten: Pflanzt Zwiebeln nicht jedes Jahr am selben Standort. Eine Fruchtfolge hilft, Krankheiten und Schädlinge zu vermeiden.
* Begleitpflanzen: Pflanzt Begleitpflanzen wie Karotten oder Ringelblumen neben die Zwiebeln. Sie können Schädlinge abwehren.
* Verschiedene Sorten ausprobieren: Probiert verschiedene Zwiebelsorten aus, um herauszufinden, welche am besten in eurem Garten wachsen und euch am besten schmecken.
* Eigene Stecklinge ziehen: Wenn ihr mutig seid, könnt ihr auch versuchen, eure eigenen Zwiebelstecklinge aus Samen zu ziehen. Das ist zwar etwas aufwendiger, aber es lohnt sich!
Ich hoffe, dieser DIY-Trick hilft euch dabei, eine reiche Zwiebelernte zu erzielen. Mit ein wenig Geduld und Pflege werdet ihr bald eure eigenen, köstlichen Zwiebeln ernten können. Viel Spaß beim Gärtnern!
Conclusion
So, there you have it! This simple, yet incredibly effective DIY trick for growing onions is a game-changer for any gardener, regardless of experience level. Forget struggling with inconsistent results or expensive starter plants. This method offers a cost-effective, sustainable, and remarkably successful way to cultivate your own delicious onions right at home.
Why is this a must-try? Because it addresses the common challenges faced by onion growers. It simplifies the planting process, minimizes transplant shock, and maximizes your chances of a bountiful harvest. Imagine the satisfaction of pulling plump, healthy onions from your garden, knowing you nurtured them from tiny seedlings with your own hands, using a technique that’s both ingenious and accessible.
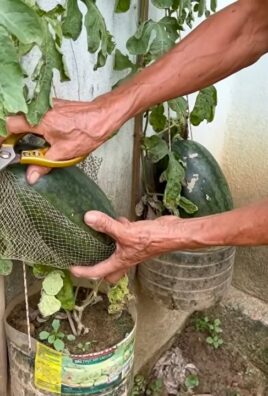
But the beauty of this method lies not only in its simplicity but also in its adaptability. Feel free to experiment with different onion varieties to discover your favorites. Try using different types of containers, from repurposed yogurt cups to biodegradable seed starting trays. You can even adapt this technique for growing other bulb vegetables like shallots or garlic, with slight modifications to the planting depth and spacing.
Consider enriching your soil with compost tea or worm castings for an extra boost of nutrients. Companion planting can also enhance your onion growth. Carrots, for example, are known to deter onion flies, while onions can repel carrot root flies. Explore these symbiotic relationships to create a thriving and balanced garden ecosystem.
Don’t be afraid to tweak the process to suit your specific climate and growing conditions. If you live in a particularly hot or dry region, provide extra shade and water during the initial stages of growth. If you’re in a colder climate, start your onions indoors earlier in the season to give them a head start.
The key is to observe your plants closely and adjust your approach as needed. Gardening is a learning process, and every season brings new opportunities to refine your techniques and deepen your understanding of the natural world.
We are confident that this DIY trick will revolutionize your onion-growing experience. It’s a testament to the power of simple solutions and the joy of connecting with nature. So, grab your onion seeds, gather your supplies, and get ready to embark on a rewarding gardening adventure.
We wholeheartedly encourage you to try this method and share your results with us! Post pictures of your thriving onion seedlings, tell us about your successes (and even your challenges!), and let’s build a community of passionate gardeners who are dedicated to growing their own food sustainably and successfully. Your insights and experiences will undoubtedly inspire others to give this trick a try and reap the rewards of homegrown onions. Let us know what varieties you tried, what soil mixes worked best, and any other tips or tricks you discovered along the way. Together, we can unlock the secrets to abundant onion harvests and create a greener, more sustainable future. Happy gardening!
Frequently Asked Questions (FAQ)
What kind of onion seeds should I use for this method?
You can use any variety of onion seeds you prefer! Consider your local climate and growing season when making your selection. Short-day onions are best suited for southern regions with mild winters, while long-day onions thrive in northern areas with longer summer days. Intermediate-day onions are a good choice for regions with moderate climates. Popular varieties include Yellow Spanish, Red Burgundy, and White Sweet Spanish. Experiment with different types to find your favorites!
How often should I water my onion seedlings?
Water your onion seedlings regularly to keep the soil consistently moist, but not waterlogged. Check the soil moisture level daily by sticking your finger about an inch deep into the soil. If it feels dry, it’s time to water. Avoid overwatering, as this can lead to root rot. A good rule of thumb is to water deeply when the top inch of soil feels dry. As the seedlings mature, you can gradually reduce the frequency of watering.
What kind of soil should I use for growing onion seedlings?
A well-draining potting mix is essential for growing healthy onion seedlings. Avoid using garden soil, as it can be too heavy and compact, hindering root growth. Look for a potting mix that contains a blend of peat moss, perlite, and vermiculite. You can also amend your potting mix with compost or worm castings to provide extra nutrients. Ensure the pH of the soil is between 6.0 and 7.0 for optimal onion growth.
How much sunlight do onion seedlings need?
Onion seedlings require plenty of sunlight to thrive. Aim for at least 6-8 hours of direct sunlight per day. If you’re starting your seedlings indoors, place them near a sunny window or use grow lights to supplement natural light. Rotate the seedlings regularly to ensure even growth on all sides. Insufficient sunlight can result in leggy and weak seedlings.
When is the best time to transplant my onion seedlings into the garden?
The best time to transplant your onion seedlings into the garden is when they are about 4-6 inches tall and the weather has warmed up. Ensure that the risk of frost has passed before transplanting. Harden off your seedlings by gradually exposing them to outdoor conditions for a week or two before transplanting. This will help them adjust to the change in environment and reduce transplant shock.
Can I use this method for growing other bulb vegetables?
Yes, this method can be adapted for growing other bulb vegetables like shallots, garlic, and leeks. However, you may need to adjust the planting depth and spacing depending on the specific vegetable. For example, garlic cloves should be planted deeper than onion seeds. Research the specific requirements of each vegetable to ensure optimal growth.
What are some common pests and diseases that affect onions?
Common pests that affect onions include onion flies, thrips, and onion maggots. Diseases include onion rot, downy mildew, and purple blotch. Monitor your plants regularly for signs of pests or diseases and take appropriate action to control them. Organic pest control methods, such as neem oil and insecticidal soap, can be effective in managing pests. Ensure good air circulation and avoid overwatering to prevent diseases.
How do I know when my onions are ready to harvest?
Onions are typically ready to harvest when the tops begin to fall over and turn yellow or brown. This indicates that the bulbs have reached their mature size. You can also gently dig around the base of the plant to check the size of the bulb. If the bulb is large and firm, it’s likely ready to harvest.
How do I store my harvested onions?
After harvesting, cure your onions by laying them out in a single layer in a well-ventilated area for 1-2 weeks. This allows the outer layers to dry and prevents rot. Once cured, store your onions in a cool, dry, and dark place. Braiding the tops together and hanging them is a traditional method of storing onions. Properly stored onions can last for several months.
What if my onion seedlings are not growing well?
If your onion seedlings are not growing well, consider the following factors: sunlight, water, soil, and nutrients. Ensure that your seedlings are receiving adequate sunlight, water, and nutrients. Check the soil pH and amend it if necessary. If you suspect a pest or disease problem, take action to control it. Sometimes, seedlings may simply need more time to develop. Be patient and continue to provide them with the care they need.
Leave a Comment