
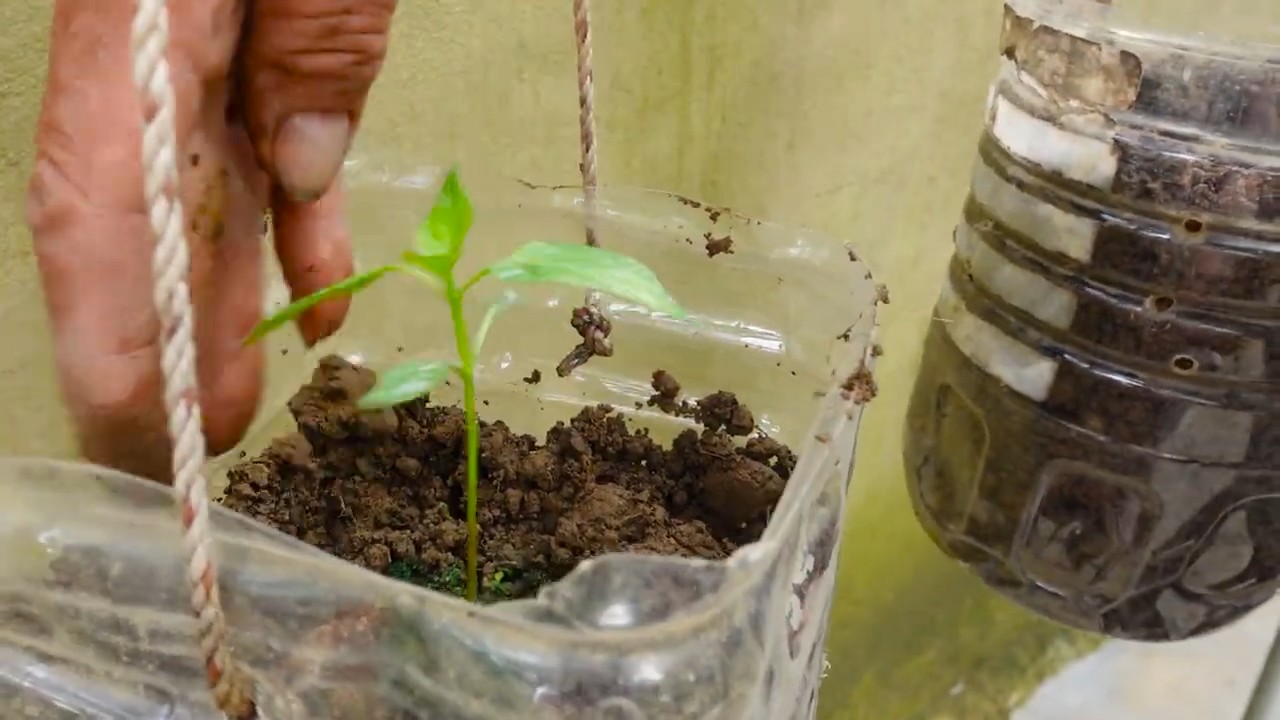
Boost Chili Pepper Harvest and set your taste buds ablaze! Have you ever dreamt of a garden overflowing with vibrant, fiery chili peppers, ready to spice up every meal? I know I have! But sometimes, despite our best efforts, those little plants just don’t seem to produce as much as we’d hoped. That’s where a few clever DIY tricks come in handy, and I’m here to share my secrets to help you achieve a bumper crop.
Chili peppers have a rich history, dating back thousands of years in the Americas. They weren’t just a food source; they held cultural and medicinal significance. From ancient rituals to traditional remedies, chili peppers have always been valued. Today, they’re a global culinary staple, adding zest and flavor to dishes worldwide.
But why do you need these DIY hacks? Well, let’s face it, gardening can be unpredictable. Factors like soil quality, sunlight, and even pests can impact your chili pepper yield. These simple, cost-effective techniques will empower you to take control and boost chili pepper harvest significantly. I’ll guide you through easy-to-follow steps, using readily available materials, to ensure your chili pepper plants thrive and reward you with an abundance of spicy goodness. Get ready to transform your garden and your cooking!

Chili-Ernte steigern: Mein DIY-Geheimnis für eine reiche Chili-Ernte
Ich liebe Chilis! Und ich liebe es noch mehr, meine eigenen anzubauen. Aber manchmal ist die Ernte einfach nicht so üppig, wie ich es mir wünsche. Deshalb habe ich im Laufe der Jahre einige Tricks und Kniffe entwickelt, um meine Chili-Ernte zu maximieren. Und heute teile ich mein bestgehütetes Geheimnis mit dir: ein DIY-Rezept, das deine Chili-Pflanzen lieben werden!
Was du brauchst: Die Zutatenliste
Bevor wir loslegen, lass uns sicherstellen, dass du alles hast, was du brauchst. Keine Sorge, die meisten Zutaten hast du wahrscheinlich schon zu Hause!
* **Eierschalen:** Das sind die Stars der Show! Sammle sie über ein paar Wochen. Je mehr, desto besser. Sie sind reich an Kalzium, was für starke Pflanzen und gesunde Früchte unerlässlich ist.
* **Kaffeesatz:** Dein morgendlicher Kaffee ist nicht nur für dich gut! Kaffeesatz ist reich an Stickstoff, der das Wachstum fördert, und er hilft, den Boden leicht sauer zu halten, was Chili-Pflanzen lieben.
* **Bananenschalen:** Nicht wegwerfen! Bananenschalen sind eine fantastische Quelle für Kalium, das für die Blütenbildung und Fruchtentwicklung entscheidend ist.
* **Epsom-Salz (Bittersalz):** Ein echter Geheimtipp! Epsom-Salz liefert Magnesium, das für die Photosynthese und die Nährstoffaufnahme wichtig ist.
* **Wasser:** Klares, sauberes Wasser, um alles zu mischen.
* **Optional: Holzasche:** Wenn du einen Kamin oder Grill hast, ist Holzasche eine tolle Ergänzung. Sie enthält Kalium und andere Spurenelemente. Aber Vorsicht: Nicht zu viel verwenden, da sie den pH-Wert des Bodens erhöhen kann.
Die Vorbereitung: Eierschalen, Kaffeesatz und Bananenschalen
Bevor wir die magische Mixtur zusammenrühren, müssen wir einige der Zutaten vorbereiten. Das ist wichtig, damit die Nährstoffe besser freigesetzt werden und die Pflanzen sie leichter aufnehmen können.
1. **Eierschalen reinigen und trocknen:** Spüle die Eierschalen gründlich aus, um alle Eierreste zu entfernen. Lass sie dann vollständig trocknen. Das verhindert Schimmelbildung.
2. **Eierschalen zerkleinern:** Sobald die Eierschalen trocken sind, zerkleinere sie so fein wie möglich. Du kannst sie in einen Gefrierbeutel geben und mit einem Nudelholz darüberrollen, oder du verwendest einen Mixer oder eine Kaffeemühle (aber sei vorsichtig, sie können stumpf werden!). Je feiner die Schalen sind, desto schneller werden sie im Boden abgebaut.
3. **Kaffeesatz trocknen:** Verteile den Kaffeesatz auf einem Backblech und lass ihn vollständig trocknen. Das verhindert Schimmelbildung und erleichtert die Handhabung.
4. **Bananenschalen trocknen:** Es gibt verschiedene Möglichkeiten, Bananenschalen zu trocknen. Du kannst sie in der Sonne auslegen (dauert ein paar Tage), im Ofen bei niedriger Temperatur (ca. 60°C) trocknen oder einen Dörrautomaten verwenden. Sie sollten knusprig trocken sein.
5. **Bananenschalen zerkleinern:** Sobald die Bananenschalen trocken sind, zerkleinere sie ebenfalls. Du kannst sie mit einer Schere schneiden oder in einem Mixer zerkleinern.
Die magische Mixtur: Das Rezept für eine reiche Chili-Ernte
Jetzt kommt der spaßige Teil: Wir mischen alle Zutaten zusammen!
1. **Die Basis:** Nimm einen großen Eimer oder eine Wanne. Gib die zerkleinerten Eierschalen, den getrockneten Kaffeesatz und die zerkleinerten Bananenschalen hinein.
2. **Das Epsom-Salz:** Füge etwa 1-2 Esslöffel Epsom-Salz hinzu. Nicht zu viel, da zu viel Magnesium schädlich sein kann.
3. **Die optionale Zutat: Holzasche:** Wenn du Holzasche verwendest, füge eine kleine Menge hinzu (ca. 1/4 Tasse).
4. **Das Wasser:** Gib langsam Wasser hinzu, bis eine Art Paste entsteht. Die Mischung sollte feucht, aber nicht zu nass sein.
5. **Gut vermischen:** Vermische alle Zutaten gründlich, sodass eine homogene Masse entsteht.
Die Anwendung: So fütterst du deine Chili-Pflanzen
Jetzt, wo wir unsere magische Mixtur haben, ist es Zeit, sie auf unsere Chili-Pflanzen anzuwenden.
1. **Die Vorbereitung des Bodens:** Lockere den Boden um deine Chili-Pflanzen vorsichtig auf. Das hilft, die Nährstoffe besser aufzunehmen.
2. **Die Anwendung der Mixtur:** Trage die Mixtur um die Basis der Chili-Pflanzen auf. Achte darauf, dass sie nicht direkt an den Stängel kommt, um Fäulnis zu vermeiden. Eine Menge von etwa 1-2 Handvoll pro Pflanze ist ausreichend.
3. **Einarbeiten in den Boden:** Arbeite die Mixtur leicht in den Boden ein.
4. **Gießen:** Gieße die Chili-Pflanzen nach der Anwendung der Mixtur gründlich. Das hilft, die Nährstoffe in den Boden zu transportieren.
5. **Wiederholung:** Wiederhole die Anwendung alle 4-6 Wochen während der Wachstumsperiode.
Zusätzliche Tipps für eine erfolgreiche Chili-Ernte
Neben meiner magischen Mixtur gibt es noch ein paar andere Dinge, die du tun kannst, um deine Chili-Ernte zu maximieren:
* **Sonnenlicht:** Chili-Pflanzen lieben die Sonne! Stelle sicher, dass sie mindestens 6-8 Stunden Sonnenlicht pro Tag bekommen.
* **Bewässerung:** Gieße deine Chili-Pflanzen regelmäßig, aber vermeide Staunässe. Der Boden sollte feucht, aber nicht durchnässt sein.
* **Beschneiden:** Beschneide deine Chili-Pflanzen regelmäßig, um das Wachstum neuer Triebe und Blüten zu fördern.
* **Schutz vor Schädlingen:** Kontrolliere deine Chili-Pflanzen regelmäßig auf Schädlinge und bekämpfe sie bei Bedarf mit natürlichen Mitteln.
* **Geduld:** Hab Geduld! Es dauert eine Weile, bis Chili-Pflanzen Früchte tragen. Aber mit der richtigen Pflege und meiner magischen Mixtur wirst du bald eine reiche Ernte genießen können!
Warum diese Mixtur funktioniert: Die Wissenschaft dahinter
Du fragst dich vielleicht, warum diese Mixtur so gut funktioniert. Hier ist die Erklärung:
* **Kalzium (Eierschalen):** Kalzium ist ein wichtiger Nährstoff für das Pflanzenwachstum. Es stärkt die Zellwände, fördert die Wurzelentwicklung und hilft, Blütenendfäule zu verhindern.
* **Stickstoff (Kaffeesatz):** Stickstoff ist ein essentieller Nährstoff für das vegetative Wachstum. Er fördert das Wachstum von Blättern und Stängeln.
* **Kalium (Bananenschalen):** Kalium ist wichtig für die Blütenbildung und Fruchtentwicklung. Es hilft, die Früchte größer, süßer und schmackhafter zu machen.
* **Magnesium (Epsom-Salz):** Magnesium ist ein wichtiger Bestandteil des Chlorophylls, dem grünen Farbstoff in Pflanzen. Es ist essentiell für die Photosynthese, den Prozess, bei dem Pflanzen Sonnenlicht in Energie umwandeln.
* **Spurenelemente (Holzasche):** Holzasche enthält eine Vielzahl von Spurenelementen, die für das Pflanzenwachstum wichtig sind.
Indem wir diese Nährstoffe auf natürliche Weise bereitstellen, helfen wir unseren Chili-Pflanzen, stark und gesund zu wachsen und eine reiche Ernte zu produzieren.
Ich hoffe, dieser DIY-Guide hilft dir, deine Chili-Ernte zu steigern! Viel Spaß beim Gärtnern und lass es dir schmecken!
Conclusion
So, there you have it! This simple, yet incredibly effective DIY trick to boost chili pepper harvest is a game-changer for any gardener, regardless of experience level. We’ve walked you through the process, highlighting the science behind why it works and offering practical tips to ensure your success. But why is this a must-try?
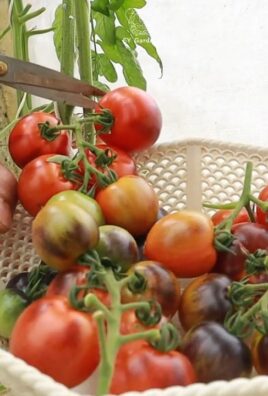
Firstly, it’s about maximizing your yield. Imagine the satisfaction of harvesting baskets overflowing with vibrant, fiery chili peppers, all thanks to a little extra effort and a readily available ingredient. This method isn’t just about getting more peppers; it’s about getting *better* peppers. The increased nutrient availability translates to healthier plants, more robust growth, and ultimately, more flavorful and potent chilies.
Secondly, it’s about sustainability and cost-effectiveness. Instead of relying solely on expensive, commercially produced fertilizers, this DIY approach allows you to harness the power of natural ingredients, reducing your environmental impact and saving you money in the long run. It’s a win-win situation for both your garden and your wallet.
Thirdly, it’s about control. You have complete control over what goes into your garden, ensuring that your chili peppers are grown with the best possible ingredients, free from harmful chemicals and additives. This is particularly important for those who prioritize organic gardening practices.
But the benefits don’t stop there. This method also encourages stronger root development, making your chili pepper plants more resilient to drought and other environmental stressors. A healthy root system is the foundation of a healthy plant, and this DIY trick helps to build that foundation.
Now, let’s talk about variations. While we’ve focused on a specific ingredient combination, feel free to experiment with other nutrient-rich additions. Consider adding compost tea, diluted seaweed extract, or even a small amount of Epsom salts to the mix. Just remember to start with small doses and observe your plants carefully to avoid over-fertilization.
Another variation involves the application method. While foliar feeding is effective, you can also apply the solution directly to the soil around the base of the plants. This allows the nutrients to be absorbed through the roots, providing a more sustained release.
We encourage you to adapt this DIY trick to your specific needs and preferences. The key is to understand the underlying principles and to experiment with different approaches until you find what works best for your garden.
Ultimately, this DIY trick is about empowering you to take control of your chili pepper harvest and to achieve remarkable results with minimal effort and expense. It’s about connecting with nature, understanding the needs of your plants, and reaping the rewards of your hard work.
So, what are you waiting for? Grab your ingredients, follow the steps outlined in this article, and get ready to witness a dramatic increase in your chili pepper production. We’re confident that you’ll be amazed by the results.
Don’t just take our word for it, though. Try it out for yourself and see the difference it makes. And most importantly, share your experience with us! We’d love to hear about your successes, your challenges, and any variations you’ve tried. Let’s build a community of chili pepper enthusiasts who are passionate about maximizing their harvest and sharing their knowledge with others.
Share your photos, your tips, and your stories on social media using #BoostChiliPepperHarvest. Let’s inspire others to try this simple yet powerful DIY trick and to experience the joy of growing their own bountiful supply of chili peppers. Happy gardening!
Frequently Asked Questions (FAQ)
What exactly does this DIY trick do to boost chili pepper harvest?
This DIY trick primarily focuses on providing chili pepper plants with readily available nutrients that are crucial for flowering and fruit production. Chili peppers are heavy feeders, meaning they require a significant amount of nutrients, especially during the flowering and fruiting stages. The ingredients in this DIY solution typically contain essential elements like nitrogen, phosphorus, and potassium (NPK), as well as micronutrients that support overall plant health and vigor. By providing these nutrients in a readily absorbable form, the plants can allocate more energy towards producing flowers and developing fruits, resulting in a significantly larger harvest. It also improves the plant’s overall health, making it more resistant to pests and diseases, which indirectly contributes to a better yield.
How often should I apply this DIY solution to my chili pepper plants?
The frequency of application depends on several factors, including the age of your plants, the soil quality, and the weather conditions. As a general guideline, you can apply the solution every 2-3 weeks during the active growing season, particularly when the plants start to flower and set fruit. However, it’s crucial to observe your plants closely and adjust the frequency accordingly. If you notice signs of over-fertilization, such as leaf burn or excessive vegetative growth, reduce the frequency of application. Conversely, if your plants appear pale or stunted, you may need to increase the frequency. Remember, it’s always better to err on the side of caution and start with smaller doses.
Can I use this DIY trick on other types of plants besides chili peppers?
While this DIY trick is specifically formulated to meet the needs of chili pepper plants, it can also be beneficial for other fruiting vegetables, such as tomatoes, eggplants, and bell peppers. These plants have similar nutrient requirements and can benefit from the readily available nutrients provided by the solution. However, it’s important to adjust the concentration of the solution based on the specific needs of each plant. For example, tomatoes may require a slightly higher concentration of phosphorus, while eggplants may benefit from a higher concentration of potassium. Always research the specific nutrient requirements of the plants you’re treating and adjust the DIY solution accordingly.
What are the signs of over-fertilization in chili pepper plants?
Over-fertilization can manifest in several ways, including leaf burn (browning or yellowing of leaf tips and edges), excessive vegetative growth (lush green foliage but few flowers or fruits), salt buildup on the soil surface, and stunted root growth. If you notice any of these signs, it’s crucial to stop applying the DIY solution immediately and flush the soil with plenty of water to remove excess nutrients. You may also need to repot the plants in fresh soil if the salt buildup is severe. In the future, reduce the frequency and concentration of the DIY solution to avoid over-fertilization.
Is this DIY trick safe for organic gardening?
The safety of this DIY trick for organic gardening depends on the ingredients you use. If you use only organic and natural ingredients, such as compost tea, seaweed extract, and Epsom salts, then the solution is perfectly safe for organic gardening. However, if you use synthetic fertilizers or other non-organic ingredients, then the solution is not considered organic. Always check the labels of your ingredients to ensure that they are certified organic and free from harmful chemicals.
What if I don’t see results immediately after applying this DIY solution?
It’s important to remember that results may not be immediate. It can take several weeks for the plants to fully absorb the nutrients and show a noticeable improvement in growth and fruit production. Be patient and continue to monitor your plants closely. Ensure that they are receiving adequate sunlight, water, and protection from pests and diseases. If you still don’t see results after several weeks, consider adjusting the frequency and concentration of the DIY solution or experimenting with different ingredients. It’s also possible that other factors, such as poor soil quality or environmental stressors, are limiting your chili pepper harvest.
Can I use this DIY solution in hydroponic systems?
While this DIY solution is primarily designed for soil-based gardening, it can potentially be adapted for use in hydroponic systems. However, it’s crucial to carefully filter the solution to remove any solid particles that could clog the hydroponic system. You may also need to adjust the pH of the solution to ensure that it’s within the optimal range for hydroponic growing. It’s recommended to start with a very diluted solution and gradually increase the concentration as needed. Monitor the plants closely for any signs of nutrient deficiencies or toxicities.
How does this DIY trick compare to commercial fertilizers for chili peppers?
Commercial fertilizers can be effective at boosting chili pepper harvest, but they often contain synthetic chemicals that can be harmful to the environment and human health. This DIY trick offers a more natural and sustainable alternative, using readily available ingredients that are safe for both your plants and the planet. While commercial fertilizers may provide a more concentrated dose of nutrients, this DIY solution provides a more balanced and gradual release of nutrients, which can be more beneficial for long-term plant health. Additionally, this DIY trick allows you to customize the nutrient composition of the solution to meet the specific needs of your chili pepper plants.
Leave a Comment