
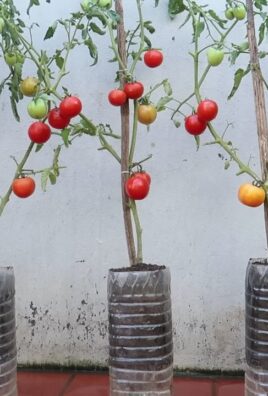
Container corn growing might sound like something out of a children’s book, but trust me, it’s a surprisingly achievable and rewarding project for any home gardener! Forget sprawling fields; we’re bringing the charm of a cornfield right to your patio, balcony, or even your sunny windowsill.
For centuries, corn has been a staple crop, deeply woven into the cultures of the Americas. From ancient civilizations to modern-day kitchens, corn has nourished and sustained communities. Now, you can connect with that rich history by cultivating your own little piece of it, no matter how limited your space.
Why should you try container corn growing? Well, imagine the satisfaction of harvesting your own sweet, juicy corn on the cob, knowing you nurtured it from seed to table. Plus, it’s a fantastic way to add a touch of rustic beauty to your outdoor space. Many people think growing corn is only for those with acres of land, but I’m here to tell you that’s simply not true! This DIY guide will equip you with all the tips and tricks you need to successfully grow corn in containers, even if you’re a complete beginner. We’ll cover everything from choosing the right container and soil to watering, fertilizing, and even dealing with pesky pests. Get ready to impress your friends and family with your green thumb and enjoy the delicious rewards of your container corn harvest!

Maisanbau im Topf: Dein DIY-Guide für eine reiche Ernte auf kleinem Raum
Hey Leute! Habt ihr auch so einen kleinen Balkon oder Garten und träumt trotzdem von frischem, selbst angebautem Mais? Dann seid ihr hier genau richtig! Ich zeige euch, wie ihr Mais erfolgreich im Topf anbauen könnt. Es ist einfacher als ihr denkt und das Ergebnis ist einfach unschlagbar. Los geht’s!
Was du brauchst: Die Materialliste
Bevor wir loslegen, hier eine Liste mit allem, was du für dein Mais-Topf-Projekt benötigst:
* Große Töpfe: Mindestens 30 Liter Volumen pro Pflanze. Mais braucht Platz für seine Wurzeln!
* Hochwertige Blumenerde: Am besten eine Mischung aus Gartenerde, Kompost und Sand.
* Mais-Saatgut: Wähle eine Sorte, die für den Anbau im Topf geeignet ist. Zwergmaissorten sind ideal.
* Dünger: Ein Langzeitdünger oder Flüssigdünger für Gemüse.
* Gießkanne oder Schlauch: Für die regelmäßige Bewässerung.
* Pflanzstäbe: Um die Pflanzen bei Bedarf zu stützen.
* Mulchmaterial: Zum Beispiel Stroh oder Holzhackschnitzel, um die Feuchtigkeit im Boden zu halten.
* Optional: Ein sonniger Standort auf deinem Balkon oder im Garten.
Die Vorbereitung: Der Grundstein für deinen Erfolg
Bevor wir mit dem Pflanzen beginnen, müssen wir ein paar Vorbereitungen treffen. Das ist wichtig, damit der Mais später gut wächst und gedeiht.
1. Die richtigen Töpfe auswählen: Wie gesagt, die Töpfe sollten groß genug sein. Ich empfehle mindestens 30 Liter Volumen pro Pflanze. Größer ist natürlich immer besser! Achte darauf, dass die Töpfe Abzugslöcher haben, damit überschüssiges Wasser ablaufen kann. Staunässe mag Mais nämlich gar nicht.
2. Die Erde vorbereiten: Mais ist ein Starkzehrer, das heißt, er braucht viele Nährstoffe. Deshalb ist eine gute Erde so wichtig. Ich mische meine Erde immer selbst:
* 1/3 Gartenerde (am besten aus dem eigenen Garten, wenn vorhanden)
* 1/3 Kompost (liefert wichtige Nährstoffe)
* 1/3 Sand (sorgt für eine gute Drainage)
Du kannst aber auch eine fertige Blumenerde für Gemüse verwenden. Achte nur darauf, dass sie hochwertig ist und ausreichend Nährstoffe enthält.
3. Den Standort wählen: Mais liebt die Sonne! Wähle einen Standort, der mindestens 6 Stunden Sonne pro Tag bekommt. Ein sonniger Balkon oder Garten ist ideal.
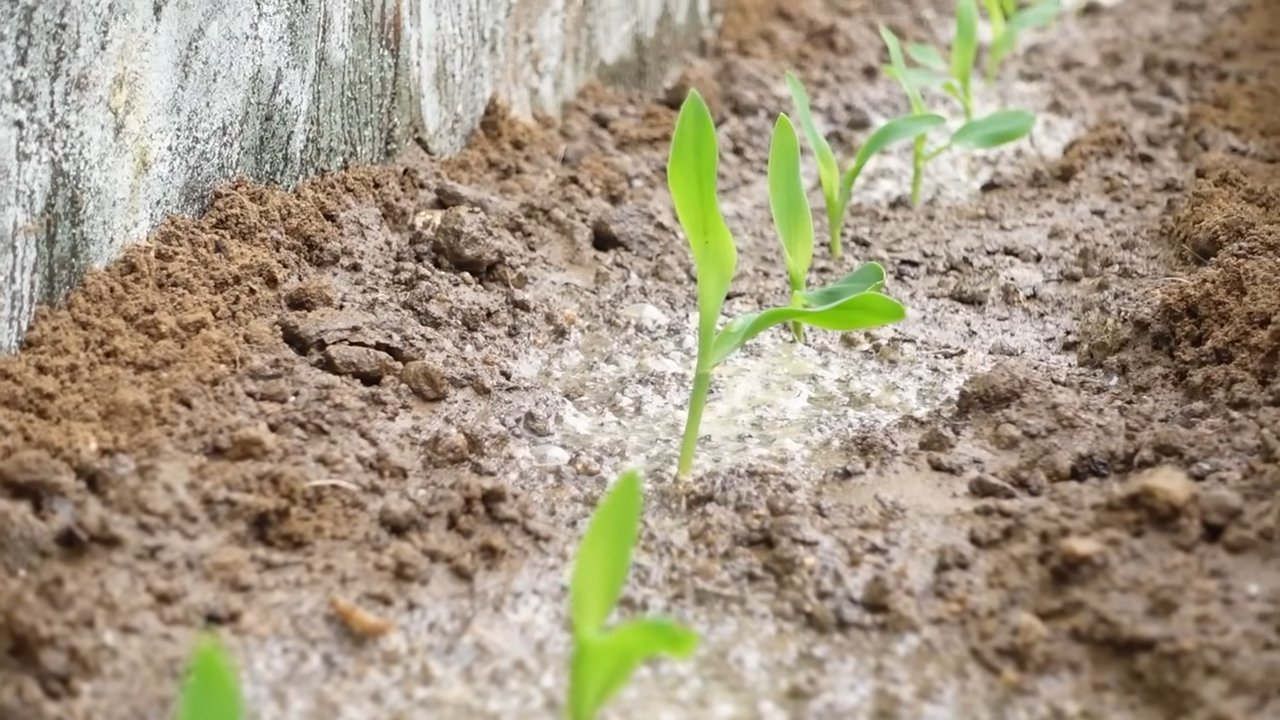
Die Aussaat: Der Start in ein neues Mais-Leben
Jetzt kommt der spannende Teil: Die Aussaat!
1. Die Samen vorbereiten: Du kannst die Mais-Samen vor der Aussaat für ein paar Stunden in lauwarmem Wasser einweichen. Das beschleunigt die Keimung. Ich mache das meistens über Nacht.
2. Die Samen aussäen: Fülle die Töpfe mit der vorbereiteten Erde. Lasse etwa 5 cm Platz bis zum Rand. Drücke die Erde leicht an. Lege dann 2-3 Mais-Samen pro Topf in die Erde. Die Samen sollten etwa 2-3 cm tief liegen. Bedecke die Samen mit Erde und drücke sie leicht an.
3. Angießen: Gieße die Erde vorsichtig an, sodass sie gut durchfeuchtet ist. Achte darauf, dass du die Samen nicht wegschwemmst.
4. Warmhalten: Stelle die Töpfe an einen warmen und hellen Ort. Die ideale Keimtemperatur liegt bei etwa 20-25 Grad Celsius.
Die Pflege: Damit dein Mais prächtig gedeiht
Nach der Aussaat ist es wichtig, den Mais gut zu pflegen. Hier sind ein paar Tipps:
1. Gießen: Mais braucht viel Wasser, besonders während der Wachstumsphase. Gieße regelmäßig, aber vermeide Staunässe. Die Erde sollte immer leicht feucht sein. An heißen Tagen musst du möglicherweise täglich gießen.
2. Düngen: Wie gesagt, Mais ist ein Starkzehrer. Dünge die Pflanzen regelmäßig mit einem Langzeitdünger oder Flüssigdünger für Gemüse. Ich dünge meine Pflanzen alle zwei Wochen mit einem Flüssigdünger.
3. Ausdünnen: Wenn mehrere Samen gekeimt sind, solltest du die schwächsten Pflanzen entfernen. Lasse nur die stärkste Pflanze pro Topf stehen.
4. Stützen: Wenn die Pflanzen größer werden, kann es sein, dass sie Unterstützung brauchen. Stecke Pflanzstäbe in die Erde und binde die Pflanzen daran fest.
5. Mulchen: Bedecke die Erde mit Mulchmaterial, zum Beispiel Stroh oder Holzhackschnitzel. Das hält die Feuchtigkeit im Boden und unterdrückt Unkraut.
6. Schädlinge und Krankheiten: Achte auf Schädlinge und Krankheiten. Mais kann von Blattläusen, Maiszünsler oder Pilzkrankheiten befallen werden. Bei Bedarf kannst du biologische Schädlingsbekämpfungsmittel einsetzen.
Die Ernte: Der Lohn deiner Mühe
Nach etwa 80-100 Tagen ist es endlich so weit: Die Ernte!
1. Den richtigen Zeitpunkt erkennen: Die Maiskolben sind reif, wenn die Hüllblätter braun und trocken sind und die Maiskörner prall und gelb sind. Du kannst auch einen Maiskolben öffnen und ein Korn mit dem Fingernagel eindrücken. Wenn eine milchige Flüssigkeit austritt, ist der Mais reif.
2. Die Ernte: Breche die Maiskolben vorsichtig von der Pflanze ab.
3. Die Verarbeitung: Du kannst den Mais sofort essen, grillen, kochen oder einfrieren. Frischer Mais schmeckt einfach am besten!
Zusätzliche Tipps für den erfolgreichen Maisanbau im Topf
* Sortenwahl: Wähle eine Zwergmaissorte, die für den Anbau im Topf geeignet ist. Diese Sorten bleiben kleiner und sind besser an die Bedingungen im Topf angepasst.
* Bestäubung: Mais ist auf Windbestäubung angewiesen. Wenn du nur wenige Pflanzen hast, kannst du die Bestäubung unterstützen, indem du die männlichen Blütenstände (die Fahnen oben an der Pflanze) abschüttelst und den Pollen auf die weiblichen Blütenstände (die Seidenfäden an den Maiskolben) verteilst.
* Nachhaltigkeit: Verwende torffreie Erde und biologischen Dünger, um die Umwelt zu schonen.
* Experimentieren: Probiere verschiedene Sorten und Anbaumethoden aus, um herauszufinden, was für dich am besten funktioniert.
Ich hoffe, dieser Guide hat dir geholfen und du hast bald eine reiche Maisernte auf deinem Balkon oder im Garten! Viel Spaß beim Gärtnern!
Conclusion
So, there you have it! Growing corn in containers isn’t just a quirky gardening experiment; it’s a surprisingly rewarding way to bring a taste of the countryside to your urban or suburban space. We’ve walked through the steps, addressed the potential challenges, and hopefully, instilled in you the confidence to give it a try.
But why is this DIY trick a must-try? Beyond the sheer novelty of harvesting your own ears of corn from your patio, growing corn in containers offers several compelling advantages. First, it’s incredibly space-efficient. If you’re limited by a small yard, balcony, or even just a sunny windowsill, container gardening allows you to cultivate a crop that would typically be relegated to larger plots of land. Second, it gives you complete control over the growing environment. You can tailor the soil composition, watering schedule, and sun exposure to perfectly suit your corn’s needs, leading to healthier plants and a more bountiful harvest. Third, it’s a fantastic educational opportunity, especially for families. Watching the corn stalks grow from tiny seedlings to towering plants, and then witnessing the formation of the ears, is a truly magical experience that connects you to the natural world.
And finally, let’s not forget the taste! Freshly picked, homegrown corn is simply unparalleled. The sweetness and flavor are far superior to anything you can find in the grocery store, and the satisfaction of knowing you grew it yourself makes it even more delicious.
Now, for a few suggestions and variations to spice things up:
* Experiment with different varieties: While we’ve focused on sweet corn, there are many other types of corn that can be successfully grown in containers, including popcorn corn, ornamental corn, and even some varieties of field corn (though these may require larger containers).
* Companion planting: Consider planting companion plants alongside your corn to improve growth and deter pests. Beans, squash, and herbs like basil and dill are all excellent choices.
* Succession planting: To extend your harvest season, try planting corn seeds in staggered intervals, a few weeks apart. This will ensure a continuous supply of fresh corn throughout the summer.
* Vertical support: For taller varieties of corn, you may need to provide some vertical support to prevent the stalks from toppling over in strong winds. Bamboo stakes or a simple trellis can work wonders.
* Fertilizer adjustments: Monitor your corn plants closely and adjust your fertilizer regimen as needed. If the leaves are pale green or yellow, it may indicate a nitrogen deficiency.
Ultimately, the best way to learn is by doing. So, we wholeheartedly encourage you to embark on this container corn growing adventure. Don’t be afraid to experiment, make mistakes, and learn from your experiences. And most importantly, have fun!
Once you’ve harvested your first crop of homegrown corn, we’d love to hear about your experience. Share your photos, tips, and challenges in the comments section below. Let’s create a community of container corn growers and learn from each other. Happy gardening!
Frequently Asked Questions (FAQ)
What is the best type of corn to grow in containers?
The best type of corn to grow in containers is typically a shorter, more compact variety of sweet corn. Look for varieties specifically bred for container gardening or those labeled as “dwarf” or “early maturing.” These varieties tend to be more manageable in smaller spaces and produce ears of corn that are appropriately sized for container growing. Some popular choices include ‘On Deck’, ‘Golden Bantam’, and ‘Trinity’. Avoid taller, more sprawling varieties of field corn, as they may outgrow your containers and require excessive support.
How big of a container do I need for growing corn?
Corn plants need a significant amount of space for their roots to develop properly. A general rule of thumb is to use a container that is at least 12 inches in diameter and 12 inches deep for each corn plant. However, larger containers are always better, as they provide more room for root growth and help to retain moisture. A 15-20 gallon container is ideal for growing 3-4 corn stalks. Make sure the container has adequate drainage holes to prevent waterlogging.
What kind of soil should I use for container corn growing?
Corn plants thrive in well-draining, nutrient-rich soil. A good potting mix for container corn should consist of a blend of compost, peat moss (or coconut coir), and perlite or vermiculite. Compost provides essential nutrients, peat moss (or coconut coir) helps to retain moisture, and perlite or vermiculite improves drainage and aeration. Avoid using garden soil in containers, as it tends to compact and drain poorly. You can also amend your potting mix with slow-release fertilizer to provide a steady supply of nutrients throughout the growing season.
How often should I water my container corn plants?
Corn plants are heavy drinkers, especially during hot weather. Water your container corn plants deeply and regularly, ensuring that the soil is consistently moist but not waterlogged. Check the soil moisture level daily, and water when the top inch of soil feels dry to the touch. In general, you may need to water your corn plants every day or every other day, depending on the weather conditions and the size of your container. During periods of drought or extreme heat, you may need to water them more frequently.
How much sunlight do container corn plants need?
Corn plants require at least 6-8 hours of direct sunlight per day to thrive. Choose a location for your containers that receives plenty of sunlight throughout the day. If you live in a particularly hot climate, you may need to provide some afternoon shade to prevent the plants from overheating. If you don’t have a sunny spot, you can supplement with grow lights.
Do I need to pollinate my container corn plants?
Yes, corn plants are wind-pollinated, meaning that the pollen from the tassels (male flowers) needs to be transferred to the silks (female flowers) to produce kernels. In a container setting, where there may be limited wind, you may need to hand-pollinate your corn plants to ensure a good harvest. To hand-pollinate, gently shake the tassels over the silks, or use a small paintbrush to collect pollen from the tassels and apply it to the silks. Repeat this process every day for several days, until the silks begin to turn brown.
How long does it take for corn to mature in containers?
The time it takes for corn to mature in containers depends on the variety of corn you are growing and the growing conditions. In general, most sweet corn varieties will mature in 60-90 days from planting. Keep an eye on the silks; they are ready to harvest when the silks have turned brown and dry, and the ears feel plump and full. You can also gently peel back the husk to check the kernels. They should be milky and juicy.
What are some common pests and diseases that affect container corn plants?
Some common pests that can affect container corn plants include aphids, corn earworms, and spider mites. Aphids can be controlled with insecticidal soap or neem oil. Corn earworms can be handpicked or treated with Bacillus thuringiensis (Bt). Spider mites can be controlled with miticides or by increasing humidity. Common diseases that can affect container corn plants include rust and leaf blight. These diseases can be prevented by providing good air circulation, avoiding overhead watering, and applying fungicides if necessary.
Can I grow corn in containers indoors?
While it is possible to grow corn in containers indoors, it can be challenging. Corn plants require a lot of sunlight, so you will need to provide supplemental lighting with grow lights. You will also need to ensure adequate pollination, as there will be no wind indoors. Additionally, corn plants can grow quite tall, so you will need to provide sufficient space for them to grow. If you are determined to grow corn indoors, choose a dwarf variety and provide optimal growing conditions.
How many corn stalks should I plant in one container?
It’s generally recommended to plant 3-4 corn stalks in a 15-20 gallon container. This allows enough space for each plant to develop properly without overcrowding. Overcrowding can lead to stunted growth, reduced yields, and increased susceptibility to pests and diseases. Make sure to space the corn stalks evenly within the container to maximize sunlight exposure and air circulation.
Leave a Comment