
Soil-Free Coriander Bucket Growing – sounds like something out of a sci-fi movie, right? But trust me, it’s a super simple and rewarding way to get fresh coriander (cilantro) right at your fingertips, even if you don’t have a garden or a green thumb! I’m so excited to share this DIY trick with you because, let’s face it, who hasn’t bought a bunch of coriander only to have it wilt away in the fridge within days?
Coriander has been a culinary staple for centuries, with roots tracing back to ancient Egypt and even mentioned in the Bible. Its vibrant flavor has graced dishes across cultures, from zesty salsas to aromatic curries. But getting a consistent supply of fresh, flavorful coriander can be a challenge, especially if you’re relying on supermarket herbs.
That’s where this soil-free bucket growing method comes in! It’s a game-changer for urban dwellers, apartment residents, or anyone who wants to bypass the hassle of traditional gardening. Imagine snipping fresh coriander leaves whenever you need them, adding a burst of flavor to your meals without any waste. This method is not only space-saving and low-maintenance, but it also eliminates the need for soil, reducing the risk of pests and diseases. So, are you ready to ditch the wilting herbs and embrace the joy of fresh, homegrown coriander? Let’s dive into this easy and effective soil-free coriander bucket growing technique!
Growing Coriander in a Bucket: A Soil-Free Adventure!
Hey there, fellow plant enthusiasts! Are you tired of battling soil pests and inconsistent watering when trying to grow your own herbs? Well, I’ve got a fantastic solution for you: growing coriander (cilantro) in a bucket, completely soil-free! This method, often called hydroponics or semi-hydroponics, is surprisingly easy, requires minimal space, and can yield a bountiful harvest of fresh coriander right at your fingertips. Trust me, once you try this, you might never go back to traditional soil gardening for herbs!
Here’s what we’ll cover in this guide:
* **Why Soil-Free?** The benefits of ditching the dirt.
* **Materials You’ll Need:** A comprehensive list of everything you’ll need to get started.
* **Setting Up Your Bucket:** Preparing your container for soil-free growing.
* **Creating Your Nutrient Solution:** The magic potion that feeds your coriander.
* **Planting Your Coriander:** Getting those seeds or seedlings into their new home.
* **Caring for Your Soil-Free Coriander:** Watering, lighting, and other essential tips.
* **Harvesting Your Bounty:** Enjoying the fruits (or rather, leaves!) of your labor.
* **Troubleshooting:** Addressing common issues and keeping your coriander happy.
Why Soil-Free?
Before we dive into the how-to, let’s talk about why you might want to consider growing coriander without soil. Here are some of the advantages I’ve personally experienced:
* Reduced Pest Problems: Soil is a breeding ground for many common garden pests. By eliminating soil, you significantly reduce the risk of infestations.
* Better Water Management: With soil-free growing, you have more control over the moisture levels around your plants’ roots. This helps prevent overwatering and underwatering, which are common causes of plant problems.
* Faster Growth: Plants grown hydroponically often grow faster than those grown in soil because they have direct access to nutrients.
* Less Mess: Let’s face it, soil can be messy! Soil-free growing is much cleaner and easier to manage, especially if you’re growing indoors.
* Space Saving: You can grow a lot of coriander in a relatively small space using this method. Perfect for apartment dwellers or anyone with limited gardening space.
Materials You’ll Need
Okay, let’s gather our supplies! Here’s a list of everything you’ll need to create your soil-free coriander bucket:
* A Bucket: A 5-gallon bucket is a good size to start with, but you can use a larger or smaller bucket depending on your needs. Make sure it’s clean and food-grade if possible.
* Net Pots or Small Plastic Cups: These will hold your coriander plants and allow the roots to access the nutrient solution. I recommend 3-4 inch net pots.
* Growing Medium: This is what will support your plants’ roots. I recommend using LECA (Lightweight Expanded Clay Aggregate) pebbles. They’re inert, reusable, and provide excellent drainage and aeration. You can also use perlite or coco coir, but I find LECA to be the easiest to manage.
* Nutrient Solution: You’ll need a hydroponic nutrient solution specifically formulated for leafy greens or herbs. There are many brands available online or at your local garden center. I personally use a two-part nutrient solution for better control.
* Coriander Seeds or Seedlings: You can start from seed or purchase seedlings from a nursery. Starting from seed is more economical, but seedlings will give you a head start.
* pH Meter or pH Test Strips: This is crucial for monitoring the pH of your nutrient solution. Coriander prefers a slightly acidic pH of around 6.0-6.5.
* pH Up and pH Down Solutions: To adjust the pH of your nutrient solution as needed.
* Water: Use filtered or dechlorinated water for best results. Tap water can contain chlorine and other chemicals that can harm your plants.
* Drill (Optional): If your bucket doesn’t already have drainage holes, you’ll need a drill to create some.
* Measuring Cups and Spoons: For accurately measuring your nutrient solution.
* Grow Lights (Optional): If you’re growing indoors and don’t have access to enough natural light, you’ll need grow lights.
Setting Up Your Bucket
Now that we have our materials, let’s get our bucket ready for planting!
1. Clean the Bucket: Thoroughly wash the bucket with soap and water to remove any dirt or debris. Rinse well.
2. Drill Drainage Holes (If Needed): If your bucket doesn’t have drainage holes, drill several holes in the bottom. This will prevent the nutrient solution from becoming stagnant and waterlogged. I usually drill about 4-5 holes, each about 1/4 inch in diameter.
3. Prepare the Net Pots: Rinse the net pots or plastic cups to remove any dust or debris.
4. Rinse the Growing Medium: Thoroughly rinse the LECA pebbles (or perlite/coco coir) to remove any dust or fine particles. This will help prevent clogging in your system.
5. Place Net Pots in Bucket: Arrange the net pots evenly spaced inside the bucket. The number of net pots will depend on the size of your bucket and how much coriander you want to grow.
6. Fill Net Pots with Growing Medium: Fill each net pot with the rinsed LECA pebbles, leaving about an inch of space at the top.
Creating Your Nutrient Solution
This is where the magic happens! The nutrient solution is what will provide your coriander plants with all the essential nutrients they need to thrive.
1. Read the Instructions: Carefully read the instructions on your hydroponic nutrient solution. Different brands have different concentrations, so it’s important to follow the instructions carefully.
2. Mix the Nutrients: In a separate container, mix the nutrient solution according to the instructions. I usually start with half the recommended strength and gradually increase it as the plants grow. If you’re using a two-part nutrient solution, add each part separately, mixing well after each addition.
3. Check the pH: Use your pH meter or pH test strips to check the pH of the nutrient solution. Coriander prefers a pH of around 6.0-6.5.
4. Adjust the pH (If Needed): If the pH is too high, add a small amount of pH down solution and mix well. If the pH is too low, add a small amount of pH up solution and mix well. Recheck the pH after each adjustment.
5. Fill the Bucket: Carefully pour the nutrient solution into the bucket, filling it to just below the bottom of the net pots. You don’t want the growing medium to be completely submerged, as this can suffocate the roots.
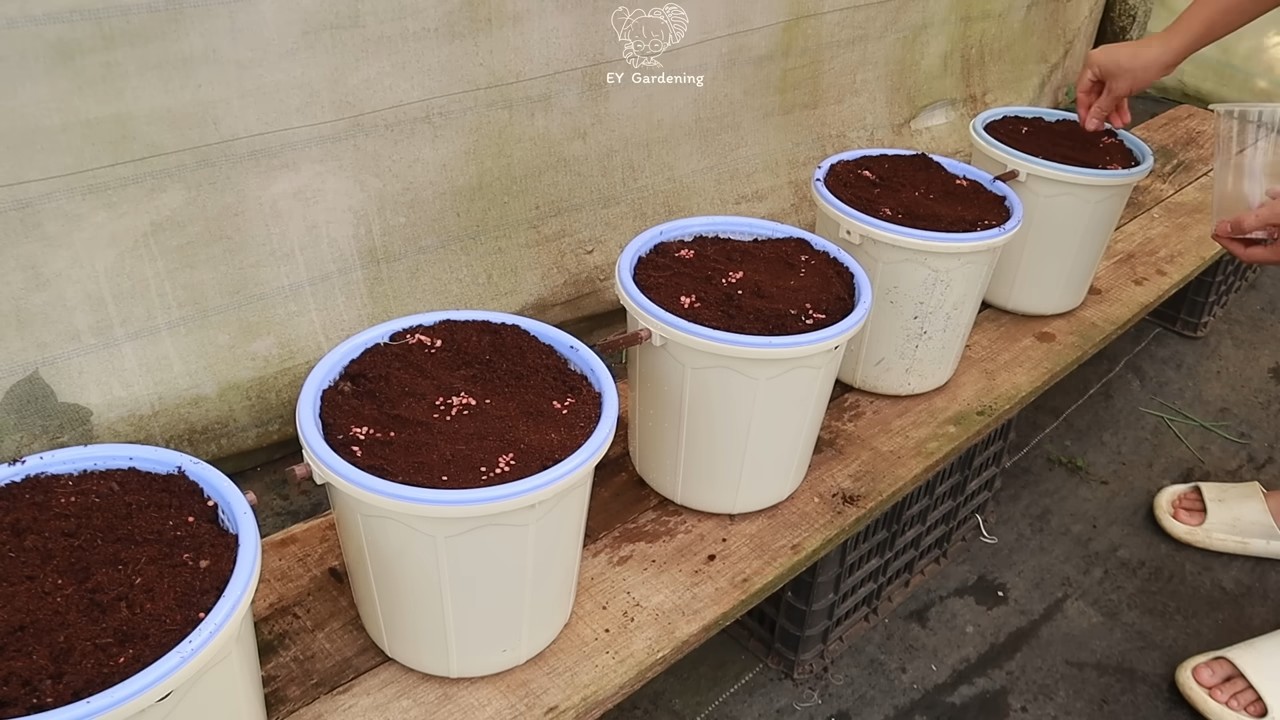
Planting Your Coriander
Now for the fun part – planting your coriander!
1. Starting from Seed: If you’re starting from seed, sow several seeds in each net pot, about 1/4 inch deep. Gently cover the seeds with a thin layer of LECA pebbles.
2. Starting from Seedlings: If you’re using seedlings, gently remove them from their containers and carefully loosen the roots. Place each seedling in a net pot, making sure the roots are surrounded by LECA pebbles.
3. Water Gently: Gently water the growing medium with a small amount of nutrient solution to moisten it.
Caring for Your Soil-Free Coriander
Now that your coriander is planted, it’s important to provide it with the right care to ensure healthy growth.
1. Lighting: Coriander needs at least 6 hours of sunlight per day. If you’re growing indoors, provide supplemental lighting with grow lights. I use LED grow lights and find they work great.
2. Watering: Monitor the nutrient solution level in the bucket and add more as needed. You want to keep the solution level just below the bottom of the net pots. Change the nutrient solution every 1-2 weeks to prevent nutrient buildup and algae growth.
3. pH Monitoring: Regularly check the pH of the nutrient solution and adjust as needed to maintain a pH of 6.0-6.5.
4. Temperature: Coriander prefers temperatures between 60-75°F (15-24°C).
5. Air Circulation: Good air circulation helps prevent fungal diseases. If you’re growing indoors, consider using a small fan to circulate the air.
6. Pest Control: Even though soil-free growing reduces pest problems, it’s still possible for pests to appear. Regularly inspect your plants for signs of pests and take action if necessary. Insecticidal soap or neem oil can be effective for controlling many common pests.
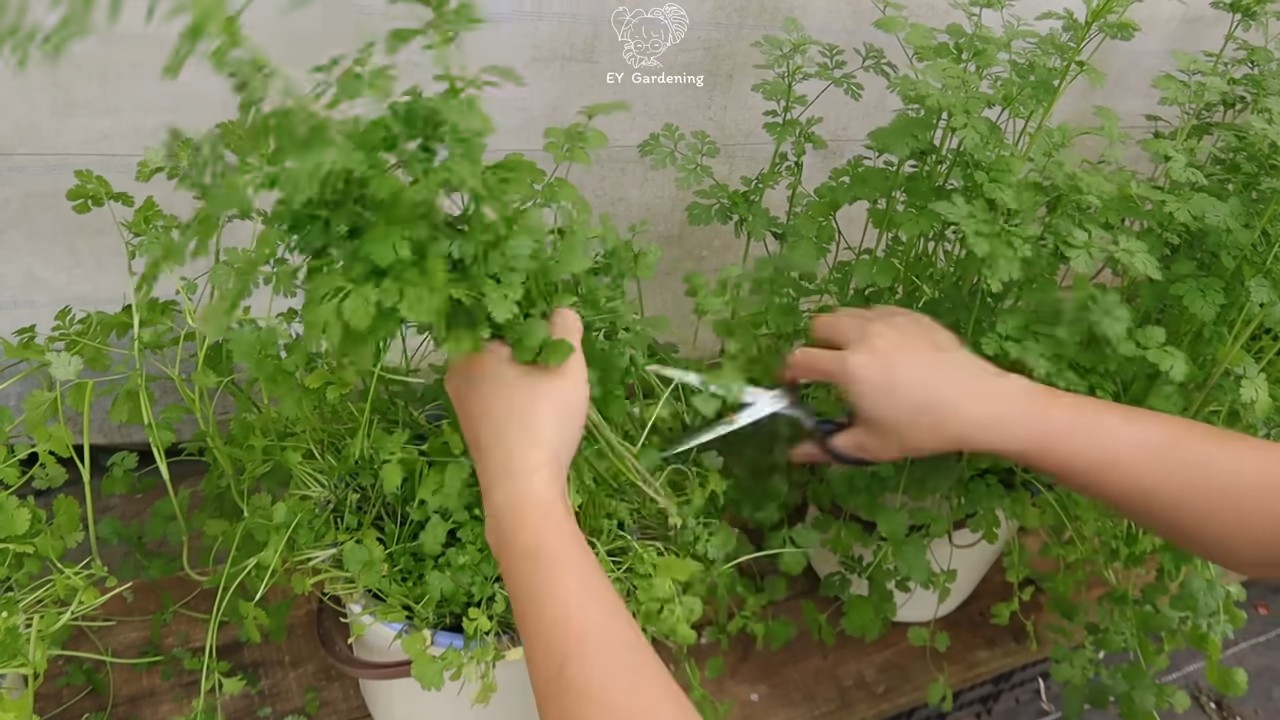
Harvesting Your Bounty
The best part! You can start
Conclusion
So, there you have it! Growing your own coriander, even without traditional soil, is not only possible but surprisingly simple and rewarding. This soil-free coriander bucket growing method opens up a world of possibilities, especially for those with limited space, poor soil conditions, or simply a desire to experiment with innovative gardening techniques.
Why is this a must-try? Because it offers a multitude of benefits. Firstly, it’s incredibly space-efficient. A single bucket can yield a substantial amount of fresh coriander, perfect for garnishing your favorite dishes or adding a burst of flavor to your culinary creations. Secondly, it minimizes the risk of soilborne diseases and pests that can often plague traditional coriander crops. By eliminating soil, you’re essentially creating a cleaner, more controlled growing environment. Thirdly, it’s a fantastic way to recycle and repurpose old buckets, contributing to a more sustainable lifestyle. And finally, let’s be honest, there’s a certain satisfaction that comes from nurturing a plant from seed to harvest, knowing that you’ve done it all yourself, in a unique and resourceful way.
But the beauty of this method lies in its adaptability. Feel free to experiment with different growing mediums. While perlite and vermiculite are excellent choices, you could also try coco coir or even a mixture of all three. Consider adding a slow-release fertilizer to the growing medium to provide your coriander with a steady supply of nutrients. You can also adjust the size of the bucket to suit your needs and available space. For a smaller yield, a smaller bucket will suffice. For a larger harvest, opt for a larger container.
And don’t limit yourself to just coriander! This soil-free bucket growing technique can be adapted for other herbs as well, such as parsley, chives, and even basil. Imagine having a whole herb garden thriving in buckets on your balcony or patio!
We wholeheartedly encourage you to give this soil-free coriander bucket growing method a try. It’s a fun, easy, and rewarding project that will provide you with a constant supply of fresh, flavorful coriander. Once you’ve experienced the joy of harvesting your own homegrown herbs, you’ll never want to go back to store-bought again.
More importantly, we want to hear about your experiences! Share your successes, your challenges, and any variations you’ve tried in the comments below. Let’s create a community of soil-free coriander enthusiasts and learn from each other. Your insights could inspire others to embark on their own gardening adventures. So, grab a bucket, some seeds, and get growing! We can’t wait to see what you create. Happy gardening!
Frequently Asked Questions (FAQ)
What exactly is soil-free growing, and why is it beneficial for coriander?
Soil-free growing, also known as hydroponics or soilless culture, involves growing plants without using traditional soil. Instead, plants receive nutrients from a water-based solution or a soilless growing medium like perlite, vermiculite, or coco coir. For coriander, this method offers several advantages. It reduces the risk of soilborne diseases and pests, provides better control over nutrient delivery, and allows for more efficient water usage. It’s also ideal for urban gardeners with limited space or poor soil quality.
What type of bucket is best for soil-free coriander growing?
Almost any clean, food-grade bucket can be used. A 5-gallon bucket is a good starting point, but you can adjust the size based on your desired yield. Ensure the bucket has drainage holes at the bottom to prevent waterlogging. Dark-colored buckets are generally preferred as they help to keep the growing medium cooler and prevent algae growth. However, if you are using a light-colored bucket, you can wrap it in dark plastic or cloth to achieve the same effect.
What are the best growing mediums to use besides perlite and vermiculite?
While perlite and vermiculite are excellent choices, other suitable growing mediums include coco coir (made from coconut husks), rockwool, and even LECA (lightweight expanded clay aggregate). Coco coir is a sustainable option that retains moisture well, while rockwool provides excellent aeration and support for the roots. LECA is reusable and provides good drainage. You can also experiment with mixing different mediums to find the combination that works best for you. For example, a mix of coco coir and perlite can provide both moisture retention and aeration.
How often should I water my soil-free coriander?
The frequency of watering depends on the growing medium, the climate, and the size of the bucket. Generally, you should water when the top inch of the growing medium feels dry to the touch. Avoid overwatering, as this can lead to root rot. Ensure that excess water drains freely from the drainage holes. In hot weather, you may need to water more frequently, while in cooler weather, you can water less often. A good rule of thumb is to check the moisture level daily and water as needed.
What type of fertilizer should I use for soil-free coriander?
Use a balanced, water-soluble fertilizer specifically formulated for herbs or leafy greens. Look for a fertilizer with an NPK ratio (nitrogen, phosphorus, potassium) that is relatively balanced, such as 10-10-10 or 20-20-20. Follow the instructions on the fertilizer package carefully, as over-fertilizing can damage the plants. You can also use a slow-release fertilizer mixed into the growing medium at the time of planting. This will provide a steady supply of nutrients over a longer period.
How much sunlight does soil-free coriander need?
Coriander thrives in full sun, which means at least 6 hours of direct sunlight per day. However, it can also tolerate partial shade, especially in hot climates. If you are growing your coriander indoors, you may need to supplement with artificial lighting, such as grow lights. Position the grow lights about 12-18 inches above the plants and keep them on for 12-14 hours per day.
How long does it take for soil-free coriander to grow?
Coriander typically germinates within 7-14 days. You can start harvesting leaves about 4-6 weeks after germination. The entire growing cycle, from seed to harvest, is usually around 8-10 weeks. To ensure a continuous supply of fresh coriander, sow new seeds every 2-3 weeks.
How do I prevent my coriander from bolting (going to seed)?
Bolting is a common problem with coriander, especially in hot weather. To prevent bolting, keep the plants well-watered and provide some shade during the hottest part of the day. You can also choose bolt-resistant varieties of coriander. Regularly harvesting the leaves can also help to delay bolting.
Can I reuse the growing medium after harvesting my coriander?
It depends on the growing medium and whether the plants were affected by any diseases or pests. Perlite and vermiculite can be reused after rinsing them thoroughly to remove any debris or salts. Coco coir can also be reused, but it may need to be amended with fresh coco coir to replenish nutrients. If the plants were affected by any diseases or pests, it’s best to discard the growing medium to prevent the spread of these problems to future crops.
What are some common problems I might encounter when growing soil-free coriander, and how can I fix them?
Some common problems include nutrient deficiencies (yellowing leaves), pests (aphids, spider mites), and diseases (root rot). Nutrient deficiencies can be addressed by adjusting the fertilizer. Pests can be controlled with insecticidal soap or neem oil. Root rot can be prevented by ensuring good drainage and avoiding overwatering. Regularly inspect your plants for any signs of problems and take action promptly to prevent them from escalating.

Leave a Comment