
Soil-free coriander growing might sound like something out of a sci-fi movie, but trust me, it’s a super achievable and rewarding project you can tackle right in your own home! Are you tired of battling soil-borne pests, inconsistent watering, or simply lacking the space for a traditional garden? Well, get ready to ditch the dirt and embrace a cleaner, easier, and surprisingly effective way to cultivate this fragrant herb.
For centuries, humans have relied on soil to nurture their plants, but innovative techniques like hydroponics and other soil-free methods have been gaining popularity, especially in urban environments. Think about it – ancient civilizations even experimented with rudimentary forms of hydroponics! Now, we’re bringing that ingenuity into our homes, making fresh herbs accessible to everyone, regardless of their gardening experience or available space.
Why should you try soil-free coriander growing? Because it’s a game-changer! Imagine having a constant supply of fresh coriander, ready to add a burst of flavor to your favorite dishes, without the hassle of weeding, dealing with messy soil, or worrying about inconsistent watering. This DIY trick is perfect for apartment dwellers, busy individuals, or anyone looking for a more sustainable and efficient way to grow their own herbs. I’m excited to share this simple yet effective method with you, so let’s dive in and unlock the secrets to a thriving, soil-free coriander harvest!
Growing Coriander Without Soil: A DIY Hydroponic Adventure!
Hey there, fellow plant enthusiasts! Ever dreamed of having fresh coriander (cilantro, if you’re in the US) readily available, without the hassle of soil and potential pests? Well, I’m here to tell you it’s totally achievable! I’ve been experimenting with hydroponics for a while now, and growing coriander without soil has become one of my favorite projects. It’s surprisingly easy, rewarding, and gives you a constant supply of this flavorful herb. Let’s dive in!
What You’ll Need
Before we get started, let’s gather our supplies. Don’t worry, you probably have many of these items lying around already!
* **Coriander Seeds:** Obviously! Make sure you get good quality seeds for the best germination rate.
* **A Container:** This could be anything from a plastic storage bin to a repurposed yogurt container. Just make sure it’s clean and food-safe. I personally like using a dark-colored container to prevent algae growth.
* **Net Pots:** These are small, mesh pots that will hold your coriander seedlings. You can find them online or at most garden centers. The size depends on your container, but usually 2-3 inch diameter pots work well.
* **Growing Medium:** Instead of soil, we’ll use an inert growing medium to support the roots. Coco coir, perlite, or rockwool are all excellent choices. I prefer coco coir for its water retention and eco-friendliness.
* **Nutrient Solution:** This is crucial for providing your coriander with the nutrients it needs to thrive. You can buy pre-mixed hydroponic nutrient solutions specifically formulated for leafy greens. Look for a balanced formula with nitrogen, phosphorus, and potassium.
* **Air Pump and Air Stone:** These will oxygenate the nutrient solution, which is essential for healthy root growth. A small aquarium air pump and air stone will do the trick.
* **pH Meter or pH Test Strips:** Maintaining the correct pH level in the nutrient solution is vital. Coriander prefers a slightly acidic pH of around 6.0 to 6.5.
* **Grow Lights (Optional):** If you don’t have a sunny spot, you’ll need grow lights to provide your coriander with sufficient light. LED grow lights are energy-efficient and work great.
* **Water:** Use filtered or dechlorinated water for the best results. Tap water can contain chlorine and other chemicals that can harm your plants.
* **Measuring Cups and Spoons:** For accurately measuring the nutrient solution.
* **Spray Bottle:** For misting the seedlings.
Step-by-Step Guide: From Seed to Harvest
Okay, let’s get our hands dirty (well, not really, since we’re avoiding soil!). Here’s a detailed breakdown of the process:
1. **Seed Preparation (Optional but Recommended):** Coriander seeds can sometimes be a bit slow to germinate. To speed things up, you can gently crush the seed husks between two hard surfaces (like a cutting board and a rolling pin). Be careful not to damage the seeds themselves! Soaking the seeds in water for 24 hours before planting can also improve germination rates.
2. **Setting Up Your Hydroponic System:**
* **Prepare the Container:** Clean your container thoroughly with soap and water. If you’re using a dark-colored container, you’re good to go. If it’s transparent, you might want to cover the outside with dark tape or paint to prevent algae growth.
* **Add the Nutrient Solution:** Fill the container with water, leaving about an inch of space at the top. Add the hydroponic nutrient solution according to the manufacturer’s instructions. It’s crucial to follow the instructions carefully to avoid over- or under-fertilizing your plants.
* Check and Adjust the pH: Use your pH meter or test strips to check the pH of the nutrient solution. Adjust the pH to between 6.0 and 6.5 using pH up or pH down solutions, which you can find at most hydroponic supply stores. Add small amounts at a time and re-check the pH until you reach the desired level.
* **Install the Air Pump and Air Stone:** Place the air stone at the bottom of the container and connect it to the air pump with the tubing. Turn on the air pump to ensure the nutrient solution is properly oxygenated.
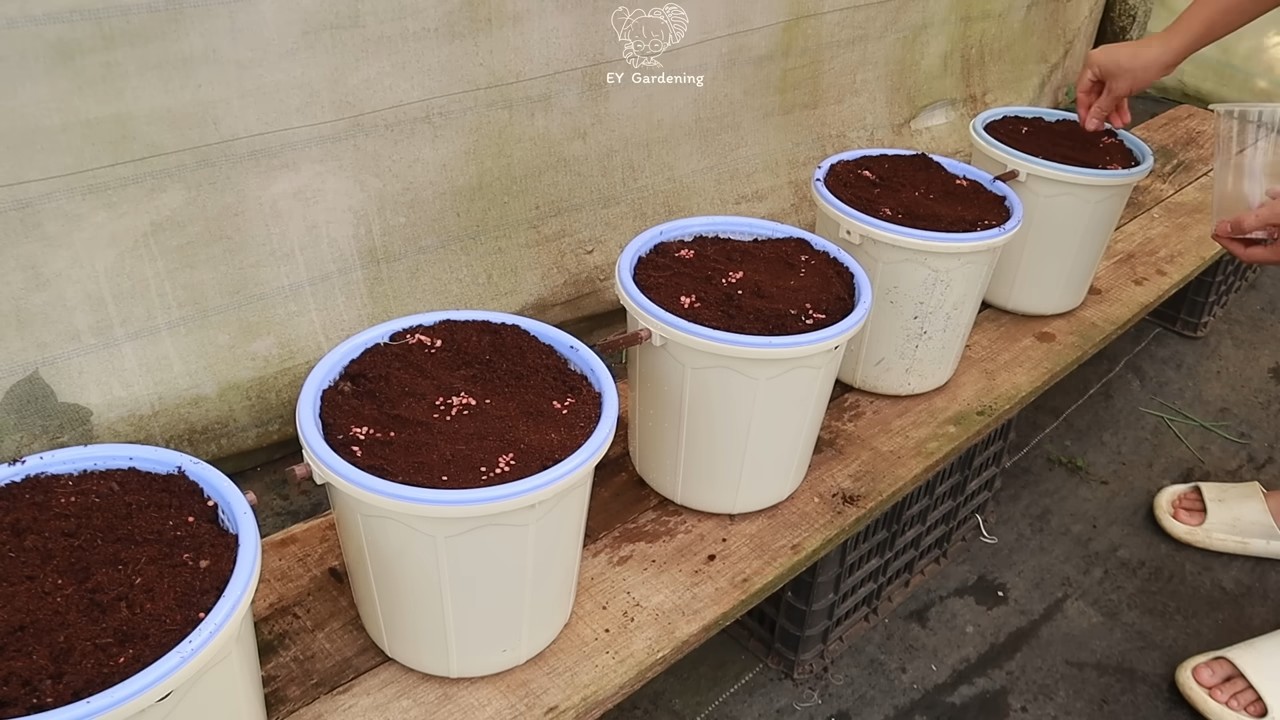
3. **Planting the Seeds:**
* **Prepare the Growing Medium:** If you’re using coco coir, rinse it thoroughly with water to remove any excess salts. If you’re using rockwool, soak it in pH-adjusted water (pH 5.5-6.0) for a few hours before planting.
* **Fill the Net Pots:** Fill the net pots with the prepared growing medium.
* **Sow the Seeds:** Sprinkle a few coriander seeds (3-5) on top of the growing medium in each net pot. Gently cover the seeds with a thin layer of the growing medium.
* Place the Net Pots in the Container:** Carefully place the net pots into the container, ensuring that the bottom of the pots are submerged in the nutrient solution. The growing medium will wick up the nutrient solution to keep the seeds moist.
4. **Germination and Early Growth:**
* **Provide Light:** Place the container in a sunny spot or under grow lights. If using grow lights, position them about 6-12 inches above the net pots.
* **Maintain Moisture:** Keep the growing medium moist by misting it with water a few times a day, especially during the first few days after planting.
* **Monitor Germination:** Coriander seeds typically germinate within 7-14 days. Once the seedlings emerge, reduce the frequency of misting.
* Thinning (Optional): Once the seedlings have a few true leaves, you can thin them out to one or two seedlings per net pot. This will give the remaining seedlings more space to grow.
5. **Ongoing Care:**
* **Monitor the Nutrient Solution:** Check the nutrient solution level regularly and add more as needed. Replace the entire nutrient solution every 1-2 weeks to prevent nutrient imbalances and the buildup of harmful bacteria.
* **Maintain pH:** Check the pH of the nutrient solution every few days and adjust as needed.
* **Provide Adequate Light:** Ensure your coriander plants are getting enough light. If they’re not getting enough light, they will become leggy and pale.
* **Control Temperature:** Coriander prefers cooler temperatures, ideally between 60-75°F (15-24°C). Avoid placing your hydroponic system in direct sunlight during the hottest part of the day.
* **Prune Regularly:** Pinch off any yellowing or dead leaves to encourage new growth.
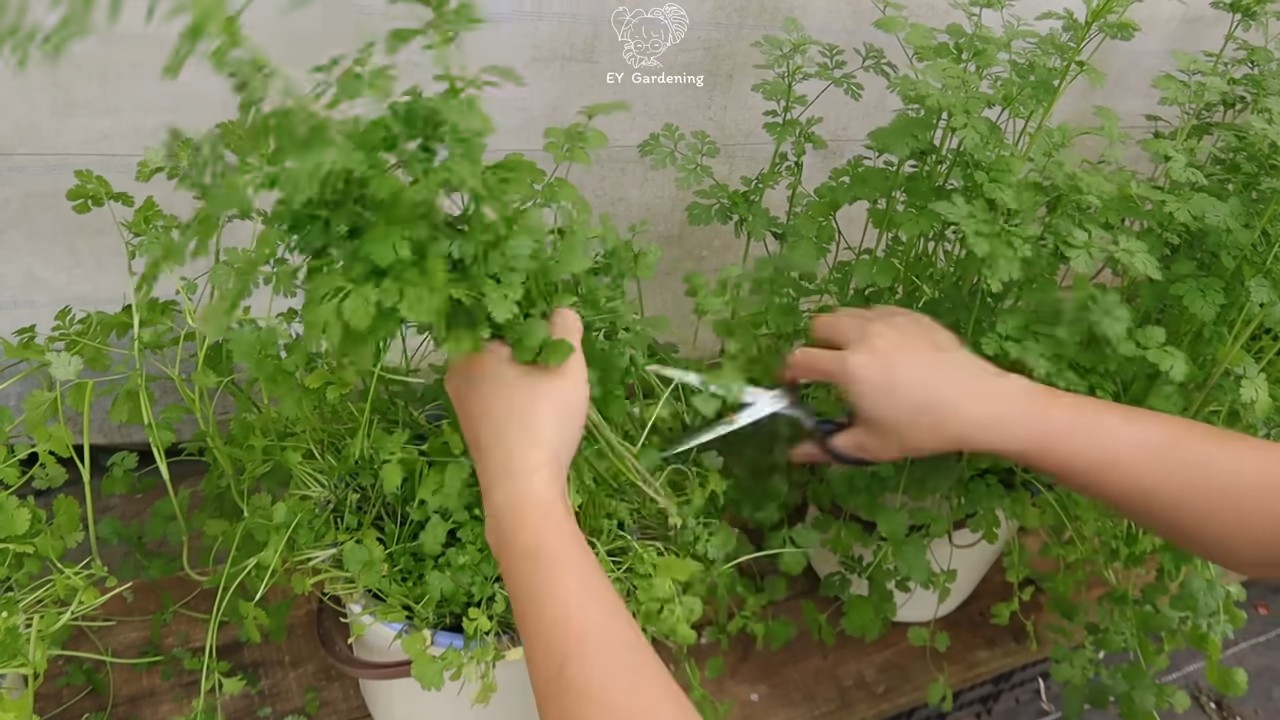
6. **Harvesting:**
* **Harvesting Time:** You can start harvesting your coriander leaves when they are about 4-6 inches tall.
* **Harvesting Method:** Use scissors or shears to cut the leaves from the top of the plant. Avoid cutting too much at once, as this can stress the plant.
* Continuous Harvest:** Coriander is a cut-and-come-again herb, meaning you can harvest leaves regularly and the plant will continue to produce new growth.
Troubleshooting Tips
Even with the best planning, you might encounter some challenges along the way. Here are a few common issues and how to address them:
* **Slow Germination:** If your coriander seeds are taking a long time to germinate, try scarifying them (gently crushing the seed husks) and soaking them in water before planting. Make sure the growing medium is consistently moist and the temperature is warm enough.
* **Yellowing Leaves:** Yellowing leaves can be a sign of nutrient deficiency, overwatering, or pH imbalance. Check the pH of the nutrient solution and adjust as needed. Ensure you’re using a balanced hydroponic nutrient solution and following the manufacturer’s instructions. If you suspect overwatering, reduce the frequency of watering.
* **Leggy Growth:** Leggy growth (tall, spindly plants with long stems) is usually a sign of insufficient light. Move your hydroponic system to a sunnier location or provide more artificial light.
* **Algae Growth:** Algae growth can occur in the nutrient solution, especially if the container is transparent. To prevent algae growth, use a dark-colored container or cover the outside of the container with dark tape or paint. You can also add a small amount of hydrogen peroxide to the nutrient solution to kill algae.
* **Pests:** While hydroponics generally reduces the risk of pests, they can still occur. Inspect your plants regularly for signs of pests, such as aphids or spider mites. If you find pests, you can try spraying them with insecticidal soap or neem oil.
Choosing the Right Nutrient Solution
Selecting the right nutrient solution is crucial for the success of your soil-free coriander growing. Here’s what I’ve learned:
* Look for a Balanced Formula: A good hydroponic nutrient solution should contain all the essential nutrients that plants need, including nitrogen (N
Conclusion
So, there you have it! Growing coriander without soil might sound like a futuristic gardening experiment, but it’s surprisingly simple, incredibly rewarding, and a fantastic solution for anyone facing space constraints, soil quality issues, or simply looking for a cleaner, more efficient way to cultivate this beloved herb. This DIY trick isn’t just about convenience; it’s about unlocking a new level of control over your coriander’s growth, ensuring a consistent supply of fresh, flavorful leaves right at your fingertips.
Why is this a must-try? Because it addresses so many common gardening challenges. No more battling weeds, worrying about soil-borne diseases, or struggling with inconsistent watering. The hydroponic approach allows you to precisely control the nutrients and moisture your coriander receives, leading to faster growth, healthier plants, and a more abundant harvest. Plus, it’s a visually appealing addition to any kitchen or balcony, bringing a touch of green and a promise of fresh flavors to your daily life.
But the beauty of this method lies in its adaptability. Feel free to experiment with different nutrient solutions to find the perfect balance for your coriander. Try varying the lighting conditions to see how it affects the leaf size and flavor intensity. Consider using different types of containers – from repurposed plastic bottles to elegant glass jars – to create a hydroponic setup that perfectly complements your personal style. You can even explore growing other herbs alongside your coriander in the same hydroponic system, creating a miniature herb garden that thrives without soil.
Don’t be afraid to get creative! Perhaps you’ll discover that adding a small air pump to your water reservoir further enhances root oxygenation, leading to even faster growth. Or maybe you’ll find that a specific type of LED grow light yields the most flavorful coriander leaves. The possibilities are endless, and the journey of discovery is part of the fun.
We wholeheartedly encourage you to give this soil-free coriander growing method a try. It’s a game-changer for herb enthusiasts, a practical solution for urban gardeners, and a fascinating experiment for anyone curious about the power of hydroponics. Once you experience the ease and efficiency of growing coriander without soil, you’ll wonder why you didn’t try it sooner.
And most importantly, we want to hear about your experiences! Share your tips, tricks, and triumphs in the comments below. Let us know what worked for you, what challenges you faced, and any variations you discovered along the way. Your insights will not only inspire other readers but also contribute to a collective knowledge base that helps us all become better hydroponic gardeners. So, grab your seeds, gather your supplies, and get ready to embark on a soil-free coriander adventure! We can’t wait to see what you create.
Frequently Asked Questions (FAQ)
What exactly is hydroponics, and is it difficult to learn?
Hydroponics is a method of growing plants without soil, using water-based nutrient solutions to provide the necessary elements for growth. While it might sound complex, the basic principles are quite simple. You’re essentially replacing the soil’s role as a nutrient delivery system with a carefully formulated water solution. The difficulty level depends on the complexity of the system you choose. Growing coriander without soil, as described in this article, is a relatively simple entry point into hydroponics, requiring minimal equipment and technical knowledge. There are many resources available online and in libraries to help you learn more about hydroponics if you want to delve deeper.
What kind of nutrient solution should I use for growing coriander without soil?
A balanced hydroponic nutrient solution specifically formulated for leafy greens is ideal. These solutions typically contain a blend of essential macronutrients (nitrogen, phosphorus, potassium) and micronutrients (iron, manganese, zinc, etc.) that coriander needs to thrive. You can find these solutions at most garden centers or online retailers specializing in hydroponic supplies. Follow the instructions on the nutrient solution packaging carefully, as the concentration needs to be precise to avoid nutrient deficiencies or toxicities. Start with a diluted solution and gradually increase the concentration as your coriander grows.
How often should I change the nutrient solution?
The frequency of nutrient solution changes depends on the size of your container and the rate at which your coriander is growing. As a general rule, change the solution every 1-2 weeks. However, it’s important to monitor the solution’s clarity and pH level. If the solution becomes cloudy or the pH drifts significantly, it’s a sign that it needs to be replaced sooner. Regularly topping off the water level with fresh nutrient solution is also crucial to maintain the correct concentration and prevent the roots from drying out.
What kind of lighting is best for growing coriander indoors?
Coriander needs adequate light to grow well indoors. Natural sunlight is ideal, but if you don’t have a sunny windowsill, you can use artificial grow lights. Fluorescent lights or LED grow lights are both good options. LED grow lights are more energy-efficient and produce less heat, making them a popular choice for indoor gardening. Aim for at least 6-8 hours of light per day. If you’re using artificial lights, position them close enough to the plants to provide sufficient light intensity, but not so close that they burn the leaves.
Can I grow coriander from seed using this soil-free method?
Yes, you can absolutely grow coriander from seed using this method. Start by germinating the seeds in a separate container filled with a sterile growing medium like rockwool or coco coir. Once the seedlings have developed a few true leaves, you can carefully transplant them into your hydroponic system. Be gentle when handling the seedlings to avoid damaging the delicate roots. Ensure that the roots are submerged in the nutrient solution, but the leaves are above the water line.
How do I prevent algae growth in my hydroponic system?
Algae growth is a common problem in hydroponic systems, especially those exposed to light. To prevent algae growth, use an opaque container to block light from reaching the nutrient solution. You can also add a small amount of hydrogen peroxide to the solution to kill algae spores. Regularly clean your container and change the nutrient solution to prevent algae from building up.
Is it possible to grow other herbs using this same soil-free method?
Yes, many other herbs can be successfully grown using hydroponics. Basil, mint, parsley, chives, and lettuce are all excellent candidates. The principles are the same: provide a balanced nutrient solution, adequate light, and proper aeration. However, different herbs may have slightly different nutrient requirements, so it’s important to research the specific needs of each herb you want to grow.
How do I harvest coriander grown without soil?
Harvesting coriander grown hydroponically is the same as harvesting coriander grown in soil. Simply snip off the leaves as needed, using scissors or pruning shears. Avoid cutting off more than one-third of the plant at a time, as this can stress the plant and slow down growth. Regular harvesting encourages the plant to produce more leaves, so don’t be afraid to use your coriander frequently.
What are some common problems I might encounter when growing coriander without soil, and how can I fix them?
Some common problems include nutrient deficiencies (yellowing leaves), algae growth, root rot (caused by overwatering or poor aeration), and pest infestations. Nutrient deficiencies can be addressed by adjusting the nutrient solution. Algae growth can be prevented by using an opaque container and changing the solution regularly. Root rot can be prevented by ensuring proper aeration and avoiding overwatering. Pest infestations can be treated with organic pesticides or by manually removing the pests. Regularly inspect your plants for any signs of problems and address them promptly to prevent them from escalating.
Can I use tap water for my nutrient solution, or do I need to use distilled water?
It’s generally recommended to use filtered or distilled water for your nutrient solution, as tap water can contain chlorine, fluoride, and other minerals that can be harmful to plants. However, if your tap water is relatively clean and low in mineral content, you can use it, but be sure to let it sit out for 24 hours to allow the chlorine to evaporate. Monitor your plants closely for any signs of nutrient imbalances and adjust the nutrient solution accordingly.
Leave a Comment