
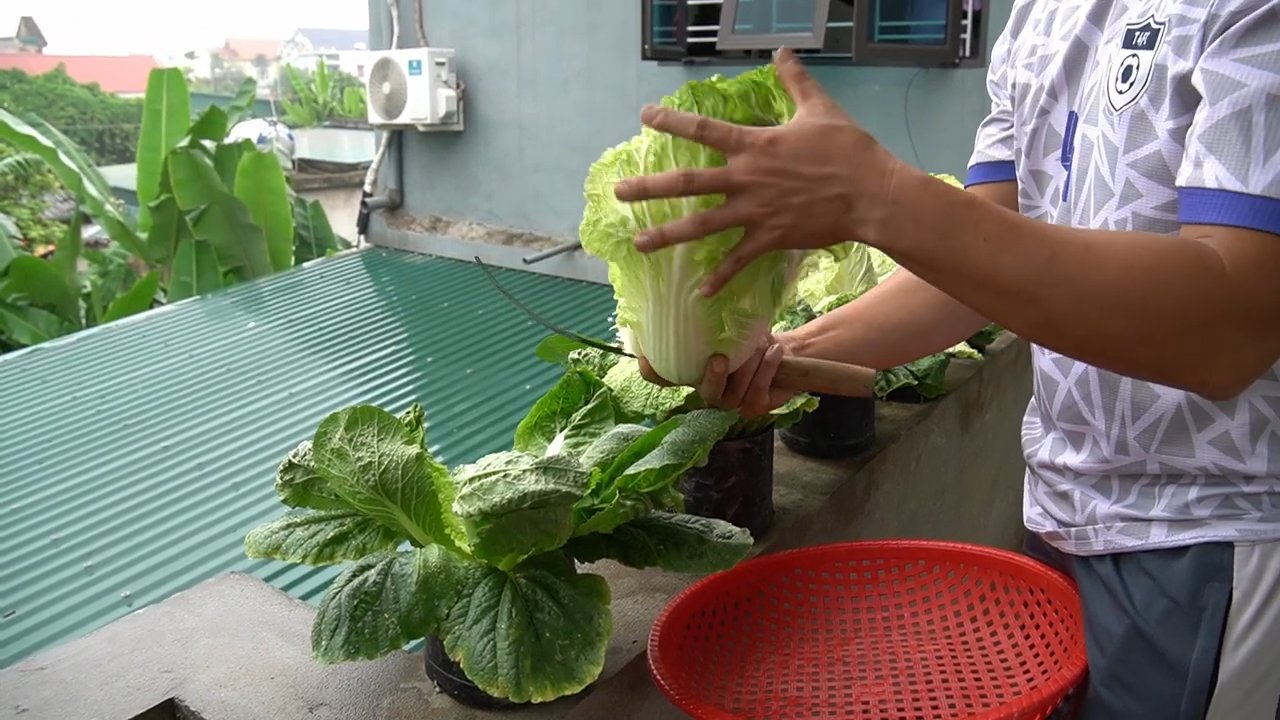
Balcony lettuce garden from plastic – sounds like a recipe for fresh salads and a whole lot of fun, right? I’m so excited to share this incredibly easy and rewarding DIY project with you! Forget those expensive grocery store greens; imagine stepping onto your balcony and harvesting crisp, delicious lettuce whenever you want.
Growing your own food, even in a small space, is a practice with roots stretching back centuries. From ancient rooftop gardens in Babylon to the modern-day victory gardens of wartime, people have always found ways to cultivate sustenance close to home. There’s something deeply satisfying about nurturing life from a tiny seed to a vibrant, edible plant.
But why a balcony lettuce garden from plastic, specifically? Well, let’s face it: space is a premium these days, especially in urban environments. And buying pre-packaged lettuce can be costly and contribute to plastic waste. This DIY hack tackles both problems head-on! We’re repurposing plastic containers – think old soda bottles, yogurt tubs, or even discarded buckets – to create a thriving vertical garden that fits perfectly on your balcony. It’s budget-friendly, eco-conscious, and incredibly easy to maintain. Plus, who doesn’t love a good DIY project that results in fresh, healthy food? I know I do!
Creating a Thriving Balcony Lettuce Garden from Recycled Plastic Containers
Hey there, fellow gardening enthusiasts! I’m so excited to share this super easy and rewarding DIY project with you: building a balcony lettuce garden using recycled plastic containers. Not only is this a fantastic way to grow your own fresh, delicious lettuce, but it’s also a great way to reduce waste and give those plastic containers a new lease on life. Trust me, there’s nothing quite like snipping off a few leaves for a salad knowing you grew them yourself!
What You’ll Need
Before we dive in, let’s gather all the necessary materials. This will make the whole process smoother and more enjoyable.
* **Plastic Containers:** This is where the recycling magic happens! Look for sturdy plastic containers like:
* Large yogurt tubs
* Margarine containers
* Ice cream buckets
* Storage bins (smaller sizes work best for balconies)
* Even plastic soda bottles (cut in half horizontally)
Make sure they’re clean and food-grade if possible, especially if you’re using containers that previously held non-food items.
* **Potting Soil:** Choose a good quality potting mix specifically formulated for vegetables. This will provide the necessary nutrients and drainage for your lettuce to thrive.
* **Lettuce Seeds or Seedlings:** You can start from seeds or buy small lettuce seedlings from your local garden center. Seedlings will give you a head start, but seeds are more economical and offer a wider variety. Consider different lettuce types like:
* Romaine
* Butterhead
* Loose-leaf (like Black Seeded Simpson or Salad Bowl)
* Crisphead (like Iceberg, though these can be trickier to grow in containers)
* **Drill or Screwdriver:** For creating drainage holes in the containers.
* **Landscape Fabric or Coffee Filters (Optional):** To line the bottom of the containers and prevent soil from washing out.
* **Watering Can or Hose:** For watering your lettuce plants.
* **Gloves (Optional):** To keep your hands clean.
* **Measuring Tape or Ruler:** To space out your lettuce plants properly.
* **Scissors or Utility Knife:** To cut landscape fabric or plastic bottles.
* **Small Shovel or Trowel:** For transferring soil and seedlings.
Preparing Your Plastic Containers
This is a crucial step to ensure your lettuce plants have proper drainage and a healthy growing environment.
1. **Clean the Containers:** Thoroughly wash the plastic containers with soap and water to remove any residue or dirt. Rinse them well and let them dry completely.
2. **Drill Drainage Holes:** Using a drill or screwdriver, create drainage holes in the bottom of each container. Aim for at least 4-5 holes, about 1/4 inch in diameter, evenly spaced across the bottom. This is super important to prevent waterlogging, which can lead to root rot.
3. **Line the Bottom (Optional):** Cut pieces of landscape fabric or coffee filters to fit the bottom of each container. Place them over the drainage holes to prevent soil from washing out when you water. This step is optional, but I highly recommend it, especially if you’re using a coarser potting mix.
Planting Your Lettuce
Now comes the fun part – planting your lettuce!
1. **Fill the Containers with Potting Soil:** Fill each container with potting soil, leaving about an inch of space at the top. Gently press down on the soil to remove any air pockets.
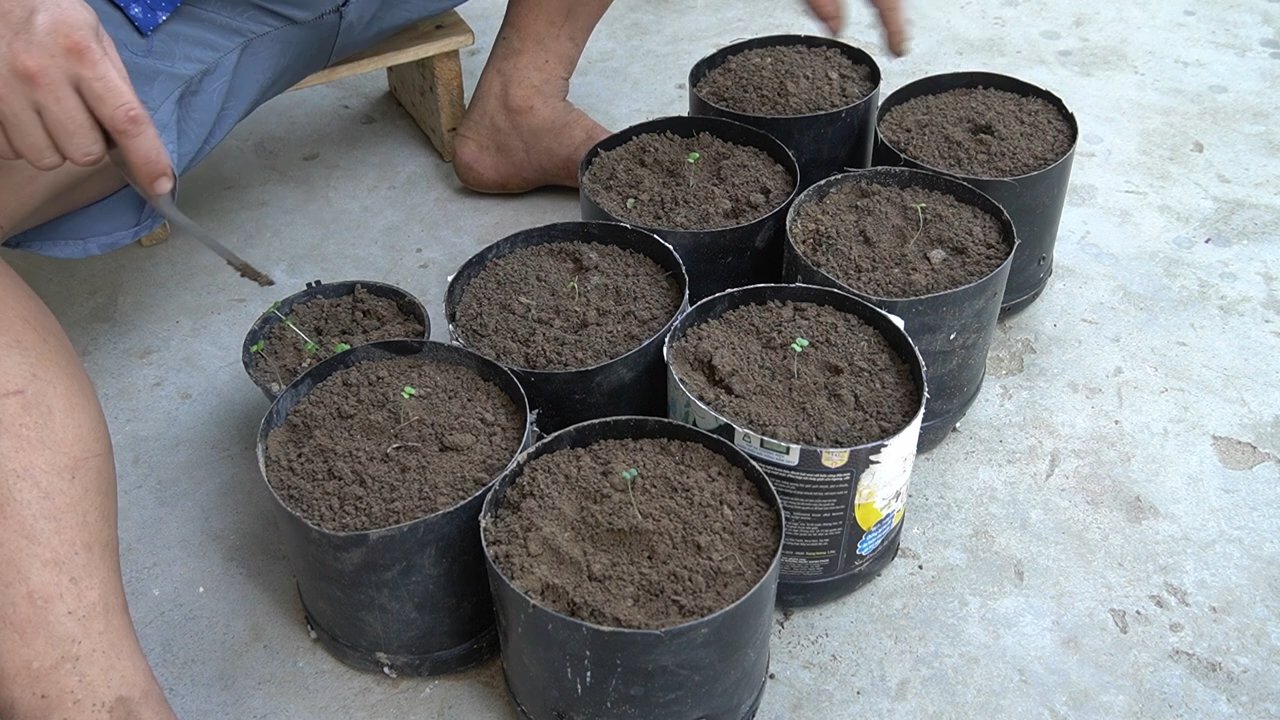
2. **Sowing Seeds (If Starting from Seeds):**
* Moisten the soil slightly.
* Sprinkle the lettuce seeds evenly over the surface of the soil.
* Cover the seeds with a thin layer of potting soil (about 1/4 inch).
* Gently water the soil using a watering can with a fine rose to avoid disturbing the seeds.
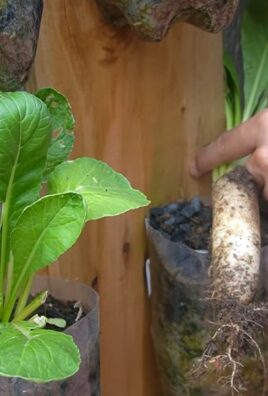
3. **Transplanting Seedlings (If Using Seedlings):**
* Gently remove the lettuce seedlings from their containers.
* Use your fingers or a trowel to create small holes in the potting soil, spaced about 6-8 inches apart.
* Place each seedling into a hole and gently press the soil around the roots.
* Water the seedlings thoroughly.
4. **Spacing:** Proper spacing is key for healthy lettuce growth. Overcrowding can lead to poor air circulation and increased risk of disease. Aim for the following spacing guidelines:
* Loose-leaf lettuce: 6-8 inches apart
* Butterhead lettuce: 8-10 inches apart
* Romaine lettuce: 10-12 inches apart
* Crisphead lettuce: 12-14 inches apart
Caring for Your Balcony Lettuce Garden
Consistent care is essential for a bountiful harvest.
1. **Watering:** Lettuce needs consistent moisture to thrive. Water your plants regularly, especially during hot and dry weather. Check the soil moisture by sticking your finger into the soil. If the top inch feels dry, it’s time to water. Avoid overwatering, as this can lead to root rot. Water in the morning to allow the foliage to dry before nightfall, which helps prevent fungal diseases.
2. **Sunlight:** Lettuce prefers partial shade, especially during the hottest part of the day. Aim for at least 4-6 hours of sunlight per day. If your balcony gets intense afternoon sun, consider providing some shade with a shade cloth or by moving the containers to a shadier spot.
3. **Fertilizing:** Lettuce is a relatively light feeder, but it will benefit from occasional fertilization. Use a balanced liquid fertilizer diluted to half strength every 2-3 weeks. Alternatively, you can amend the soil with compost or worm castings at planting time.
4. **Pest Control:** Keep an eye out for common lettuce pests like aphids, slugs, and snails.
* **Aphids:** These tiny insects can suck the sap from lettuce leaves, causing them to become disto
Hey there, fellow gardening enthusiasts! I’m so excited to share this super easy and rewarding DIY project with you: building a balcony lettuce garden using recycled plastic containers. Not only is this a fantastic way to grow your own fresh, delicious lettuce, but it’s also a great way to reduce waste and give those plastic containers a new lease on life. Trust me, there’s nothing quite like snipping off a few leaves for a salad knowing you grew them yourself!
What You’ll Need
Before we dive in, let’s gather all the necessary materials. This will make the whole process smoother and more enjoyable.
* **Plastic Containers:** This is where the recycling magic happens! Look for sturdy plastic containers like:
* Large yogurt tubs
* Margarine containers
* Ice cream buckets
* Storage bins (smaller sizes work best for balconies)
* Even plastic soda bottles (cut in half horizontally)
Make sure they’re clean and food-grade if possible, especially if you’re using containers that previously held non-food items.
* **Potting Soil:** Choose a good quality potting mix specifically formulated for vegetables. This will provide the necessary nutrients and drainage for your lettuce to thrive.
* **Lettuce Seeds or Seedlings:** You can start from seeds or buy small lettuce seedlings from your local garden center. Seedlings will give you a head start, but seeds are more economical and offer a wider variety. Consider different lettuce types like:
* Romaine
* Butterhead
* Loose-leaf (like Black Seeded Simpson or Salad Bowl)
* Crisphead (like Iceberg, though these can be trickier to grow in containers)
* **Drill or Screwdriver:** For creating drainage holes in the containers.
* **Landscape Fabric or Coffee Filters (Optional):** To line the bottom of the containers and prevent soil from washing out.
* **Watering Can or Hose:** For watering your lettuce plants.
* **Gloves (Optional):** To keep your hands clean.
* **Measuring Tape or Ruler:** To space out your lettuce plants properly.
* **Scissors or Utility Knife:** To cut landscape fabric or plastic bottles.
* **Small Shovel or Trowel:** For transferring soil and seedlings.
Preparing Your Plastic Containers
This is a crucial step to ensure your lettuce plants have proper drainage and a healthy growing environment.
1. **Clean the Containers:** Thoroughly wash the plastic containers with soap and water to remove any residue or dirt. Rinse them well and let them dry completely.
2. **Drill Drainage Holes:** Using a drill or screwdriver, create drainage holes in the bottom of each container. Aim for at least 4-5 holes, about 1/4 inch in diameter, evenly spaced across the bottom. This is super important to prevent waterlogging, which can lead to root rot.
3. **Line the Bottom (Optional):** Cut pieces of landscape fabric or coffee filters to fit the bottom of each container. Place them over the drainage holes to prevent soil from washing out when you water. This step is optional, but I highly recommend it, especially if you’re using a coarser potting mix.
Planting Your Lettuce
Now comes the fun part – planting your lettuce!
1. **Fill the Containers with Potting Soil:** Fill each container with potting soil, leaving about an inch of space at the top. Gently press down on the soil to remove any air pockets.
2. **Sowing Seeds (If Starting from Seeds):**
* Moisten the soil slightly.
* Sprinkle the lettuce seeds evenly over the surface of the soil.
* Cover the seeds with a thin layer of potting soil (about 1/4 inch).
* Gently water the soil using a watering can with a fine rose to avoid disturbing the seeds.
3. **Transplanting Seedlings (If Using Seedlings):**
* Gently remove the lettuce seedlings from their containers.
* Use your fingers or a trowel to create small holes in the potting soil, spaced about 6-8 inches apart.
* Place each seedling into a hole and gently press the soil around the roots.
* Water the seedlings thoroughly.
4. **Spacing:** Proper spacing is key for healthy lettuce growth. Overcrowding can lead to poor air circulation and increased risk of disease. Aim for the following spacing guidelines:
* Loose-leaf lettuce: 6-8 inches apart
* Butterhead lettuce: 8-10 inches apart
* Romaine lettuce: 10-12 inches apart
* Crisphead lettuce: 12-14 inches apart
Caring for Your Balcony Lettuce Garden
Consistent care is essential for a bountiful harvest.
1. **Watering:** Lettuce needs consistent moisture to thrive. Water your plants regularly, especially during hot and dry weather. Check the soil moisture by sticking your finger into the soil. If the top inch feels dry, it’s time to water. Avoid overwatering, as this can lead to root rot. Water in the morning to allow the foliage to dry before nightfall, which helps prevent fungal diseases.
2. **Sunlight:** Lettuce prefers partial shade, especially during the hottest part of the day. Aim for at least 4-6 hours of sunlight per day. If your balcony gets intense afternoon sun, consider providing some shade with a shade cloth or by moving the containers to a shadier spot.
3. **Fertilizing:** Lettuce is a relatively light feeder, but it will benefit from occasional fertilization. Use a balanced liquid fertilizer diluted to half strength every 2-3 weeks. Alternatively, you can amend the soil with compost or worm castings at planting time.
4. **Pest Control:** Keep an eye out for common lettuce pests like aphids, slugs, and snails.
* **Aphids:** These tiny insects can suck the sap from lettuce leaves, causing them to become distorted and yellow. You can control aphids by spraying them with a strong stream of water, using insecticidal soap, or introducing beneficial insects like ladybugs.
* **Slugs and Snails:** These slimy creatures can munch on lettuce leaves, leaving behind unsightly holes. You can control slugs and snails by handpicking them off the plants, using slug bait, or creating barriers around the containers with copper tape or diatomaceous earth.
5. **Weeding:** Regularly remove any weeds that pop up in your containers. Weeds compete with lettuce plants for nutrients and water.
6. **Thinning (If Starting from Seeds):** Once your lettuce seedlings have a few true leaves, thin them out to the recommended spacing. This will give the remaining plants room to grow and prevent overcrowding.
Harvesting Your Lettuce
The best part! Harvesting your own fresh lettuce.
1. **When to Harvest:** You can start harvesting lettuce leaves as soon as they are large enough to eat. For loose-leaf lettuce, you can harvest individual leaves as needed, starting with the outer leaves. For head lettuce, wait until the head is firm and well-formed before harvesting.
2. **How to Harvest:**
* **Loose-leaf lettuce:** Use scissors or a knife to cut off the outer leaves about an inch above the soil line. This will allow the plant to continue producing new leaves.
* **Head lettuce:** Use a knife to cut the head off at the base of the plant.
3. **Storage:** Freshly harvested lettuce is best eaten immediately. However, you can store it in the refrigerator for a few days. Wash and dry the lettuce leaves thoroughly, then wrap them in a paper towel and store them in a plastic bag or container.
Troubleshooting
Even with the best care, you might encounter some challenges. Here are a few common problems and how to address them:
* **Yellowing Leaves:** This could be a sign of overwatering, underwatering, nutrient deficiency, or pest infestation. Check the soil moisture, fertilize if necessary, and inspect the plants for pests.
* **Bolting (Premature Flowering):** Lettuce can bolt (go to seed) in hot weather. This makes the leaves bitter. To prevent bolting, provide shade during the hottest part of the day and choose heat-tolerant lettuce varieties.
* **Root Rot:** This is caused by overwatering and poor drainage. Make sure your containers have adequate drainage holes and avoid overwatering.
* **Pest Infestations:** Regularly inspect your plants for pests and take action promptly to prevent infestations from spreading.
Tips for Success
* **Choose the Right Location:** Select a balcony location that receives at least 4-6 hours of sunlight per day, but is protected from intense afternoon sun.
* **Use High-Quality Potting Soil:** Don’t skimp on the potting soil. A good quality potting mix will provide the necessary nutrients and drainage for your lettuce to thrive.
* **Water Regularly:** Lettuce needs consistent moisture, especially during hot weather.
* **Fertilize Sparingly:** Lettuce is a light feeder, so don’t over-fertilize.
* **Harvest Regularly:**
Conclusion
Transforming your balcony into a thriving lettuce garden using repurposed plastic containers is more than just a clever DIY project; it’s a gateway to fresh, flavorful salads right outside your door. This method offers a sustainable, cost-effective, and space-saving solution for growing your own greens, even if you’re limited to apartment living or a small outdoor area. The satisfaction of harvesting your own lettuce, knowing exactly where it came from and what went into its growth, is unparalleled.
This project is a must-try for several compelling reasons. Firstly, it significantly reduces your reliance on store-bought lettuce, which can often be expensive and lack the vibrant taste of freshly picked greens. Secondly, it promotes sustainability by giving a new life to plastic containers that would otherwise end up in landfills. Thirdly, it’s incredibly accessible, requiring minimal tools, space, and gardening experience. Even if you’ve never grown anything before, this project is a fantastic starting point.
But the benefits don’t stop there. Growing your own lettuce allows you to control the entire process, from the type of soil you use to the amount of sunlight your plants receive. This control translates to healthier, more nutritious lettuce, free from harmful pesticides and herbicides. Plus, the act of gardening itself is incredibly therapeutic, providing a calming and rewarding activity that connects you with nature.
Ready to take your balcony garden to the next level? Consider experimenting with different varieties of lettuce. Romaine, butterhead, and loose-leaf varieties all thrive in containers and offer a diverse range of flavors and textures. You can also add companion plants like herbs (basil, chives, parsley) or flowers (marigolds, nasturtiums) to attract pollinators and deter pests. Another variation is to create a vertical lettuce garden by stacking multiple containers or using a hanging planter. This maximizes space and adds visual appeal to your balcony.
Don’t be afraid to get creative with your container choices. While repurposed plastic containers are ideal, you can also use old buckets, tubs, or even laundry baskets. Just make sure they have drainage holes to prevent waterlogging. Remember to choose a well-draining potting mix specifically formulated for containers, and provide your lettuce with plenty of sunlight (at least 6 hours per day).
We wholeheartedly encourage you to embark on this rewarding DIY adventure. Building a balcony lettuce garden from plastic is not only a practical way to grow your own food but also a fun and engaging project that can bring joy and satisfaction to your life. Once you’ve harvested your first batch of homegrown lettuce, you’ll be hooked!
We’d love to hear about your experiences! Share your photos, tips, and challenges in the comments below. Let’s create a community of balcony gardeners and inspire others to embrace the joys of growing their own food. What are you waiting for? Grab some plastic containers, potting mix, and lettuce seeds, and start building your own balcony lettuce garden today!
Frequently Asked Questions (FAQ)
What type of plastic containers are best for a balcony lettuce garden?
Ideally, you should use food-grade plastic containers that are labeled with a recycling symbol and a number (1, 2, 4, or 5) indicating the type of plastic. These plastics are generally considered safe for growing food. Avoid using containers made from polystyrene (plastic #6), as they can leach chemicals into the soil. Thoroughly clean and sanitize any used containers before planting to remove any potential contaminants. Make sure the containers are sturdy enough to hold the weight of the soil and plants, especially when wet. Dark-colored containers can absorb more heat, which can be beneficial in cooler climates but may overheat the soil in warmer regions. Consider using lighter-colored containers or painting dark containers white to reflect sunlight.
How much sunlight does my balcony lettuce garden need?
Lettuce thrives in full sun, requiring at least 6 hours of direct sunlight per day. However, in hotter climates, providing some afternoon shade can prevent the leaves from wilting or burning. Observe your balcony throughout the day to determine the areas that receive the most sunlight. If your balcony doesn’t receive enough natural sunlight, you can supplement with grow lights. Position the grow lights a few inches above the lettuce plants and adjust the height as they grow. Rotate the containers regularly to ensure that all sides of the plants receive equal exposure to sunlight.
What kind of soil should I use for my balcony lettuce garden?
Use a well-draining potting mix specifically formulated for containers. Avoid using garden soil, as it can become compacted in containers and hinder drainage. A good potting mix will retain moisture while allowing excess water to drain away, preventing root rot. You can also amend the potting mix with compost or other organic matter to improve its fertility and water-holding capacity. Consider adding perlite or vermiculite to the potting mix to further improve drainage and aeration. Before planting, moisten the potting mix thoroughly to ensure that it is evenly hydrated.
How often should I water my balcony lettuce garden?
Water your lettuce plants regularly, keeping the soil consistently moist but not waterlogged. The frequency of watering will depend on factors such as the weather, the type of container, and the size of the plants. Check the soil moisture by sticking your finger about an inch into the soil. If it feels dry, it’s time to water. Water deeply, allowing the water to drain out of the drainage holes. Avoid overhead watering, as this can promote fungal diseases. Instead, water at the base of the plants. During hot weather, you may need to water your lettuce plants more frequently, possibly even twice a day.
How do I fertilize my balcony lettuce garden?
Lettuce is a relatively light feeder, but it still benefits from regular fertilization. Use a balanced liquid fertilizer diluted to half strength every two to three weeks. Alternatively, you can use a slow-release fertilizer at planting time. Avoid over-fertilizing, as this can lead to leggy growth and bitter-tasting leaves. Organic fertilizers, such as compost tea or fish emulsion, are also excellent choices. Monitor your lettuce plants for signs of nutrient deficiencies, such as yellowing leaves or stunted growth. Adjust your fertilization schedule accordingly.
How do I protect my balcony lettuce garden from pests and diseases?
Regularly inspect your lettuce plants for signs of pests or diseases. Common pests include aphids, slugs, and snails. You can control aphids by spraying them with a strong stream of water or using insecticidal soap. Slugs and snails can be handpicked or trapped using beer traps. To prevent fungal diseases, ensure good air circulation around the plants and avoid overhead watering. Remove any diseased leaves promptly. Consider using organic pest control methods, such as neem oil or diatomaceous earth. Companion planting with herbs like basil or marigolds can also help deter pests.
When and how do I harvest my balcony lettuce?
You can start harvesting lettuce leaves as soon as they are large enough to eat, typically about 4-6 weeks after planting. Harvest outer leaves first, leaving the inner leaves to continue growing. This cut-and-come-again method allows you to harvest lettuce continuously for several weeks. Use a sharp knife or scissors to cut the leaves cleanly. Harvest lettuce in the morning, when the leaves are crisp and hydrated. Avoid harvesting during hot weather, as the leaves may be wilted and bitter. Store harvested lettuce in the refrigerator in a plastic bag or container.
What if my lettuce bolts (goes to seed)?
Bolting is a natural process that occurs when lettuce plants are exposed to high temperatures or long days. Bolted lettuce leaves become bitter and less palatable. To prevent bolting, choose heat-tolerant lettuce varieties and provide shade during hot weather. If your lettuce plants start to bolt, you can still harvest the leaves, but they may not taste as good. You can also allow the plants to go to seed and collect the seeds for future planting.
Can I grow lettuce on my balcony year-round?
Whether you can grow lettuce year-round on your balcony depends on your climate. In mild climates, you may be able to grow lettuce throughout the year. In colder climates, you may need to protect your lettuce plants from frost or snow. You can use row covers, cold frames, or greenhouses to extend the growing season. Choose cold-hardy lettuce varieties for winter growing. In hot climates, you may need to provide shade and water your lettuce plants more frequently to prevent bolting.


Leave a Comment