
Grow Celery Year Round? Absolutely! Imagine fresh, crisp celery stalks always at your fingertips, ready to add a delightful crunch to your salads, soups, and snacks. No more last-minute grocery runs or settling for wilted, sad-looking celery from the store. This DIY guide is your passport to celery self-sufficiency, and trust me, it’s easier than you think!
Celery, with its refreshing taste and satisfying crunch, has been a culinary staple for centuries. Originating in the Mediterranean, it was initially valued more for its medicinal properties than its flavor. Over time, it evolved into the crisp, juicy vegetable we know and love today. But what if you could bypass the seasonal limitations and grow celery year round, regardless of your climate?
That’s where this DIY magic comes in. Many gardeners struggle with celery, often finding it bolts in the summer heat or succumbs to frost in the winter. This article will equip you with simple, effective techniques to extend your celery growing season, allowing you to enjoy a continuous harvest. I’ll share my favorite tricks and hacks, from choosing the right varieties to creating protective environments, so you can savor the taste of homegrown celery all year long. Let’s get growing!
Grow Celery Indoors: A Year-Round Harvest!
Hey there, fellow gardening enthusiasts! Ever crave that crisp, refreshing crunch of celery in the dead of winter? Well, I’m here to tell you that you can have it! Growing celery indoors is totally achievable, and I’m going to walk you through every step of the process. Get ready to enjoy homegrown celery whenever you want!
What You’ll Need: The Celery Starter Pack
Before we dive in, let’s gather our supplies. This is what you’ll need to get started:
* Celery Stalk: Choose a healthy-looking celery stalk from the grocery store. Look for one with a firm base and vibrant green stalks. Organic is always a plus!
* Shallow Dish or Bowl: Something to hold water and the celery base.
* Potting Mix: A good quality potting mix is essential for healthy growth.
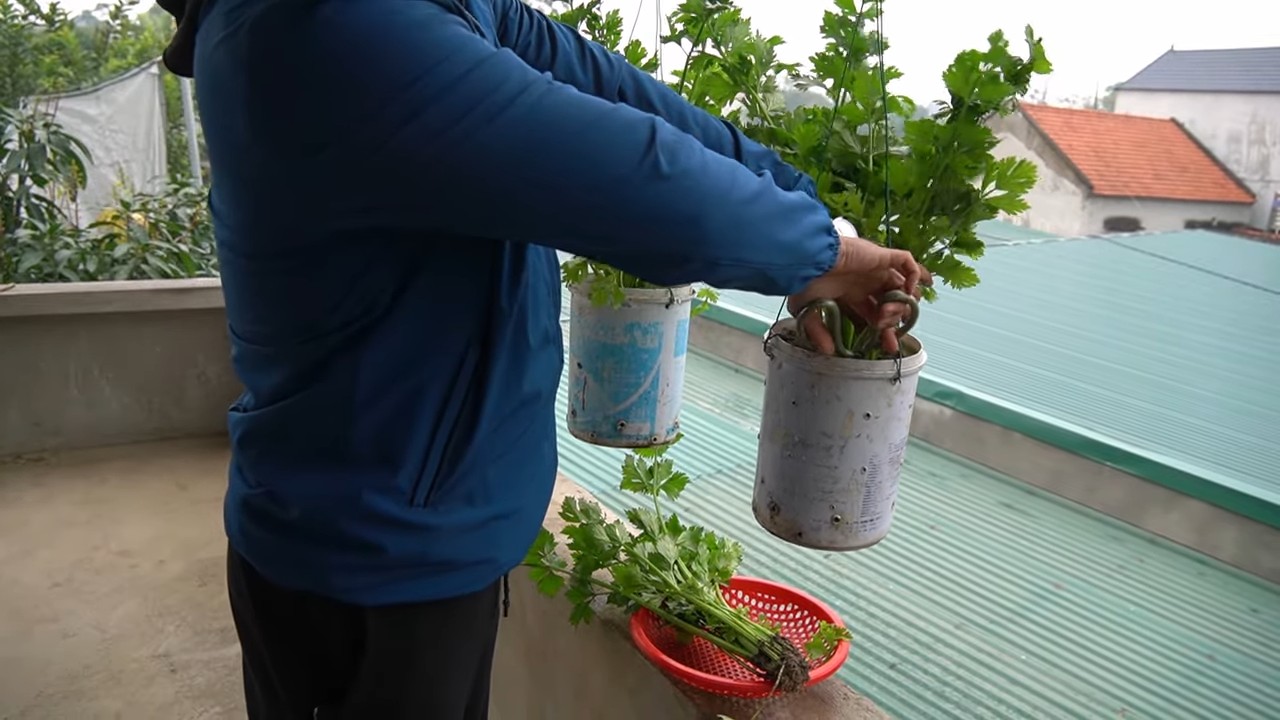
* Pot: Choose a pot that’s at least 8 inches in diameter and depth. Celery needs room for its roots to spread.
* Water: Tap water is fine, but letting it sit out for a day to dechlorinate is even better.
* Grow Lights (Optional but Recommended): If you don’t have a sunny windowsill, grow lights will be your best friend.
* Spray Bottle: For misting the celery leaves.
* Fertilizer (Optional): A balanced liquid fertilizer can give your celery a boost.
Reviving Your Celery: From Grocery Store to Garden
Okay, let’s get this celery party started! The first step is to coax that grocery store celery stalk back to life.
1. Cut the Celery Base: Using a sharp knife, carefully cut off the celery stalk about 2 inches from the bottom. This is the base we’ll be working with. Don’t throw away the stalks you cut off! You can use them in your cooking.
2. Place in Water: Put the celery base in your shallow dish or bowl and add enough water to cover the bottom inch or so. Make sure the cut end is submerged.
3. Find a Sunny Spot: Place the dish in a bright, sunny windowsill. If you don’t have a sunny spot, don’t worry! We’ll talk about grow lights later.
4. Change the Water Regularly: Change the water every day or two to prevent bacteria growth. This is super important!
5. Wait for Roots to Grow: Now comes the waiting game. Over the next few days, you should start to see small roots emerging from the bottom of the celery base. You might also see new green shoots sprouting from the top. This is a sign that your celery is happy and ready to grow! This process usually takes about 5-7 days.
Planting Your Celery: Giving it a Home
Once your celery has developed a good set of roots (about an inch or two long), it’s time to plant it in a pot.
1. Prepare the Pot: Fill your pot with potting mix, leaving about an inch of space at the top.
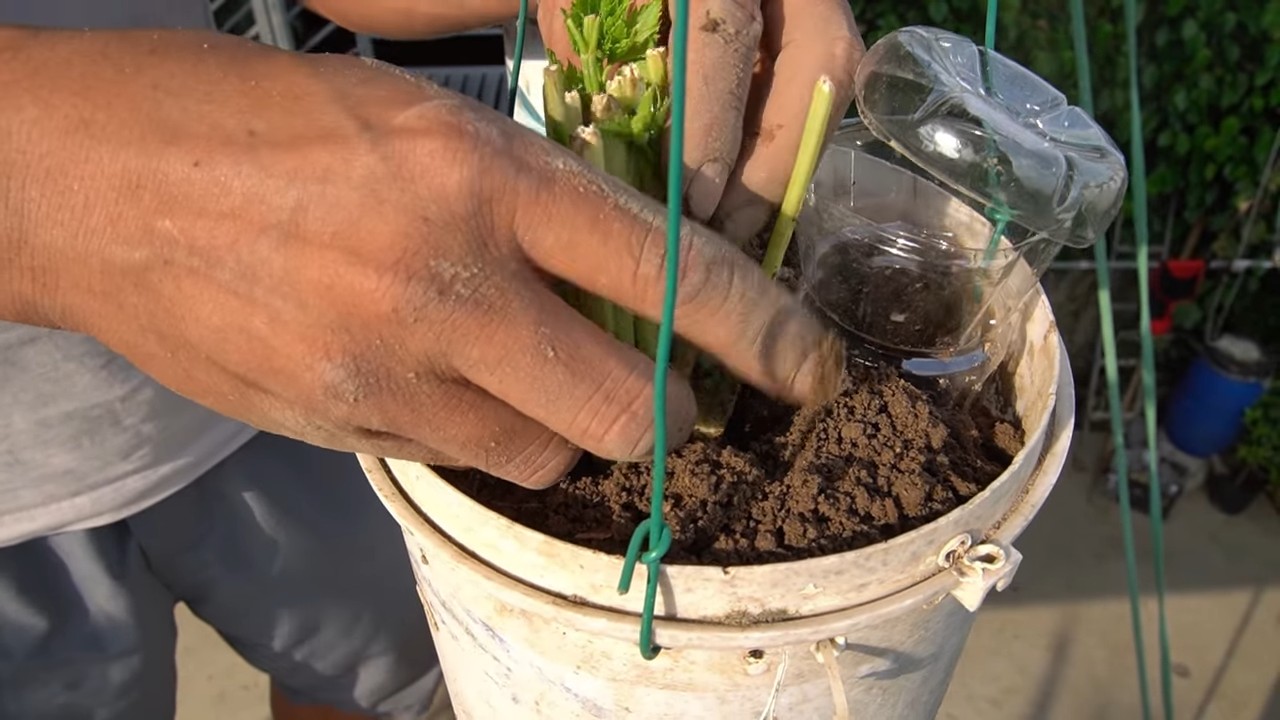
2. Make a Hole: Use your finger or a small trowel to create a hole in the center of the potting mix, large enough to accommodate the celery base and its roots.
3. Plant the Celery: Carefully remove the celery base from the water and gently place it in the hole. Make sure the roots are spread out and not crammed together.
4. Cover the Roots: Fill the hole with potting mix, gently pressing down around the celery base to secure it in place. The top of the celery base should be just above the soil level.
5. Water Thoroughly: Water the potting mix thoroughly until water drains out of the bottom of the pot. This will help settle the soil and ensure the roots are well-hydrated.
Caring for Your Celery: Keeping it Happy and Healthy
Now that your celery is planted, it’s time to provide it with the care it needs to thrive.
1. Light: Celery needs plenty of light to grow. If you have a sunny windowsill, place your pot there. If not, use grow lights. Position the grow lights about 6-12 inches above the celery plant and keep them on for 12-14 hours a day.
2. Watering: Celery likes consistently moist soil, but not soggy. Water your celery when the top inch of soil feels dry to the touch. Make sure to water thoroughly, allowing the water to drain out of the bottom of the pot.
3. Humidity: Celery prefers a humid environment. If your home is dry, you can increase the humidity around your celery plant by misting it with water regularly. You can also place the pot on a tray filled with pebbles and water. Make sure the bottom of the pot isn’t sitting directly in the water, as this can lead to root rot.
4. Fertilizing (Optional): If you want to give your celery a boost, you can fertilize it every few weeks with a balanced liquid fertilizer. Follow the instructions on the fertilizer label.
5. Temperature: Celery prefers temperatures between 60-70°F (15-21°C). Avoid placing your celery plant near drafts or sources of heat.
6. Pest Control: Keep an eye out for pests like aphids or spider mites. If you notice any pests, you can try spraying your celery plant with insecticidal soap.
Harvesting Your Celery: The Sweet Reward
After a few months of care, your celery should be ready to harvest!
1. Harvesting Individual Stalks: You can harvest individual stalks of celery as needed. Simply cut off the outer stalks near the base of the plant. This will allow the inner stalks to continue growing.
2. Harvesting the Whole Plant: If you want to harvest the entire plant, simply cut it off at the base.
3. Enjoy Your Harvest: Wash your harvested celery and enjoy it in salads, soups, or as a healthy snack!
Troubleshooting: Common Celery Problems and Solutions
Even with the best care, you might encounter some problems while growing celery indoors. Here are some common issues and how to fix them:
* Yellowing Leaves: This could be a sign of overwatering, underwatering, or nutrient deficiency. Check the soil moisture and adjust your watering accordingly. If you suspect a nutrient deficiency, try fertilizing your celery plant.
* Leggy Growth: This is usually caused by insufficient light. Make sure your celery plant is getting enough light, either from a sunny windowsill or grow lights.
* Slow Growth: This could be due to a variety of factors, including insufficient light, improper watering, or poor soil. Make sure you’re providing your celery plant with the right conditions.
* Pests: Keep an eye out for pests like aphids or spider mites. If you notice any pests, you can try spraying your celery plant with insecticidal soap.
Grow Lights: Your Indoor Gardening Secret Weapon
Let’s talk more about grow lights. They’re a game-changer for indoor gardening, especially if you don’t have a naturally sunny spot.
* Types of Grow Lights: There are several types of grow lights available, including LED, fluorescent, and incandescent. LED grow lights are generally the most energy-efficient and long-lasting.
* Light Spectrum: Plants need a specific spectrum of light to grow properly. Look for grow lights that provide a full spectrum of light, including both blue and red wavelengths.
* Placement: Position your grow lights about 6-12 inches above your celery plant. You may need to adjust the height as your celery grows.
* Timer: Use a timer to keep your grow lights on for 12-14 hours a day. This will ensure your celery plant gets enough light to thrive.
Tips and Tricks for Celery Success
Here are a few extra tips and tricks to help you grow the best celery ever:
* Choose the Right Variety: Some celery varieties are better suited for indoor growing than others. Look for varieties that are compact and disease-resistant.
* Rotate Your Celery Plant: Rotate your celery plant regularly to ensure it gets even light exposure on all sides.
* Pinch Off Flowers: If your celery plant starts to flower, pinch off the flowers to encourage leaf growth.
* Clean Your Tools: Always clean your gardening tools before and after use to prevent the spread of disease.
* Be Patient: Growing celery takes time and patience. Don’t get discouraged if you don’t see results immediately. Just keep providing your celery plant with the care it needs, and you’ll eventually be rewarded with a delicious harvest.
Enjoy Your Homegrown Celery!
And there you have it! You’re now equipped with the knowledge and skills to grow celery indoors year-round. It might seem like a lot of work at first, but trust me, the taste of homegrown
Conclusion
So, there you have it! Growing celery year-round might seem like a daunting task reserved for seasoned gardeners, but with this simple DIY trick, fresh, crisp celery stalks can be a staple in your kitchen, no matter the season. Forget those limp, expensive bunches from the grocery store – imagine the satisfaction of harvesting your own vibrant, flavorful celery whenever you need it.
This method isn’t just about convenience; it’s about control. You know exactly what goes into your celery, avoiding harmful pesticides and ensuring the freshest possible flavor. Plus, it’s incredibly rewarding to nurture a plant from scraps and watch it thrive.
Why is this DIY trick a must-try? Because it’s cost-effective, sustainable, and surprisingly easy. It minimizes waste by utilizing celery scraps that would otherwise end up in the compost bin. It provides a continuous supply of fresh celery, perfect for soups, salads, snacks, and everything in between. And it connects you to the natural world, offering a small but significant step towards a more self-sufficient lifestyle.
Don’t be afraid to experiment! Try different varieties of celery to discover your favorite flavor profile. Consider using organic potting mix for an even healthier harvest. You can also adjust the size of your container depending on the space you have available. If you live in a particularly cold climate, you might need to provide extra protection during the winter months, such as moving your celery indoors or covering it with a frost blanket.
We encourage you to give this DIY celery growing trick a try. It’s a fun and rewarding project that will enhance your culinary creations and bring a touch of green to your home, all year round. Once you’ve experienced the joy of harvesting your own celery, you’ll never look at store-bought celery the same way again.
Don’t keep this secret to yourself! Share your experiences with us in the comments below. We’d love to hear about your successes, your challenges, and any variations you’ve tried. Let’s build a community of year-round celery growers and inspire others to embrace the joys of homegrown produce. So, grab those celery scraps, get your hands dirty, and start growing your own delicious, fresh celery today!
Frequently Asked Questions (FAQ)
1. What kind of celery works best for this DIY trick?
Any type of celery you buy from the grocery store will work, but organic celery is generally recommended to avoid any potential pesticide residue. Look for celery stalks that are firm and have a healthy-looking base with visible roots. The fresher the celery, the better the chances of successful regrowth.
2. How long does it take for celery to regrow using this method?
You should start to see new growth within a week or two. It typically takes around 2-3 months to grow a full-sized celery stalk that’s ready for harvesting. The exact timeframe will depend on factors like sunlight, temperature, and the quality of your potting mix. Be patient and consistent with watering, and you’ll be rewarded with a bountiful harvest.
3. What kind of soil is best for growing celery?
Celery thrives in rich, well-draining soil. A good quality potting mix amended with compost is ideal. The soil should be able to retain moisture without becoming waterlogged. You can also add a slow-release fertilizer to provide essential nutrients for healthy growth.
4. How much sunlight does celery need?
Celery needs at least 6 hours of sunlight per day to thrive. If you’re growing celery indoors, place it near a sunny window or use a grow light to supplement natural light. Insufficient sunlight can result in leggy growth and a less flavorful harvest.
5. How often should I water my celery?
Celery needs consistent moisture to grow properly. Water deeply whenever the top inch of soil feels dry to the touch. Avoid overwatering, as this can lead to root rot. During hot weather, you may need to water more frequently.
6. Can I grow celery in a container? What size container is needed?
Yes, celery grows well in containers. Choose a container that is at least 8-10 inches deep and wide to allow ample room for the roots to develop. Make sure the container has drainage holes to prevent waterlogging.
7. How do I harvest celery?
You can harvest celery stalks as needed, starting with the outer stalks. Simply cut the stalks near the base of the plant with a sharp knife. The plant will continue to produce new stalks as long as you leave the inner core intact.
8. What are some common problems when growing celery, and how can I prevent them?
Some common problems include pests like aphids and celery leaf miners, as well as diseases like celery blight. To prevent these problems, inspect your plants regularly for signs of infestation or disease. Use organic pest control methods like insecticidal soap or neem oil to control pests. Ensure good air circulation to prevent fungal diseases.
9. Can I grow celery from seed instead of using scraps?
Yes, you can grow celery from seed, but it’s a more time-consuming process. Celery seeds are very small and require a long germination period. It’s generally easier and faster to grow celery from scraps using the method described in this article.
10. Is it possible to grow celery indoors year-round?
Yes, with proper care and attention, you can grow celery indoors year-round. Provide adequate sunlight, consistent moisture, and a nutrient-rich potting mix. You may also need to supplement with a grow light during the winter months.
11. How can I make my celery taste sweeter?
The sweetness of celery can be influenced by several factors. Ensure the plant receives adequate sunlight, as this helps with sugar production. Consistent watering is also crucial, as drought stress can lead to bitter-tasting celery. You can also try adding a small amount of Epsom salts to the soil, as magnesium can enhance the flavor.
12. What are some creative ways to use homegrown celery?
Beyond the usual soups and salads, homegrown celery can be used in a variety of creative ways. Try juicing it for a refreshing and healthy beverage. Use it as a base for homemade vegetable broth. Add it to stir-fries for a crunchy texture. Or, pickle it for a tangy and flavorful condiment. The possibilities are endless!


Leave a Comment