
Backyard Vineyard Grape Growing: Imagine stepping into your backyard and plucking a sun-warmed, juicy grape straight from the vine. Sounds like a dream, right? Well, it doesn’t have to be! This DIY guide will unlock the secrets to cultivating your very own backyard vineyard, transforming your outdoor space into a fruitful paradise.
Grape growing boasts a rich history, dating back thousands of years to ancient civilizations like the Egyptians and Romans, who revered grapes not only for their delicious fruit but also for the wine they produced. Today, the allure of growing your own grapes remains strong. But why should you embark on this exciting journey?
In today’s world, where we’re increasingly conscious of where our food comes from, backyard vineyard grape growing offers a fantastic way to connect with nature and enjoy fresh, organic produce. Plus, think of the satisfaction of sharing your homegrown grapes with friends and family, or even crafting your own homemade juice or jam! This DIY project isn’t just about growing grapes; it’s about creating a sustainable and rewarding hobby that will bring joy for years to come. So, grab your gardening gloves, and let’s get started on creating your very own backyard vineyard!
Dein eigener Weinberg im Garten: So ziehst du leckere Trauben selbst!
Hey Leute, habt ihr euch jemals vorgestellt, euren eigenen Wein im Garten anzubauen? Klingt nach viel Arbeit, oder? Aber keine Sorge, ich zeige euch, wie ihr mit ein bisschen Geduld und den richtigen Tricks einen kleinen, aber feinen Weinberg in eurem Garten anlegen könnt. Es ist einfacher, als ihr denkt, und das Gefühl, eure eigenen Trauben zu ernten, ist einfach unbezahlbar!
Was du brauchst: Die Vorbereitung
Bevor wir loslegen, brauchen wir natürlich das richtige Equipment und ein bisschen Planung. Hier ist eine Liste, damit wir nichts vergessen:
* Rebstöcke: Wählt robuste Sorten, die für euer Klima geeignet sind. Informiert euch am besten in einer Baumschule oder bei einem Winzer in eurer Nähe. Ich empfehle Sorten wie Regent, Solaris oder Johanniter für kühlere Regionen.
* Pflanzpfähle: Diese geben den jungen Rebstöcken Halt. Bambusstäbe oder Holzpfähle sind ideal.
* Draht: Für das Spalier, an dem die Reben wachsen werden. Verzinkter Draht ist wetterfest und langlebig.
* Drahtspanner: Damit könnt ihr den Draht straff ziehen.
* Pfosten: Stabile Pfosten, die das Spalier tragen. Holzpfosten oder Metallpfosten sind geeignet.
* Werkzeug: Spaten, Schaufel, Gartenschere, Drahtschneider, Hammer, eventuell eine Bohrmaschine.
* Bodenverbesserer: Kompost, Hornspäne oder anderer organischer Dünger.
* Mulch: Stroh, Rindenmulch oder Grasschnitt, um den Boden feucht zu halten und Unkraut zu unterdrücken.
* Gießkanne oder Gartenschlauch: Für die Bewässerung.
* Geduld: Weinbau braucht Zeit und Pflege!
Die richtige Rebsorte wählen: Das A und O
Die Wahl der richtigen Rebsorte ist entscheidend für den Erfolg deines kleinen Weinbergs. Nicht jede Sorte gedeiht in jedem Klima. Hier ein paar Tipps:
* Klima: Informiert euch über die Klimazone in eurer Region. Welche Temperaturen herrschen im Winter? Wie viel Sonne gibt es im Sommer?
* Boden: Der Boden sollte gut durchlässig sein und nicht zu Staunässe neigen. Ein leicht saurer Boden ist ideal.
* Resistenz: Wählt Sorten, die resistent gegen Pilzkrankheiten sind. Das spart euch viel Arbeit und Pflanzenschutzmittel.
* Geschmack: Natürlich sollte euch der Wein, der aus den Trauben gewonnen wird, auch schmecken! Probiert verschiedene Weine und informiert euch über die Eigenschaften der jeweiligen Rebsorte.
Schritt-für-Schritt-Anleitung: So pflanzt du deine Rebstöcke
Jetzt geht’s ans Eingemachte! Hier ist eine detaillierte Anleitung, wie ihr eure Rebstöcke richtig pflanzt:
1. Standort vorbereiten: Wählt einen sonnigen Standort mit mindestens 6 Stunden Sonne pro Tag. Der Boden sollte gut durchlässig sein. Entfernt Unkraut und Steine.
2. Boden verbessern: Grabt den Boden großzügig um und mischt Kompost, Hornspäne oder anderen organischen Dünger unter. Das verbessert die Bodenstruktur und versorgt die jungen Rebstöcke mit Nährstoffen.
3. Pflanzlöcher ausheben: Grabt Pflanzlöcher, die doppelt so breit und tief sind wie der Wurzelballen der Rebstöcke. Der Abstand zwischen den Rebstöcken sollte je nach Sorte und Spalierform zwischen 1 und 2 Metern betragen.
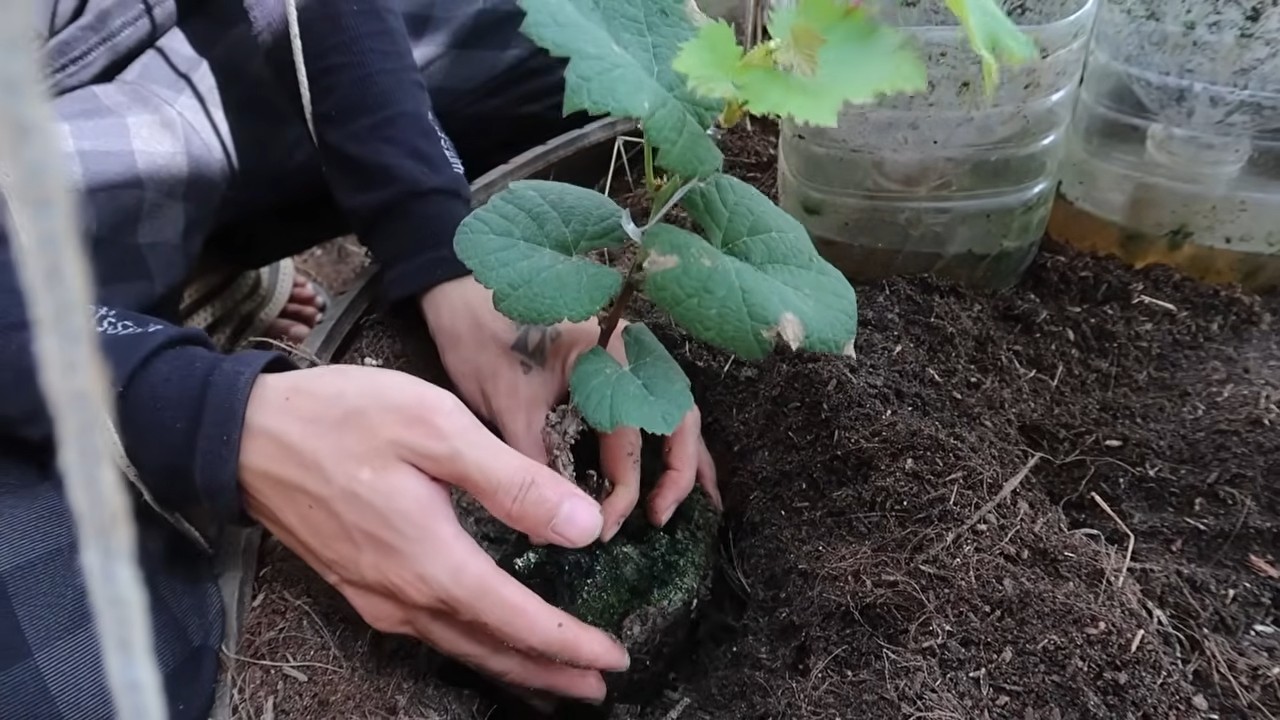
4. Rebstöcke vorbereiten: Entfernt vorsichtig den Topf oder die Verpackung von den Rebstöcken. Lockert den Wurzelballen etwas auf.
5. Rebstöcke pflanzen: Setzt die Rebstöcke in die Pflanzlöcher und füllt sie mit Erde auf. Achtet darauf, dass die Veredelungsstelle (die Verdickung am Stamm) etwa 5-10 cm über der Erdoberfläche liegt.
6. Angießen: Gießt die Rebstöcke gründlich an. Das hilft, dass sich die Erde um die Wurzeln setzt.
7. Pflanzpfähle setzen: Setzt neben jeden Rebstock einen Pflanzpfahl. Bindet den jungen Trieb locker am Pfahl fest.
8. Mulchen: Verteilt eine Schicht Mulch um die Rebstöcke. Das hält den Boden feucht und unterdrückt Unkraut.
Das Spalier bauen: Die Rankhilfe für deine Reben
Ein Spalier ist wichtig, damit die Reben richtig wachsen und die Trauben gut belüftet sind. Hier zeige ich euch, wie ihr ein einfaches Spalier selbst bauen könnt:
1. Pfosten setzen: Setzt die Pfosten in einem Abstand von 3-4 Metern in den Boden. Die Pfosten sollten stabil sein und mindestens 1,80 Meter hoch sein.
2. Draht spannen: Spannt den Draht zwischen den Pfosten. Beginnt mit dem untersten Draht, der etwa 50 cm über dem Boden liegt. Spannt dann weitere Drähte in einem Abstand von 30-40 cm.
3. Draht spannen: Benutzt Drahtspanner, um den Draht straff zu ziehen. Ein straffer Draht ist wichtig, damit die Reben Halt finden.
4. Reben anbinden: Bindet die Triebe der Reben locker am Draht fest. Achtet darauf, dass die Triebe nicht eingeschnürt werden.
Die Pflege: So bleiben deine Reben gesund und ertragreich
Die Pflege ist das A und O für einen erfolgreichen Weinbau. Hier sind ein paar wichtige Tipps:
* Bewässerung: Gießt die Rebstöcke regelmäßig, besonders in trockenen Perioden. Achtet darauf, dass der Boden nicht austrocknet.
* Düngung: Düngt die Rebstöcke im Frühjahr mit Kompost, Hornspäne oder einem speziellen Weinreben-Dünger.
* Schnitt: Der Rebschnitt ist wichtig, um die Form der Reben zu bestimmen und den Ertrag zu regulieren. Informiert euch über die verschiedenen Schnittmethoden und wendet sie entsprechend an.
* Pflanzenschutz: Kontrolliert die Reben regelmäßig auf Schädlinge und Krankheiten. Bei Bedarf könnt ihr biologische Pflanzenschutzmittel einsetzen.
* Unkrautbekämpfung: Entfernt regelmäßig Unkraut um die Rebstöcke. Mulchen hilft, Unkraut zu unterdrücken.
Der Rebschnitt: Die Kunst des Beschneidens
Der Rebschnitt ist eine Wissenschaft für sich, aber keine Angst, mit ein bisschen Übung bekommt ihr das hin! Hier sind die Grundlagen:
* Warum schneiden? Der Rebschnitt dient dazu, die Form der Rebe zu bestimmen, den Ertrag zu regulieren und die Qualität der Trauben zu verbessern.
* Wann schneiden? Der Hauptschnitt erfolgt im Winter, wenn die Reben ruhen. Ein Sommerschnitt kann notwendig sein, um zu dichtes Laub auszulichten.
* Wie schneiden? Es gibt verschiedene Schnittmethoden, je nach Rebsorte und Spalierform. Informiert euch über die für eure Reben geeignete Methode.
* Die wichtigsten Regeln: Schneidet immer sauber und schräg, um das Eindringen von Krankheiten zu verhindern. Lasst immer ein paar Augen (Knospen) stehen, aus denen neue Triebe wachsen können.
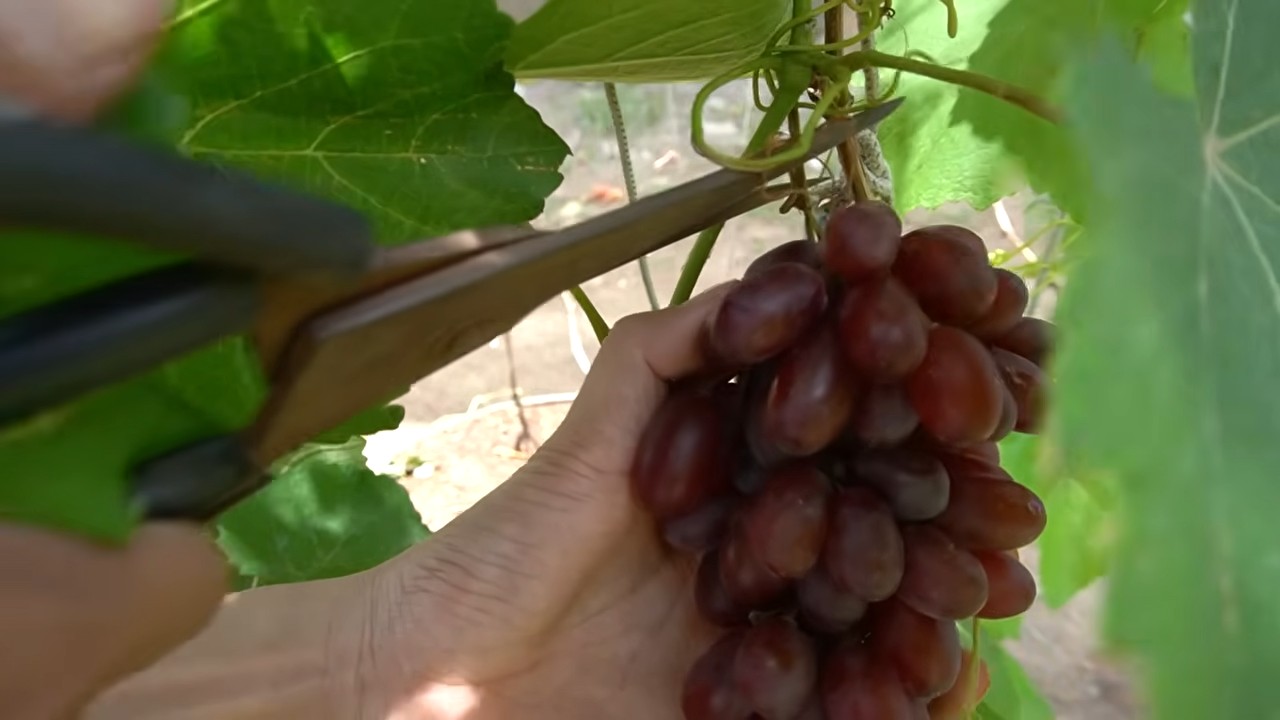
Die Ernte: Der Lohn deiner Mühe
Nach all der Arbeit kommt endlich der schönste Teil: die Ernte!
* Wann ernten? Der Zeitpunkt der Ernte hängt von der Rebsorte, dem Wetter und dem gewünschten Reifegrad der Trauben ab. Die Trauben sollten süß und aromatisch sein.
* Wie ernten? Schneidet die Trauben mit einer scharfen Schere ab. Achtet darauf, die Beeren nicht zu beschädigen.
* Was tun mit den Trauben? Ihr könnt die Trauben direkt essen, zu Saft verarbeiten oder natürlich zu Wein!
Häufige Probleme und Lösungen: Was tun, wenn’s nicht klappt?
Auch beim Weinbau kann es zu Problemen kommen. Hier sind ein paar häufige Probleme und ihre Lösungen:
* Pilzkrankheiten: Mehltau und Falscher Mehltau sind häufige
Conclusion
Embarking on the journey of backyard vineyard grape growing might seem daunting at first, but the rewards – both tangible and intangible – are well worth the effort. From the satisfaction of nurturing a plant from its humble beginnings to the sheer delight of harvesting your own sun-ripened grapes, this DIY project offers a unique connection to nature and a delicious payoff. We’ve explored the essential steps, from selecting the right grape variety for your climate and soil to providing the necessary support structures and diligently managing pests and diseases.
But why is this DIY trick a must-try? Because it empowers you to control the entire process, ensuring the quality and flavor of your grapes from vine to table. Store-bought grapes, while convenient, often lack the depth of flavor and character that homegrown grapes possess. Plus, you’ll avoid the pesticides and other chemicals that are sometimes used in commercial agriculture. You’ll know exactly what went into your grapes, making them a healthier and more satisfying choice.
Beyond the practical benefits, backyard vineyard grape growing offers a therapeutic escape from the stresses of modern life. The act of pruning, training, and tending to your vines can be incredibly meditative, providing a sense of accomplishment and connection to the natural world. It’s a hobby that engages your mind and body, offering a welcome respite from screens and deadlines.
Consider these variations to personalize your backyard vineyard:
* Espalier Training: Train your grapevines against a wall or fence for a beautiful and space-saving design. This method is particularly well-suited for smaller yards.
* Arbor or Pergola: Create a stunning focal point in your garden by training your grapevines over an arbor or pergola. This provides shade and creates a romantic, inviting space.
* Container Growing: If you have limited space or poor soil, consider growing your grapes in large containers. Choose a dwarf variety and provide adequate support.
* Different Grape Varieties: Experiment with different grape varieties to find your favorites. Consider table grapes for fresh eating, wine grapes for winemaking, or juice grapes for making juice and jams.
We encourage you to take the plunge and try this rewarding DIY project. Start small, learn as you go, and don’t be afraid to experiment. The journey of backyard vineyard grape growing is just as enjoyable as the destination.
Share your experience! We’d love to hear about your successes, challenges, and favorite grape varieties. Post photos of your vineyard, share your tips and tricks, and connect with other backyard grape growers in the comments below. Let’s build a community of passionate grape enthusiasts! Remember, mastering the art of backyard vineyard grape growing is a continuous learning process, and sharing our experiences helps us all grow together.
FAQ
What are the best grape varieties for beginners?
Choosing the right grape variety is crucial for success, especially for beginners. Some varieties are more disease-resistant and easier to grow than others. For table grapes, consider ‘Reliance’ (seedless, pink), ‘Canadice’ (seedless, red), or ‘Vanessa’ (seedless, red). These varieties are known for their cold hardiness and resistance to common grape diseases. For wine grapes, ‘Marquette’ (red) and ‘Frontenac’ (red) are good choices for cooler climates, while ‘Cabernet Sauvignon’ and ‘Chardonnay’ can thrive in warmer regions. Always check with your local nursery or agricultural extension office to determine the best varieties for your specific climate and soil conditions. They can provide valuable insights based on local experience.
How much space do I need for a backyard vineyard?
The amount of space required depends on the training system you choose and the vigor of the grape variety. As a general rule, allow at least 8-10 feet between rows and 6-8 feet between vines within a row. If you’re using an espalier system, you can train vines closer together, perhaps 4-6 feet apart. Container-grown grapes require even less space, but you’ll need to choose a dwarf variety and provide adequate support. Before planting, carefully consider the mature size of your chosen variety and plan accordingly. Overcrowding can lead to poor air circulation, increased disease pressure, and reduced fruit production.
How often should I water my grapevines?
Watering frequency depends on several factors, including climate, soil type, and the age of the vines. Young vines need more frequent watering than established vines. In general, water deeply and infrequently, allowing the soil to dry out slightly between waterings. During hot, dry periods, you may need to water more frequently. Use a soaker hose or drip irrigation system to deliver water directly to the roots, avoiding wetting the foliage, which can promote disease. Monitor the soil moisture regularly and adjust your watering schedule accordingly. Overwatering can be just as harmful as underwatering, leading to root rot and other problems.
What kind of fertilizer should I use for my grapevines?
Grapevines benefit from regular fertilization, but it’s important to avoid over-fertilizing, which can lead to excessive vegetative growth at the expense of fruit production. A balanced fertilizer with a ratio of 10-10-10 or 12-12-12 is a good starting point. Apply fertilizer in early spring, before the vines begin to actively grow. You can also amend the soil with compost or other organic matter to improve its fertility and drainage. Soil testing is recommended to determine the specific nutrient needs of your soil. This will help you choose the right fertilizer and avoid deficiencies or imbalances.
How do I protect my grapes from pests and diseases?
Pest and disease management is an essential part of backyard vineyard grape growing. Common pests include Japanese beetles, grape phylloxera, and grape berry moths. Common diseases include powdery mildew, downy mildew, and black rot. Monitor your vines regularly for signs of pests or diseases. Use organic pest control methods whenever possible, such as hand-picking insects, using insecticidal soap, or applying neem oil. Prune your vines properly to improve air circulation and reduce humidity, which can help prevent fungal diseases. Consider using disease-resistant grape varieties. If necessary, use appropriate fungicides or insecticides, following the manufacturer’s instructions carefully.
When is the best time to harvest my grapes?
Determining the optimal harvest time is crucial for achieving the best flavor and quality. The best way to determine ripeness is to taste the grapes. Look for a balance of sweetness and acidity. The berries should be plump and juicy, and the seeds should be brown. You can also use a refractometer to measure the sugar content (Brix) of the juice. The ideal Brix level depends on the grape variety and your intended use (table grapes, wine grapes, etc.). Harvest grapes on a dry day, preferably in the morning, after the dew has dried. Handle the grapes gently to avoid bruising.
How do I prune my grapevines?
Pruning is essential for maintaining the health and productivity of your grapevines. Pruning removes dead, damaged, and unproductive wood, improves air circulation, and encourages fruit production. The best time to prune is in late winter or early spring, before the vines begin to actively grow. The specific pruning method depends on the training system you’re using. Consult a guide or video specific to your chosen training system. Be sure to use sharp, clean pruning shears to avoid damaging the vines.
Can I grow grapes in containers?
Yes, you can successfully grow grapes in containers, especially if you have limited space or poor soil. Choose a dwarf or compact grape variety that is well-suited for container growing. Use a large container with good drainage. Fill the container with a well-draining potting mix. Provide adequate support for the vines, such as a trellis or stake. Water regularly and fertilize as needed. Container-grown grapes may need to be protected from extreme temperatures during the winter.
What do I do with my grapes after I harvest them?
The possibilities are endless! You can eat them fresh, make juice, jam, jelly, or wine. You can also dry them to make raisins. If you have a large harvest, consider sharing your grapes with friends and neighbors. Experiment with different recipes and find your favorite ways to enjoy your homegrown grapes. Don’t be afraid to get creative and try new things.

Leave a Comment