
Balcony chili gardening: Imagine stepping onto your balcony and plucking a vibrant, fiery chili pepper, ready to spice up your next meal. Sounds dreamy, right? Well, it doesn’t have to be just a dream! For centuries, growing food in small spaces has been a necessity and a source of pride for urban dwellers around the world. From the hanging gardens of Babylon to the window boxes of Parisian apartments, the desire to cultivate our own food is deeply ingrained in us.
But let’s be honest, sometimes the idea of gardening feels overwhelming, especially when you’re short on space. That’s where these DIY tricks and hacks come in! I’m here to show you that balcony chili gardening is not only possible, but also incredibly rewarding. Whether you’re a seasoned gardener or a complete newbie, these simple tips will help you transform your balcony into a thriving chili pepper paradise.
Why chili peppers, you ask? Well, besides adding a delicious kick to your dishes, they’re relatively easy to grow in containers, and they bring a splash of color and vibrancy to any space. Plus, knowing you grew them yourself? That’s a feeling you just can’t beat! So, let’s dive in and unlock the secrets to successful balcony chili gardening. Get ready to harvest your own homegrown heat!
Balkon-Chili-Garten: Dein scharfer DIY-Guide
Hey Chili-Liebhaber! Du träumst von einer eigenen Chili-Ernte direkt auf deinem Balkon? Dann bist du hier genau richtig! Ich zeige dir, wie du mit ein paar einfachen Schritten deinen Balkon in ein kleines Chili-Paradies verwandelst. Keine Angst, es ist einfacher als du denkst!
Was du für deinen Balkon-Chili-Garten brauchst:
* Chili-Samen oder Jungpflanzen: Wähle Sorten, die dir schmecken und für den Anbau im Topf geeignet sind.
* Töpfe oder Kübel: Achte auf eine ausreichende Größe (mindestens 10 Liter pro Pflanze) und eine gute Drainage.
* Hochwertige Pflanzerde: Spezielle Chili-Erde ist ideal, aber auch eine gute Gemüseerde tut’s.
* Dünger: Flüssigdünger oder Langzeitdünger für Chili-Pflanzen.
* Gießkanne oder Schlauch: Zum regelmäßigen Gießen.
* Pflanzstäbe (optional): Für Sorten, die etwas mehr Halt brauchen.
* Sprühflasche (optional): Für die Blattdüngung und zur Vorbeugung von Schädlingen.
* Geduld und Liebe: Das Wichtigste überhaupt!
Chili-Anzucht: Der Start in dein Chili-Abenteuer
Du hast zwei Möglichkeiten: Entweder du ziehst deine Chilis aus Samen selbst oder du kaufst bereits vorgezogene Jungpflanzen. Ich persönlich finde die Anzucht aus Samen super spannend, aber beides hat seine Vor- und Nachteile.
Variante 1: Chili-Anzucht aus Samen
1. Der richtige Zeitpunkt: Starte am besten im Februar oder März mit der Anzucht. Chilis brauchen eine lange Wachstumsperiode.
2. Das Anzuchtgefäß: Kleine Anzuchttöpfe oder eine Anzuchtschale sind perfekt. Fülle sie mit Anzuchterde.
3. Die Aussaat: Lege die Chili-Samen etwa 0,5 cm tief in die Erde und bedecke sie leicht.
4. Feuchtigkeit ist Trumpf: Befeuchte die Erde vorsichtig mit einer Sprühflasche. Sie sollte feucht, aber nicht nass sein.
5. Das Mini-Gewächshaus: Decke die Anzuchttöpfe mit Frischhaltefolie oder einem Deckel ab, um ein feuchtwarmes Klima zu schaffen. Vergiss nicht, regelmäßig zu lüften, um Schimmelbildung zu vermeiden.
6. Der Standort: Stelle die Anzuchtgefäße an einen warmen und hellen Ort. Eine Fensterbank über der Heizung ist ideal.
7. Die Keimung: Nach etwa 1-3 Wochen sollten die ersten Keimlinge sprießen.
8. Pikieren: Sobald die kleinen Chili-Pflänzchen ihre ersten richtigen Blätter (neben den Keimblättern) haben, ist es Zeit zum Pikieren. Das bedeutet, du setzt jede Pflanze einzeln in einen größeren Topf mit normaler Pflanzerde. Sei dabei vorsichtig, um die Wurzeln nicht zu beschädigen.
Variante 2: Chili-Jungpflanzen kaufen
1. Die Auswahl: Achte beim Kauf auf gesunde Pflanzen mit kräftigen Blättern und einem stabilen Stiel. Vermeide Pflanzen mit gelben oder braunen Blättern oder Anzeichen von Schädlingen.
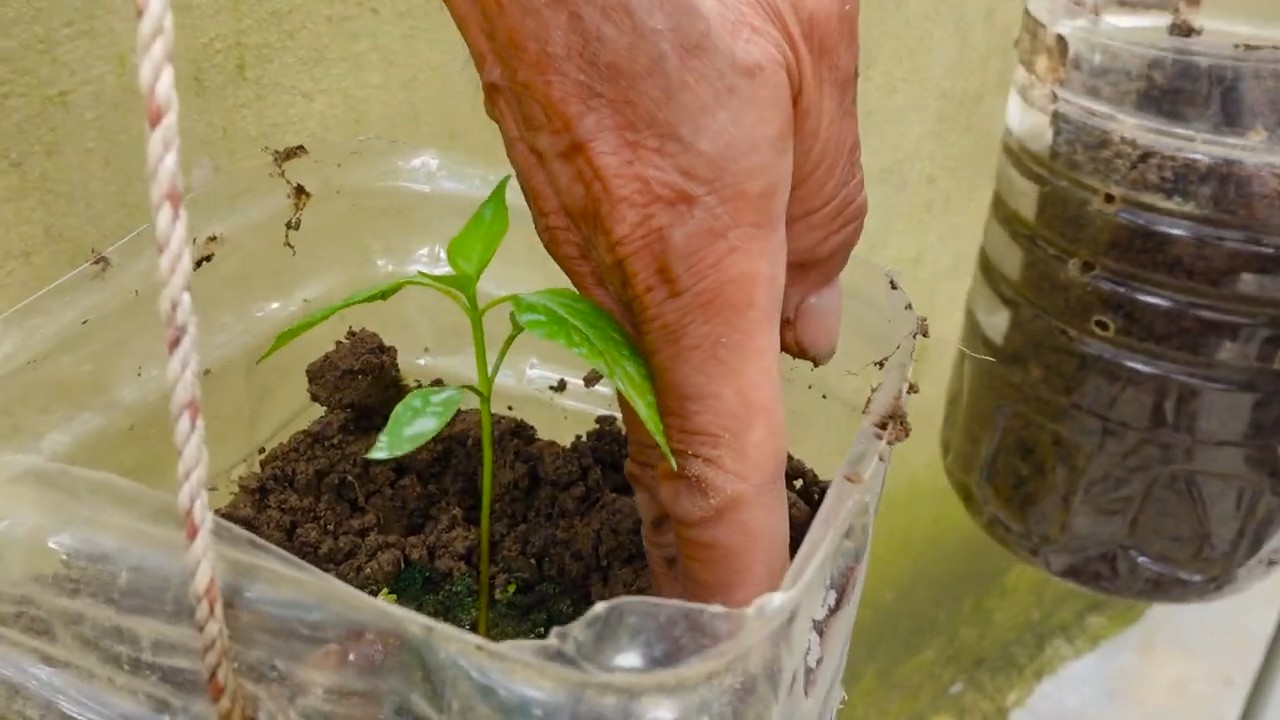
2. Das Umtopfen: Setze die Jungpflanzen in größere Töpfe mit frischer Pflanzerde um. Gehe dabei behutsam vor, um die Wurzeln nicht zu verletzen.
Der Umzug auf den Balkon: Chilis im Freien
Sobald die Temperaturen steigen und keine Frostgefahr mehr besteht (in der Regel ab Mitte Mai), können deine Chili-Pflanzen auf den Balkon umziehen.
1. Die Vorbereitung: Wähle einen sonnigen und windgeschützten Standort für deine Chili-Pflanzen.
2. Die Töpfe: Verwende ausreichend große Töpfe oder Kübel mit guter Drainage. Löcher im Boden sind wichtig, damit überschüssiges Wasser ablaufen kann.
3. Die Erde: Fülle die Töpfe mit hochwertiger Pflanzerde. Ich empfehle spezielle Chili-Erde, da diese optimal auf die Bedürfnisse der Pflanzen abgestimmt ist.
4. Das Einpflanzen: Setze die Chili-Pflanzen vorsichtig in die Töpfe und fülle die Erde auf. Achte darauf, dass der Wurzelballen vollständig bedeckt ist.
5. Das Angießen: Gieße die Pflanzen nach dem Einpflanzen gründlich an.
Die Pflege: So bleiben deine Chilis glücklich
Die richtige Pflege ist entscheidend für eine reiche Chili-Ernte.
1. Gießen: Chilis brauchen regelmäßig Wasser, besonders an heißen Tagen. Die Erde sollte immer leicht feucht sein, aber Staunässe unbedingt vermeiden. Gieße am besten morgens oder abends, wenn die Sonne nicht mehr so stark scheint.
2. Düngen: Chilis sind Starkzehrer und brauchen ausreichend Nährstoffe. Dünge deine Pflanzen regelmäßig mit einem speziellen Chili-Dünger. Flüssigdünger kannst du dem Gießwasser beifügen, Langzeitdünger mischst du unter die Erde.
3. Schneiden (optional): Du kannst deine Chili-Pflanzen beschneiden, um sie buschiger zu machen und die Ernte zu fördern. Entferne dazu einfach die Triebspitzen.
4. Schädlingsbekämpfung: Kontrolliere deine Pflanzen regelmäßig auf Schädlinge wie Blattläuse oder Spinnmilben. Bei Befall kannst du natürliche Mittel wie Brennnesseljauche oder Neemöl einsetzen.
5. Stützen: Einige Chili-Sorten, besonders solche mit großen Früchten, brauchen Unterstützung. Verwende Pflanzstäbe oder Rankhilfen, um die Pflanzen zu stabilisieren.
Die Ernte: Der Lohn deiner Mühe
Endlich ist es soweit! Deine Chilis sind reif und bereit für die Ernte.
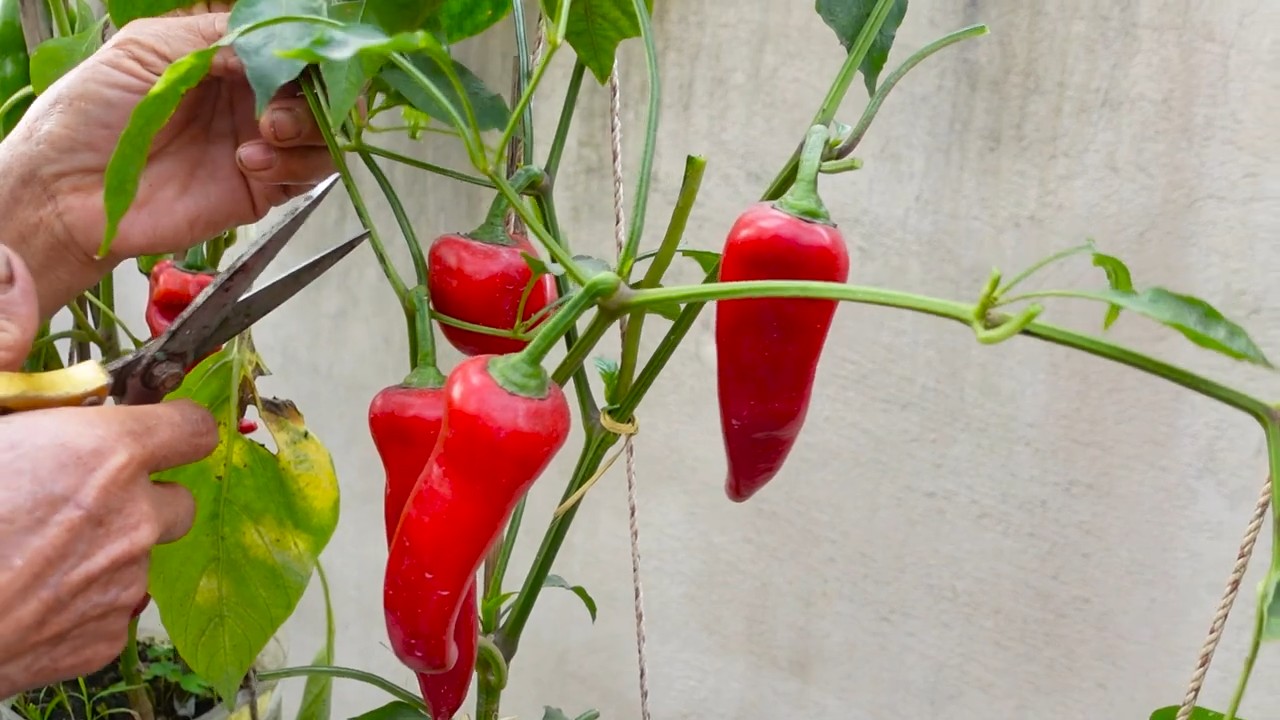
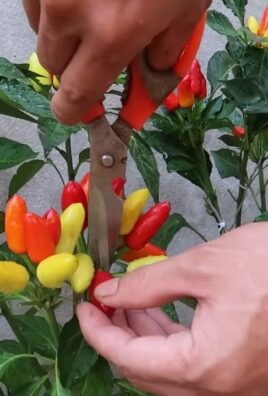
1. Der Reifezeitpunkt: Die Farbe der Chilis ändert sich, je nach Sorte, von Grün über Gelb, Orange bis Rot. Die Früchte sollten prall und fest sein.
2. Die Ernte: Schneide die Chilis mit einer Schere oder einem Messer ab. Trage am besten Handschuhe, um Hautreizungen zu vermeiden.
3. Die Verarbeitung: Du kannst deine Chilis frisch verwenden, trocknen, einlegen oder zu Soßen und Pulvern verarbeiten. Deiner Kreativität sind keine Grenzen gesetzt!
Sortenempfehlungen für den Balkon:
Es gibt unzählige Chili-Sorten, aber nicht alle sind für den Anbau im Topf geeignet. Hier sind ein paar Empfehlungen:
* Jalapeño: Eine klassische Sorte mit mittlerer Schärfe.
* Habanero: Für alle, die es richtig scharf mögen.
* Cayenne: Vielseitig verwendbar und relativ einfach anzubauen.
* Pimientos de Padrón: Eine spanische Spezialität, von denen einige scharf sind und andere nicht.
* Thai Chili: Kleine, aber feurige Chilis für die asiatische Küche.
* Peperoncini: Milde, italienische Chilis, ideal zum Einlegen.
* Rocoto: Eine etwas anspruchsvollere Sorte, die aber mit ihrem fruchtigen Aroma überzeugt.
Häufige Probleme und Lösungen:
* Gelbe Blätter: Können auf Nährstoffmangel, Staunässe oder Schädlingsbefall hindeuten.
* Blattläuse: Bekämpfe sie mit Brennnesseljauche oder Neemöl.
* Spinnmilben: Erhöhe die Luftfeuchtigkeit und sprühe die Pflanzen mit Wasser ab.
* Faule Früchte: Können durch Staunässe oder Pilzbefall verursacht werden. Sorge für eine gute Drainage und entferne befallene Früchte.
* Keine Früchte: Kann an fehlender Bestäubung liegen. Hilf mit einem Pinsel nach oder stelle die Pflanzen an einen windigeren Ort.
Zusätzliche Tipps für eine erfolgreiche Chili-Ernte:
* Regelmäßiges Drehen der Töpfe: So bekommen alle Seiten der Pflanze ausreichend Sonne.
* Mulchen: Eine
Conclusion
So, there you have it! Transforming your balcony into a vibrant, chili-pepper-producing oasis is not only achievable, but surprisingly simple and incredibly rewarding. We’ve walked you through the essential steps, from selecting the right chili varieties to nurturing your plants for a bountiful harvest. But why is this DIY balcony chili gardening trick a must-try?
Firstly, imagine the satisfaction of plucking fresh, fiery chilies straight from your own plants, ready to add a kick to your favorite dishes. No more relying on store-bought peppers that may lack the intensity or freshness you crave. With your own balcony garden, you control the quality and flavor, ensuring a consistent supply of delicious heat.
Secondly, balcony chili gardening is a fantastic way to connect with nature, even in the heart of the city. The simple act of tending to your plants – watering, pruning, and watching them grow – can be incredibly therapeutic and stress-relieving. It’s a mini-escape from the hustle and bustle of urban life, right on your doorstep.
Thirdly, it’s a sustainable and eco-friendly way to enjoy fresh produce. By growing your own chilies, you reduce your reliance on commercially grown peppers, which often involve long-distance transportation and potentially harmful pesticides. You’re contributing to a healthier planet, one chili pepper at a time.
But the beauty of balcony chili gardening lies in its adaptability. Feel free to experiment with different chili varieties to find your perfect heat level. Try growing them in different types of containers – terracotta pots, hanging baskets, or even repurposed containers. Consider companion planting with herbs like basil or oregano to enhance the flavor of your chilies and deter pests.
Variations to Explore:
* Hydroponic Chili Gardening: For a more advanced approach, explore hydroponic systems for growing chilies on your balcony. This method can be highly efficient and space-saving.
* Vertical Chili Gardens: Maximize your balcony space by creating a vertical chili garden using stacked planters or wall-mounted containers.
* Ornamental Chili Varieties: If you’re looking for both beauty and spice, consider growing ornamental chili varieties that boast colorful foliage and unique pepper shapes.
We wholeheartedly encourage you to give this DIY balcony chili gardening trick a try. It’s a fun, rewarding, and delicious way to transform your outdoor space. Don’t be afraid to experiment, learn from your mistakes, and most importantly, enjoy the process.
Once you’ve harvested your first batch of homegrown chilies, we’d love to hear about your experience! Share your photos, tips, and recipes with us in the comments section below. Let’s create a community of balcony chili gardeners and inspire others to embrace the joy of growing their own food. Happy gardening!
Frequently Asked Questions (FAQ)
Q1: What are the best chili varieties to grow on a balcony?
A: The best chili varieties for balcony gardening are those that are compact, productive, and well-suited to container growing. Some excellent choices include:
* Jalapeño: A classic choice, jalapeños are relatively easy to grow and produce a good yield of moderately spicy peppers.
* Serrano: Similar to jalapeños but with a slightly higher heat level, serranos are another great option for beginners.
* Thai Chili: These small, fiery peppers are perfect for adding a kick to Asian-inspired dishes. They are also relatively compact and productive.
* Habanero: For those who like it hot, habaneros are a good choice, but be aware that they require a longer growing season and more attention.
* Cayenne: These long, slender peppers are versatile and can be used fresh, dried, or ground into powder.
Consider your personal preference for heat level and the amount of space you have available when choosing your chili varieties.
Q2: What size container do I need for my chili plants?
A: The size of the container will depend on the variety of chili you are growing. As a general rule, aim for a container that is at least 12 inches in diameter and 12 inches deep for smaller varieties like Thai chilies. Larger varieties like jalapeños and habaneros will benefit from larger containers, such as 5-gallon buckets or larger pots. Ensure the container has drainage holes to prevent waterlogging.
Q3: How often should I water my chili plants on the balcony?
A: Watering frequency will depend on the weather conditions, the type of container you are using, and the size of your plants. Check the soil moisture regularly by sticking your finger about an inch into the soil. If the soil feels dry, it’s time to water. Water deeply until water drains out of the drainage holes. Avoid overwatering, as this can lead to root rot. During hot, sunny weather, you may need to water your plants daily.
Q4: What kind of fertilizer should I use for my balcony chili garden?
A: Chili plants benefit from regular fertilization, especially during the growing season. Use a balanced fertilizer with an NPK ratio (nitrogen, phosphorus, potassium) of around 10-10-10 or 14-14-14. You can also use a fertilizer specifically formulated for tomatoes or peppers. Follow the instructions on the fertilizer package for application rates. Avoid over-fertilizing, as this can burn the roots of your plants.
Q5: How much sunlight do chili plants need on a balcony?
A: Chili plants need at least 6-8 hours of direct sunlight per day to thrive. Choose a location on your balcony that receives plenty of sunlight. If your balcony is shaded for part of the day, try to position your plants so that they receive the most sunlight possible. You can also supplement with grow lights if necessary.
Q6: How do I protect my chili plants from pests and diseases on the balcony?
A: Regularly inspect your plants for signs of pests or diseases. Common pests that affect chili plants include aphids, spider mites, and whiteflies. You can control these pests with insecticidal soap or neem oil. Diseases such as powdery mildew and fungal leaf spots can be prevented by ensuring good air circulation and avoiding overwatering. If you notice any signs of disease, remove the affected leaves and treat the plant with a fungicide.
Q7: When can I harvest my chilies?
A: The time it takes for chilies to mature will depend on the variety. Generally, chilies are ready to harvest when they have reached their mature color and size. For example, jalapeños are typically harvested when they are dark green and about 2-3 inches long. Habaneros are harvested when they are bright orange. Use a sharp knife or scissors to cut the chilies from the plant, leaving a small stem attached.
Q8: Can I grow chilies indoors if I don’t have a balcony?
A: Yes, you can grow chilies indoors, but you will need to provide them with adequate light. Place your plants near a sunny window or use grow lights to supplement the natural light. Follow the same care instructions as for balcony-grown chilies.
Q9: How do I dry my homegrown chilies?
A: There are several ways to dry your homegrown chilies. One method is to string them together and hang them in a warm, dry place until they are completely dry. Another method is to use a dehydrator. You can also dry them in the oven on a low temperature (around 150°F) for several hours. Once the chilies are dry, store them in an airtight container in a cool, dark place.
Q10: Can I save seeds from my homegrown chilies?
A: Yes, you can save seeds from your homegrown chilies, but be aware that the resulting plants may not be true to type, especially if you are growing hybrid varieties. To save seeds, allow the chilies to fully ripen on the plant. Then, carefully remove the seeds and dry them thoroughly. Store the dried seeds in an airtight container in a cool, dark place.

Leave a Comment