
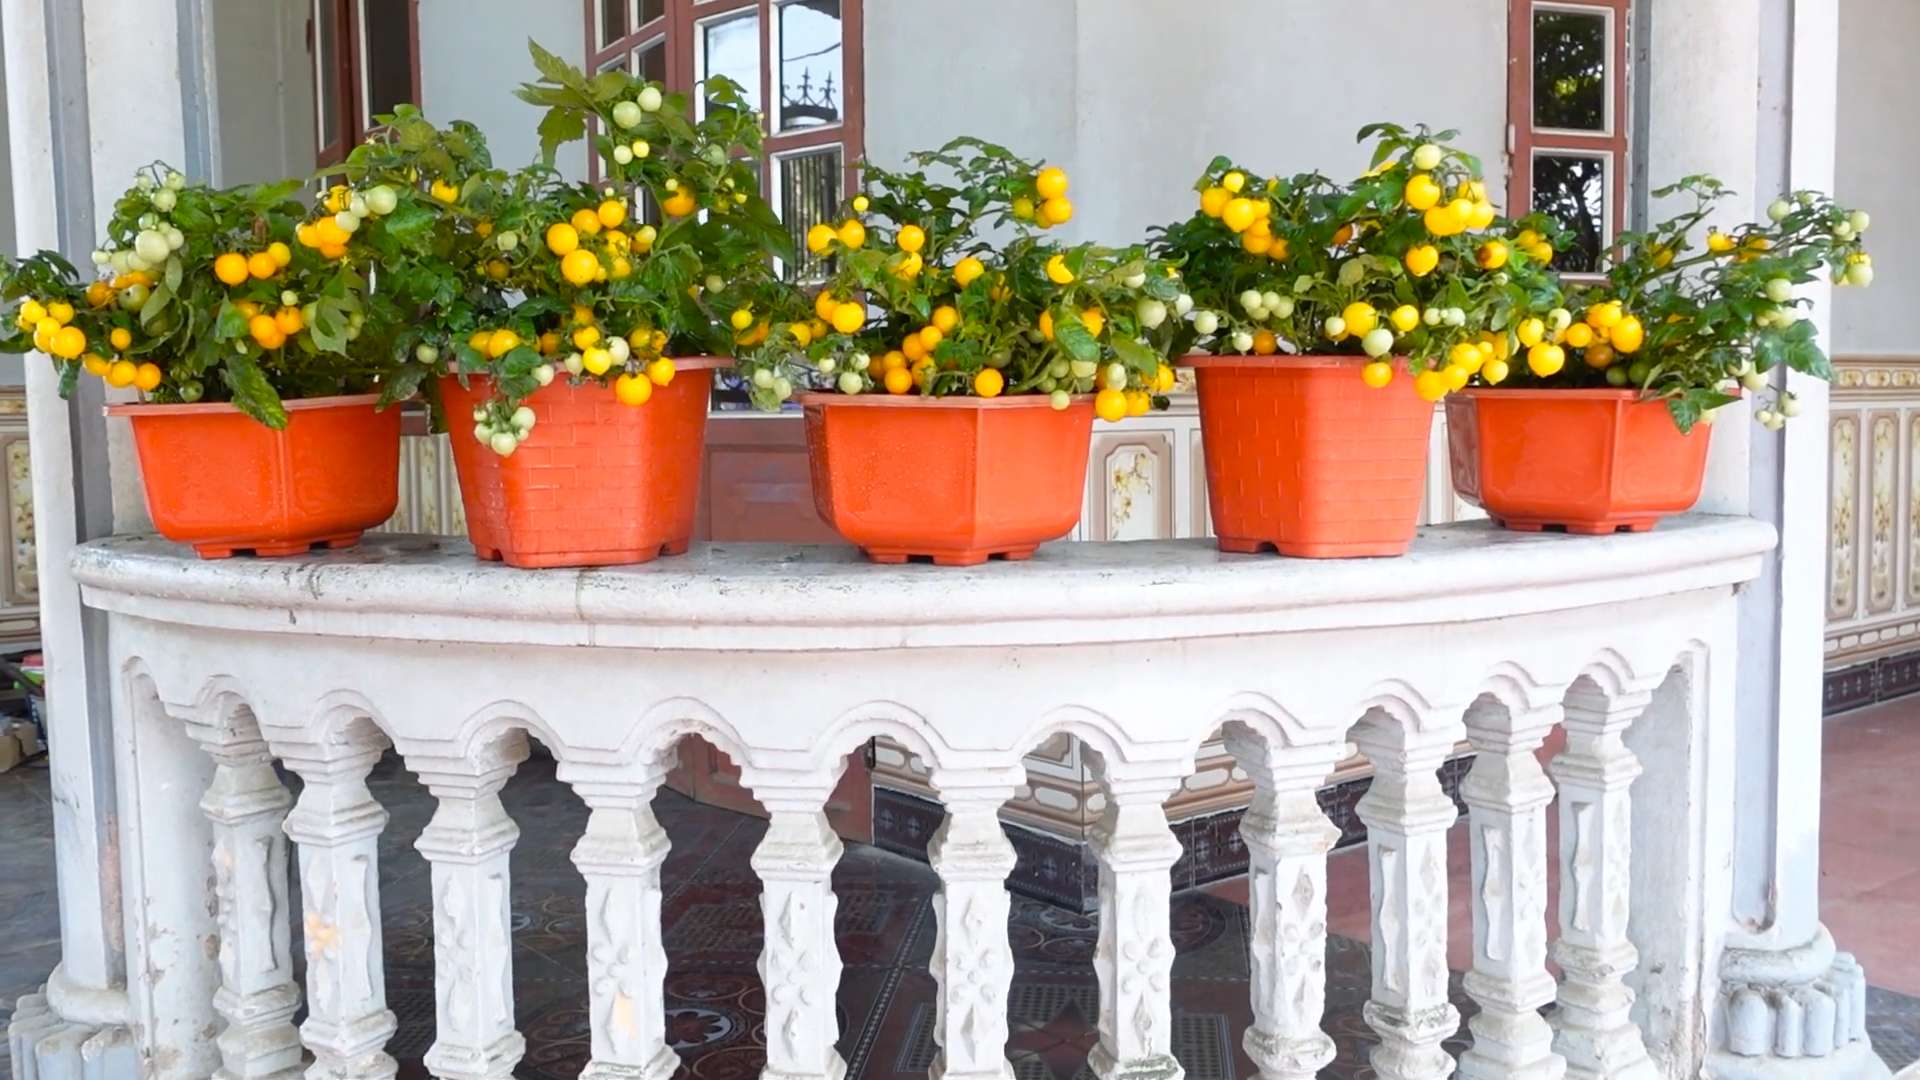
Balcony Tomato Growing Tips: Dreaming of vine-ripened, juicy tomatoes bursting with flavor, but only have a balcony to work with? You’re not alone! For centuries, urban dwellers have found creative ways to cultivate their own food, transforming limited spaces into thriving edible gardens. From ancient rooftop gardens in Babylon to the modern-day “grow your own” movement, the desire to connect with nature and enjoy fresh produce is deeply ingrained in us.
But let’s face it, successfully growing tomatoes on a balcony can feel like a daunting task. Limited sunlight, restricted space, and the challenges of container gardening can leave you feeling defeated before you even begin. That’s where these balcony tomato growing tips come in! I’m here to share my tried-and-true secrets and DIY hacks that will help you transform your balcony into a tomato-producing paradise, no matter how small your space.
Imagine stepping outside your door and plucking a sun-warmed tomato for your salad or sandwich. No more bland, store-bought tomatoes! This article is your ultimate guide to mastering the art of balcony tomato growing. I’ll walk you through everything from choosing the right varieties and containers to providing the perfect amount of sunlight and nutrients. Get ready to unleash your inner urban farmer and enjoy the delicious rewards of your own balcony garden!
Growing Tomatoes on Your Balcony: A Comprehensive DIY Guide
Hey there, fellow balcony gardeners! I’m so excited you’re thinking about growing tomatoes on your balcony. It’s totally doable, even if you don’t have a sprawling backyard. I’ve been doing it for years, and let me tell you, there’s nothing quite like biting into a sun-ripened tomato you grew yourself, just steps from your living room. This guide will walk you through everything you need to know to have a thriving balcony tomato garden.
Choosing the Right Tomato Variety
Okay, first things first: not all tomatoes are created equal, especially when it comes to balcony gardening. You need to pick varieties that are well-suited for container growing. Here’s what I recommend:
* **Determinate (Bush) Varieties:** These tomatoes grow to a certain size and then stop, producing all their fruit at once or over a relatively short period. They’re more compact and manageable for balconies. Some great determinate varieties include:
* Roma
* Celebrity
* Patio
* Bush Early Girl
* **Indeterminate (Vining) Varieties:** These tomatoes keep growing and producing fruit throughout the season. They need more support (like a tall cage or trellis) and regular pruning. While they can be grown on balconies, they require more attention. If you’re up for the challenge, consider:
* Cherry Tomatoes (like Sweet Million or Sun Gold)
* Grape Tomatoes
* Early Girl (can be either determinate or indeterminate, so check the seed packet)
* **Dwarf Varieties:** These are specifically bred for small spaces and containers. They’re super compact and perfect for balconies. Look for varieties like:
* Tiny Tim
* Venus
* Red Robin
Pro Tip: Read the seed packet or plant label carefully to understand the growth habit and space requirements of the tomato variety you choose.
Gathering Your Supplies
Alright, let’s get our hands dirty! Here’s what you’ll need to get started:
* **Containers:** This is crucial! Choose containers that are at least 12 inches in diameter and 12 inches deep. Bigger is generally better, as it gives the roots more room to grow. I prefer using fabric pots (grow bags) because they allow for better drainage and aeration.
* **Potting Mix:** Don’t use garden soil! It’s too heavy and compacts easily in containers. Instead, use a high-quality potting mix specifically formulated for containers. Look for a mix that contains peat moss, perlite, and vermiculite.
* **Tomato Seedlings or Seeds:** You can start your tomatoes from seed indoors 6-8 weeks before the last expected frost, or you can buy seedlings from a local nursery. If you’re a beginner, I recommend starting with seedlings – it’s a bit easier.
* **Tomato Cage or Trellis:** Indeterminate varieties need support to keep them from sprawling. Even some determinate varieties benefit from a little support.
* **Fertilizer:** Tomatoes are heavy feeders, so you’ll need to fertilize them regularly. Use a balanced fertilizer (like 10-10-10) or a tomato-specific fertilizer.
* **Watering Can or Hose:** You’ll need a way to water your plants regularly.
* **Gardening Gloves:** Protect your hands!
* **Pruning Shears or Scissors:** For pruning suckers (more on that later).
* **Optional: Mulch:** Mulch helps retain moisture in the soil and suppress weeds. You can use straw, wood chips, or even shredded newspaper.
Planting Your Tomato Seedlings
Okay, let’s get those tomatoes in the ground (or, well, in the container)!
1. **Prepare the Container:** Fill your container with potting mix, leaving a few inches of space at the top.
2. **Dig a Hole:** Dig a hole in the center of the container that’s large enough to accommodate the root ball of your tomato seedling.
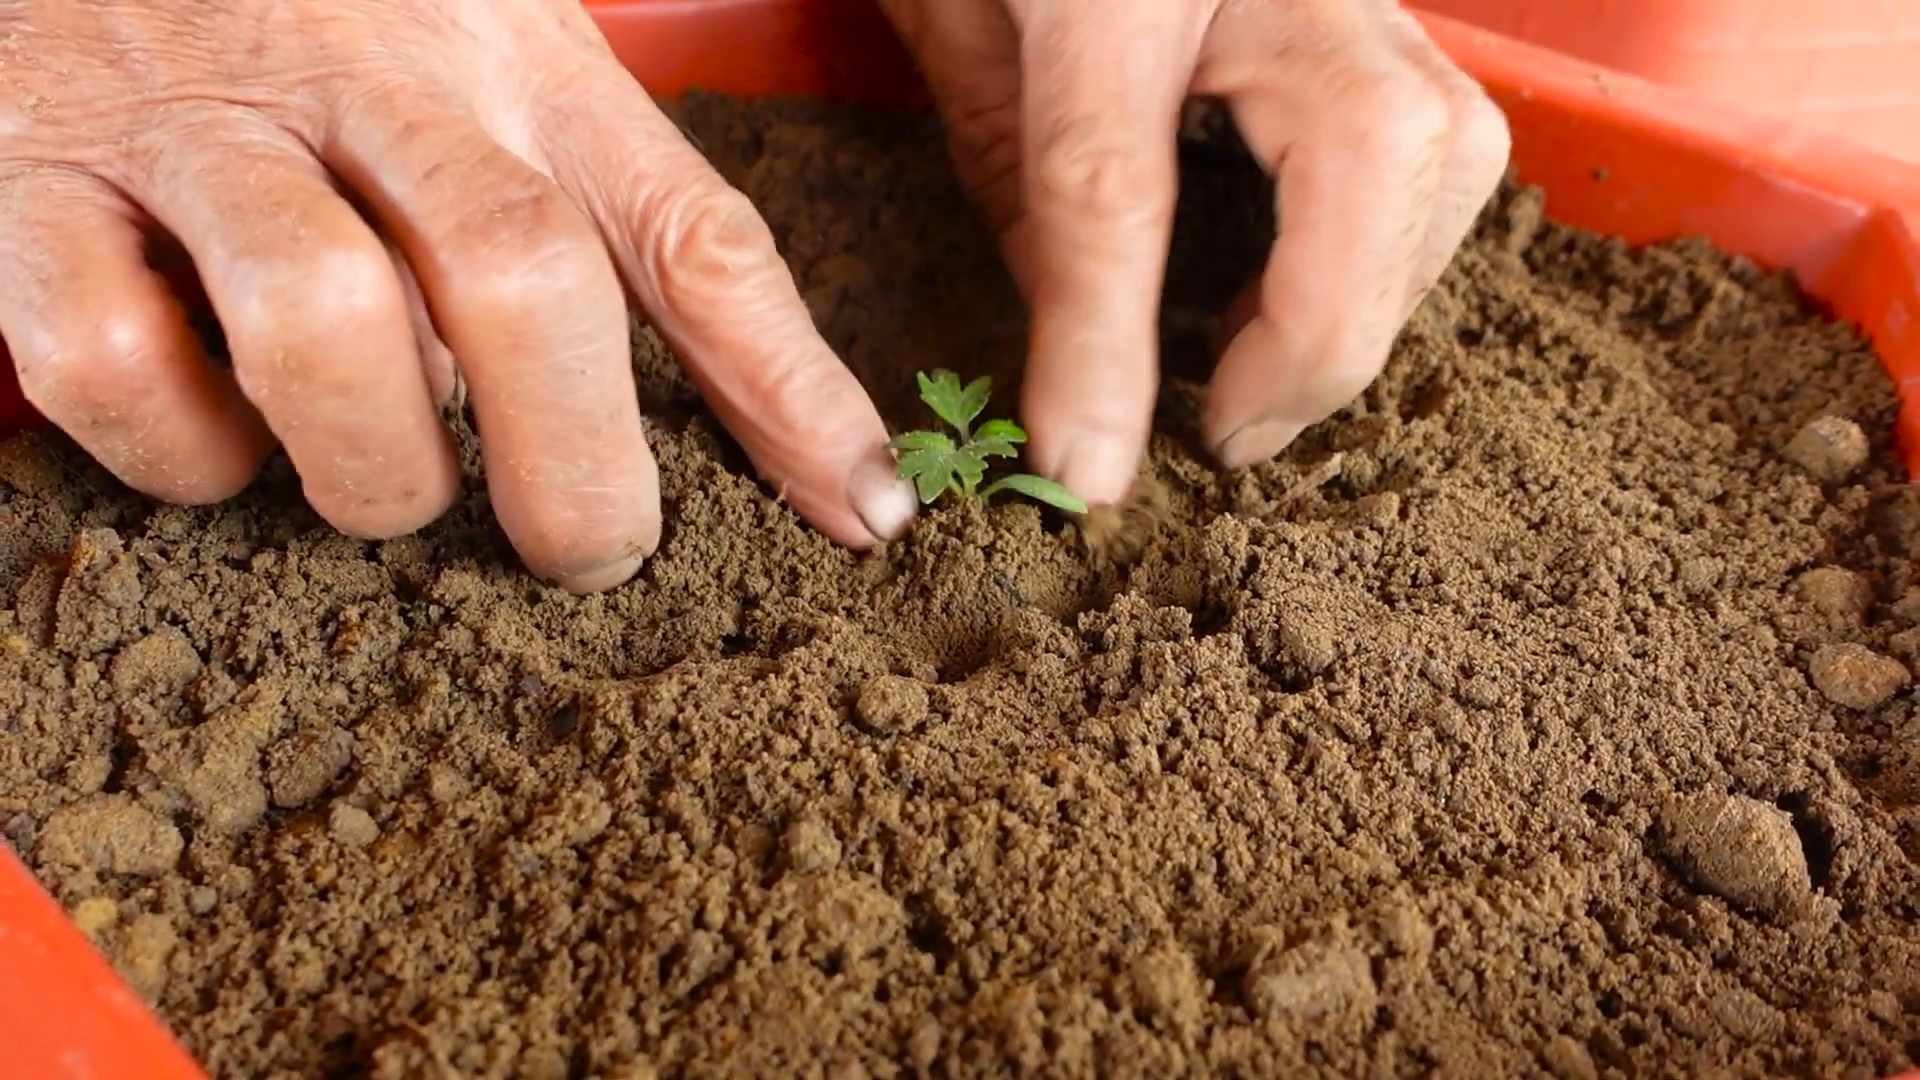
3. **Remove the Seedling from its Container:** Gently squeeze the sides of the seedling’s container to loosen the root ball. Carefully remove the seedling, being careful not to damage the roots.
4. **Plant the Seedling:** Place the seedling in the hole and gently backfill with potting mix. Make sure the top of the root ball is level with the soil surface.
5. **Water Thoroughly:** Water the seedling thoroughly until water drains out of the bottom of the container.
6. **Add Support:** If you’re using a tomato cage or trellis, install it now. Gently guide the tomato plant through the cage or tie it to the trellis.
7. **Mulch (Optional):** Add a layer of mulch around the base of the plant to help retain moisture and suppress weeds.
Caring for Your Balcony Tomatoes
Now comes the fun part – watching your tomatoes grow! Here’s how to keep them happy and healthy:
1. **Watering:** Tomatoes need consistent watering, especially when they’re fruiting. Water deeply whenever the top inch of soil feels dry to the touch. Avoid overwatering, as this can lead to root rot. I usually water every day or every other day, depending on the weather.
2. **Fertilizing:** As I mentioned before, tomatoes are heavy feeders. Start fertilizing your plants about two weeks after planting. Use a balanced fertilizer or a tomato-specific fertilizer according to the package directions. I like to use a liquid fertilizer every two weeks.
3. **Sunlight:** Tomatoes need at least 6-8 hours of sunlight per day to thrive. Place your containers in the sunniest spot on your balcony. If your balcony doesn’t get enough direct sunlight, you might consider using grow lights.
4. **Pruning:** Pruning is important for indeterminate tomato varieties. You’ll need to remove the “suckers” that grow between the main stem and the branches. These suckers will steal energy from the plant and reduce fruit production. To prune, simply pinch off the suckers with your fingers or use pruning shears.
5. **Pest and Disease Control:** Keep an eye out for pests like aphids, whiteflies, and tomato hornworms. You can usually control these pests with insecticidal soap or neem oil. Also, watch out for diseases like early blight and blossom end rot. Good air circulation and proper watering can help prevent these diseases. If you do encounter a disease, remove the affected leaves or fruit.
6. **Pollination:** While tomatoes are self-pollinating, sometimes they need a little help, especially on balconies where there aren’t many bees or other pollinators. You can hand-pollinate your tomatoes by gently shaking the flowers or using a small paintbrush to transfer pollen from one flower to another.
Harvesting Your Tomatoes
This is the moment you’ve been waiting for! Your tomatoes are ready to harvest when they’re fully colored and slightly soft to the touch. Gently twist the tomato off the vine.
Pro Tip: Tomatoes will continue to ripen after they’re picked. If you have a tomato that’s almost ripe but the weather is turning cold, you can pick it and let it ripen indoors.
Troubleshooting Common Problems
Even with the best care, you might encounter some problems along the way. Here are a few common issues and how to fix them:
* **Blossom End Rot:** This is caused by a calcium deficiency. The bottom of the tomato turns black and leathery. To prevent blossom end rot, make sure your soil is well-drained and that you’re watering consistently. You can also add calcium to the soil by using bone meal or Epsom salts.
* **Early Blight:** This is a fungal disease that causes dark spots on the leaves. To prevent early blight, provide good air circulation and avoid overhead watering. If you see signs of early blight, remove the affected leaves.
* **Aphids:** These tiny insects suck the sap from plants. You can control aphids with insecticidal soap or neem oil.
* **Whiteflies:** These small, white insects fly around the plant when disturbed. You can control whiteflies with insecticidal soap or neem oil.
* **Tomato Hornworms:** These large green caterpillars can quickly defoliate a tomato plant. Handpick them off the plant and drop them into a bucket of soapy water.
Extra Tips for Balcony Tomato Success
* **Rotate Your Crops:** If you grow tomatoes in the same containers year after year, the soil can become depleted of nutrients. Rotate your crops by planting different vegetables in the containers each year.
* **Use Companion Planting:** Companion planting is the practice of planting different plants together that benefit each other. Some good companion plants for tomatoes include basil, marigolds, and onions.
* **Protect from Wind:** Balconies can be windy, which can damage tomato plants. Protect your plants from the wind by placing them in a sheltered spot or using a windbreak.
* **Consider Self-Watering Containers:** If you’re forgetful about watering, self-watering containers can be a lifesaver. They have a reservoir of water that the plant can draw from as needed.
*
Conclusion
So, there you have it! Transforming your balcony into a thriving tomato garden is not only achievable but also incredibly rewarding. We’ve explored practical tips and tricks to ensure your success, from selecting the right varieties to mastering watering and fertilization techniques. But the real magic lies in the DIY self-watering container. This simple yet ingenious method addresses the most common challenges faced by balcony gardeners: inconsistent watering and nutrient delivery.
Why is this DIY trick a must-try? Because it empowers you to cultivate lush, healthy tomato plants even with a busy schedule or limited gardening experience. The self-watering system provides a consistent supply of moisture, preventing the dreaded overwatering or underwatering that can stunt growth and lead to blossom end rot. It also allows for efficient nutrient uptake, ensuring your plants receive the nourishment they need to produce abundant, flavorful tomatoes.
Beyond the basic design, feel free to experiment with variations. Consider adding a layer of mulch on top of the soil to further conserve moisture and suppress weeds. You could also incorporate a small trellis or support system directly into the container to provide additional support for your growing tomato plants. For those with limited space, try using smaller containers and dwarf tomato varieties specifically bred for container gardening. Cherry tomatoes, Roma tomatoes, and patio tomatoes are excellent choices for balconies.
Don’t be afraid to get creative with your container design! Use recycled materials like old buckets or plastic bins to create your self-watering system. Decorate the containers to match your balcony’s aesthetic and add a personal touch to your urban garden. Remember, gardening should be enjoyable, so embrace the process and have fun experimenting.
The beauty of this DIY approach is its adaptability. You can tailor the size and design of the self-watering container to suit your specific needs and space constraints. Whether you have a sprawling balcony or a tiny Juliet balcony, you can adapt this method to grow delicious, homegrown tomatoes.
We are confident that by implementing these balcony tomato growing tips, especially the DIY self-watering container, you’ll be harvesting a bountiful crop of juicy, sun-ripened tomatoes in no time. Imagine the satisfaction of plucking a fresh tomato from your own balcony garden and using it in your favorite recipes. From salads and sandwiches to sauces and salsas, the possibilities are endless.
So, what are you waiting for? Gather your supplies, get your hands dirty, and embark on your balcony tomato growing adventure today! We encourage you to try this DIY trick and share your experience with us. Post photos of your thriving tomato plants on social media using #BalconyTomatoSuccess and let us know what worked best for you. Your insights could inspire other urban gardeners to create their own edible oases. Let’s cultivate a community of balcony tomato enthusiasts and share the joy of homegrown goodness! Remember, even a small space can yield big rewards when it comes to growing your own food. Embrace the challenge, enjoy the process, and savor the delicious fruits (or rather, vegetables!) of your labor. Happy gardening!
Frequently Asked Questions (FAQs)
What type of container is best for a DIY self-watering tomato planter?
The ideal container is a large, opaque plastic bin or bucket. Opaque containers prevent algae growth in the water reservoir. The size depends on the tomato variety; determinate (bush) varieties need at least a 5-gallon container, while indeterminate (vining) varieties require 10-gallon or larger. Make sure the container is food-grade plastic to avoid leaching harmful chemicals into the soil. You can also repurpose old storage bins or buckets, giving them a new life as a tomato planter.
How often do I need to refill the water reservoir in my DIY self-watering container?
The frequency of refilling depends on several factors, including the size of the reservoir, the weather conditions, and the size of the tomato plant. During hot, sunny weather, you may need to refill the reservoir every day or two. In cooler, cloudier weather, you may only need to refill it every few days. Check the water level regularly by lifting the inner container or using a water level indicator. A good rule of thumb is to refill the reservoir when it’s about half empty.
What kind of soil should I use for my balcony tomato plants?
Use a high-quality potting mix specifically formulated for containers. Avoid using garden soil, as it can become compacted in containers and doesn’t drain well. A good potting mix will be lightweight, well-draining, and contain essential nutrients for healthy plant growth. You can also amend the potting mix with compost or other organic matter to improve its fertility and water retention. Consider adding perlite or vermiculite to further enhance drainage.
How much sunlight do balcony tomato plants need?
Tomato plants need at least 6-8 hours of direct sunlight per day to thrive. Choose a location on your balcony that receives ample sunlight throughout the day. If your balcony doesn’t receive enough direct sunlight, you may need to supplement with artificial grow lights. Rotate the containers regularly to ensure that all sides of the plant receive equal sunlight exposure.
How do I prevent blossom end rot in my balcony tomatoes?
Blossom end rot is a common problem in tomatoes caused by calcium deficiency. To prevent it, ensure your soil is rich in calcium and that your plants receive consistent watering. The DIY self-watering container helps with consistent watering. You can also add calcium supplements to the soil, such as bone meal or crushed eggshells. Avoid over-fertilizing with nitrogen, as this can interfere with calcium uptake.
What are some common pests and diseases that affect balcony tomato plants, and how can I control them?
Common pests include aphids, whiteflies, and spider mites. You can control these pests by spraying your plants with insecticidal soap or neem oil. Diseases include early blight, late blight, and powdery mildew. Prevent these diseases by providing good air circulation, avoiding overhead watering, and using disease-resistant tomato varieties. If you notice signs of disease, remove the affected leaves and spray the plant with a fungicide.
Can I grow other vegetables in a self-watering container on my balcony?
Yes, you can grow many other vegetables in self-watering containers, including peppers, cucumbers, eggplants, and herbs. Choose vegetables that are well-suited for container gardening and that have similar watering and nutrient requirements. Be sure to provide adequate support for vining vegetables like cucumbers and tomatoes.
How do I fertilize my balcony tomato plants in a self-watering container?
Use a balanced liquid fertilizer specifically formulated for tomatoes. Dilute the fertilizer according to the package instructions and add it to the water reservoir when you refill it. Avoid over-fertilizing, as this can damage the plants. You can also supplement with organic fertilizers like compost tea or fish emulsion.
What tomato varieties are best suited for balcony gardening?
Determinate (bush) varieties are generally better suited for balcony gardening because they are more compact and require less space. Some popular determinate varieties include Roma, Celebrity, and Patio. Indeterminate (vining) varieties can also be grown on balconies, but they require more space and support. Some popular indeterminate varieties include Cherry, Beefsteak, and Early Girl. Consider the size of your balcony and the amount of sunlight it receives when choosing tomato varieties.
How do I prune my balcony tomato plants?
Pruning helps to improve air circulation, reduce disease, and encourage fruit production. Remove suckers (the small shoots that grow between the main stem and the branches) from indeterminate tomato varieties to encourage the plant to focus its energy on fruit production. You can also remove yellowing or diseased leaves to improve air circulation and prevent the spread of disease.
Leave a Comment