
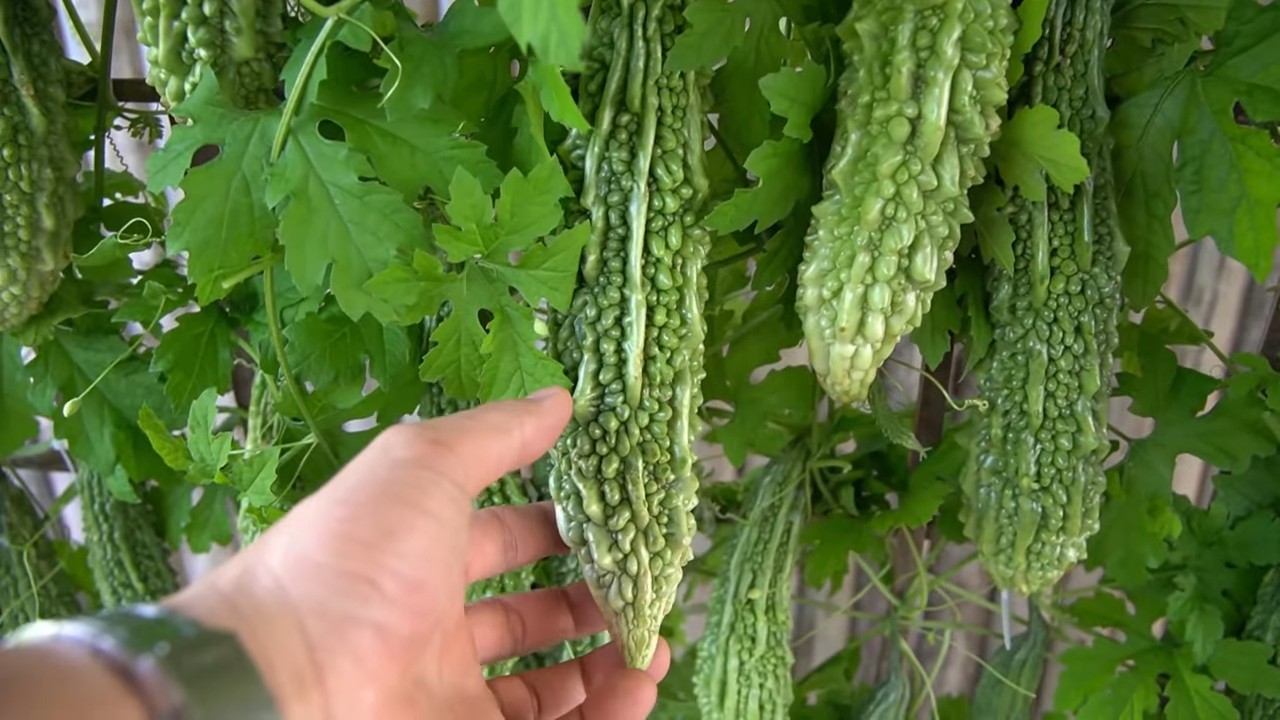
Bitter melon plant growth can seem like a daunting task, I know! You might be thinking, “This knobbly, uniquely flavored vegetable is too tricky for my humble garden.” But trust me, with a few clever tricks and a little DIY spirit, you can absolutely cultivate a thriving bitter melon vine right in your backyard.
For centuries, bitter melon has been a staple in Asian and African cuisines and traditional medicine. Its distinctive bitterness is prized for its health benefits and culinary versatility. Imagine harvesting your own fresh, organic bitter melon, knowing you nurtured it from seed to table!
Why bother with these DIY hacks for bitter melon plant growth? Well, let’s face it, gardening can be unpredictable. Sometimes, even with the best intentions, our plants struggle. These simple, cost-effective techniques will help you overcome common challenges like pest infestations, nutrient deficiencies, and poor fruit production. I’m going to share some secrets to ensure your bitter melon vine climbs high, produces abundantly, and provides you with a delicious and healthy harvest. Get ready to roll up your sleeves and transform your garden into a bitter melon paradise!
DIY: Supercharge Your Bitter Melon Harvest!
Hey there, fellow gardeners! Are you ready to take your bitter melon game to the next level? I’ve been experimenting with a few tricks and techniques over the years, and I’m excited to share my secrets to getting a bumper crop of these wonderfully (and yes, sometimes bitter!) gourds. This guide is all about maximizing your bitter melon plant’s potential, from seed to harvest. Let’s dive in!
Choosing the Right Variety & Starting Strong
First things first, selecting the right variety is crucial. Some varieties are more heat-tolerant, others are more disease-resistant, and some simply produce larger or more flavorful fruit. Do a little research and choose a variety that’s well-suited to your local climate and growing conditions. I personally love the ‘Taiwanese White’ variety for its mild flavor and prolific production.
* Variety Selection: Research and choose a bitter melon variety that thrives in your climate. Consider factors like heat tolerance, disease resistance, and fruit size.
* Seed Starting (Optional): While you can directly sow bitter melon seeds, starting them indoors gives them a head start, especially in cooler climates.
* Seed Scarification: Bitter melon seeds have a tough outer shell. Gently scarifying them (nicking the surface with a knife or sandpaper) helps with germination.
* Soaking Seeds: Soak the scarified seeds in warm water for 24-48 hours before planting. This further softens the seed coat and encourages sprouting.
Now, let’s get those seeds germinating!
1. Prepare Your Seed Starting Mix: Use a well-draining seed starting mix. I like to mix equal parts peat moss, perlite, and vermiculite.
2. Sow the Seeds: Plant the seeds about ½ inch deep in small pots or seedling trays.
3. Water Gently: Water the soil gently to avoid disturbing the seeds.
4. Provide Warmth: Bitter melon seeds need warmth to germinate. Aim for a soil temperature of 75-85°F (24-29°C). You can use a heat mat to help maintain the temperature.
5. Maintain Moisture: Keep the soil consistently moist, but not waterlogged.
6. Wait Patiently: Germination usually takes 7-14 days.
Preparing the Garden Bed: Location, Location, Location!
Bitter melon plants are sun-worshippers and heavy feeders. Choosing the right location and preparing the soil properly are essential for a successful harvest.
* Sunlight: Bitter melon needs at least 6-8 hours of direct sunlight per day.
* Soil: The soil should be well-draining, fertile, and slightly acidic to neutral (pH 6.0-7.0).
* Support System: Bitter melon is a vine, so it needs a strong trellis, fence, or other support structure to climb on.
Here’s how I prepare my garden bed:
1. Choose a Sunny Spot: Select a location that receives plenty of sunlight throughout the day.
2. Amend the Soil: Dig in plenty of compost, well-rotted manure, or other organic matter to improve soil fertility and drainage. I usually add about 4-6 inches of compost to my beds.
3. Check the pH: Test the soil pH and adjust if necessary. You can use lime to raise the pH or sulfur to lower it.
4. Install a Trellis: Set up a sturdy trellis or other support structure before planting. This will save you time and effort later on. I prefer using a cattle panel trellis, as it’s strong and provides ample support for the vines.
Transplanting & Planting Out
Once your seedlings have developed a few sets of true leaves (usually after 4-6 weeks), they’re ready to be transplanted into the garden. If you directly sowed your seeds, thin them out to the strongest plant.
* Timing: Transplant or direct sow after the last frost when the soil has warmed up to at least 60°F (15°C).
* Spacing: Space plants 18-24 inches apart along the trellis.
Here’s the transplanting process:
1. Harden Off Seedlings: Gradually acclimate your seedlings to outdoor conditions by exposing them to increasing amounts of sunlight and wind over a period of 7-10 days.
2. Dig Holes: Dig holes that are slightly larger than the root balls of your seedlings.
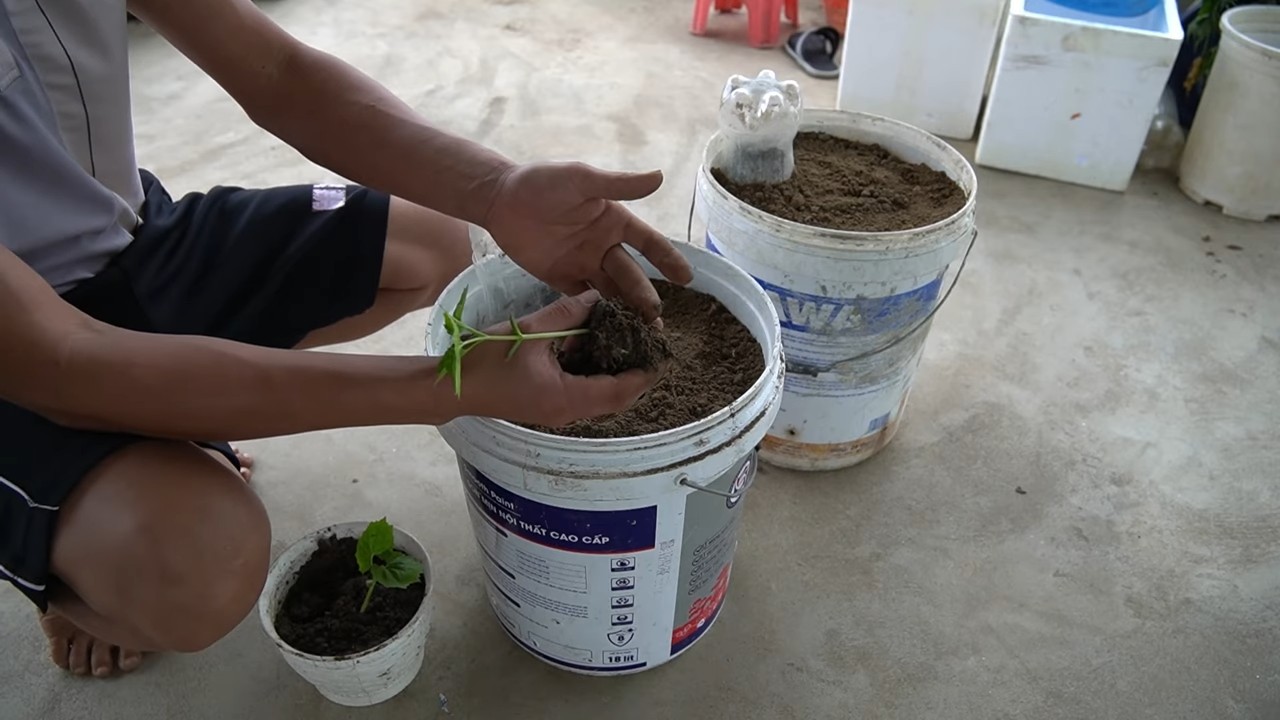
3. Carefully Remove Seedlings: Gently remove the seedlings from their pots, being careful not to damage the roots.
4. Plant Seedlings: Place the seedlings in the holes and backfill with soil.
5. Water Thoroughly: Water the plants thoroughly after transplanting.
6. Mulch: Apply a layer of mulch around the plants to help retain moisture, suppress weeds, and regulate soil temperature. I like to use straw or shredded leaves.
Watering & Fertilizing: Keeping Your Plants Happy & Healthy
Consistent watering and regular fertilization are crucial for maximizing your bitter melon yield.
* Watering: Water deeply and regularly, especially during hot, dry weather. Aim for at least 1 inch of water per week.
* Fertilizing: Bitter melon plants are heavy feeders and benefit from regular fertilization.
Here’s my watering and fertilizing routine:
1. Water Deeply: Water deeply at the base of the plants, avoiding wetting the foliage. This helps prevent fungal diseases.
2. Water Early in the Morning: Water early in the morning to allow the foliage to dry before nightfall.
3. Fertilize Regularly: Fertilize every 2-3 weeks with a balanced fertilizer (e.g., 10-10-10) or a fertilizer specifically formulated for vegetables. I also like to supplement with liquid seaweed extract for added nutrients and trace minerals.
4. Side-Dress with Compost: Side-dress the plants with compost every month to provide a slow-release source of nutrients.
Pruning & Training: Guiding Your Vines to Success
Pruning and training your bitter melon vines can help improve air circulation, promote fruit production, and make harvesting easier.
* Pruning: Remove any dead, diseased, or yellowing leaves. You can also prune back excessive growth to improve air circulation.
* Training: Train the vines to climb the trellis by gently guiding them and tying them to the support structure as needed.
Here’s how I prune and train my bitter melon vines:
1. Remove Suckers: Remove any suckers (shoots that grow from the base of the plant) to encourage the plant to focus its energy on fruit production.
2. Pinch Back Tips: Pinch back the tips of the vines to encourage branching and more fruit production.
3. Guide the Vines: Gently guide the vines to climb the trellis, using plant ties or twine to secure them as needed.
4. Maintain Air Circulation: Prune back any dense foliage to improve air circulation and prevent fungal diseases.
Pest & Disease Control: Keeping Problems at Bay
Bitter melon plants can be susceptible to certain pests and diseases, but with proper care and preventative measures, you can minimize problems.
* Common Pests: Aphids, spider mites, squash bugs, and cucumber beetles.
* Common Diseases: Powdery mildew, downy mildew, and fungal leaf spots.
Here’s my approach to pest and disease control:
1. Inspect Regularly: Regularly inspect your plants for signs of pests or diseases.
2. Handpick Pests: Handpick any pests that you find on the plants.
3. Use Insecticidal Soap: Treat infestations of aphids, spider mites, or other soft-bodied insects with insecticidal soap.
4. Apply Neem Oil: Apply neem oil to control a variety of pests and diseases.
5. Ensure Good Air Circulation: Ensure good air circulation around the plants to prevent fungal diseases.
6. Remove Infected Leaves: Remove any infected leaves to prevent the spread of disease.
7. Use Fungicides (If Necessary): If fungal diseases become severe, you may need to use a fungicide. Choose a fungicide that is specifically labeled for use on vegetables.
Pollination: Ensuring Fruit Set
Bitter melon plants have separate male and female flowers. While they can be pollinated by insects, hand-pollination can significantly increase fruit set, especially in areas with low pollinator activity.
* Identifying Male and Female Flowers: Male flowers have a long, thin stem, while female flowers have a small, immature fruit behind the flower.
* Hand-Pollination: Use a small paintbrush or cotton swab to transfer pollen from the male flower to the female flower.
Here’s how I hand-pollinate my bitter melon flowers:
1. Identify Male and Female Flowers: Locate both male and female flowers that
Conclusion
If you’ve ever struggled with getting your bitter melon plants to thrive, or if you’re simply looking for a more organic and cost-effective way to boost their growth, then this DIY trick is an absolute game-changer. We’ve explored a simple yet powerful method to harness the natural benefits of readily available resources to create a potent growth enhancer specifically tailored for your bitter melon. Forget expensive fertilizers laden with chemicals; this approach is all about nurturing your plants with the goodness they crave, resulting in healthier, more productive vines and a bountiful harvest of those wonderfully bitter gourds.
The beauty of this DIY solution lies not only in its effectiveness but also in its adaptability. Feel free to experiment with variations to suit your specific needs and available resources. For instance, if you don’t have access to banana peels, consider using other potassium-rich ingredients like potato peels or even wood ash (in moderation, of course!). You can also adjust the fermentation time based on the ambient temperature; warmer conditions will accelerate the process. Remember to always dilute the solution before applying it to your plants to avoid any potential burning.
Beyond the core recipe, think about incorporating other beneficial elements into your bitter melon’s growing environment. Companion planting with herbs like basil or marigolds can help deter pests and attract beneficial insects. Regular pruning to improve air circulation and sunlight penetration will also contribute to healthier growth and increased fruit production. And don’t forget the importance of consistent watering, especially during hot and dry periods.
Ultimately, the success of any gardening endeavor hinges on experimentation and observation. What works wonders in one garden might require slight adjustments in another. That’s why we wholeheartedly encourage you to try this DIY trick for boosting your bitter melon plant growth and to meticulously observe how your plants respond. Take notes on the specific ingredients you use, the dilution ratios, and the frequency of application. This will allow you to fine-tune the process and create a personalized growth-enhancing regimen that perfectly suits your garden’s unique conditions.
We are confident that you’ll be amazed by the results. Imagine vibrant, healthy vines laden with plump, bitter melons, all thanks to a simple, natural solution you created yourself. It’s a truly rewarding experience that connects you more deeply to the growing process and provides you with a sustainable and eco-friendly way to cultivate your own food.
So, what are you waiting for? Gather your ingredients, follow the steps outlined, and embark on this exciting journey to unlock the full potential of your bitter melon plants. And most importantly, we want to hear about your experiences! Share your successes, your challenges, and any variations you’ve tried in the comments below. Let’s create a community of passionate gardeners who are dedicated to growing healthy, delicious bitter melons using natural and sustainable methods. Your insights could be invaluable to others who are just starting out, and together, we can all learn and grow. Let’s cultivate a thriving community around **bitter melon plant growth** and share the fruits (or rather, the gourds!) of our labor.
Frequently Asked Questions (FAQ)
What exactly does this DIY trick do for my bitter melon plants?
This DIY trick primarily focuses on providing your bitter melon plants with essential nutrients, particularly potassium, in a readily available form. Potassium is crucial for various plant functions, including fruit development, disease resistance, and overall vigor. The fermentation process breaks down the organic matter, making these nutrients more easily absorbed by the plant’s roots. Think of it as a natural, slow-release fertilizer that nourishes your bitter melon plants from the inside out. It also encourages beneficial microbial activity in the soil, further enhancing nutrient uptake and promoting a healthy root system.
How often should I apply this DIY solution to my bitter melon plants?
The frequency of application depends on several factors, including the age of your plants, the soil conditions, and the weather. As a general guideline, you can apply the diluted solution every 2-3 weeks during the active growing season. For younger plants, you might want to start with a more diluted solution and apply it less frequently. Observe your plants closely for any signs of nutrient deficiency (e.g., yellowing leaves, stunted growth) or over-fertilization (e.g., leaf burn). Adjust the frequency and concentration accordingly. During periods of heavy rain, you may need to reapply the solution more often as the nutrients can be leached from the soil.
Can I use this DIY solution on other plants besides bitter melon?
Yes, you can! While this recipe is specifically tailored for bitter melon due to its potassium needs, the basic principle of using fermented organic matter as a fertilizer can be applied to other plants as well. Plants that benefit from potassium-rich fertilizers, such as tomatoes, peppers, and cucumbers, will likely respond well to this solution. However, it’s always a good idea to research the specific nutrient requirements of each plant and adjust the recipe accordingly. For example, some plants might prefer a higher nitrogen content, in which case you could add ingredients like coffee grounds or grass clippings to the fermentation process.
What if I don’t have all the ingredients listed in the recipe?
Don’t worry! The beauty of DIY gardening is that you can often substitute ingredients based on what you have available. The key is to focus on providing the essential nutrients that your bitter melon plants need. If you don’t have banana peels, you can use other potassium-rich sources like potato peels, sweet potato peels, or even wood ash (use sparingly as it can raise the soil pH). If you don’t have molasses, you can use other sources of sugar, such as honey or even fruit juice. The sugar acts as a food source for the beneficial microbes during the fermentation process. The most important thing is to experiment and see what works best for your plants.
How do I know if the fermentation process is working correctly?
You’ll know the fermentation process is working by observing a few key signs. First, you’ll likely notice bubbles forming in the mixture as the microbes break down the organic matter. You might also detect a slightly sour or yeasty smell. The color of the mixture may also change over time. It’s important to note that the fermentation process can produce gases, so make sure to use a container with a loose-fitting lid or vent to prevent pressure buildup. If you see mold growing on the surface of the mixture, it’s generally best to discard it and start over. However, a white, powdery film is usually harmless and can be stirred back into the mixture.
Is this DIY solution safe for my pets and children?
While this DIY solution is made from natural ingredients, it’s still important to exercise caution when using it around pets and children. The fermented mixture can have a strong odor that might be attractive to animals, and ingesting large quantities could cause digestive upset. It’s best to store the solution in a secure location out of reach of children and pets. When applying the solution to your plants, avoid spraying it directly on areas where pets or children are likely to come into contact. And as with any gardening product, it’s always a good idea to wash your hands thoroughly after handling the solution.
My bitter melon plants are already growing well. Do I still need this DIY solution?
Even if your bitter melon plants are already thriving, this DIY solution can still provide a boost. Think of it as a way to optimize their growth and maximize their yield. By providing them with a readily available source of essential nutrients, you can help them reach their full potential. It’s also a great way to maintain their health and vigor throughout the growing season, especially during periods of stress such as heat waves or drought. Plus, using a natural and sustainable fertilizer is always a good choice for the environment.

Leave a Comment