
Canned tomatoes gardening hack – sounds a little crazy, right? But trust me, this unexpected trick could be the secret weapon your garden has been missing! I know, I know, you’re probably thinking, “Canned tomatoes? In my garden? Seriously?” But before you dismiss it as another wacky internet fad, let me tell you why this simple hack is gaining serious traction among gardening enthusiasts.
For generations, gardeners have sought ways to boost their soil’s health and provide their plants with the nutrients they crave. While the exact origin of using canned tomatoes in the garden is a bit murky, the underlying principle is rooted in understanding soil acidity. Tomatoes, both fresh and canned, are naturally acidic, and this acidity can be incredibly beneficial for certain plants that thrive in slightly acidic soil. Think blueberries, azaleas, and even some vegetables!
So, why should you consider this canned tomatoes gardening hack? Well, many of us struggle with soil that’s too alkaline, hindering nutrient absorption and leading to lackluster growth. Instead of resorting to expensive and potentially harsh chemical treatments, this DIY method offers a natural and affordable way to gently lower your soil’s pH, creating a more hospitable environment for your acid-loving plants. Plus, it’s a fantastic way to repurpose leftover canned tomatoes or even those that are nearing their expiration date. Let’s dive in and discover how this simple pantry staple can transform your garden!
Verwandle leere Konservendosen in blühende Gärten: Ein DIY-Guide
Hallo liebe Gartenfreunde! Habt ihr euch jemals gefragt, was ihr mit all den leeren Konservendosen machen sollt, die sich in eurer Küche ansammeln? Wegwerfen? Niemals! Heute zeige ich euch, wie ihr diese unscheinbaren Dosen in charmante und praktische Pflanzgefäße verwandeln könnt. Dieser DIY-Hack ist nicht nur super einfach und kostengünstig, sondern auch eine tolle Möglichkeit, euren grünen Daumen zu beweisen und gleichzeitig etwas für die Umwelt zu tun. Lasst uns gemeinsam aus Müll etwas Schönes erschaffen!
Was du brauchst: Die Materialliste
Bevor wir loslegen, hier eine Liste der Dinge, die du für dieses Projekt benötigst:
* Leere Konservendosen (Tomaten, Bohnen, Suppen – alles ist erlaubt!)
* Dosenöffner (zum sicheren Entfernen des Deckels)
* Spülmittel und Wasser (zum Reinigen der Dosen)
* Schleifpapier (fein- bis mittelgrob)
* Bohrmaschine (optional, aber sehr hilfreich)
* Bohrer (für Metall, ca. 6-8 mm)
* Sprühfarbe (in deinen Lieblingsfarben!) oder Acrylfarbe und Pinsel
* Klarlack (zum Versiegeln der Farbe, optional)
* Erde (am besten Blumenerde)
* Pflanzen (Kräuter, Blumen, Gemüse – was dein Herz begehrt!)
* Handschuhe (zum Schutz deiner Hände)
* Zeitungspapier oder Abdeckfolie (zum Schutz deiner Arbeitsfläche)
* Hammer und Nagel (optional, für die Drainage)
Schritt-für-Schritt-Anleitung: So verwandelst du Dosen in Pflanzgefäße
Hier kommt die detaillierte Anleitung, damit auch wirklich nichts schiefgeht:
1. Dosen vorbereiten: Zuerst müssen wir die leeren Konservendosen gründlich reinigen. Entferne alle Etiketten und Klebereste. Am besten weichst du die Dosen kurz in warmem Seifenwasser ein, dann lassen sich die Etiketten leichter ablösen. Spüle die Dosen anschließend gründlich aus und trockne sie ab.
2. Sicherheit geht vor: Überprüfe den oberen Rand der Dosen. Oft sind diese nach dem Öffnen scharfkantig. Um Verletzungen zu vermeiden, schleife ich den Rand mit Schleifpapier glatt. Trage dabei Handschuhe, um deine Hände zu schützen. Beginne mit gröberem Schleifpapier und wechsle dann zu feinerem, um ein optimales Ergebnis zu erzielen.
3. Drainage schaffen: Pflanzen brauchen eine gute Drainage, damit das Wasser ablaufen kann und die Wurzeln nicht faulen. Hier gibt es zwei Möglichkeiten:
* Variante 1 (mit Bohrmaschine): Mit der Bohrmaschine bohre ich vorsichtig 3-4 Löcher in den Boden der Dose. Achte darauf, dass du einen Bohrer für Metall verwendest und nicht zu viel Druck ausübst, damit die Dose nicht verbeult.
* Variante 2 (mit Hammer und Nagel): Wenn du keine Bohrmaschine hast, kannst du auch mit Hammer und Nagel Löcher in den Boden der Dose schlagen. Lege die Dose auf eine stabile Unterlage (z.B. ein Stück Holz) und schlage vorsichtig mit Hammer und Nagel Löcher in den Boden. Auch hier gilt: Vorsicht ist besser als Nachsicht!
4. Die Dosen gestalten: Jetzt kommt der spaßige Teil! Hier kannst du deiner Kreativität freien Lauf lassen und die Dosen nach deinen Wünschen gestalten.
* Sprühfarbe: Wenn du Sprühfarbe verwendest, lege die Dosen auf Zeitungspapier oder Abdeckfolie und sprühe sie gleichmäßig ein. Achte darauf, dass du in einem gut belüfteten Raum arbeitest oder draußen bist. Lasse die Farbe gut trocknen, bevor du eine zweite Schicht aufträgst.
* Acrylfarbe: Wenn du Acrylfarbe verwendest, kannst du die Dosen mit einem Pinsel bemalen. Hier sind deiner Fantasie keine Grenzen gesetzt! Du kannst Muster malen, Schriftzüge anbringen oder die Dosen einfach nur in deinen Lieblingsfarben bemalen. Lasse die Farbe ebenfalls gut trocknen.
5. Farbe versiegeln (optional): Um die Farbe vor Witterungseinflüssen zu schützen und die Dosen haltbarer zu machen, kannst du sie mit Klarlack versiegeln. Sprühe den Klarlack gleichmäßig auf die Dosen und lasse ihn gut trocknen.
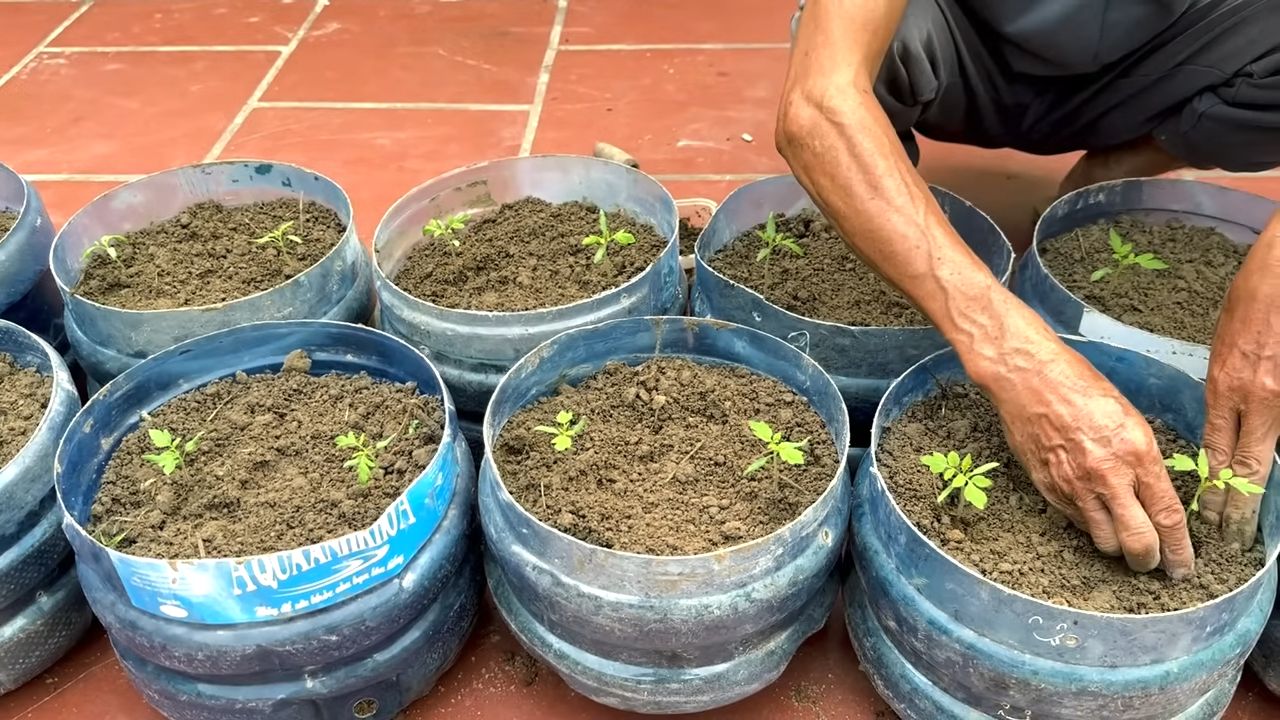
6. Befüllen und bepflanzen: Nun sind die Dosen bereit, befüllt und bepflanzt zu werden! Fülle die Dosen mit Blumenerde und pflanze deine Lieblingspflanzen ein. Achte darauf, dass die Pflanzen genügend Platz haben und gieße sie regelmäßig.
Zusätzliche Tipps und Tricks für dein Dosen-Gartenprojekt
* Rost vermeiden: Um Rostbildung zu vermeiden, kannst du die Innenseite der Dosen mit einer Rostschutzfarbe behandeln, bevor du sie bepflanzt.
* Dosen aufhängen: Wenn du die Dosen aufhängen möchtest, kannst du mit der Bohrmaschine Löcher in den oberen Rand der Dosen bohren und sie mit Draht oder Schnur aufhängen.
* Kreative Designs: Lass deiner Kreativität freien Lauf! Du kannst die Dosen mit Stoffresten bekleben, mit Muscheln verzieren oder mit Serviettentechnik gestalten.
* Beschriftung: Beschrifte die Dosen, damit du weißt, welche Pflanzen darin wachsen. Du kannst dafür Etiketten verwenden oder die Namen der Pflanzen direkt auf die Dosen schreiben.
* Upcycling-Projekt: Dieses Projekt ist nicht nur eine tolle Möglichkeit, leere Konservendosen wiederzuverwenden, sondern auch ein Beitrag zum Umweltschutz.
* Gruppenprojekt: Dieses DIY-Projekt eignet sich auch hervorragend für Kindergeburtstage oder andere Gruppenaktivitäten.
Pflanzenwahl: Was wächst gut in Konservendosen?
Die Auswahl der Pflanzen hängt natürlich von deinen Vorlieben und den Lichtverhältnissen ab. Hier ein paar Ideen:
* Kräuter: Kräuter wie Basilikum, Petersilie, Schnittlauch, Thymian und Rosmarin eignen sich hervorragend für den Anbau in Konservendosen. Sie sind pflegeleicht und du hast immer frische Kräuter zur Hand.
* Blumen: Kleine Blumen wie Stiefmütterchen, Ringelblumen, Petunien und Gänseblümchen sehen in Konservendosen einfach bezaubernd aus.
* Gemüse: Auch einige Gemüsesorten lassen sich in Konservendosen anbauen, z.B. Radieschen, Salat, Erdbeeren und Mini-Tomaten.
* Sukkulenten: Sukkulenten sind pflegeleicht und benötigen wenig Wasser. Sie sind daher ideal für den Anbau in Konservendosen.
Wo stelle ich meine Dosen-Gärten auf?
Der Standort deiner Dosen-Gärten hängt von den Bedürfnissen der Pflanzen ab. Die meisten Pflanzen benötigen einen sonnigen Standort, aber einige bevorzugen auch Halbschatten. Stelle die Dosen-Gärten auf den Balkon, die Terrasse, die Fensterbank oder in den Garten. Achte darauf, dass die Pflanzen genügend Licht und Wasser bekommen.
Pflegehinweise für deine Dosen-Pflanzen
* Gießen: Gieße die Pflanzen regelmäßig, aber vermeide Staunässe. Die Erde sollte immer leicht feucht sein.
* Düngen: Dünge die Pflanzen regelmäßig mit einem Flüssigdünger, um sie mit Nährstoffen zu versorgen.
* Schneiden: Schneide verwelkte Blätter und Blüten regelmäßig ab, um das Wachstum der Pflanzen zu fördern.
* Umpflanzen: Wenn die Pflanzen zu groß für die Dosen werden, solltest du sie in größere Gefäße umpflanzen.
Ich hoffe, diese Anleitung hat dir gefallen und du bist inspiriert, deine eigenen Konservendosen-Gärten zu gestalten. Viel Spaß beim Gärtnern! Und denk daran: Jeder kleine Beitrag zum Umweltschutz zählt!
Conclusion
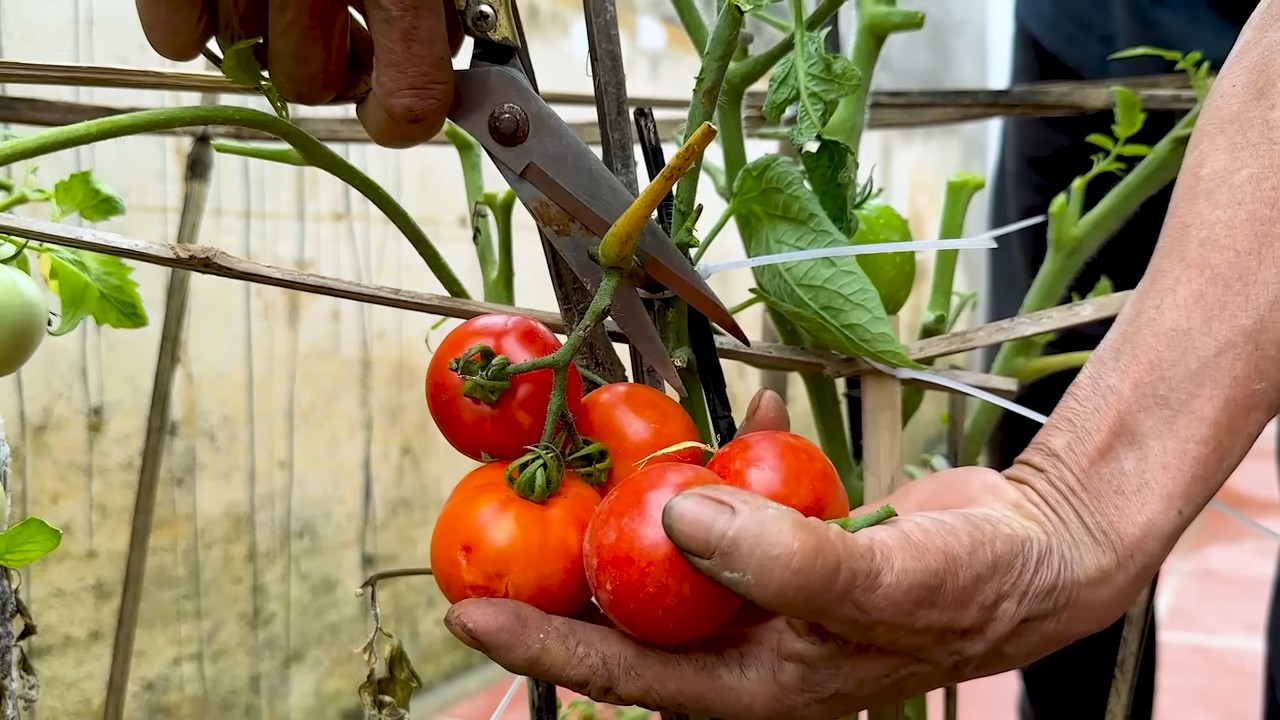
So, there you have it! This simple, yet incredibly effective, canned tomatoes gardening hack is more than just a clever trick; it’s a game-changer for anyone looking to boost their tomato yields and cultivate healthier, more robust plants. We’ve explored how the calcium in canned tomatoes acts as a natural fertilizer, combating blossom-end rot and providing essential nutrients directly to the roots. This method is not only cost-effective, repurposing something you likely already have in your pantry, but it’s also an environmentally friendly alternative to synthetic fertilizers.
Think about it: no more unsightly blemishes on your prized tomatoes, no more wasted fruit, and a significantly reduced risk of disease. This hack allows you to harness the power of readily available resources to create a thriving tomato garden, regardless of your experience level. Whether you’re a seasoned gardener or just starting out, this is a technique that’s easy to implement and yields impressive results.
But don’t just take our word for it! We encourage you to try this canned tomatoes gardening hack for yourself. Experiment with different types of canned tomatoes – crushed, diced, or whole – to see which works best for your soil and tomato variety. Consider adding other beneficial amendments to the planting hole, such as bone meal or Epsom salts, to further enhance the nutrient content and promote healthy growth.
For those growing in containers, this hack is particularly beneficial. Container gardens often lack the natural nutrients found in the ground, making them more susceptible to deficiencies. The calcium boost from the canned tomatoes can make a significant difference in the health and productivity of your container-grown tomatoes.
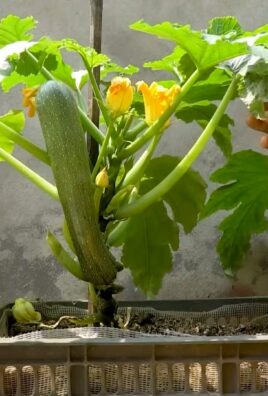
And the best part? This method isn’t limited to just tomatoes! You can also use this technique for other calcium-loving plants, such as peppers, eggplants, and squash. Just be sure to adjust the amount of canned tomatoes used based on the size and needs of the plant.
We’re confident that once you try this simple trick, you’ll be amazed by the difference it makes. Imagine harvesting baskets overflowing with juicy, flavorful tomatoes, all thanks to a humble can of tomatoes. It’s a rewarding experience that connects you to the natural world and allows you to enjoy the fruits (or vegetables!) of your labor.
So, grab a can of tomatoes, head out to your garden, and get ready to witness the magic. We’re eager to hear about your experiences! Share your results, tips, and variations in the comments below. Let’s create a community of thriving tomato gardeners, all empowered by this simple yet powerful canned tomatoes gardening hack. Let us know if you have tried this hack before and what your experience was. Did you notice a difference in your tomato plants? What other tips do you have for growing healthy tomatoes? We can’t wait to hear from you!
Frequently Asked Questions (FAQ)
What exactly is the canned tomatoes gardening hack?
The canned tomatoes gardening hack involves using canned tomatoes as a natural fertilizer for tomato plants. The calcium in the tomatoes helps prevent blossom-end rot, a common problem that causes the bottom of tomatoes to turn black and rot. It also provides other essential nutrients that promote healthy growth and increased yields.
How do I use canned tomatoes in my garden?
The most common method is to add crushed or diced canned tomatoes to the planting hole when you transplant your tomato seedlings. Simply dig a hole slightly larger than the root ball of your seedling, add a layer of canned tomatoes to the bottom, and then place the seedling in the hole. Cover the roots with soil and water thoroughly. You can also bury a can of tomatoes next to the plant, making sure to poke holes in the can for drainage.
What kind of canned tomatoes should I use?
You can use any type of canned tomatoes, including crushed, diced, whole, or even tomato sauce. Look for canned tomatoes that are low in sodium and do not contain any added sugars or preservatives. Organic canned tomatoes are always a good choice. The key is the calcium content, so ensure the can lists calcium as a nutrient.
How much canned tomatoes should I use per plant?
A general guideline is to use about one 14.5-ounce can of tomatoes per plant. For larger plants or plants that are already established, you can use up to two cans. Adjust the amount based on the size and needs of your plant. For smaller plants, half a can may be sufficient.
When should I apply the canned tomatoes?
The best time to apply the canned tomatoes is when you transplant your tomato seedlings into the garden. This gives the plants a calcium boost right from the start. You can also reapply the canned tomatoes every few weeks during the growing season to maintain healthy growth.
Can I use this hack for other plants besides tomatoes?
Yes, you can use this hack for other calcium-loving plants, such as peppers, eggplants, and squash. These plants also benefit from the calcium and other nutrients found in canned tomatoes. Adjust the amount of canned tomatoes used based on the size and needs of the plant.
Will this hack attract pests or animals?
While the smell of tomatoes might attract some pests, the amount used in this hack is typically not enough to cause a significant problem. You can also cover the canned tomatoes with soil to minimize the odor. If you are concerned about pests, you can use other pest control methods, such as companion planting or organic insecticides.
Is this hack safe for the environment?
Yes, this hack is a safe and environmentally friendly way to fertilize your tomato plants. It repurposes a common household item and reduces the need for synthetic fertilizers, which can be harmful to the environment.
What if I don’t have canned tomatoes? Can I use fresh tomatoes?
While fresh tomatoes contain calcium, the concentration is much lower than in canned tomatoes. Canned tomatoes are processed in a way that makes the calcium more readily available to plants. If you don’t have canned tomatoes, you can use other calcium-rich amendments, such as bone meal or eggshells.
How long will it take to see results from this hack?
You should start to see results within a few weeks of applying the canned tomatoes. Look for healthier, more robust plants with fewer signs of blossom-end rot. You may also notice an increase in the number and size of your tomatoes.
What if my tomatoes still get blossom-end rot after using this hack?
Blossom-end rot can be caused by a variety of factors, including calcium deficiency, inconsistent watering, and soil pH imbalances. If your tomatoes still get blossom-end rot after using this hack, make sure you are watering your plants consistently and that your soil pH is within the optimal range (6.0-6.8). You may also need to add other calcium-rich amendments to your soil.
Can I use this hack in container gardens?
Yes, this hack is particularly beneficial for container gardens. Container gardens often lack the natural nutrients found in the ground, making them more susceptible to deficiencies. The calcium boost from the canned tomatoes can make a significant difference in the health and productivity of your container-grown tomatoes.
Does the acidity of the tomatoes affect the soil pH?
While tomatoes are acidic, the amount used in this hack is typically not enough to significantly affect the soil pH. However, if you are concerned about soil pH, you can test your soil regularly and amend it as needed.
Where can I learn more about growing healthy tomatoes?
There are many resources available online and in libraries about growing healthy tomatoes. You can also consult with local gardening experts or join a gardening club. Experimentation and observation are key to learning what works best for your specific growing conditions.

Leave a Comment