
Cape Gooseberry Growing Guide: Unlock the Secrets to Golden Berry Abundance!
Have you ever stumbled upon those intriguing little golden berries, nestled in their papery husks, and wondered, “Could I grow these myself?” Well, wonder no more! This DIY guide is your passport to cultivating your very own patch of delicious and nutritious cape gooseberries. For centuries, these delightful fruits, also known as golden berries or physalis, have been enjoyed around the world, with roots tracing back to South America. They’re not only a tasty treat but also packed with vitamins and antioxidants, making them a fantastic addition to any healthy diet.
But why should you embark on this cape gooseberry growing adventure? In today’s world, where access to fresh, locally sourced produce is becoming increasingly important, growing your own food is a rewarding and empowering experience. Plus, store-bought cape gooseberries can be quite pricey! Imagine the satisfaction of harvesting your own bounty, knowing exactly where your food comes from and how it was grown. This cape gooseberry growing guide will equip you with all the knowledge and simple DIY tricks you need to successfully cultivate these unique fruits, even if you’re a complete beginner. I’m excited to share my tips and tricks with you, so let’s get started and transform your garden into a golden berry paradise!
Growing Cape Gooseberries: A DIY Guide to Golden Goodness
Okay, so you want to grow Cape Gooseberries? Awesome! These little golden gems are surprisingly easy to cultivate at home, and the taste is just incredible – a sweet and tangy burst of sunshine. I’ve had great success with them, and I’m excited to share my tips and tricks with you. Let’s get started!
Choosing Your Cape Gooseberry Variety
While there aren’t a ton of distinct varieties, knowing what you’re planting is still important. Most commonly, you’ll find the standard *Physalis peruviana*, which is what I usually grow. It’s reliable and produces a good yield. However, you might also come across varieties with slightly different fruit sizes or growth habits. Do a little research at your local nursery or online seed supplier to see what’s available in your area.
Starting from Seed (My Preferred Method!)
I personally love starting Cape Gooseberries from seed. It gives you more control over the process and is generally more cost-effective.
When to Start Seeds:
* Timing is Key: Start your seeds indoors about 6-8 weeks before the last expected frost in your area. This gives them a good head start. I usually aim for late February or early March, depending on my local climate.
Materials You’ll Need:
* Cape Gooseberry seeds
* Seed starting trays or small pots
* Seed starting mix (a light, well-draining mix is crucial)
* Spray bottle with water
* Heat mat (optional, but helpful for germination)
* Grow light (optional, but recommended for strong seedlings)
Step-by-Step Seed Starting:
1. Prepare Your Seed Starting Trays: Fill your seed starting trays or pots with the seed starting mix. Gently tamp it down to remove any large air pockets.
2. Sow the Seeds: Cape Gooseberry seeds are tiny, so be careful not to plant them too deep. I usually sprinkle a few seeds on top of the soil in each cell or pot and then lightly cover them with a thin layer of the seed starting mix (about 1/4 inch deep).
3. Water Gently: Use a spray bottle to mist the soil thoroughly. You want it to be moist but not soggy.
4. Provide Warmth: Place the seed starting trays on a heat mat if you have one. This will help to speed up germination. The ideal soil temperature is around 70-75°F (21-24°C).
5. Provide Light: Place the trays under a grow light or in a sunny windowsill. If using a windowsill, rotate the trays regularly to ensure even growth.
6. Maintain Moisture: Keep the soil consistently moist by misting it regularly. Don’t let it dry out completely.
7. Be Patient: Germination can take anywhere from 7-21 days, so don’t get discouraged if you don’t see sprouts right away.
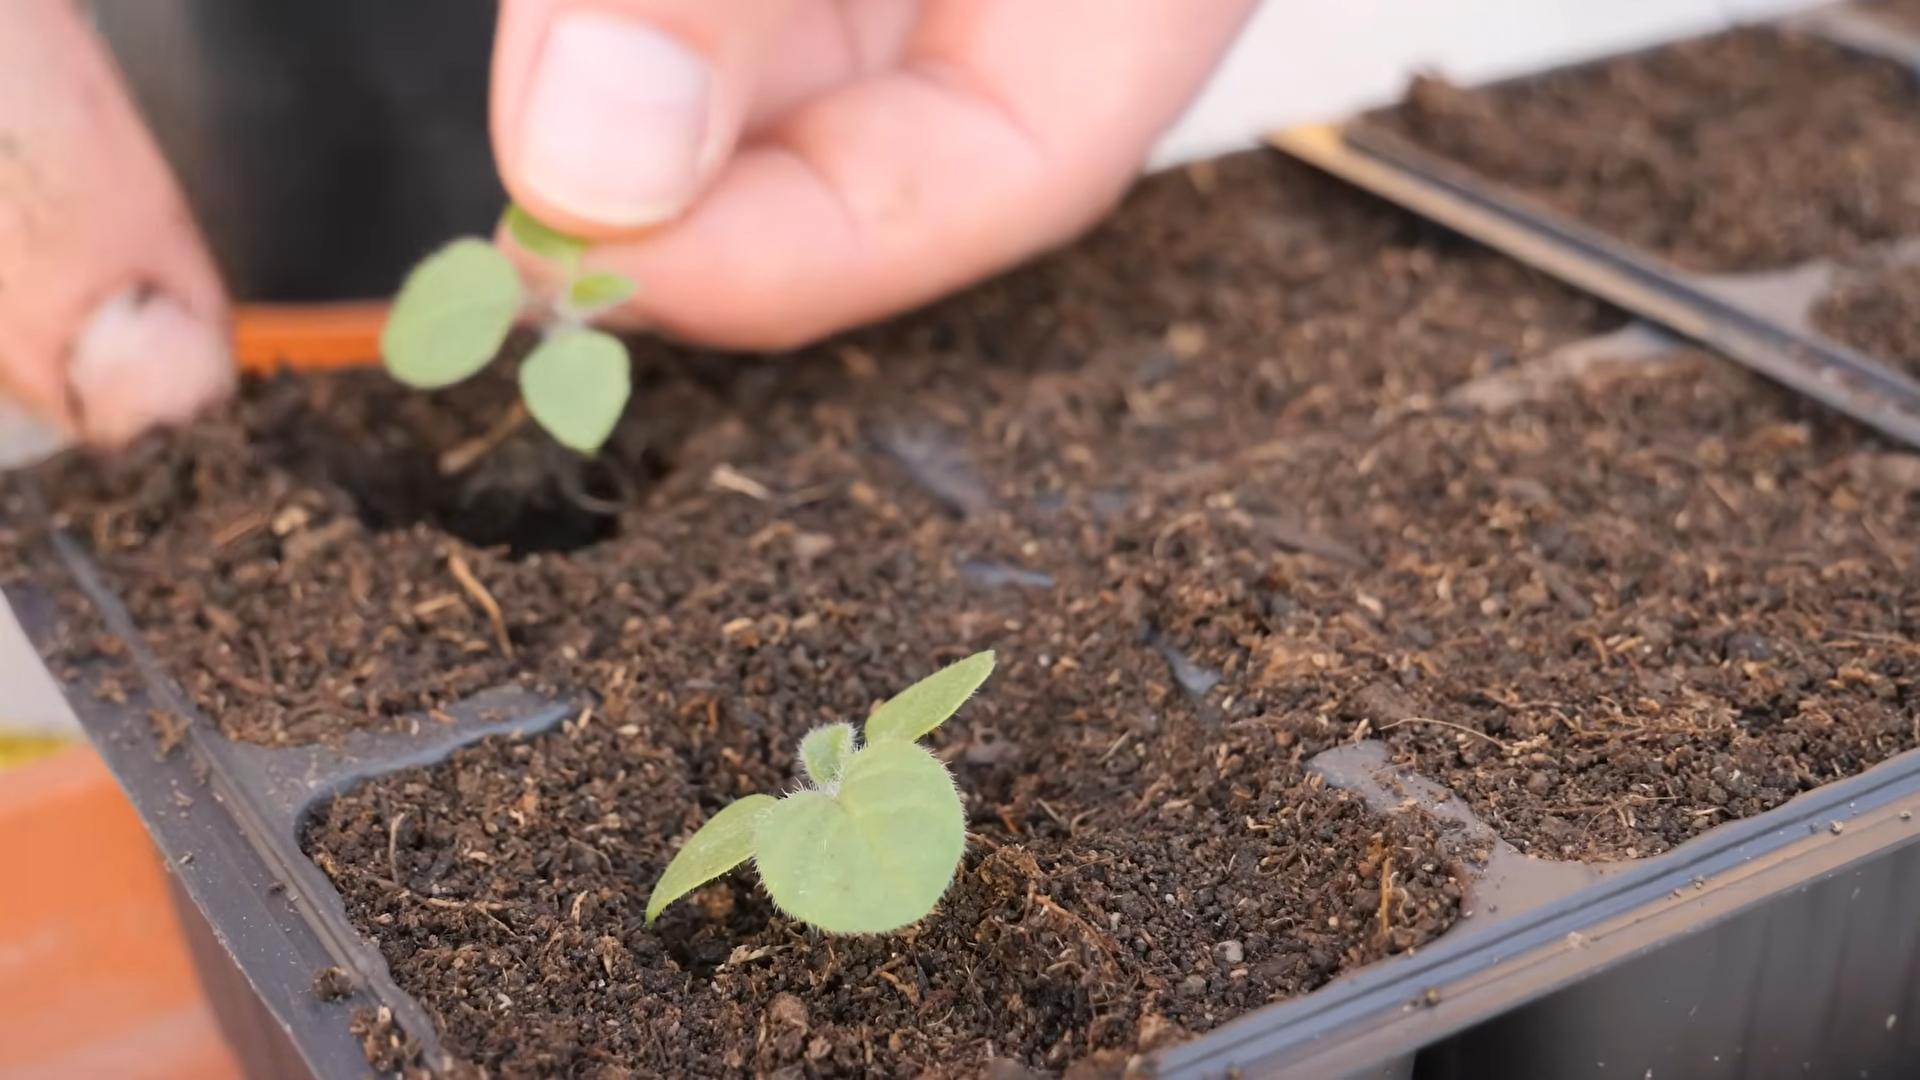
8. Thin Seedlings (If Necessary): Once the seedlings have emerged and have a couple of sets of true leaves, thin them out so that only the strongest seedling remains in each cell or pot.
Transplanting Your Seedlings
Once your seedlings are big enough and the weather is warm enough, it’s time to transplant them outdoors.
When to Transplant:
* Wait for Warm Weather: The most important thing is to wait until all danger of frost has passed and the soil has warmed up. Cape Gooseberries are sensitive to cold temperatures. I usually wait until the night time temperatures are consistently above 50°F (10°C).
* Harden Off Seedlings: Before transplanting, you’ll need to harden off your seedlings. This means gradually exposing them to outdoor conditions over a period of about a week. Start by placing them outside in a sheltered location for a few hours each day, gradually increasing the amount of time they spend outdoors.
Preparing Your Garden Bed:
* Choose a Sunny Location: Cape Gooseberries need at least 6-8 hours of sunlight per day to thrive.
* Prepare the Soil: They prefer well-draining soil that is rich in organic matter. Amend your soil with compost or well-rotted manure before planting.
* Space Plants Properly: Space your plants about 2-3 feet apart to allow them plenty of room to grow.
Step-by-Step Transplanting:
1. Dig Holes: Dig holes that are slightly larger than the root balls of your seedlings.
2. Gently Remove Seedlings: Carefully remove the seedlings from their trays or pots, being careful not to damage the roots.
3. Place Seedlings in Holes: Place the seedlings in the holes and backfill with soil. Gently firm the soil around the base of the plants.
4. Water Thoroughly: Water the plants thoroughly after transplanting.
5. Mulch (Optional): Apply a layer of mulch around the base of the plants to help retain moisture and suppress weeds.
Caring for Your Cape Gooseberry Plants
Once your plants are in the ground, there are a few things you’ll need to do to keep them healthy and productive.
Watering:
* Water Regularly: Cape Gooseberries need consistent moisture, especially during hot, dry weather. Water deeply whenever the top inch of soil feels dry.
* Avoid Overwatering: Be careful not to overwater, as this can lead to root rot.
Fertilizing:
* Fertilize Sparingly: Cape Gooseberries don’t need a lot of fertilizer. I usually give them a light feeding of a balanced fertilizer (like a 10-10-10) a few weeks after transplanting and then again a few weeks later.
* Avoid Over-Fertilizing: Over-fertilizing can lead to excessive foliage growth and reduced fruit production.
Pruning:
* Pruning is Optional: Cape Gooseberries don’t necessarily need to be pruned, but you can prune them to improve air circulation and encourage bushier growth.
* Remove Dead or Damaged Branches: Remove any dead or damaged branches as needed.
* Pinch Back Tips: You can also pinch back the tips of the branches to encourage bushier growth.
Pest and Disease Control:
* Monitor for Pests: Keep an eye out for common garden pests like aphids, whiteflies, and spider mites.
* Treat Pests Organically: If you find pests, treat them with an organic insecticide like insecticidal soap or neem oil.
* Prevent Diseases: To prevent diseases, ensure good air circulation around your plants and avoid overwatering.
Harvesting Your Cape Gooseberries
This is the fun part! Harvesting your own homegrown Cape Gooseberries is incredibly rewarding.
When to Harvest:
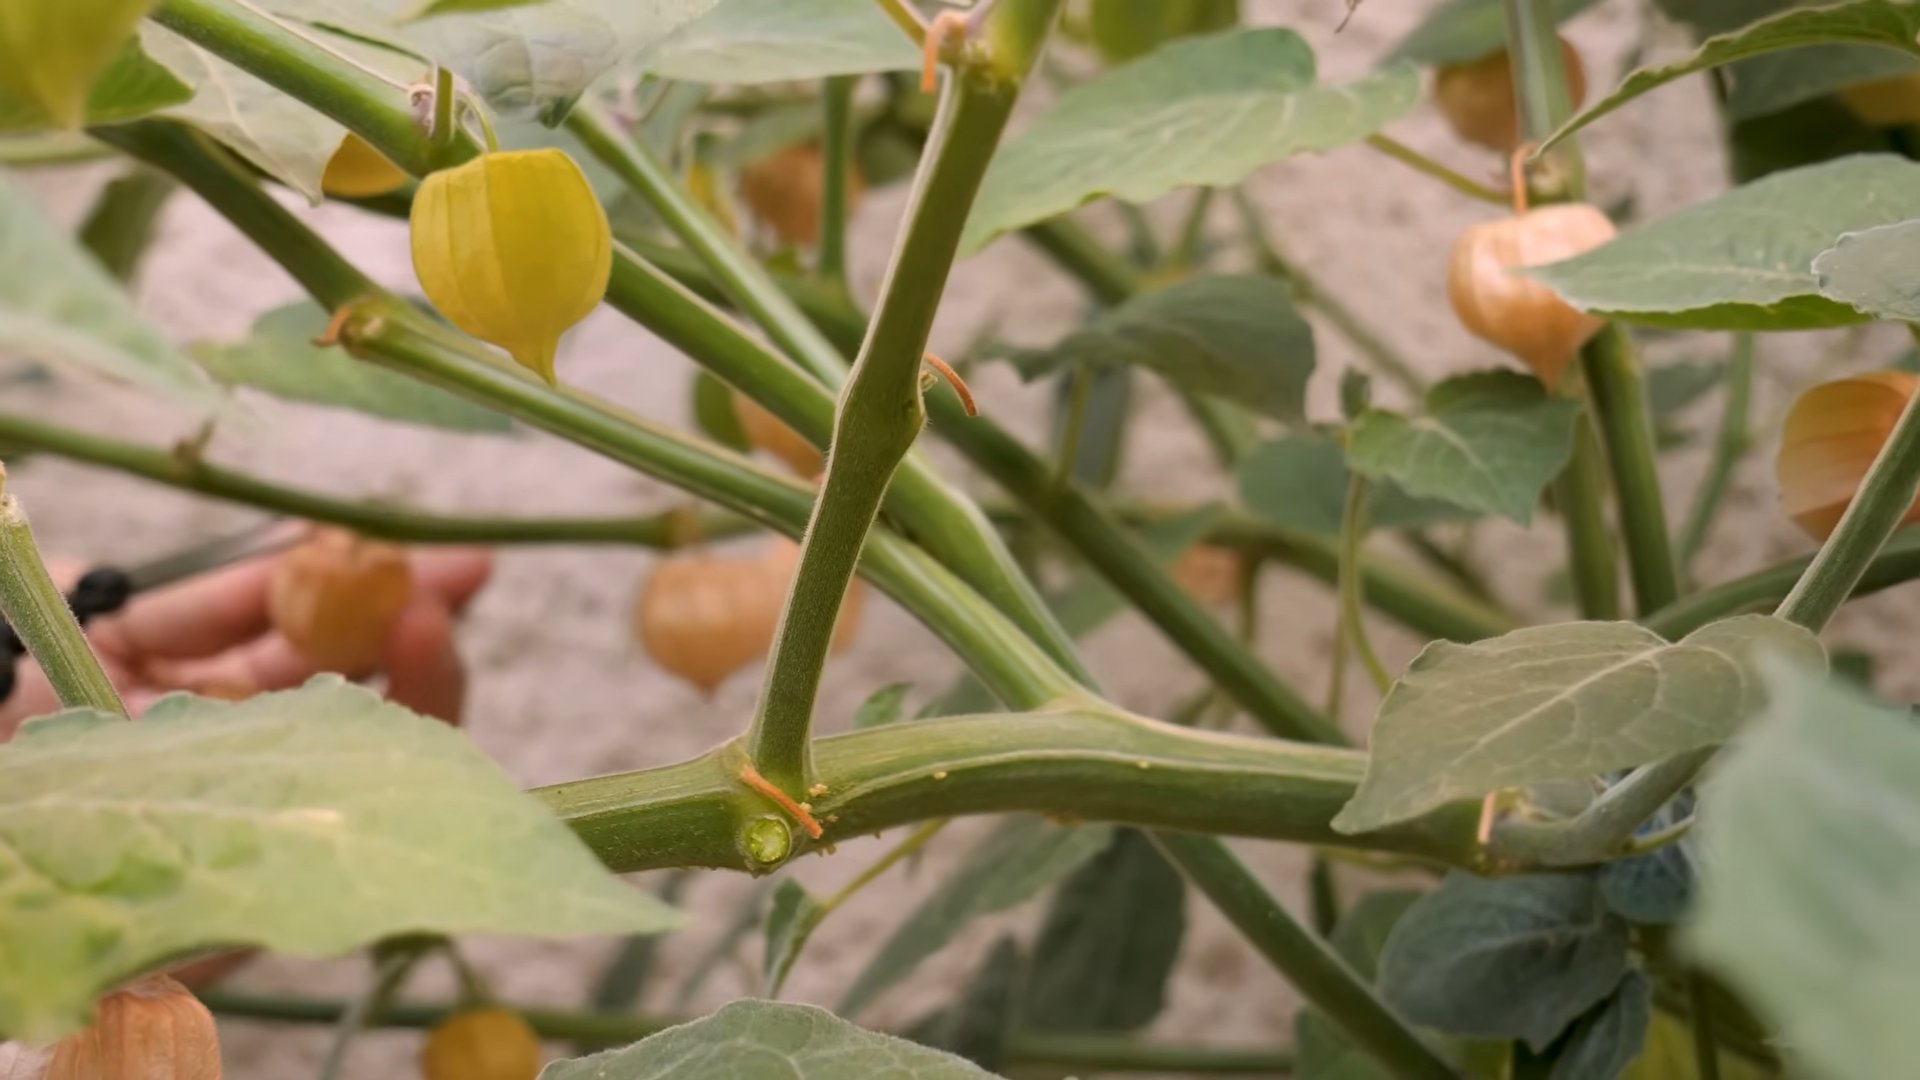
* Wait for the Husk to Dry: The fruit is ripe when the papery husk surrounding it has turned brown and dry.
* The Fruit Should Be Golden: The fruit inside the husk should be a golden color.
* Gently Shake the Plant: Ripe fruit will often fall off the plant when gently shaken.
How to Harvest:
1. Gently Pick the Fruit: Gently pick the ripe fruit from the plant.
2. Store in the Husk: Store the fruit in its husk in a cool, dry place. They can last for several weeks this way.
Using Your Cape Gooseberries
Now that you’ve harvested your Cape Gooseberries, it’s time to enjoy them!
Eating Them Fresh:
* Remove the Husk: Simply remove the husk and pop the fruit into your mouth.
* Enjoy the Tangy-Sweet Flavor: The flavor is a unique blend of sweet and tangy, with hints of pineapple and tomato.
Making Jam or Preserves:
* Cape Gooseberry Jam is Delicious: Cape Gooseberries make a delicious jam or preserve. There are tons of recipes online.
* Experiment with Flavors: Try adding other fruits or spices to your jam for a unique flavor.
Baking with Them:
* Add to Pies and Tarts: Cape Gooseberries can be added to pies, tarts, and other baked goods.
* Use in Muffins and Scones: They also make a great addition to muffins and scones.
Freezing Them:
* Freeze for Later Use: You can freeze Cape Gooseberries for later use.
* Spread on a Tray: Spread the fruit on a baking sheet and freeze until solid. Then, transfer them to a freezer bag or container.
Troubleshooting Common Problems
Even with the best care, you might encounter a few problems along the way. Here are some common issues and how to address them:
* Lack of Fruit: If your plants are not producing fruit, it could be due to a lack of sunlight
Conclusion
So, there you have it! Mastering the art of growing cape gooseberries doesn’t require a green thumb blessed by the gardening gods. It’s about understanding their needs, providing the right environment, and employing a few clever tricks along the way. This guide has armed you with the knowledge to cultivate these delightful golden berries right in your own backyard, balcony, or even a sunny windowsill.
Why is this DIY approach a must-try? Because store-bought cape gooseberries, if you can even find them, often come with a hefty price tag and may lack the vibrant freshness of homegrown fruit. Plus, there’s an unparalleled satisfaction in nurturing a plant from seed to harvest, knowing you’ve played an active role in bringing this unique flavor to your table.
Beyond the basic steps, feel free to experiment! Consider these variations to personalize your cape gooseberry growing experience:
* Vertical Gardening: If space is limited, train your cape gooseberry plants to climb a trellis or support structure. This not only saves space but also adds an aesthetic touch to your garden.
* Companion Planting: Plant basil, marigolds, or nasturtiums near your cape gooseberries. These companion plants can help deter pests and attract beneficial insects, creating a healthier ecosystem for your plants.
* Container Gardening: Choose larger containers (at least 12 inches in diameter) and use a well-draining potting mix. This allows you to move your plants indoors during colder months, extending the growing season.
* Different Varieties: Explore different varieties of cape gooseberries, such as ‘Goldie’ or ‘Giant,’ to discover your preferred flavor profile and fruit size.
Growing cape gooseberries is a rewarding journey, and we encourage you to embark on it! Don’t be afraid to get your hands dirty, experiment with different techniques, and learn from your experiences. The sweet and tangy reward of freshly harvested cape gooseberries is well worth the effort.
Now, it’s your turn! We’re eager to hear about your cape gooseberry growing adventures. Share your tips, successes, and even your challenges in the comments below. Let’s create a community of cape gooseberry enthusiasts and learn from each other. Happy gardening!
Frequently Asked Questions (FAQ)
What are cape gooseberries, and what do they taste like?
Cape gooseberries, also known as golden berries, Inca berries, or physalis, are small, round fruits enclosed in a papery husk. They belong to the nightshade family, related to tomatoes and eggplants. The taste is a unique blend of sweet and tart, often described as a combination of pineapple, strawberry, and tomato. They have a slightly acidic tang that makes them incredibly refreshing.
How long does it take to grow cape gooseberries from seed?
Growing cape gooseberries from seed typically takes around 90-120 days from sowing to harvest. The germination process itself can take 1-3 weeks. Once the seedlings emerge, they need about 60-90 days to mature and produce fruit. Starting seeds indoors 6-8 weeks before the last expected frost can give you a head start on the growing season.
What kind of soil do cape gooseberries need?
Cape gooseberries thrive in well-draining soil that is rich in organic matter. A slightly acidic to neutral pH (6.0-7.0) is ideal. Amend your soil with compost or well-rotted manure before planting to improve drainage and fertility. Avoid heavy clay soils, as they can lead to root rot. If you’re growing in containers, use a high-quality potting mix specifically formulated for fruits and vegetables.
How much sunlight do cape gooseberries require?
Cape gooseberries need at least 6-8 hours of direct sunlight per day to produce abundant fruit. Choose a sunny location in your garden or on your balcony where your plants will receive ample sunlight throughout the day. If you’re growing indoors, supplement with grow lights if necessary. Insufficient sunlight can result in leggy growth and reduced fruit production.
How often should I water my cape gooseberry plants?
Water your cape gooseberry plants regularly, especially during hot and dry weather. Keep the soil consistently moist but not waterlogged. Water deeply at the base of the plant, avoiding wetting the foliage, which can increase the risk of fungal diseases. Check the soil moisture regularly and adjust your watering schedule accordingly. Container-grown plants may need more frequent watering than those grown in the ground.
Do cape gooseberries need fertilizer?
Yes, cape gooseberries benefit from regular fertilization. Use a balanced fertilizer (e.g., 10-10-10) or a fertilizer specifically formulated for tomatoes or other fruiting vegetables. Apply fertilizer according to the package instructions, typically every 2-3 weeks during the growing season. Avoid over-fertilizing, as this can lead to excessive vegetative growth at the expense of fruit production.
How do I know when cape gooseberries are ripe?
Cape gooseberries are ripe when the papery husk turns from green to a light tan or brown color and the fruit inside is a golden yellow or orange. The husk will also become dry and papery. The fruit should easily detach from the plant when gently touched. Taste one to confirm ripeness – it should be sweet and tangy.
Are cape gooseberries susceptible to pests and diseases?
Cape gooseberries are generally relatively pest and disease-resistant, but they can be susceptible to certain problems, such as aphids, whiteflies, and fungal diseases like powdery mildew. Regularly inspect your plants for signs of pests or diseases and take appropriate action if necessary. Use organic pest control methods, such as insecticidal soap or neem oil, to control pests. Ensure good air circulation around your plants to prevent fungal diseases.
Can I grow cape gooseberries in containers?
Yes, cape gooseberries grow well in containers, making them a great option for gardeners with limited space. Choose a container that is at least 12 inches in diameter and has drainage holes. Use a well-draining potting mix and provide regular watering and fertilization. Container-grown plants may need to be moved indoors during colder months to protect them from frost.
How do I store cape gooseberries?
Cape gooseberries can be stored in their husks at room temperature for several days or in the refrigerator for up to two weeks. To store them for longer periods, you can freeze them. Simply remove the husks, wash the berries, and spread them out on a baking sheet to freeze individually. Once frozen, transfer them to a freezer bag or container. You can also make jams, jellies, or preserves to extend their shelf life.
Leave a Comment