
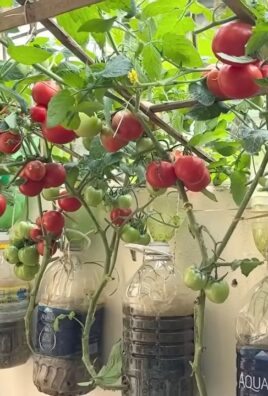
Chili Pepper High Yield: Dreaming of a garden bursting with fiery, flavorful chili peppers? I know I am! Imagine the satisfaction of harvesting baskets overflowing with vibrant reds, yellows, and greens, ready to spice up your favorite dishes. But let’s be honest, sometimes getting those chili peppers to thrive can feel like a real challenge.
For centuries, chili peppers have been more than just a culinary ingredient. Originating in South America, they’ve been used in traditional medicine, religious ceremonies, and even as a form of currency! Their journey across the globe is a testament to their enduring appeal and versatility. But even with all that history, getting a truly chili pepper high yield in your own backyard can feel elusive.
That’s where these DIY tricks and hacks come in! We all want to maximize our garden’s potential, and chili peppers are no exception. Whether you’re a seasoned gardener or just starting out, these simple yet effective techniques will help you unlock the secrets to a bountiful harvest. Forget struggling with stunted growth and disappointing yields – I’m going to share my favorite tips and tricks to ensure you’re swimming in chili peppers before you know it. Let’s get started and turn your chili pepper dreams into a delicious reality!
Chili-Ernte maximieren: Dein DIY-Guide für eine reiche Chili-Ernte
Hey Chili-Liebhaber! Bist du bereit, deine Chili-Ernte auf das nächste Level zu heben? Ich zeige dir, wie du mit ein paar einfachen Tricks und Kniffen eine wahre Chili-Flut ernten kannst. Keine Sorge, es ist einfacher als du denkst!
Grundlagen für eine erfolgreiche Chili-Zucht
Bevor wir uns in die Details stürzen, lass uns sicherstellen, dass wir die Grundlagen abgedeckt haben. Eine gesunde Chili-Pflanze ist die Basis für eine reiche Ernte.
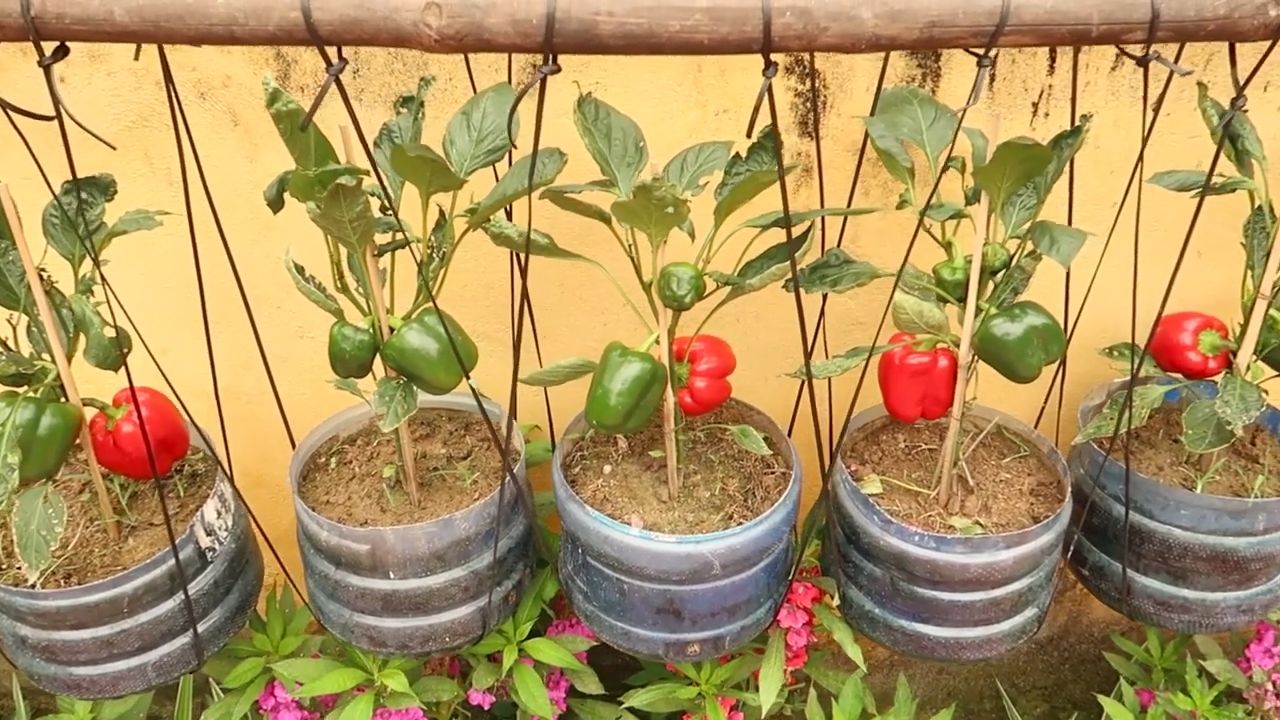
* Die richtige Sorte wählen: Nicht alle Chilis sind gleich! Einige Sorten sind von Natur aus ertragreicher als andere. Recherchiere, welche Sorten in deinem Klima gut gedeihen und für ihre hohe Ernte bekannt sind. Beliebte Optionen sind Jalapeños, Serrano, Thai Chilis und Habaneros.
* Der perfekte Standort: Chilis lieben die Sonne! Stelle sicher, dass deine Pflanzen mindestens 6-8 Stunden direktes Sonnenlicht pro Tag bekommen. Ein windgeschützter Standort ist ebenfalls ideal, um Schäden an den Pflanzen zu vermeiden.
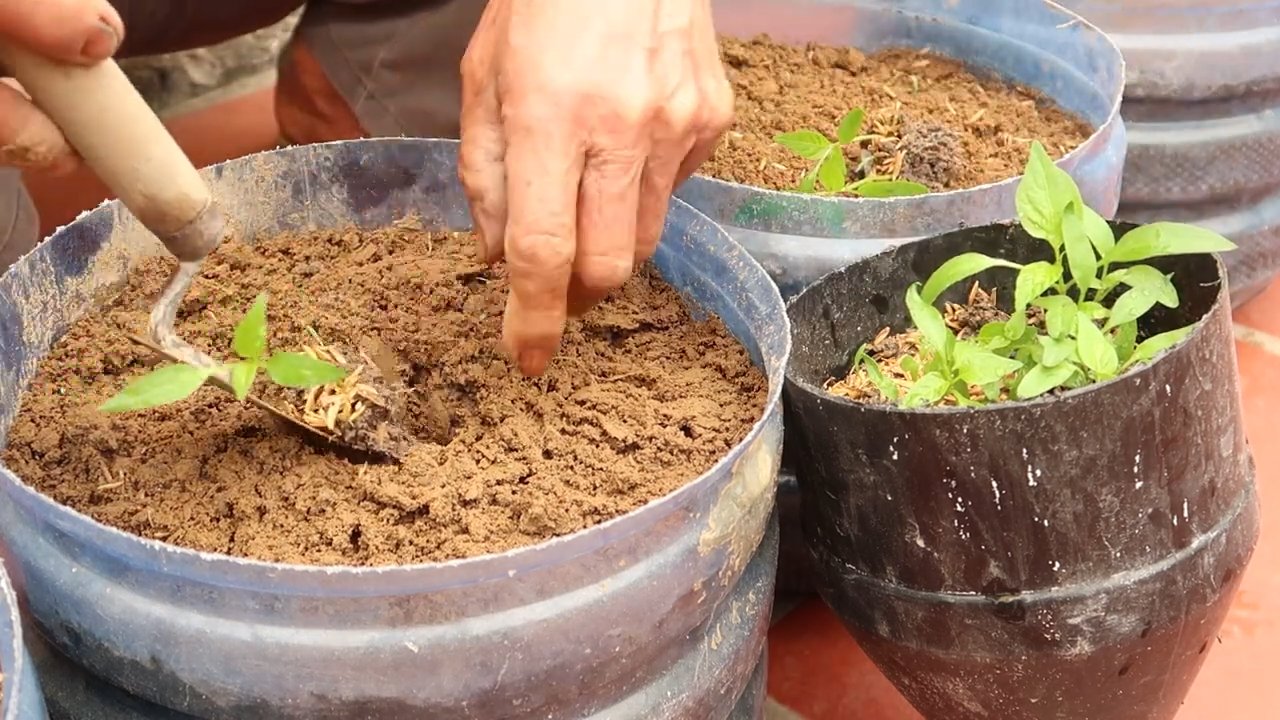
* Der richtige Boden: Chilis brauchen einen gut durchlässigen, nährstoffreichen Boden. Du kannst spezielle Chili-Erde kaufen oder deinen eigenen Mix aus Gartenerde, Kompost und Perlit herstellen.
* Regelmäßiges Gießen: Chilis mögen es feucht, aber nicht nass. Gieße regelmäßig, besonders während heißer Perioden. Achte darauf, dass das Wasser gut ablaufen kann, um Staunässe zu vermeiden.
* Die richtige Düngung: Chilis sind hungrig! Dünge deine Pflanzen regelmäßig mit einem speziellen Chili-Dünger oder einem ausgewogenen Flüssigdünger. Achte auf den NPK-Wert (Stickstoff, Phosphor, Kalium) und wähle einen Dünger, der reich an Phosphor und Kalium ist, um die Blütenbildung und Fruchtreife zu fördern.
DIY-Tricks für eine maximale Chili-Ernte
Jetzt kommen wir zu den spannenden DIY-Tricks, mit denen du deine Chili-Ernte wirklich maximieren kannst!
1. Chili-Pflanzen beschneiden für mehr Ertrag
Das Beschneiden von Chili-Pflanzen mag im ersten Moment kontraproduktiv erscheinen, aber es kann tatsächlich zu einer höheren Ernte führen. Durch das Beschneiden förderst du die Verzweigung der Pflanze, was zu mehr Blüten und somit zu mehr Chilis führt.
Schritt-für-Schritt-Anleitung:
1. Wann beschneiden? Beschneide deine Chili-Pflanzen, wenn sie etwa 20-30 cm hoch sind.
2. Wo beschneiden? Suche nach der ersten Verzweigung der Pflanze. Schneide den Haupttrieb direkt über dieser Verzweigung ab.
3. Wie beschneiden? Verwende eine saubere und scharfe Gartenschere oder ein Messer. Achte darauf, einen sauberen Schnitt zu machen, um Infektionen zu vermeiden.
4. Nach dem Beschneiden: Dünge deine Pflanze nach dem Beschneiden, um das Wachstum neuer Triebe zu fördern.
2. Chili-Pflanzen bestäuben für eine sichere Ernte
Chilis sind selbstbestäubend, aber manchmal brauchen sie ein wenig Hilfe, besonders wenn sie in Innenräumen oder in einem Gewächshaus wachsen. Eine manuelle Bestäubung kann die Fruchtbildung deutlich verbessern.
Schritt-für-Schritt-Anleitung:
1. Wann bestäuben? Bestäube deine Chili-Pflanzen, wenn die Blüten geöffnet sind. Die beste Zeit dafür ist am Vormittag, wenn die Luft trocken ist.
2. Wie bestäuben? Es gibt verschiedene Methoden zur manuellen Bestäubung:
* Pinsel-Methode: Verwende einen kleinen, weichen Pinsel, um den Pollen von einer Blüte zur nächsten zu übertragen.
* Schüttel-Methode: Schüttle die Pflanze vorsichtig, um den Pollen freizusetzen.
* Wattestäbchen-Methode: Verwende ein Wattestäbchen, um den Pollen von einer Blüte zur nächsten zu übertragen.
3. Wie oft bestäuben? Wiederhole die Bestäubung alle paar Tage, bis die Blüten abfallen und sich kleine Chilis bilden.
3. Chili-Pflanzen richtig düngen für mehr Wachstum und Ertrag
Die richtige Düngung ist entscheidend für eine reiche Chili-Ernte. Chilis brauchen eine ausgewogene Ernährung, um gesund zu wachsen und viele Früchte zu produzieren.
Schritt-für-Schritt-Anleitung:
1. Welchen Dünger verwenden? Verwende einen speziellen Chili-Dünger oder einen ausgewogenen Flüssigdünger mit einem hohen Anteil an Phosphor und Kalium. Diese Nährstoffe fördern die Blütenbildung und Fruchtreife.
2. Wie oft düngen? Dünge deine Chili-Pflanzen alle 2-3 Wochen während der Wachstumsperiode.
3. Wie düngen? Befolge die Anweisungen auf der Düngerpackung. Achte darauf, den Dünger nicht direkt auf die Blätter zu gießen, um Verbrennungen zu vermeiden.
4. Zusätzliche Tipps:
* Komposttee: Komposttee ist ein natürlicher Dünger, der reich an Nährstoffen ist. Du kannst ihn selbst herstellen oder im Gartencenter kaufen.
* Epsom-Salz: Epsom-Salz (Bittersalz) enthält Magnesium, das für das Wachstum von Chili-Pflanzen wichtig ist. Löse einen Esslöffel Epsom-Salz in einem Liter Wasser auf und gieße deine Pflanzen damit alle paar Wochen.
4. Chili-Pflanzen vor Schädlingen und Krankheiten schützen
Schädlinge und Krankheiten können deine Chili-Ernte erheblich beeinträchtigen. Es ist wichtig, deine Pflanzen regelmäßig zu kontrollieren und bei Bedarf Maßnahmen zu ergreifen.
Schritt-für-Schritt-Anleitung:
1. Regelmäßige Kontrolle: Untersuche deine Chili-Pflanzen regelmäßig auf Anzeichen von Schädlingen oder Krankheiten. Achte auf Blattläuse, Spinnmilben, Thripse, Weiße Fliegen, Pilzkrankheiten und andere Probleme.
2. Natürliche Schädlingsbekämpfung:
* Neemöl: Neemöl ist ein natürliches Insektizid, das gegen viele Schädlinge wirksam ist. Sprühe deine Pflanzen regelmäßig mit einer Neemöl-Lösung ein.
* Nützlinge: Fördere Nützlinge wie Marienkäfer, Florfliegen und Schlupfwespen, die Schädlinge fressen.
* Seifenlösung: Eine einfache Seifenlösung kann gegen Blattläuse und andere Schädlinge helfen. Mische einen Teelöffel Flüssigseife (ohne Zusätze) in einem Liter Wasser und sprühe deine Pflanzen damit ein.
3. Krankheitsbekämpfung:
* Gute Belüftung: Sorge für eine gute Belüftung, um Pilzkrankheiten vorzubeugen.
* Kupfersprays: Kupfersprays können gegen Pilzkrankheiten wirksam sein.
* Befallene Blätter entfernen: Entferne befallene Blätter sofort, um die Ausbreitung der Krankheit zu verhindern.
5. Chili-Pflanzen richtig wässern für eine optimale Entwicklung
Die richtige Bewässerung ist entscheidend für das Wachstum und die Fruchtbildung von Chili-Pflanzen. Zu viel oder zu wenig Wasser kann zu Problemen führen.
Schritt-für-Schritt-Anleitung:
1. Wie oft wässern? Wässere deine Chili-Pflanzen regelmäßig, besonders während heißer Perioden. Die Häufigkeit hängt von verschiedenen Faktoren ab, wie z.B. dem Wetter, der Bodenart und der Größe der Pflanze.
2. Wie viel wässern? Gieße so viel, dass der Boden gut durchfeuchtet ist, aber vermeide Staunässe.
3. Wie wässern? Gieße direkt an die Wurzeln der Pflanze und vermeide es, die Blätter zu benetzen, um Pilzkrankheiten vorzubeugen.
4. Zusätzliche Tipps:
* Fingerprobe: Stecke deinen Finger etwa 2-3 cm tief in den Boden. Wenn sich der Boden trocken anfühlt, ist es Zeit
Conclusion
So, there you have it! Unlocking a chili pepper high yield doesn’t require expensive fertilizers or complicated gardening techniques. This simple, DIY trick, focusing on [mention the specific trick from the article, e.g., Epsom salt foliar spray, coffee ground amendment, etc.], is a game-changer for both novice and experienced gardeners alike. We’ve shown you how easy it is to implement, the science behind why it works, and the potential benefits you can reap – a bountiful harvest of vibrant, flavorful chili peppers.
But why is this a must-try? Beyond the promise of more peppers, this method is sustainable, cost-effective, and allows you to have greater control over what goes into your garden. You’re not relying on harsh chemicals; instead, you’re harnessing the power of readily available resources to nourish your plants and maximize their potential. Imagine the satisfaction of harvesting baskets full of peppers, knowing you achieved it with a simple, natural solution.
Don’t be afraid to experiment! While we’ve outlined the basic method, there’s room for personalization. For example, if you’re using [mention the specific trick again, e.g., Epsom salt], you could try different concentrations to see what works best for your specific chili pepper variety and soil conditions. If you’re growing different types of chili peppers, from mild bell peppers to fiery habaneros, you might find that some respond better to this treatment than others. Consider keeping a gardening journal to track your results and fine-tune your approach over time.
Another variation to consider is combining this trick with other proven methods for boosting chili pepper production. Think about companion planting – basil, for instance, is known to deter pests and improve the flavor of chili peppers. Proper watering techniques, ensuring your plants receive adequate sunlight, and regular pruning to encourage branching are all essential components of a successful chili pepper garden. This DIY trick is a powerful tool, but it works best when integrated into a holistic approach to plant care.
We’re confident that this DIY trick will significantly improve your chili pepper harvest. But the real magic happens when you try it for yourself. We encourage you to give it a go, observe the results, and share your experiences with us and the wider gardening community. Did you notice a significant increase in pepper production? Did you find that your peppers were larger, more flavorful, or more vibrant in color? What variations did you try, and what were the results?
Share your photos, tips, and stories in the comments section below. Let’s learn from each other and create a thriving community of chili pepper enthusiasts! Remember, gardening is a journey of discovery, and every experiment, successful or not, is a valuable learning opportunity. So, get your hands dirty, embrace the process, and prepare to be amazed by the power of this simple yet effective DIY trick for achieving a chili pepper high yield. Happy gardening!
Frequently Asked Questions (FAQ)
What exactly does this DIY trick do for my chili pepper plants?
This DIY trick, specifically [mention the specific trick again, e.g., Epsom salt foliar spray], provides your chili pepper plants with essential nutrients that are often lacking in the soil. [Explain the science behind the trick and how it benefits the plant. For example: Epsom salt provides magnesium and sulfur, which are crucial for chlorophyll production (essential for photosynthesis) and nutrient uptake. This leads to healthier plants, more flowers, and ultimately, a higher yield of chili peppers.] By supplementing these nutrients, you’re essentially giving your plants the building blocks they need to thrive and produce an abundance of peppers. It also helps to strengthen the plant’s cell walls, making them more resistant to pests and diseases.
How often should I apply this DIY trick to my chili pepper plants?
The frequency of application depends on several factors, including the specific trick you’re using, the age of your plants, and the condition of your soil. [Provide specific recommendations based on the trick. For example: For Epsom salt foliar spray, a general guideline is to apply it every 2-4 weeks during the growing season. For coffee ground amendment, you can incorporate it into the soil at planting time and then side-dress your plants every month or so.] It’s always best to start with a conservative approach and observe how your plants respond. If you notice signs of nutrient deficiency, such as yellowing leaves or stunted growth, you may need to increase the frequency of application. Conversely, if you see signs of nutrient toxicity, such as leaf burn, reduce the frequency or concentration.
Can I use this DIY trick on other types of plants besides chili peppers?
While this trick is particularly beneficial for chili peppers, it can also be used on other plants that benefit from [mention the key nutrient provided by the trick, e.g., magnesium and sulfur]. Tomatoes, peppers, and roses are all known to respond well to [mention the specific trick again, e.g., Epsom salt]. However, it’s important to research the specific needs of each plant before applying any DIY treatment. Some plants may be more sensitive to certain nutrients than others. Always start with a small test area to ensure that the treatment is not harmful.
What are the signs of nutrient deficiency in chili pepper plants?
Recognizing the signs of nutrient deficiency is crucial for addressing the problem promptly and effectively. Some common signs include:
* **Yellowing leaves:** This can indicate a deficiency in magnesium, nitrogen, or iron.
* **Stunted growth:** This can be a sign of a deficiency in phosphorus, potassium, or nitrogen.
* **Leaf curl:** This can be caused by a deficiency in calcium or boron.
* **Blossom end rot:** This is a common problem in tomatoes and peppers and is caused by a calcium deficiency.
* **Poor fruit set:** This can be a sign of a deficiency in boron or phosphorus.
If you notice any of these symptoms, it’s important to investigate the cause and take corrective action. This DIY trick can be a valuable tool in addressing nutrient deficiencies, but it’s also important to ensure that your plants are receiving adequate water, sunlight, and overall care.
Is there a risk of over-applying this DIY trick?
Yes, it is possible to over-apply any DIY treatment, including this one. Over-application can lead to nutrient toxicity, which can be just as harmful as nutrient deficiency. Signs of nutrient toxicity include leaf burn, stunted growth, and poor fruit production. It’s important to follow the recommended guidelines and to observe your plants carefully for any signs of distress. If you suspect that you have over-applied the treatment, flush the soil with plenty of water to help remove excess nutrients.
Where can I find the ingredients for this DIY trick?
The ingredients for this DIY trick are readily available at most garden centers, hardware stores, and even some grocery stores. [Mention the specific ingredients and where to find them. For example: Epsom salt can be found in the pharmacy section of most grocery stores or at garden centers. Coffee grounds are, of course, readily available if you brew coffee at home, or you can often get them for free from local coffee shops.] The affordability and accessibility of these ingredients are one of the key benefits of this DIY approach.
What if I don’t see results right away?
Patience is key when it comes to gardening. It may take several weeks or even months to see noticeable results from this DIY trick. Factors such as weather conditions, soil quality, and the overall health of your plants can all influence the speed at which they respond to the treatment. Continue to monitor your plants closely and provide them with the care they need. If you don’t see any improvement after a reasonable period of time, consider adjusting the frequency or concentration of the treatment, or consult with a local gardening expert for further advice. Remember that achieving a chili pepper high yield is a process, and it requires ongoing attention and care.
Leave a Comment