
Coffee and dish soap mixture – sounds like the start of a strange recipe, right? But trust me, this isn’t for your next culinary masterpiece! Instead, it’s your secret weapon for a thriving, pest-free garden. For generations, gardeners have sought natural and effective ways to protect their precious plants, often turning to time-tested remedies passed down through families.
I’ve always been fascinated by the ingenuity of these DIY solutions. Think about it: before the age of readily available chemical pesticides, resourceful gardeners relied on their knowledge of nature to keep their gardens flourishing. And guess what? Many of those techniques still work wonders today!
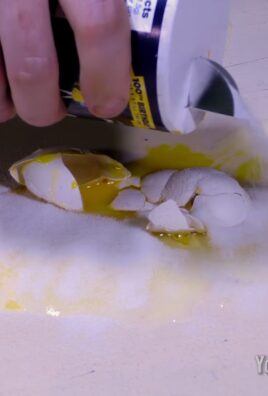
That’s where this coffee and dish soap mixture comes in. Are you tired of battling aphids, spider mites, or other pesky critters that are turning your beautiful blooms into a buffet? Do you want to avoid harsh chemicals that could harm beneficial insects or contaminate your soil? Then you absolutely need this simple, yet powerful, DIY trick in your gardening arsenal. I’m going to show you exactly how to whip up this concoction and use it to keep your garden healthy and vibrant, all while being kind to the environment. Let’s get started!
DIY Coffee & Dish Soap Plant Fertilizer: A Gardener’s Secret Weapon
Hey fellow plant lovers! Are you looking for a natural and effective way to boost your plant’s growth and keep those pesky bugs away? Well, you’ve come to the right place! I’m going to share my favorite DIY plant fertilizer recipe using two ingredients you probably already have in your kitchen: coffee and dish soap. Yes, you read that right! This simple concoction can work wonders for your green friends.
Why Coffee and Dish Soap?
Before we dive into the how-to, let’s talk about why this combination is so beneficial.
* Coffee Grounds: Coffee grounds are a fantastic source of nitrogen, which is essential for healthy foliage growth. They also contain other beneficial nutrients like phosphorus, potassium, and magnesium. Plus, they help improve soil drainage and aeration. Used coffee grounds are also slightly acidic, which many plants love, especially acid-loving plants like azaleas, hydrangeas, and blueberries.
* Dish Soap: Now, you might be thinking, “Dish soap? In my plant fertilizer?” But hear me out! A small amount of mild dish soap acts as a surfactant. This means it helps the coffee and water mixture spread evenly over the plant’s leaves and soil, ensuring maximum absorption of nutrients. It also helps to break down the waxy coating on some insects, making them more vulnerable. It’s a natural pest control method!
Important Note: It’s crucial to use a mild, unscented dish soap. Avoid soaps with bleach, degreasers, or antibacterial additives, as these can harm your plants. I personally use a simple, plant-based dish soap.
What You’ll Need
* Used coffee grounds (cooled and drained)
* Mild, unscented dish soap
* Water
* Spray bottle or watering can
* Measuring spoons or cups
* A container for mixing
Step-by-Step Guide: Making Your Coffee & Dish Soap Fertilizer
Alright, let’s get down to business! Here’s how to make your own coffee and dish soap plant fertilizer:
1. Gather Your Coffee Grounds: After you’ve brewed your morning coffee, don’t toss those grounds! Let them cool completely. I usually collect mine in a container over a few days. Make sure to drain any excess water from the grounds before using them. Excess water can dilute the mixture too much.
2. Prepare the Mixture: This is where the magic happens! You’ll need to create the right concentration for your plants. I’ve found that the following ratio works well for most plants:
* 1 cup of used coffee grounds
* 1 gallon of water
* 1 teaspoon of mild dish soap
You can adjust the amount depending on how much fertilizer you need. Just keep the ratio consistent. For example, if you only need a smaller amount, you could use:
* 1/4 cup of used coffee grounds
* 1 quart of water
* 1/4 teaspoon of mild dish soap
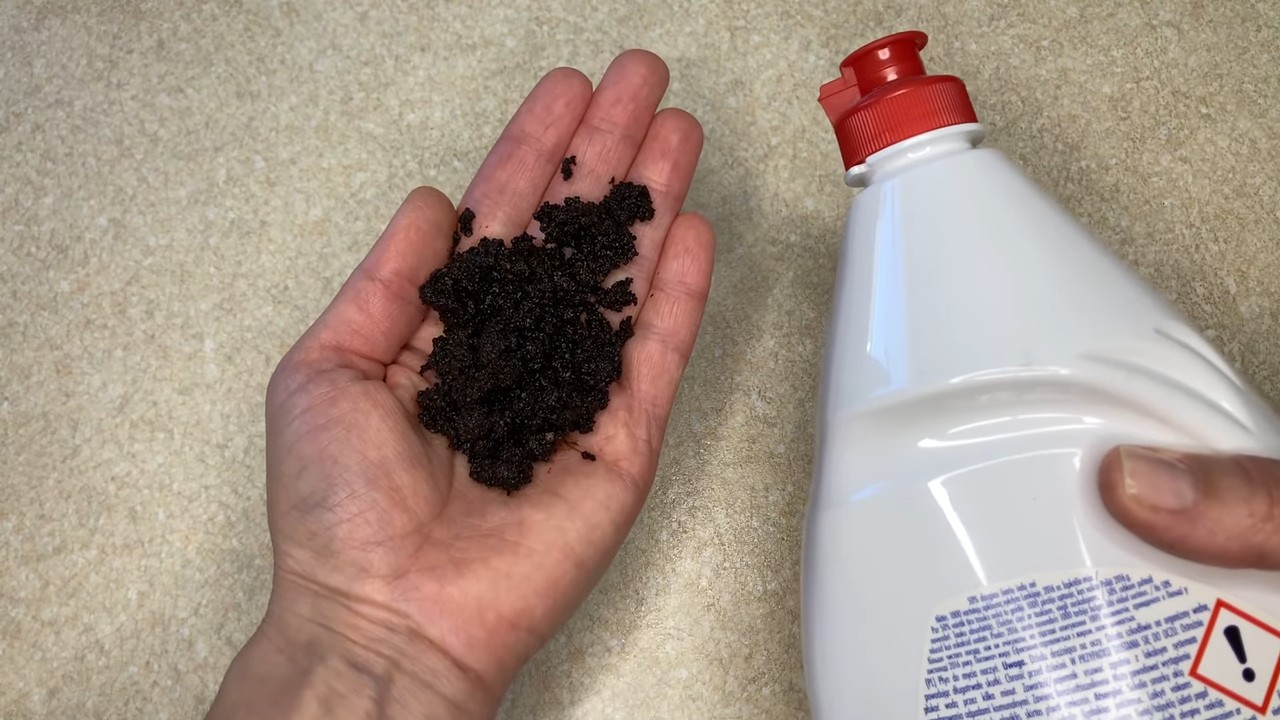
3. Mix Thoroughly: In your mixing container, combine the water, coffee grounds, and dish soap. Stir well until the dish soap is fully dissolved and the coffee grounds are evenly distributed. You don’t want clumps of coffee grounds sitting at the bottom.
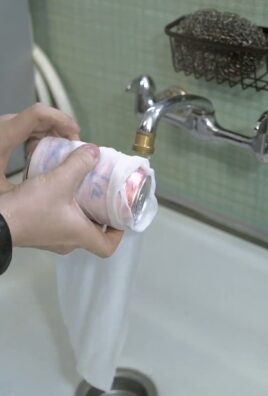
4. Strain the Mixture (Optional): This step is optional, but I highly recommend it, especially if you’re using a spray bottle. Straining the mixture will remove any larger coffee ground particles that could clog the nozzle. You can use a cheesecloth, fine-mesh sieve, or even an old t-shirt to strain the mixture.
5. Transfer to Spray Bottle or Watering Can: Once the mixture is ready, carefully pour it into your spray bottle or watering can. Make sure the container is clean to avoid introducing any unwanted bacteria to your plants.
Applying Your Homemade Fertilizer
Now that you have your coffee and dish soap fertilizer, it’s time to put it to work!
1. Test on a Small Area First: Before applying the fertilizer to all of your plants, it’s always a good idea to test it on a small, inconspicuous area first. This will help you ensure that the mixture doesn’t harm your plants. Wait a day or two to see if there are any adverse reactions, such as leaf burn or discoloration.
2. Water Your Plants First: Before applying the fertilizer, make sure your plants are already watered. This will help the fertilizer absorb more evenly and prevent root burn.
3. Apply to Soil and Foliage: You can apply the fertilizer to both the soil and the foliage of your plants. For the soil, simply pour the mixture around the base of the plant, avoiding direct contact with the stem. For the foliage, lightly mist the leaves with the spray bottle. Be sure to get both the top and bottom of the leaves, as this is where many pests like to hide.
4. Frequency of Application: I usually fertilize my plants with this mixture every 2-4 weeks during the growing season (spring and summer). During the dormant season (fall and winter), you can reduce the frequency to once a month or even skip it altogether.
Tips and Tricks for Success
Here are a few extra tips to help you get the most out of your coffee and dish soap fertilizer:
* Use Fresh Coffee Grounds: While you can use coffee grounds that have been sitting for a few days, fresh grounds are generally more effective. They contain more nutrients and haven’t had as much time to decompose.
* Adjust the Ratio as Needed: Every plant is different, so you may need to adjust the ratio of coffee grounds, water, and dish soap to suit your specific plants. If you notice any signs of over-fertilization, such as leaf burn or yellowing, reduce the amount of coffee grounds in the mixture.
* Don’t Over-Fertilize: It’s better to under-fertilize than to over-fertilize. Over-fertilizing can damage your plants and even kill them.
* Use on Outdoor Plants: This fertilizer is great for both indoor and outdoor plants. However, be mindful of the weather when applying it to outdoor plants. Avoid applying it on hot, sunny days, as this can cause leaf burn.
* Store Leftover Fertilizer: If you have any leftover fertilizer, you can store it in a sealed container in a cool, dark place for up to a week. After that, it’s best to discard it.
* Observe Your Plants: Pay close attention to your plants after applying the fertilizer. Look for signs of improvement, such as new growth, greener leaves, and increased flowering. Also, watch out for any signs of problems, such as leaf burn, yellowing, or pest infestations.
Troubleshooting
Even with the best intentions, sometimes things don’t go as planned. Here are a few common issues you might encounter and how to address them:
* Leaf Burn: If you notice that your plant’s leaves are turning brown or crispy after applying the fertilizer, it could be a sign of leaf burn. This is usually caused by over-fertilization or applying the fertilizer on a hot, sunny day. To fix this, flush the soil with plenty of water to remove excess fertilizer.
* Yellowing Leaves: Yellowing leaves can be a sign of several problems, including over-fertilization, under-fertilization, or nutrient deficiencies. If you suspect over-fertilization, flush the soil with water. If you suspect under-fertilization, increase the frequency of application. If you suspect nutrient deficiencies, consider adding a balanced fertilizer to your routine.
* Pest Infestations: While the dish soap in this fertilizer can help control some pests, it’s not a cure-all. If you have a severe pest infestation, you may need to use a stronger insecticide.
* Mold Growth: In some cases, you may notice mold growing on the soil surface after applying the fertilizer. This is usually caused by overwatering or poor drainage. To fix this, allow the soil to dry out completely between waterings and improve drainage by adding perlite or vermiculite to the soil.
Plants That Love Coffee
While this fertilizer is generally safe for most plants, some plants particularly benefit from the acidity and nutrients in coffee grounds. These include:
* Azaleas
* Hydrangeas
* Rhododendrons
* Blueberries
* Roses
* Tomatoes
* Carrots
* Radishes
Plants to Use Coffee Grounds Cautiously On
While coffee grounds are generally beneficial, some plants are sensitive to acidity or may not need the extra nitrogen. Use caution when applying this fertilizer to:
* Lavender
* Rosemary
* Succulents
* Cacti
For these plants, use a diluted version of the fertilizer or apply it less frequently.
Final Thoughts
I hope this guide has inspired you to try making your own coffee and dish soap plant fertilizer. It’s a simple, affordable, and effective way to give your plants a boost and keep them healthy and happy. Remember to always observe your plants and adjust the recipe as needed. Happy gardening!
Conclusion
So, there you have it! This simple yet surprisingly effective DIY trick using a coffee and dish soap mixture is a game-changer for tackling those stubborn, stuck-on messes around your home. Forget spending a fortune on harsh chemicals and specialized cleaners. This eco-friendly and budget-conscious solution harnesses the natural power of coffee grounds and the degreasing action of dish soap to deliver impressive results.
Why is this a must-try? Because it’s not just about cleaning; it’s about cleaning smarter. The abrasive texture of the coffee grounds gently scrubs away grime without scratching delicate surfaces, while the dish soap lifts grease and dirt, leaving behind a sparkling clean finish. It’s a win-win! Plus, you’re repurposing used coffee grounds, reducing waste and giving them a second life.
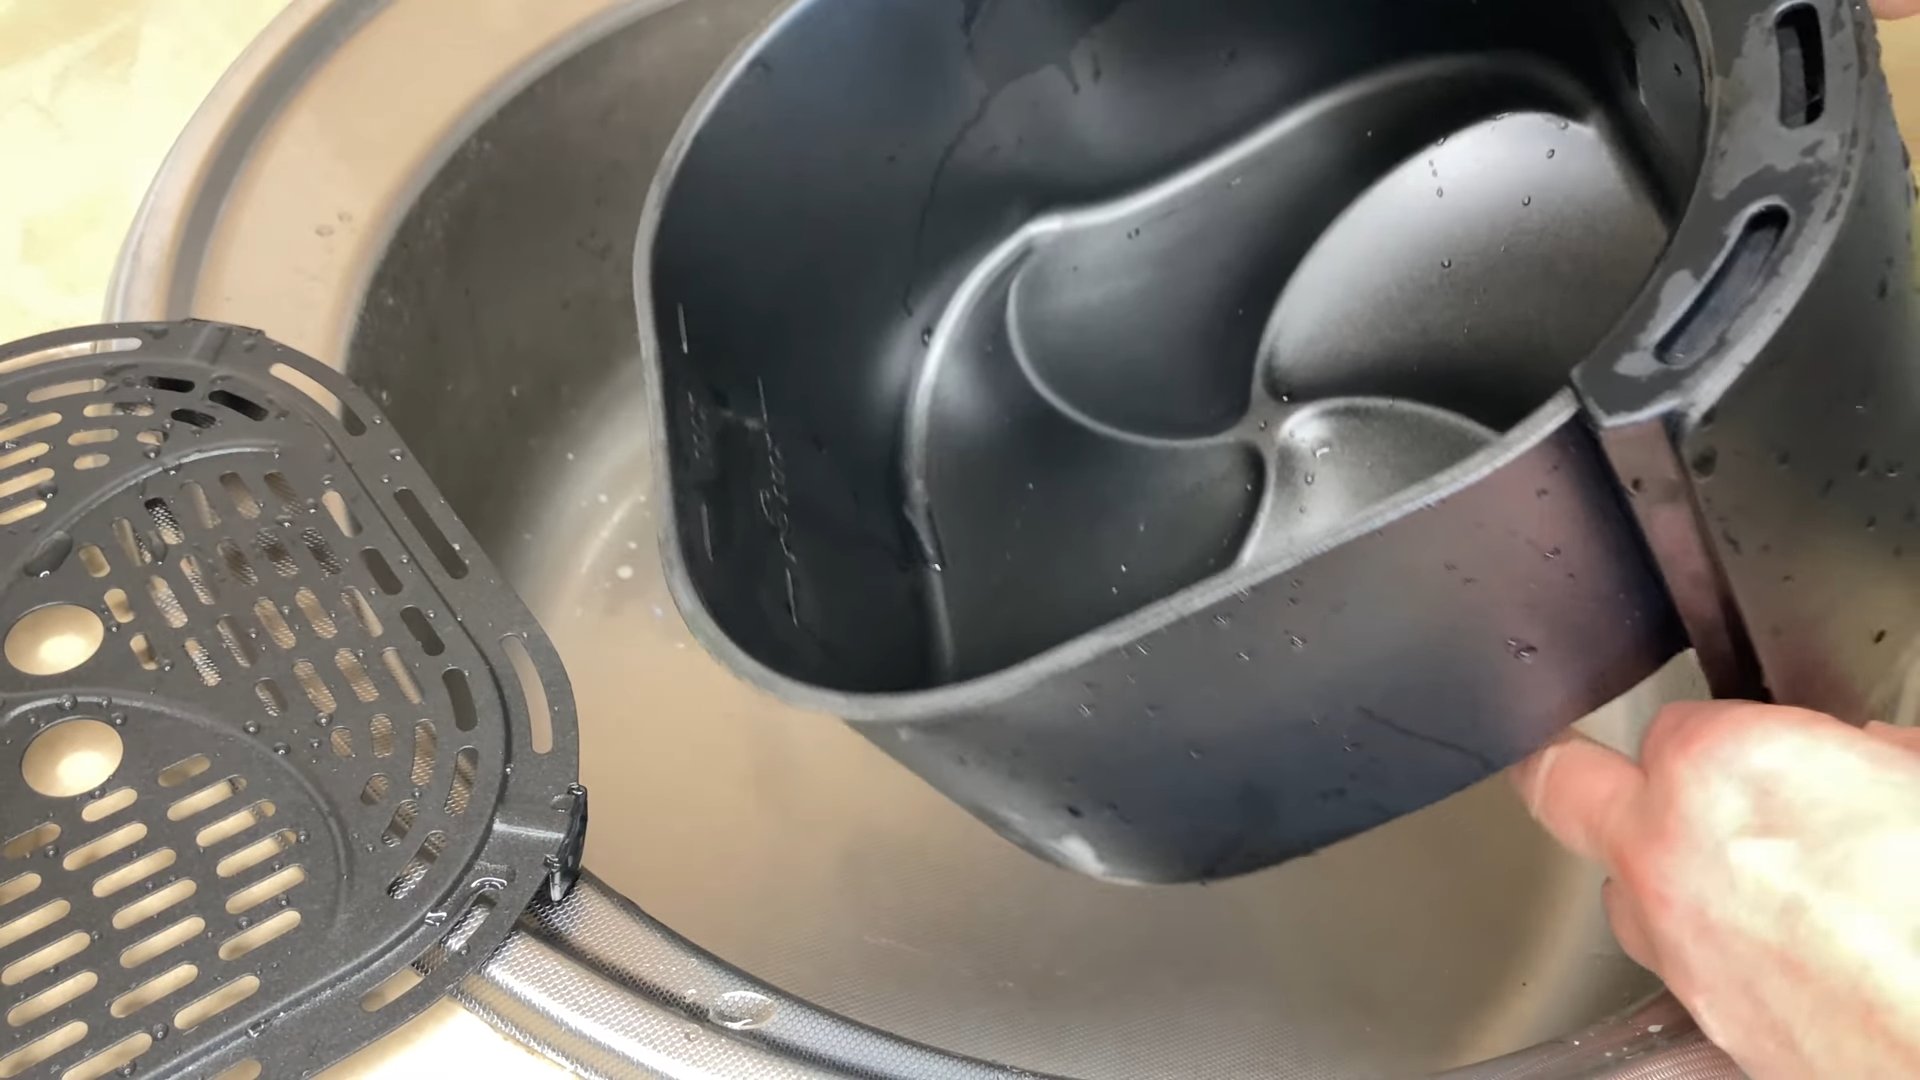
Think beyond just your pots and pans. This mixture works wonders on:
* **Burnt food residue in baking dishes:** Say goodbye to hours of soaking and scrubbing.
* **Grime on stovetops:** Easily remove grease splatters and burnt-on food.
* **Dirty grout:** Restore the shine to your tiled surfaces.
* **Outdoor furniture:** Remove mildew and dirt buildup.
* **BBQ grills:** A natural and effective way to clean grates.
For variations, consider adding a few drops of essential oils like lemon or tea tree for an extra boost of cleaning power and a pleasant scent. You can also adjust the ratio of coffee grounds to dish soap depending on the severity of the mess. For tougher stains, use a higher concentration of coffee grounds. For more delicate surfaces, dilute the mixture with a bit of water.
Don’t just take our word for it. We wholeheartedly encourage you to try this **coffee and dish soap mixture** for yourself. We’re confident that you’ll be amazed by the results. It’s a simple, effective, and environmentally friendly way to keep your home sparkling clean.
Once you’ve given it a try, we’d love to hear about your experience! Share your before-and-after photos, tips, and variations in the comments below. Let’s build a community of savvy cleaners who are passionate about finding natural and effective solutions. Happy cleaning!
Frequently Asked Questions
Is this coffee and dish soap mixture safe to use on all surfaces?
While the coffee and dish soap mixture is generally safe for most surfaces, it’s always a good idea to test it in an inconspicuous area first, especially on delicate materials like painted surfaces, certain types of plastic, or natural stone. The abrasiveness of the coffee grounds could potentially scratch some surfaces, so proceed with caution. For particularly sensitive items, dilute the mixture with water or use a softer sponge or cloth. Avoid using it on surfaces that are prone to staining, such as unsealed grout or porous materials.
What type of coffee grounds should I use?
You can use any type of coffee grounds, whether they are fresh or used. Used coffee grounds are ideal because you’re repurposing them, reducing waste. However, make sure the used grounds are relatively clean and free of any large debris. If you’re using fresh grounds, you might want to use a coarser grind for better scrubbing power. The key is to have a slightly abrasive texture to help lift dirt and grime.
What type of dish soap is best to use?
Any standard dish soap will work well in this mixture. However, for a more eco-friendly approach, consider using a natural or plant-based dish soap. These soaps are often free of harsh chemicals and are gentler on the environment. Avoid using dish soaps that contain bleach or other strong chemicals, as they may react negatively with the coffee grounds or damage certain surfaces.
How do I store the coffee and dish soap mixture?
You can store the coffee and dish soap mixture in an airtight container in a cool, dry place. It’s best to use it within a week or two, as the coffee grounds may start to mold over time. If you notice any signs of mold or a foul odor, discard the mixture. You can also make smaller batches as needed to ensure freshness. Label the container clearly to avoid any confusion.
Can I use this mixture to clean my hands?
Yes, you can use this mixture to clean your hands, especially after working in the garden or doing other messy tasks. The coffee grounds will help to exfoliate your skin and remove dirt and grime, while the dish soap will cleanse and degrease. However, be mindful that the coffee grounds can be slightly abrasive, so avoid using it on sensitive or irritated skin. Rinse your hands thoroughly with water after using the mixture and apply a moisturizer to prevent dryness.
Will the coffee grounds stain my surfaces?
In most cases, the coffee grounds will not stain your surfaces, especially if you rinse them thoroughly after cleaning. However, it’s always a good idea to test the mixture in an inconspicuous area first, particularly on light-colored or porous surfaces. If you’re concerned about staining, you can dilute the mixture with more water or use a lighter-colored coffee roast. Avoid leaving the mixture on surfaces for extended periods of time.
How do I dispose of the coffee and dish soap mixture after use?
You can dispose of the coffee and dish soap mixture down the drain, but be sure to flush it with plenty of water to prevent clogging. Alternatively, you can compost the mixture, as coffee grounds are a great addition to compost piles. Avoid disposing of large amounts of the mixture down the drain, as it could potentially cause plumbing issues.
Can I add other ingredients to the mixture?
Yes, you can experiment with adding other ingredients to the mixture to enhance its cleaning power or scent. Some popular additions include:
* **Essential oils:** Add a few drops of lemon, tea tree, or lavender essential oil for a pleasant scent and added cleaning benefits.
* **Vinegar:** Add a splash of white vinegar for extra degreasing power and to help remove hard water stains.
* **Baking soda:** Add a tablespoon of baking soda for extra scrubbing power and to help neutralize odors.
Remember to test any new additions in an inconspicuous area first to ensure they don’t damage the surface you’re cleaning.
Is this mixture safe for septic systems?
While small amounts of coffee grounds are generally safe for septic systems, it’s best to avoid disposing of large quantities down the drain. Over time, the accumulation of coffee grounds can potentially clog the system. If you have a septic system, consider composting the coffee grounds instead of disposing of them down the drain.
How often can I use this coffee and dish soap mixture?
You can use this coffee and dish soap mixture as often as needed to clean your home. However, it’s important to monitor the surfaces you’re cleaning and adjust the frequency of use accordingly. If you notice any signs of damage or wear, reduce the frequency or dilute the mixture with more water. Regular cleaning with this mixture can help prevent the buildup of dirt and grime, making your cleaning tasks easier in the long run.
Leave a Comment