
Cold weather radish growing doesn’t have to be a gamble! Have you ever dreamed of enjoying crisp, peppery radishes straight from your garden, even when Jack Frost is nipping at your nose? I know I have! It’s incredibly satisfying to harvest fresh produce when everyone else is bundled up indoors, waiting for spring.
Radishes, surprisingly, have a rich history, dating back to ancient Egypt and Greece, where they were valued not only for their taste but also for their medicinal properties. Imagine, those ancient gardeners knew something we’re just rediscovering – the resilience of this humble root vegetable!
But let’s be honest, successfully growing radishes in cold weather can feel like a bit of a mystery. That’s why I’m sharing my tried-and-true DIY tricks and hacks to help you extend your growing season and enjoy a bountiful harvest of these delightful veggies, even when the temperatures drop. This article will give you the confidence to start your own cold weather radish growing project, ensuring a steady supply of crunchy goodness for your salads, snacks, and more. Forget those bland, store-bought radishes – let’s get growing!
Growing Radishes in Cold Weather: A DIY Guide to a Bountiful Harvest
Hey there, fellow gardening enthusiasts! I’m so excited to share my secrets for growing radishes even when the weather turns chilly. Radishes are fantastic because they’re quick to mature and can tolerate cooler temperatures, making them perfect for extending your growing season. Let’s dive into how you can enjoy fresh, crisp radishes even when Jack Frost is nipping at your nose!
Choosing the Right Radish Variety
First things first, not all radishes are created equal, especially when it comes to cold weather tolerance. Here’s what I look for:
* Consider Maturity Time: Opt for varieties that mature quickly (20-30 days). This ensures you can harvest them before a hard freeze sets in.
* Look for Cold-Hardy Types: Some varieties are specifically bred for cooler climates.
* My Top Recommendations: ‘Cherry Belle’ (a classic!), ‘French Breakfast’ (mild and elongated), and ‘Black Spanish’ (a winter radish with a peppery kick) are my go-to choices. ‘Sparkler’ is another great option.
Preparing Your Garden Bed
Radishes aren’t too fussy, but a little preparation goes a long way.
* Sunlight is Key: Choose a spot that gets at least 6 hours of sunlight per day, even in the colder months.
* Soil Matters: Radishes prefer loose, well-drained soil. Amend heavy clay soil with compost or well-rotted manure to improve drainage.
* pH Balance: Aim for a soil pH between 6.0 and 7.0. A soil test kit can help you determine your soil’s pH.
* Clear the Area: Remove any rocks, weeds, or debris that could hinder root growth.
Planting Your Radish Seeds
Now for the fun part – planting!
* Timing is Everything: Start planting radishes 4-6 weeks before the first expected frost in your area. You can also do succession planting (planting a small batch every week or two) for a continuous harvest.
* Depth and Spacing: Plant seeds about ½ inch deep and 1 inch apart. Rows should be spaced about 6 inches apart.
* Water Gently: After planting, water the soil gently to avoid disturbing the seeds.
* Mark Your Rows: Label your rows with the radish variety and planting date. This helps you keep track of your progress.
Protecting Your Radishes from the Cold
This is where the “cold weather” part really comes into play. We need to give our little radish seedlings a fighting chance against the elements.
* Row Covers: These are lightweight fabrics that you can drape over your plants to protect them from frost, wind, and pests. I swear by them!
* Cold Frames: A cold frame is a simple structure that provides a sheltered environment for plants. You can build one yourself or purchase a ready-made one.
* Mulch: Apply a layer of mulch (straw, hay, or shredded leaves) around your radish plants to insulate the soil and retain moisture.
* Water Wisely: Water your radishes in the morning so the foliage has time to dry before nightfall. Avoid overwatering, as this can lead to fungal diseases.
Step-by-Step Planting and Protection Guide
Let’s break it down into easy-to-follow steps:
1. Prepare the Soil: Amend your garden bed with compost or well-rotted manure. Rake the soil smooth and remove any rocks or debris.
2. Create Furrows: Use a trowel or your finger to create shallow furrows about ½ inch deep and 6 inches apart.
3. Sow the Seeds: Sprinkle radish seeds into the furrows, spacing them about 1 inch apart.
4. Cover the Seeds: Gently cover the seeds with soil and pat it down lightly.
5. Water Thoroughly: Water the soil gently but thoroughly.
6. Apply Mulch: Spread a layer of mulch around the radish plants to insulate the soil.
7. Install Row Covers or Cold Frame: If you’re using row covers, drape them over the plants and secure them with stakes or weights. If you’re using a cold frame, place it over the planting area.
8. Monitor and Water: Check the soil moisture regularly and water as needed. Make sure the row covers or cold frame are properly ventilated to prevent overheating.
Caring for Your Radishes
Even with protection, your radishes will need some TLC.
* Thinning: Once the seedlings emerge, thin them to about 2 inches apart. This gives them enough room to grow. Don’t just toss the thinnings! You can eat the tiny radish greens in salads.
* Weeding: Keep the garden bed free of weeds, which can compete with radishes for nutrients and water.
* Watering: Radishes need consistent moisture to grow quickly and develop crisp roots. Water deeply whenever the top inch of soil feels dry.
* Fertilizing: Radishes don’t need a lot of fertilizer, but a light feeding of a balanced fertilizer (10-10-10) can help them grow. Follow the instructions on the fertilizer package.
Dealing with Pests and Diseases
Thankfully, radishes are relatively pest-free, but here are a few things to watch out for:
* Flea Beetles: These tiny beetles can chew holes in radish leaves. Row covers are an excellent way to prevent flea beetle damage. You can also use insecticidal soap if necessary.
* Root Maggots: These larvae can tunnel into radish roots, causing them to rot. Crop rotation and row covers can help prevent root maggot infestations.
* Fungal Diseases: Overwatering and poor ventilation can lead to fungal diseases. Make sure to water your radishes in the morning and provide adequate ventilation.
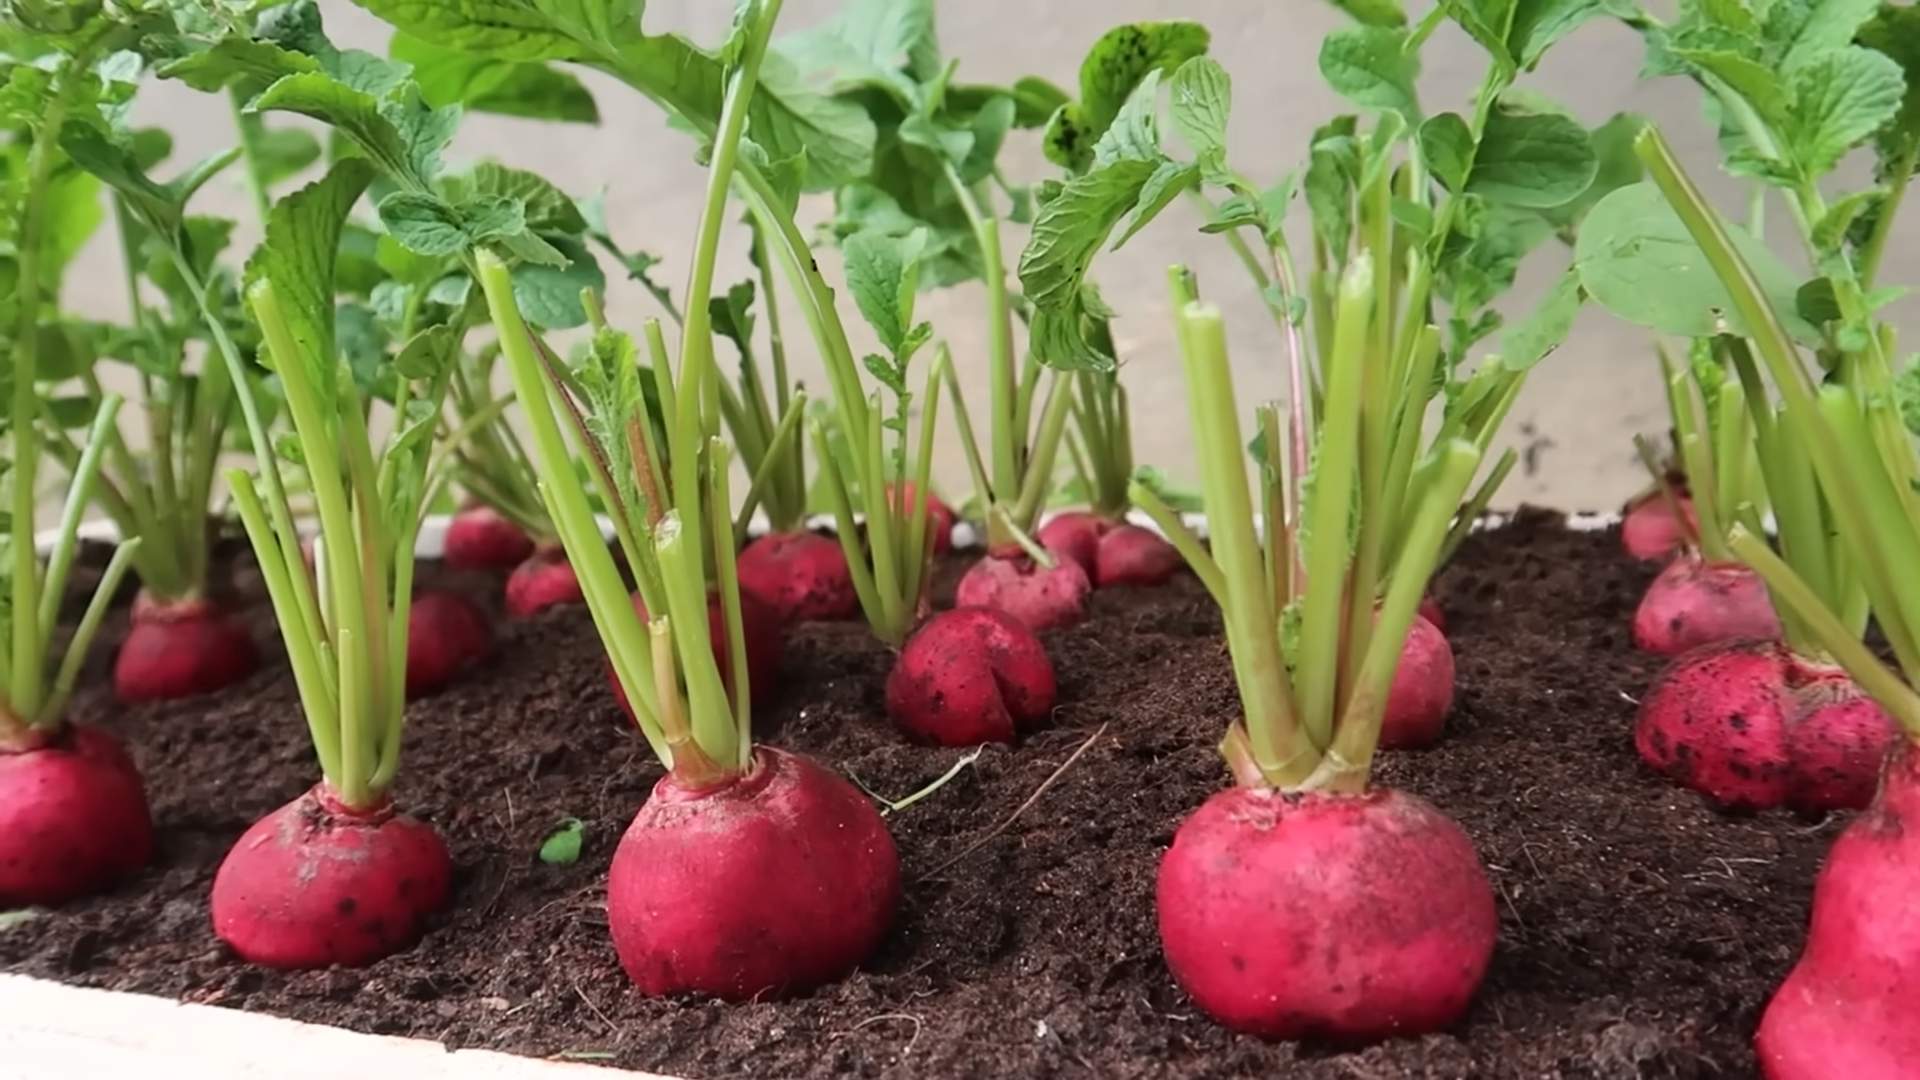
Harvesting Your Radishes
The moment we’ve all been waiting for!
* Timing is Crucial: Radishes are ready to harvest when they reach the size specified on the seed packet. Don’t let them get too big, or they’ll become woody and bitter.
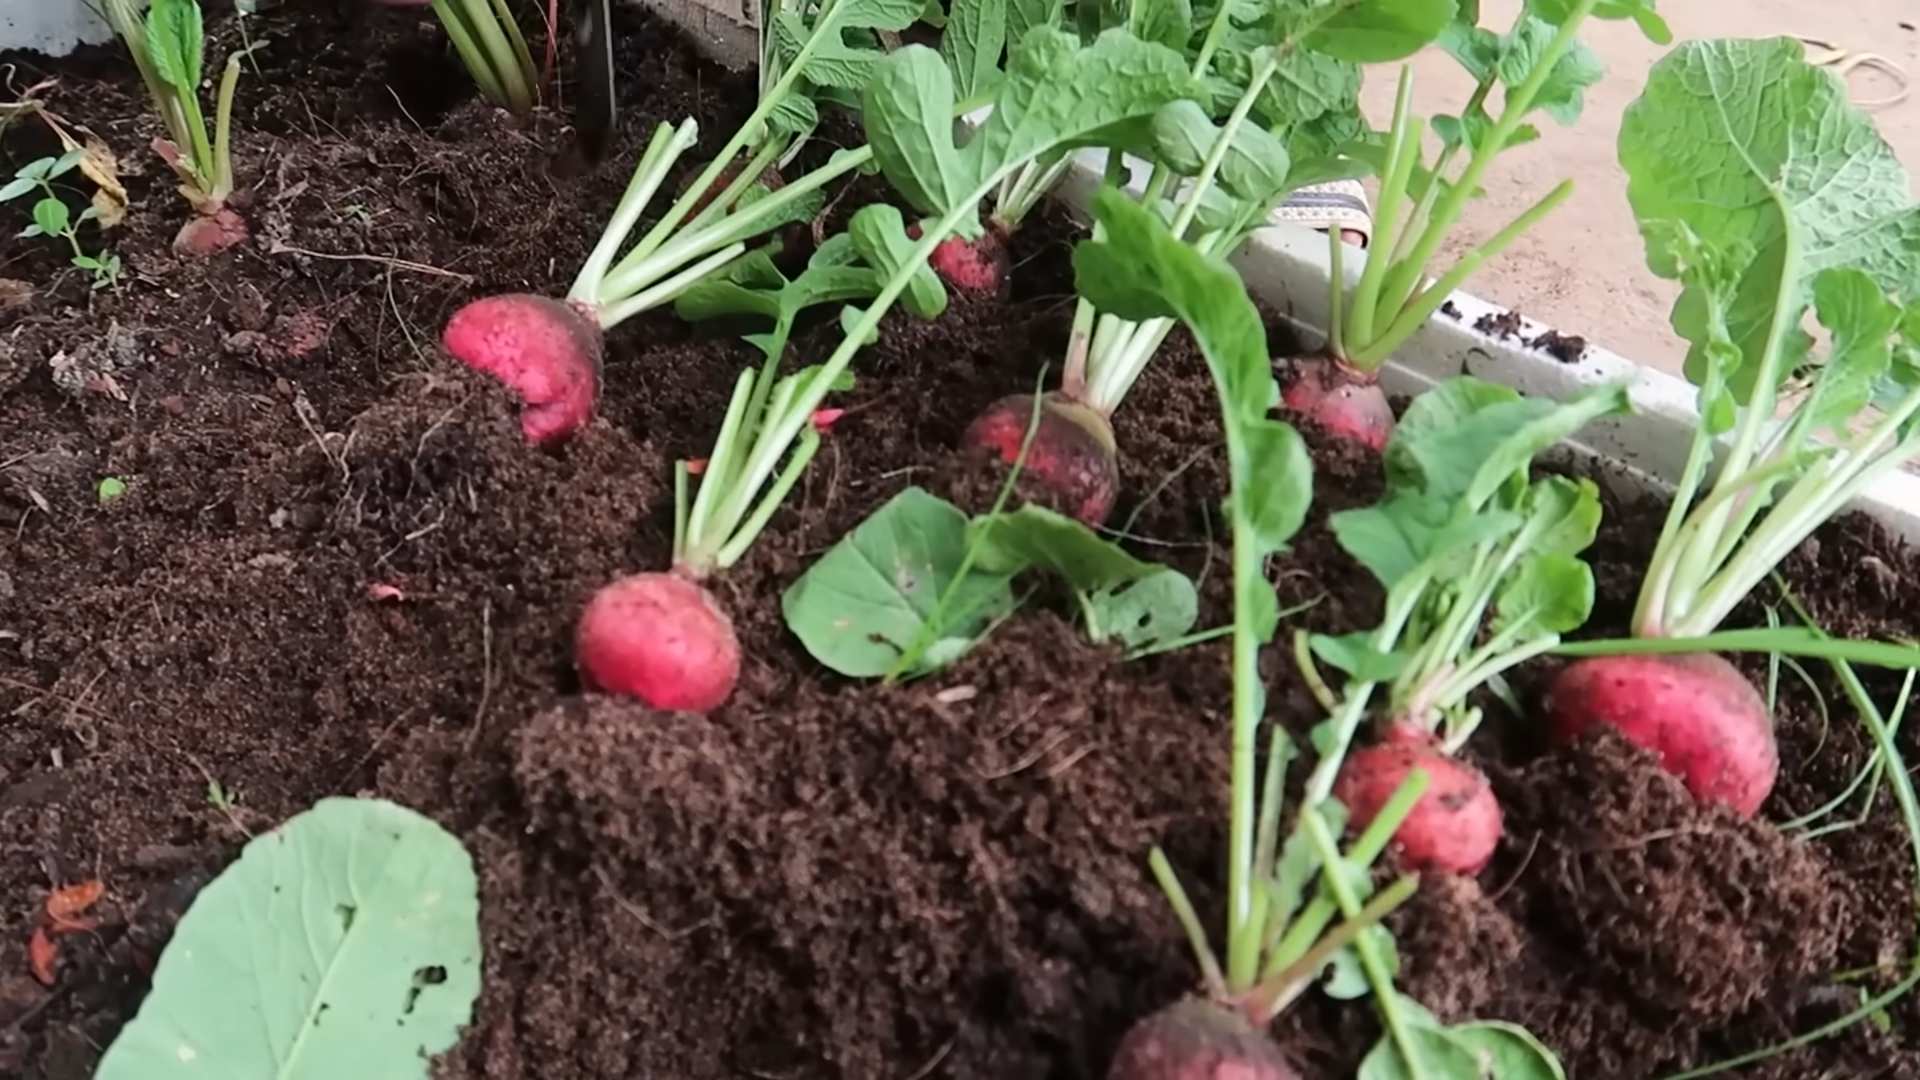
* Pull Gently: Gently pull the radishes from the soil. If the soil is dry, water it beforehand to make harvesting easier.
* Wash and Store: Wash the radishes thoroughly and remove the tops. Store them in a plastic bag in the refrigerator for up to a week.
Troubleshooting Common Problems
Even with the best planning, things can sometimes go wrong. Here are some common problems and how to fix them:
* Radishes are too small: This could be due to overcrowding, lack of sunlight, or poor soil. Thin the plants, move them to a sunnier location, and amend the soil with compost.
* Radishes are woody or bitter: This is usually caused by letting them grow too large or by inconsistent watering. Harvest them when they’re the right size and water them regularly.
* Radishes are cracked: This can be caused by inconsistent watering. Water deeply and regularly, especially during dry spells.
* Radishes are not forming bulbs: This could be due to poor soil, lack of sunlight, or planting too late in the season. Amend the soil, move the plants to a sunnier location, and plant earlier next time.
Extending Your Radish Harvest
Want to keep those radishes coming? Here’s how:
* Succession Planting: As I mentioned earlier, plant a small batch of radishes every week or two for a continuous harvest.
* Cold Frames and Greenhouses: If you have a cold frame or greenhouse, you can extend your radish growing season even further.
* Winter Radishes: Consider planting winter radish varieties like ‘Black Spanish’ or ‘China Rose’. These varieties take longer to mature but can be harvested in the late fall or early winter.
My Favorite Radish Recipes
Now that you’ve got a bounty of radishes, what to do with them? Here are a few of my favorite ways to enjoy them:
* Radish and Butter Sandwiches: A classic! Thinly slice radishes and spread them on buttered bread with a sprinkle of sea salt.
* Radish Salad: Combine sliced radishes with cucumbers, tomatoes, and a vinaigrette dressing.
* Roasted Radishes: Toss radishes with olive oil, salt, and pepper and roast them in the oven until tender.
* Radish Greens Pesto: Don’t throw away the radish greens! Use them to make a delicious pesto.
* Pickled Radishes: A great way to preserve radishes and add a tangy flavor to your meals.
Final Thoughts
Growing radishes in cold weather is a rewarding experience. With a little planning and effort, you can enjoy fresh, crisp radishes even when the temperatures drop.
Conclusion
So, there you have it! Mastering the art of cold weather radish growing is not only achievable but also incredibly rewarding. We’ve explored the simple yet effective DIY trick of creating a mini-greenhouse using readily available materials, a method that significantly extends your radish growing season and protects your precious crops from the harsh elements.
Why is this DIY trick a must-try? Because it empowers you to enjoy fresh, crisp radishes long after your neighbors have given up on their gardens. It’s a cost-effective solution that minimizes the risk of frost damage, bolting, and pest infestations, all common challenges faced when growing radishes in colder climates. Imagine the satisfaction of harvesting vibrant, flavorful radishes in the dead of winter, adding a burst of freshness to your meals when you need it most.
But the beauty of this DIY approach lies in its adaptability. Feel free to experiment with different materials for your mini-greenhouse. Instead of plastic sheeting, consider using old windows or even repurposed shower curtains. The key is to create a barrier that traps heat and shields your radishes from the wind and snow.
For those living in particularly harsh climates, you might want to consider adding a layer of insulation to your mini-greenhouse. Straw bales or even old blankets can provide extra protection against freezing temperatures. You can also experiment with different radish varieties known for their cold hardiness, such as ‘French Breakfast’ or ‘Cherry Belle’. These varieties are specifically bred to withstand colder conditions and are more likely to thrive in your DIY mini-greenhouse.
Don’t be afraid to get creative and tailor this DIY trick to your specific needs and resources. The most important thing is to provide your radishes with a consistent environment that protects them from the elements and allows them to flourish.
We are confident that this DIY trick will revolutionize your cold weather radish growing experience. It’s a simple, effective, and affordable way to extend your harvest and enjoy fresh, delicious radishes year-round.
Now, we want to hear from you! Give this DIY trick a try and share your experiences with us. Did it work for you? What challenges did you encounter? What variations did you try? Your feedback is invaluable and will help us refine this technique and make it even more accessible to other gardeners. Share your photos, tips, and stories in the comments section below. Let’s build a community of cold weather radish growing enthusiasts and help each other enjoy the fruits (or rather, the roots) of our labor!
Frequently Asked Questions (FAQ)
What are the best radish varieties for cold weather growing?
Choosing the right radish variety is crucial for success in colder climates. Some excellent options include ‘French Breakfast’, ‘Cherry Belle’, ‘Black Spanish’, and ‘Winter Radish’. These varieties are known for their cold hardiness and ability to mature quickly, even in less-than-ideal conditions. ‘French Breakfast’ and ‘Cherry Belle’ are particularly popular for their mild flavor and quick growth, while ‘Black Spanish’ and ‘Winter Radish’ are larger, spicier varieties that can be stored for longer periods. Always check the seed packet for specific recommendations and maturity dates for your region.
How do I prevent my radishes from bolting in cold weather?
Bolting, or premature flowering, is a common problem with radishes, especially when they are stressed by temperature fluctuations. To prevent bolting in cold weather, ensure your radishes receive consistent moisture and are protected from extreme temperature swings. The DIY mini-greenhouse helps with this by providing a more stable environment. Also, harvest your radishes as soon as they reach maturity. Overripe radishes are more likely to bolt. Consider using shade cloth during warmer days to prevent overheating within the mini-greenhouse.
How often should I water my radishes in cold weather?
Watering frequency depends on the specific conditions in your area. Generally, radishes need consistent moisture to thrive, but overwatering can lead to rot. Check the soil moisture regularly by sticking your finger about an inch into the soil. If it feels dry, it’s time to water. Water deeply but less frequently, allowing the soil to dry out slightly between waterings. In colder weather, the evaporation rate is lower, so you may need to water less often than you would during the summer months.
What type of soil is best for growing radishes in cold weather?
Radishes prefer well-drained, loose soil that is rich in organic matter. Amend your soil with compost or well-rotted manure before planting to improve drainage and fertility. Avoid heavy clay soils, as they can become waterlogged and hinder root development. A slightly acidic to neutral soil pH (around 6.0 to 7.0) is ideal. You can test your soil pH using a home testing kit or by sending a sample to your local agricultural extension office.
How much sunlight do radishes need in cold weather?
Radishes need at least 6 hours of sunlight per day to thrive. In colder weather, sunlight can be limited, so choose a location for your mini-greenhouse that receives maximum sun exposure. If sunlight is still insufficient, consider using grow lights to supplement natural light. Position the grow lights a few inches above the radish seedlings and provide them with 12-14 hours of light per day.
How do I protect my radishes from pests and diseases in cold weather?
The DIY mini-greenhouse provides a physical barrier against many common radish pests, such as flea beetles and root maggots. However, it’s still important to monitor your plants regularly for signs of infestation or disease. Use organic pest control methods, such as insecticidal soap or neem oil, to control pests. Ensure good air circulation within the mini-greenhouse to prevent fungal diseases. Remove any diseased or damaged plants promptly to prevent the spread of disease.
Can I grow other vegetables in the mini-greenhouse with my radishes?
Yes, you can grow other cool-season vegetables alongside your radishes in the mini-greenhouse. Good companion plants for radishes include lettuce, spinach, and other leafy greens. These vegetables have similar growing requirements and can benefit from the protection provided by the mini-greenhouse. Avoid planting radishes with members of the brassica family (such as cabbage and broccoli), as they can compete for nutrients and attract similar pests.
How long does it take for radishes to mature in cold weather?
The maturity time for radishes varies depending on the variety and growing conditions. Generally, radishes mature in 20-30 days. However, in colder weather, the growth rate may be slower. Monitor your radishes closely and harvest them as soon as they reach the desired size. Overripe radishes can become woody and bitter.
What if my mini-greenhouse gets too hot on sunny days?
Ventilation is crucial to prevent overheating within the mini-greenhouse on sunny days. Open the sides or top of the mini-greenhouse to allow for air circulation. You can also use shade cloth to reduce the amount of sunlight entering the mini-greenhouse. Monitor the temperature inside the mini-greenhouse regularly and adjust the ventilation as needed.
How do I store radishes after harvesting them in cold weather?
To store radishes after harvesting, remove the greens and wash the roots thoroughly. Store the radishes in a plastic bag in the refrigerator. They should last for several weeks. You can also store radishes in a root cellar or a cool, dark place.


Leave a Comment