
Cowpea garden at home – sounds like a dream, right? Imagine stepping outside your door and harvesting fresh, delicious cowpeas whenever you want! Forget those bland, store-bought veggies; with a little know-how, you can cultivate your own thriving cowpea patch, bursting with flavor and nutrients. But where do you even begin? Don’t worry, I’m here to guide you through some simple yet effective DIY tricks and hacks that will transform your backyard (or even your balcony!) into a cowpea paradise.
Cowpeas, also known as black-eyed peas, have a rich history, dating back thousands of years. Originating in Africa, they’ve become a staple in cuisines around the world, particularly in the Southern United States. They’re not just delicious; they’re also incredibly nutritious, packed with protein, fiber, and essential vitamins.
Why should you bother with a DIY cowpea garden? Well, for starters, you’ll have access to the freshest, most flavorful cowpeas imaginable. Plus, gardening is a fantastic way to relieve stress, connect with nature, and even save money on groceries. In this article, I’ll share my favorite DIY techniques for creating a thriving cowpea garden at home, even if you’re a complete beginner. Get ready to get your hands dirty and enjoy the satisfaction of growing your own food!
Bohnengarten für Zuhause: Dein eigener Augenbohnen-Anbau
Hey Gartenfreunde! Habt ihr Lust, eure eigenen Augenbohnen anzubauen? Es ist einfacher, als ihr denkt, und das Ergebnis ist super lecker und gesund. Ich zeige euch, wie ihr das ganz einfach zu Hause hinbekommt, egal ob ihr einen großen Garten oder nur einen kleinen Balkon habt. Los geht’s!
Was du für deinen Augenbohnen-Garten brauchst
Bevor wir loslegen, hier eine Liste mit allem, was du brauchst:
* Augenbohnen-Samen: Am besten Bio-Qualität, damit du sicher sein kannst, dass sie nicht behandelt wurden. Du findest sie in Gartencentern oder online.
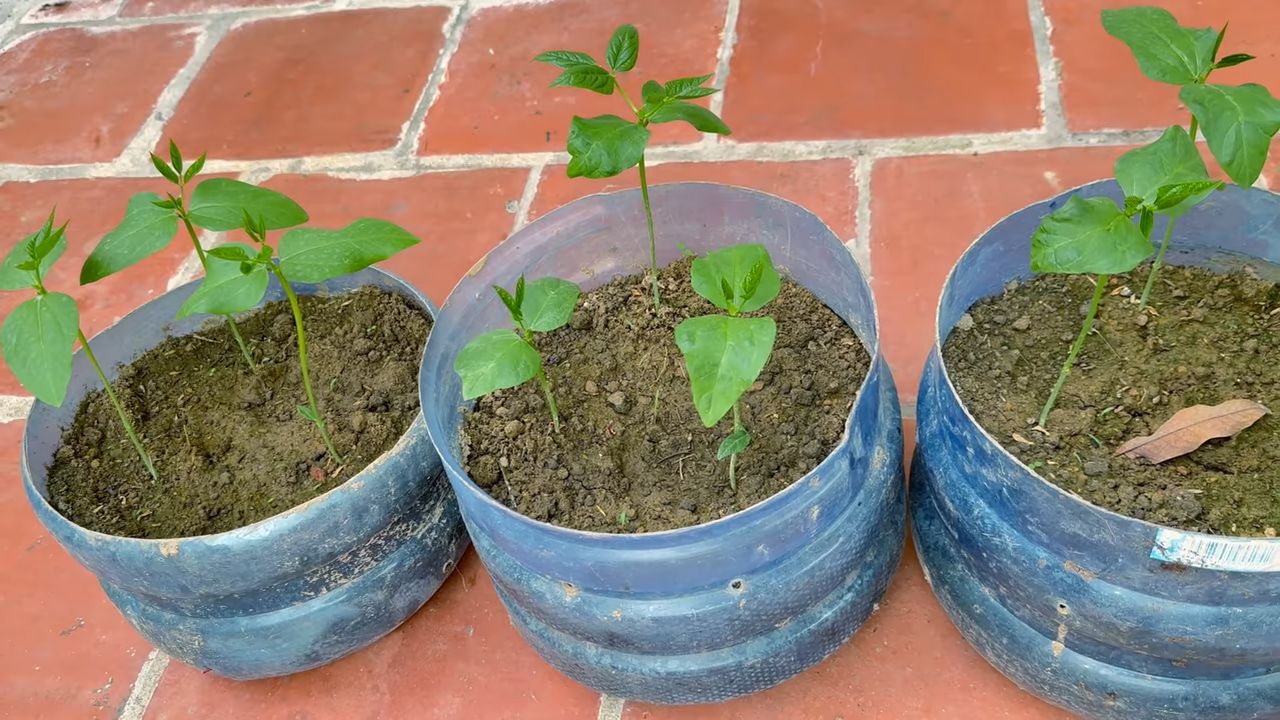
* Pflanzgefäße: Töpfe, Kübel oder ein Hochbeet – alles ist möglich, solange es ausreichend Platz für die Wurzeln bietet.
* Gute Erde: Eine Mischung aus Gartenerde, Kompost und Sand ist ideal. Die Erde sollte locker und gut durchlässig sein.
* Gießkanne oder Schlauch: Zum regelmäßigen Gießen.
* Rankhilfe (optional): Augenbohnen können klettern, daher ist eine Rankhilfe wie ein Spalier oder ein Zaun hilfreich, besonders wenn du wenig Platz hast.
* Gartengeräte: Eine kleine Schaufel, eine Harke und eventuell eine Pflanzkelle.
* Dünger (optional): Ein organischer Dünger kann das Wachstum fördern.
Die Vorbereitung: Der Schlüssel zum Erfolg
Die richtige Vorbereitung ist das A und O für eine reiche Ernte. Hier sind die Schritte, die du beachten solltest:
1. Den richtigen Standort wählen: Augenbohnen lieben die Sonne! Such dir einen Platz aus, der mindestens sechs Stunden Sonne am Tag bekommt. Ein warmer, windgeschützter Ort ist ideal.
2. Die Erde vorbereiten: Fülle deine Pflanzgefäße mit der vorbereiteten Erde. Achte darauf, dass die Erde locker ist und keine Klumpen hat. Du kannst die Erde auch mit Kompost anreichern, um sie noch nährstoffreicher zu machen.
3. Die Samen vorbereiten (optional): Du kannst die Samen vor dem Pflanzen für ein paar Stunden in lauwarmem Wasser einweichen. Das beschleunigt die Keimung. Aber keine Sorge, es funktioniert auch ohne.
Aussaat: So kommen die Bohnen in die Erde
Jetzt kommt der spannende Teil: das Pflanzen der Samen!
1. Die Samen säen: Mach mit dem Finger oder einem kleinen Stäbchen kleine Löcher in die Erde (ca. 2-3 cm tief). Der Abstand zwischen den Löchern sollte etwa 5-10 cm betragen. Lege in jedes Loch 2-3 Samen. Das erhöht die Wahrscheinlichkeit, dass mindestens eine Bohne keimt.
2. Die Löcher schließen: Bedecke die Samen vorsichtig mit Erde und drücke sie leicht an.
3. Gießen: Gieße die Erde vorsichtig an, damit die Samen nicht weggespült werden. Die Erde sollte feucht, aber nicht nass sein.
Pflege: Damit deine Augenbohnen prächtig gedeihen
Die Pflege ist entscheidend, damit deine Augenbohnen gesund wachsen und viele leckere Schoten produzieren.
1. Regelmäßiges Gießen: Augenbohnen brauchen regelmäßig Wasser, besonders während der Blütezeit und der Schotenbildung. Achte darauf, dass die Erde immer leicht feucht ist, aber vermeide Staunässe.
2. Unkraut jäten: Halte das Unkraut in Schach, damit deine Augenbohnen genügend Nährstoffe und Platz zum Wachsen haben.
3. Düngen (optional): Wenn du möchtest, kannst du deine Augenbohnen alle paar Wochen mit einem organischen Dünger düngen. Das fördert das Wachstum und die Ernte.
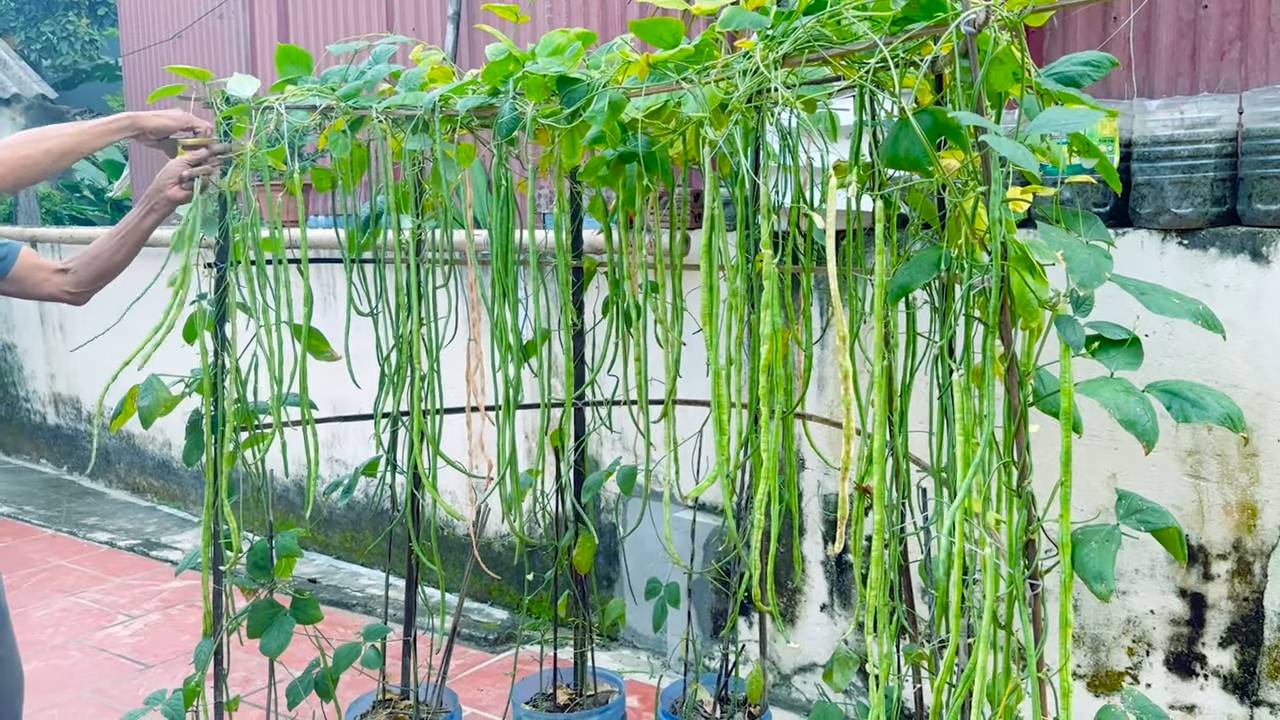
4. Rankhilfe anbringen: Wenn deine Augenbohnen anfangen zu klettern, brauchen sie eine Rankhilfe. Du kannst ein Spalier, einen Zaun oder einfach ein paar Stäbe verwenden.
5. Schädlinge und Krankheiten beobachten: Achte auf Anzeichen von Schädlingen oder Krankheiten. Blattläuse, Schnecken oder Pilzbefall können deine Pflanzen schädigen. Bei Bedarf kannst du natürliche Schädlingsbekämpfungsmittel einsetzen.
Ernte: Der Lohn deiner Mühe
Nach etwa 60-90 Tagen kannst du deine ersten Augenbohnen ernten!
1. Den richtigen Zeitpunkt erkennen: Die Schoten sind reif, wenn sie prall gefüllt sind und sich leicht vom Stiel lösen lassen. Die Bohnen im Inneren sollten gut entwickelt sein, aber noch nicht zu hart.
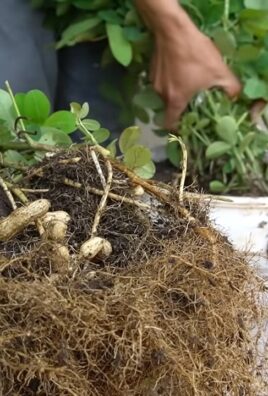
2. Die Ernte: Pflücke die Schoten vorsichtig ab, ohne die Pflanze zu beschädigen.
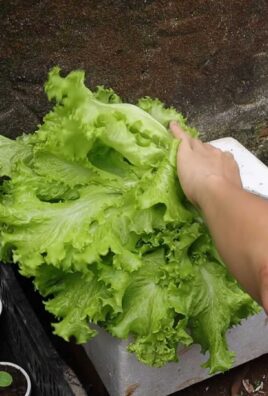
3. Die Bohnen verarbeiten: Du kannst die Augenbohnen frisch verwenden oder sie trocknen, um sie später zu verwenden. Frische Augenbohnen sind köstlich in Salaten, Suppen oder als Beilage. Getrocknete Augenbohnen müssen vor dem Kochen eingeweicht werden.
Extra-Tipps für eine reiche Ernte
Hier sind noch ein paar zusätzliche Tipps, die dir helfen können, eine besonders reiche Ernte zu erzielen:
* Fruchtfolge beachten: Pflanze Augenbohnen nicht jedes Jahr am selben Standort. Wechsle die Pflanzenarten ab, um den Boden gesund zu halten und Krankheiten vorzubeugen.
* Mulchen: Bedecke die Erde um deine Augenbohnen mit einer Schicht Mulch (z.B. Stroh oder Rasenschnitt). Das hält die Feuchtigkeit im Boden, unterdrückt Unkraut und schützt die Wurzeln vor extremen Temperaturen.
* Regelmäßig ernten: Je öfter du erntest, desto mehr Schoten werden deine Augenbohnen produzieren.
Häufige Probleme und Lösungen
Auch beim Anbau von Augenbohnen können Probleme auftreten. Hier sind einige der häufigsten Probleme und wie du sie lösen kannst:
* Schlechte Keimung: Wenn die Samen nicht keimen, kann das verschiedene Ursachen haben. Die Samen könnten zu alt sein, die Erde zu trocken oder zu kalt. Achte darauf, frische Samen zu verwenden, die Erde feucht zu halten und die richtige Temperatur zu gewährleisten.
* Blattläuse: Blattläuse können deine Pflanzen schwächen. Du kannst sie mit einem Wasserstrahl abspritzen oder natürliche Schädlingsbekämpfungsmittel wie Neemöl verwenden.
* Schnecken: Schnecken lieben Augenbohnen! Du kannst Schneckenkorn verwenden oder natürliche Barrieren wie Kaffeesatz oder Eierschalen um deine Pflanzen legen.
* Pilzbefall: Bei feuchtem Wetter kann es zu Pilzbefall kommen. Achte auf eine gute Belüftung und vermeide Staunässe. Bei Bedarf kannst du ein Fungizid verwenden.
Augenbohnen in verschiedenen Klimazonen
Augenbohnen sind relativ anpassungsfähig, aber sie bevorzugen warme Klimazonen. In kälteren Regionen solltest du sie erst nach den letzten Frösten aussäen oder sie in einem Gewächshaus vorziehen. In sehr heißen Regionen solltest du darauf achten, dass die Pflanzen ausreichend Schatten bekommen, besonders während der heißesten Stunden des Tages.
Augenbohnen im Topf: So klappt’s auch auf dem Balkon
Kein Garten? Kein Problem! Augenbohnen lassen sich auch wunderbar im Topf oder Kübel auf dem Balkon anbauen. Achte darauf, dass die Töpfe ausreichend groß sind (mindestens 20 Liter Fassungsvermögen) und über Abzugslöcher verfügen. Verwende eine gute Erde und dünge regelmäßig. Eine Rankhilfe ist auch im Topf empfehlenswert.
Warum du deine eigenen Augenbohnen anbauen solltest
Es gibt viele gute Gründe, deine eigenen Augenbohnen anzubauen:
* Frische und Geschmack: Selbst angebaute Augenbohnen schmecken einfach besser als gekaufte.
* Gesundheit: Du weißt genau, was in deinen Bohnen steckt und kannst auf Pestizide verzichten.
* Nachhaltigkeit: Du reduzierst Transportwege und unterstützt eine nachhaltige Landwirtschaft.
* Entspannung: Gartenarbeit ist eine tolle Möglichkeit, um Stress abzubauen und sich mit der Natur zu verbinden.
* Stolz: Es ist ein tolles Gefühl, seine eigenen Lebensmittel anzubauen und zu ernten.
Also, worauf wartest du noch? Leg los und pflanze deine eigenen Augenbohnen! Ich bin sicher, du wirst begeistert sein. Viel Erfolg und eine reiche Ernte!
Conclusion
So, there you have it! Cultivating your own cowpea garden at home is not just a rewarding experience; it’s a pathway to fresher, healthier, and more flavorful meals. We’ve explored the simple steps, from selecting the right seeds to harvesting your bountiful crop. But why is this DIY trick a must-try?
Firstly, consider the unparalleled freshness. Store-bought cowpeas, while convenient, often lack the vibrant taste and nutritional value of freshly picked ones. When you grow your own, you control the entire process, ensuring that your cowpeas are harvested at their peak ripeness and consumed within hours, maximizing their flavor and nutrient content. This is especially important for cowpeas, as their delicate flavor profile is best enjoyed when they are fresh.
Secondly, think about the cost savings. While the initial investment in seeds and soil might seem like an expense, it pales in comparison to the long-term savings you’ll reap from consistently harvesting your own cowpeas. Over time, you’ll significantly reduce your grocery bills and enjoy a sustainable source of this nutritious legume.
Thirdly, and perhaps most importantly, growing your own cowpeas is an incredibly satisfying experience. There’s something truly special about nurturing a plant from seed to harvest, witnessing its growth, and ultimately enjoying the fruits (or in this case, the legumes) of your labor. It’s a connection to nature that can be both therapeutic and educational, especially for children.
But the beauty of this DIY project lies in its adaptability. Feel free to experiment with different varieties of cowpeas to discover your favorites. Try planting them alongside other vegetables like corn or okra, which can provide natural support and create a mutually beneficial growing environment. You can also explore different planting methods, such as container gardening, if you have limited space. Consider adding organic fertilizers or compost to enrich the soil and boost your cowpea yield.
Don’t be afraid to get creative and tailor the process to your specific needs and preferences.
And remember, success in gardening often comes with a bit of trial and error. Don’t be discouraged if your first attempt isn’t perfect. Learn from your mistakes, adjust your approach, and keep experimenting. With a little patience and persistence, you’ll be well on your way to enjoying a thriving cowpea garden at home.
We wholeheartedly encourage you to embark on this rewarding journey. Start small, be patient, and most importantly, have fun! Once you’ve harvested your first batch of homegrown cowpeas, we’d love to hear about your experience. Share your tips, tricks, and photos with us in the comments below. Let’s create a community of passionate home gardeners and celebrate the joys of growing our own food. So, grab your seeds, get your hands dirty, and experience the magic of a homegrown cowpea garden!
Frequently Asked Questions (FAQ)
What are the best varieties of cowpeas to grow at home?
Choosing the right cowpea variety depends on your climate, soil conditions, and personal preferences. Some popular and reliable varieties for home gardens include:
* **Black-eyed peas:** These are perhaps the most well-known type of cowpea, prized for their creamy texture and nutty flavor. They are relatively easy to grow and adapt well to various climates.
* **Crowder peas:** These peas are named for their tightly packed pods. They have a rich, earthy flavor and are often used in Southern cuisine.
* **Cream peas:** As the name suggests, these peas have a delicate, creamy texture and a mild flavor. They are a good choice for those who prefer a less intense taste.
* **Whippoorwill peas:** These peas have a distinctive mottled appearance and a slightly sweet flavor. They are known for their high yields and disease resistance.
* **Pinkeye Purple Hull peas:** These are easily identified by their pinkish-purple pods. They have a tender texture and a slightly sweet flavor.
Research which varieties are best suited to your local climate and growing conditions. Local nurseries and agricultural extension offices can provide valuable recommendations.
How much sunlight do cowpeas need?
Cowpeas thrive in full sunlight, requiring at least 6-8 hours of direct sunlight per day. Insufficient sunlight can lead to stunted growth, reduced yields, and increased susceptibility to diseases. Choose a planting location that receives ample sunlight throughout the day. If you’re growing cowpeas in containers, make sure to place them in a sunny spot.
What type of soil is best for growing cowpeas?
Cowpeas prefer well-drained soil that is rich in organic matter. They can tolerate a wide range of soil types, but they perform best in sandy loam or loamy soil. Before planting, amend the soil with compost or other organic matter to improve drainage, fertility, and water retention. Cowpeas are relatively tolerant of slightly acidic soil, with a pH range of 6.0 to 7.0 being ideal.
How often should I water my cowpea plants?
Water cowpea plants regularly, especially during dry periods. Aim to keep the soil consistently moist but not waterlogged. Water deeply and less frequently, rather than shallowly and more often, to encourage deep root growth. Avoid overhead watering, as this can increase the risk of fungal diseases. Mulching around the plants can help to retain moisture and suppress weeds.
When is the best time to harvest cowpeas?
The best time to harvest cowpeas depends on the variety and your personal preference. For fresh shelling peas, harvest when the pods are plump and filled with peas, but before they start to dry out. For dried peas, allow the pods to dry completely on the vine before harvesting. The pods should be brittle and the peas should rattle inside.
How can I prevent pests and diseases from affecting my cowpea plants?
Several pests and diseases can affect cowpea plants, including aphids, bean beetles, and fungal diseases. To prevent these problems, practice good garden hygiene, such as removing weeds and debris from around the plants. Use organic pest control methods, such as insecticidal soap or neem oil, to control pests. Ensure good air circulation to prevent fungal diseases. Consider planting disease-resistant varieties of cowpeas. Crop rotation can also help to prevent the buildup of soilborne pests and diseases.
Can I grow cowpeas in containers?
Yes, cowpeas can be successfully grown in containers, making them a great option for those with limited space. Choose a large container with good drainage holes. Use a well-draining potting mix that is rich in organic matter. Provide adequate sunlight and water regularly. You may need to fertilize container-grown cowpeas more frequently than those grown in the ground. Consider using a trellis or other support structure to help the plants climb.
How do I store cowpeas after harvesting?
Freshly shelled cowpeas can be stored in the refrigerator for up to a week. For longer storage, you can freeze them. Blanch the peas in boiling water for a few minutes, then cool them in ice water. Drain well and store in freezer bags or containers. Dried cowpeas can be stored in an airtight container in a cool, dry place for up to a year.
Are cowpeas good for companion planting?
Yes, cowpeas are excellent companion plants for many other vegetables. They are known for their ability to fix nitrogen in the soil, which benefits other plants. Good companion plants for cowpeas include corn, okra, and squash. Avoid planting cowpeas near onions or garlic, as these can inhibit their growth.
What are the nutritional benefits of eating cowpeas?
Cowpeas are a highly nutritious food, packed with protein, fiber, vitamins, and minerals. They are a good source of iron, folate, and potassium. Cowpeas are also low in fat and calories, making them a healthy addition to any diet. The high fiber content can help to regulate blood sugar levels and promote digestive health.
Leave a Comment