
Cowpea no till gardening: Ever dream of a garden bursting with vibrant, healthy cowpeas without the back-breaking labor of tilling? I know I have! Imagine skipping the hours of digging, turning, and weeding, and instead, focusing on the joy of watching your plants thrive. This isn’t just a lazy gardener’s dream; it’s a smart, sustainable way to cultivate a bountiful harvest.
No-till gardening, while seemingly modern, actually echoes ancient agricultural practices. Indigenous communities around the world have long understood the importance of preserving soil structure and minimizing disturbance. They knew that healthy soil is a living ecosystem, and tilling disrupts that delicate balance. Today, we’re rediscovering these time-tested methods and applying them to our modern gardens.
But why should you embrace cowpea no till gardening? Well, for starters, it saves you time and energy! More importantly, it improves soil health, reduces erosion, conserves water, and even sequesters carbon. In a world increasingly concerned about environmental sustainability, no-till gardening is a powerful tool for creating a healthier planet, one cowpea at a time. Plus, who doesn’t want a bigger harvest with less work? Let’s dive into some simple DIY tricks and hacks that will transform your garden and make growing cowpeas a breeze!
No-Till Augenbohnenanbau: Dein DIY-Leitfaden für eine einfache Ernte
Hallo liebe Gartenfreunde! Ich freue mich riesig, euch heute in die Welt des No-Till-Anbaus von Augenbohnen (Cowpeas) einzuführen. Diese Methode ist nicht nur super schonend für den Boden, sondern spart auch jede Menge Zeit und Mühe. Keine schwere Gartenarbeit mehr – versprochen! Lasst uns gemeinsam entdecken, wie ihr mit minimalem Aufwand eine reiche Ernte erzielen könnt.
Was ist No-Till-Anbau und warum ist er toll?
Beim No-Till-Anbau, auch Direktsaat genannt, verzichten wir komplett auf das Umgraben oder Pflügen des Bodens. Stattdessen säen wir die Samen direkt in die vorhandene Bodenstruktur. Das hat viele Vorteile:
* Bodengesundheit: Der Boden bleibt intakt, was das Bodenleben fördert und die Nährstoffspeicherung verbessert.
* Wasserspeicherung: Der Boden kann mehr Wasser aufnehmen und speichern, was besonders in trockenen Regionen wichtig ist.
* Weniger Unkraut: Die ungestörte Bodenoberfläche reduziert das Aufkeimen von Unkrautsamen.
* Zeitersparnis: Kein Umgraben bedeutet weniger Arbeit und mehr Zeit für andere Gartenprojekte.
* Erosionsschutz: Der Boden wird vor Erosion durch Wind und Wasser geschützt.
* Nachhaltigkeit: Weniger Bodenbearbeitung bedeutet weniger CO2-Emissionen.
Vorbereitung ist alles: Die richtige Planung
Bevor wir loslegen, ist eine gute Vorbereitung das A und O. Hier sind die wichtigsten Schritte:
* Standortwahl: Augenbohnen lieben die Sonne! Wählt einen Standort, der mindestens 6-8 Stunden Sonnenlicht pro Tag bekommt.
* Bodenanalyse: Obwohl Augenbohnen relativ anspruchslos sind, ist es gut zu wissen, wie es um euren Boden bestellt ist. Ein einfacher Bodentest gibt Aufschluss über den pH-Wert und den Nährstoffgehalt. Augenbohnen bevorzugen einen leicht sauren bis neutralen Boden (pH-Wert zwischen 6,0 und 7,0).
* Bodenverbesserung (optional): Wenn euer Boden sehr sandig oder lehmig ist, könnt ihr ihn mit Kompost oder gut verrottetem Mist verbessern. Das verbessert die Wasserspeicherung und die Nährstoffversorgung. Aber Achtung: Beim No-Till-Anbau arbeiten wir den Kompost nicht ein, sondern verteilen ihn nur oberflächlich.
* Unkrautbekämpfung: Das ist der wichtigste Schritt! Bevor ihr sät, müsst ihr das Unkraut gründlich entfernen. Am besten geht das mit einer Hacke oder einem Unkrautstecher. Achtet darauf, auch die Wurzeln zu entfernen, damit das Unkraut nicht wiederkommt. Ihr könnt auch eine dicke Schicht Mulch (z.B. Stroh, Heu oder Holzhackschnitzel) ausbringen, um das Unkrautwachstum zu unterdrücken.
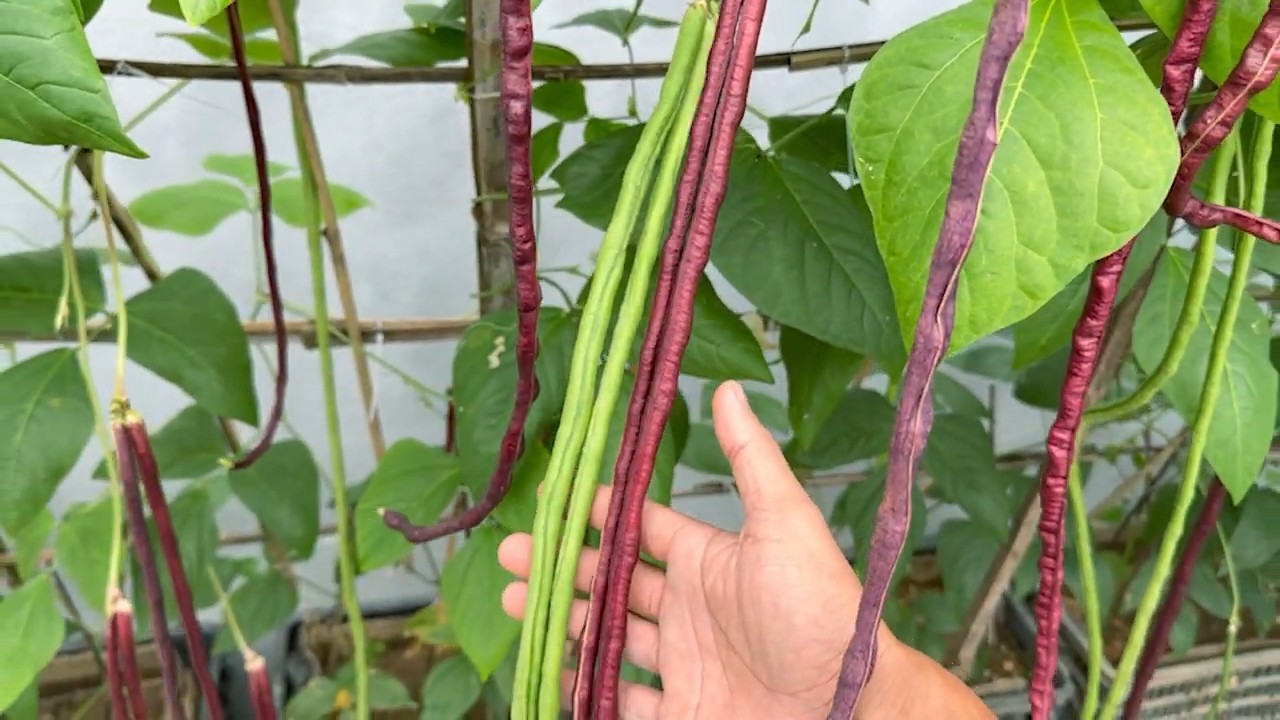
* Auswahl der Augenbohnensorte: Es gibt viele verschiedene Augenbohnensorten. Informiert euch, welche Sorten in eurer Region gut gedeihen und welche euch am besten schmecken. Beliebte Sorten sind z.B. ‘Blackeye Pea’, ‘Pinkeye Purple Hull’ und ‘California Blackeye’.
Die Aussaat: So geht’s richtig
Jetzt kommt der spannende Teil: die Aussaat! Hier sind die Schritte, die ihr beachten solltet:
1. Der richtige Zeitpunkt: Augenbohnen sind wärmeliebend und sollten erst nach den letzten Frösten ausgesät werden. Die Bodentemperatur sollte mindestens 18°C betragen. In den meisten Regionen ist das zwischen Mai und Juni der Fall.
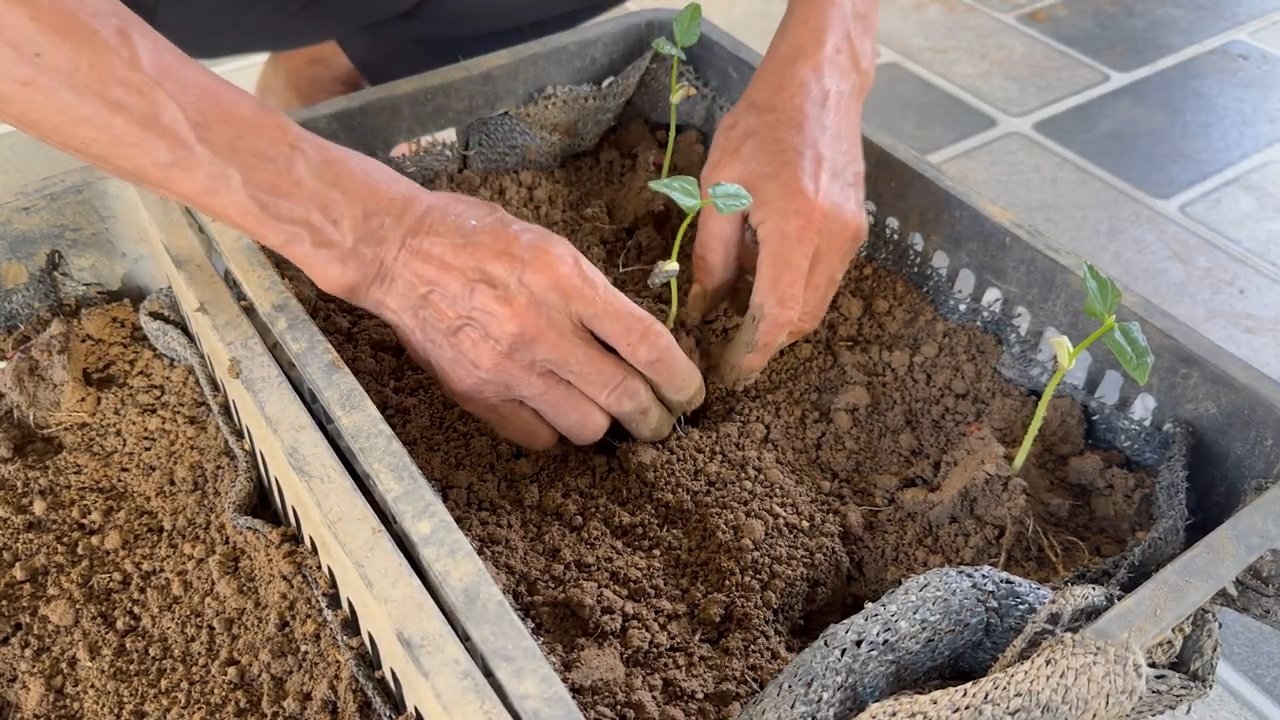
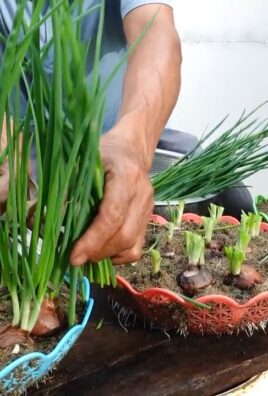
2. Die Aussaatmethode: Beim No-Till-Anbau säen wir die Samen direkt in den ungestörten Boden. Macht mit einem Stock oder einem Pflanzholz kleine Löcher in den Boden. Die Löcher sollten etwa 2-3 cm tief sein.
3. Der Pflanzabstand: Der Pflanzabstand hängt von der jeweiligen Sorte ab. In der Regel beträgt er etwa 10-15 cm zwischen den Pflanzen und 60-75 cm zwischen den Reihen.
4. Die Aussaat: Legt 2-3 Samen in jedes Loch und bedeckt sie mit Erde. Drückt die Erde leicht an.
5. Das Gießen: Gießt die Samen nach der Aussaat gründlich an. Achtet darauf, dass der Boden feucht bleibt, bis die Samen keimen.
Die Pflege: So bleiben eure Augenbohnen gesund und glücklich
Auch nach der Aussaat brauchen eure Augenbohnen noch etwas Pflege. Hier sind die wichtigsten Punkte:
* Gießen: Augenbohnen brauchen regelmäßig Wasser, besonders während der Blütezeit und der Hülsenbildung. Gießt am besten früh morgens, damit die Blätter bis zum Abend abtrocknen können. Vermeidet Staunässe, da dies zu Wurzelfäule führen kann.
* Unkrautbekämpfung: Kontrolliert regelmäßig das Unkraut und entfernt es, bevor es zu groß wird. Eine dicke Mulchschicht hilft, das Unkrautwachstum zu unterdrücken.
* Düngung (optional): Augenbohnen sind Leguminosen und können Stickstoff aus der Luft binden. Daher ist eine zusätzliche Düngung in der Regel nicht notwendig. Wenn euer Boden jedoch sehr nährstoffarm ist, könnt ihr etwas Kompost oder organischen Dünger ausbringen. Achtet darauf, den Dünger nicht einzuarbeiten, sondern nur oberflächlich zu verteilen.
* Schutz vor Schädlingen und Krankheiten: Augenbohnen sind relativ robust, können aber von Blattläusen, Bohnenkäfern oder Pilzkrankheiten befallen werden. Kontrolliert eure Pflanzen regelmäßig und ergreift bei Bedarf Maßnahmen. Bei Blattläusen hilft oft ein kräftiger Wasserstrahl oder eine Behandlung mit Schmierseifenlösung. Gegen Bohnenkäfer könnt ihr Nützlinge wie Schlupfwespen einsetzen. Bei Pilzkrankheiten solltet ihr befallene Blätter entfernen und für eine gute Belüftung sorgen.
Die Ernte: Der Lohn der Mühe
Nach etwa 60-90 Tagen sind eure Augenbohnen reif für die Ernte. Die Hülsen sollten prall gefüllt und leicht gelblich sein.
1. Der Erntezeitpunkt: Erntet die Hülsen, wenn sie trocken und leicht zu öffnen sind.
2. Die Erntemethode: Pflückt die Hülsen vorsichtig von den Pflanzen.
3. Die Verarbeitung: Ihr könnt die Augenbohnen frisch essen, kochen, einfrieren oder trocknen. Getrocknete Augenbohnen sind lange haltbar und können später wieder eingeweicht und gekocht werden.
Mulchen für den No-Till-Erfolg
Mulchen ist ein entscheidender Faktor beim No-Till-Anbau. Es hilft, Unkraut zu unterdrücken, die Bodentemperatur zu regulieren und die Feuchtigkeit zu speichern.
* Welches Mulchmaterial ist geeignet? Stroh, Heu, Holzhackschnitzel, Laub oder Grasschnitt sind gute Optionen. Achtet darauf, dass das Mulchmaterial frei von Unkrautsamen ist.
* Wie dick sollte die Mulchschicht sein? Eine Mulchschicht von 5-10 cm ist ideal.
* Wann sollte gemulcht werden? Mulcht am besten direkt nach der Aussaat oder nach dem Auflaufen der Pflanzen.
Häufige Fehler vermeiden
Auch beim No-Till-Anbau können Fehler passieren. Hier sind einige häufige Fehler, die ihr vermeiden solltet:
* Unzureichende Unkrautbekämpfung vor der Aussaat: Das ist der häufigste Fehler! Wenn ihr das Unkraut nicht gründlich entfernt, wird es euch später über den Kopf wachsen.
* Zu dichte Aussaat: Wenn ihr die Samen zu dicht aussät, konkurrieren die Pflanzen um Licht, Wasser und Nährstoffe.
* Falscher Standort: Augenbohnen brauchen viel Sonne. Wenn sie zu wenig Sonne bekommen, werden sie nicht gut wachsen.
* Zu wenig Wasser: Augenbohnen brauchen regelmäßig Wasser, besonders während der Blütezeit und der Hülsenbildung.
* Vernachlässigung der Pflege: Auch beim No-Till-Anbau müsst ihr eure Pflanzen regelmäßig kontrollieren und pflegen.
Zusätzliche Tipps und Tricks
* Fruchtfolge: Baut Augenbohnen nicht jedes Jahr am selben Standort an. Eine Fruchtfolge hilft, Krankheiten und Schädlinge zu vermeiden und die Bodengesundheit
Conclusion
So, there you have it! Embracing the **cowpea no till gardening** method isn’t just a gardening trend; it’s a game-changer for your soil, your time, and ultimately, your harvest. We’ve explored how this approach minimizes soil disturbance, leading to improved soil structure, reduced erosion, and enhanced water retention – all crucial for thriving cowpeas. Think of it as giving your cowpeas the VIP treatment, setting them up for success from the very beginning.
But the benefits extend beyond just the plant itself. By skipping the tilling, you’re also fostering a healthier soil ecosystem, teeming with beneficial microbes and earthworms that naturally enrich the soil and protect your plants from pests and diseases. It’s a win-win situation for your garden and the environment.
Now, you might be thinking, “This sounds great, but is it really that easy?” The answer is a resounding yes! While there might be a slight learning curve initially, the long-term benefits far outweigh the initial effort. Plus, the beauty of no-till gardening is its adaptability.
Here are a few variations to consider to tailor the method to your specific needs and preferences:
* **Cover Crop Cocktails:** Experiment with different cover crop mixes to find what works best for your soil. Consider adding oats, rye, or even daikon radishes to your mix for added benefits like weed suppression and soil aeration.
* **Mulch Mania:** Don’t be afraid to get creative with your mulch! While straw is a popular choice, you can also use shredded leaves, wood chips, or even compost. Just make sure the mulch is organic and free from harmful chemicals.
* **Companion Planting Power:** Maximize your garden’s potential by incorporating companion plants alongside your cowpeas. Consider planting basil to repel pests or sunflowers to provide shade and attract pollinators.
* **Direct Seeding vs. Transplanting:** While direct seeding is common with no-till, you can also start your cowpeas indoors and transplant them into your no-till garden bed. This can be particularly helpful in areas with shorter growing seasons.
Ultimately, the best way to discover the magic of **cowpea no till gardening** is to try it yourself. Start small, experiment with different techniques, and observe how your cowpeas respond. You might be surprised at how much easier and more rewarding gardening can be when you work with nature instead of against it.
We’re confident that once you experience the benefits of no-till gardening for your cowpeas, you’ll never go back to tilling again. So, grab your seeds, gather your mulch, and get ready to embark on a gardening adventure that’s good for your plants, your soil, and the planet.
Don’t forget to share your experiences with us! We’d love to hear about your successes, challenges, and any tips you’ve discovered along the way. Let’s build a community of no-till gardeners and help each other grow the best cowpeas possible! Share your photos and stories on our social media channels using #CowpeaNoTillGardening. Happy gardening!
Frequently Asked Questions (FAQ)
What exactly is no-till gardening, and why is it beneficial for cowpeas?
No-till gardening, also known as zero tillage, is a method of growing crops without disturbing the soil through plowing, tilling, or hoeing. Instead, the soil surface is left undisturbed, and seeds are planted directly into the soil or through a layer of mulch. This approach offers numerous benefits for cowpeas, including:
* **Improved Soil Structure:** No-till gardening helps maintain the natural structure of the soil, creating better drainage and aeration. This is crucial for cowpea roots to thrive and access nutrients.
* **Reduced Erosion:** By leaving the soil undisturbed, no-till gardening minimizes soil erosion caused by wind and water. This is especially important in areas with heavy rainfall or strong winds.
* **Enhanced Water Retention:** No-till gardening increases the soil’s ability to retain moisture, which is essential for cowpeas, especially during dry periods.
* **Increased Organic Matter:** No-till gardening promotes the accumulation of organic matter in the soil, which improves soil fertility and provides essential nutrients for cowpeas.
* **Reduced Weed Growth:** The mulch layer used in no-till gardening helps suppress weed growth, reducing the need for herbicides or manual weeding.
* **Healthier Soil Ecosystem:** No-till gardening fosters a thriving soil ecosystem, teeming with beneficial microbes and earthworms that naturally enrich the soil and protect plants from pests and diseases.
How do I prepare my garden bed for cowpea no-till gardening?
Preparing your garden bed for cowpea no-till gardening is relatively simple. Here’s a step-by-step guide:
1. **Clear the Area:** Remove any existing vegetation, rocks, or debris from the garden bed. You can use a scythe or weed whacker to cut down the vegetation, leaving the roots in place.
2. **Amend the Soil (If Necessary):** If your soil is particularly poor or compacted, you may need to amend it with compost or other organic matter. Spread a layer of compost over the soil surface and let it sit for a few weeks before planting.
3. **Apply a Cover Crop (Optional):** Planting a cover crop before planting your cowpeas can further improve soil health and suppress weeds. Choose a cover crop that is well-suited to your climate and soil type.
4. **Mulch the Area:** Cover the garden bed with a thick layer of mulch, such as straw, shredded leaves, or wood chips. The mulch layer should be at least 4-6 inches thick to effectively suppress weeds and retain moisture.
5. **Plant Your Cowpeas:** Once the garden bed is prepared, you can plant your cowpea seeds directly into the mulch layer. Simply push the mulch aside, plant the seeds according to the package instructions, and then replace the mulch around the seedlings.
What type of mulch is best for cowpea no-till gardening?
The best type of mulch for cowpea no-till gardening depends on your specific needs and preferences. Some popular options include:
* **Straw:** Straw is a readily available and affordable mulch option. It decomposes slowly, providing long-lasting weed suppression and moisture retention.
* **Shredded Leaves:** Shredded leaves are a great way to recycle fall leaves and provide valuable nutrients to the soil. They decompose relatively quickly, so you may need to replenish them periodically.
* **Wood Chips:** Wood chips are a durable mulch option that can last for several years. They are particularly effective at suppressing weeds and retaining moisture.
* **Compost:** Compost is a nutrient-rich mulch option that can improve soil fertility and promote healthy plant growth. However, it decomposes quickly, so you may need to replenish it frequently.
* **Grass Clippings:** Grass clippings can be used as mulch, but it’s important to ensure they are free from herbicides and pesticides. Allow the clippings to dry before applying them to the garden bed to prevent matting.
How do I control weeds in my cowpea no-till garden?
Weed control is an important aspect of cowpea no-till gardening. The thick mulch layer helps suppress weed growth, but some weeds may still emerge. Here are some strategies for controlling weeds in your no-till garden:
* **Hand Weeding:** Regularly hand-pull any weeds that emerge through the mulch layer. Be sure to remove the entire root system to prevent them from regrowing.
* **Hoeing:** Use a hoe to carefully cultivate the soil around your cowpea plants, removing any weeds that are growing close to the stems.
* **Cover Crops:** Planting a cover crop before planting your cowpeas can help suppress weed growth and improve soil health.
* **Herbicides (As a Last Resort):** If weed pressure is severe, you may need to use herbicides as a last resort. Choose a herbicide that is specifically labeled for use on cowpeas and follow the instructions carefully.
How often should I water my cowpeas in a no-till garden?
The watering frequency for your cowpeas in a no-till garden will depend on several factors, including the weather, soil type, and the age of the plants. Generally, you should water your cowpeas deeply and infrequently, allowing the soil to dry out slightly between waterings.
* **Newly Planted Seeds:** Keep the soil consistently moist until the seeds germinate and the seedlings emerge.
* **Young Plants:** Water young plants regularly, especially during dry periods.
* **Mature Plants:** Mature plants are more drought-tolerant and can tolerate longer periods without watering.
Check the soil moisture regularly by sticking your finger into the soil. If the soil feels dry to the touch, it’s time to water. When watering, water deeply and slowly, allowing the water to soak into the soil. Avoid watering the foliage, as this can promote fungal diseases.
Are there any specific cowpea varieties that are better suited for no-till gardening?
While most cowpea varieties can be grown successfully using no-till gardening methods, some varieties may be better suited than others. Consider choosing varieties that are known for their disease resistance, drought tolerance, and vigorous growth. Some popular cowpea varieties for no-till gardening include:
* **Blackeye Peas:** A classic cowpea variety known for its creamy texture and
Leave a Comment