
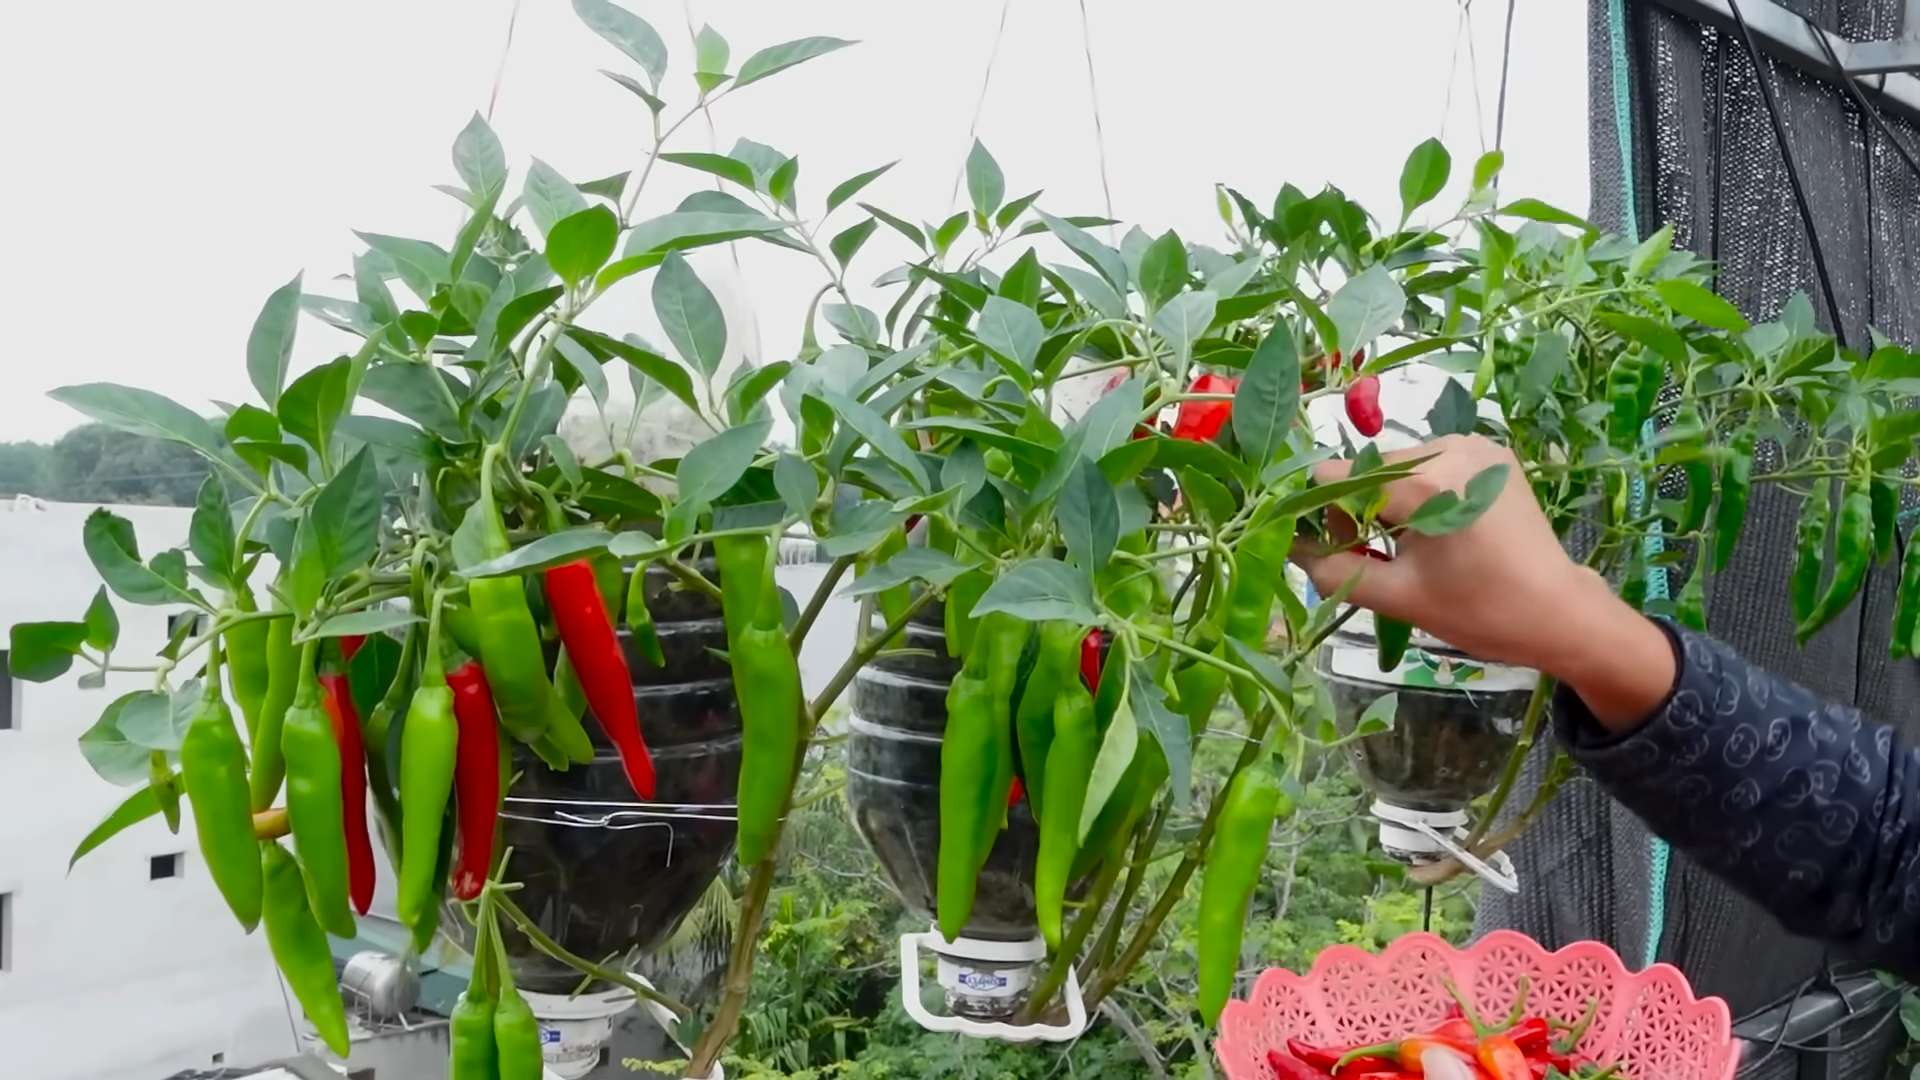
DIY chili planters: Imagine plucking fiery red chilies straight from your own balcony, ready to spice up your next meal! Forget those bland, store-bought seasonings – with a little creativity and some simple steps, you can cultivate your own vibrant chili garden, even if you’re short on space. For centuries, chilies have added zest to cuisines around the world, from the ancient Aztecs who used them in rituals to the fiery curries of India.
But why settle for just buying them when you can experience the joy of growing your own? In this article, I’m going to show you some fantastic and easy DIY chili planters that will not only add a touch of green to your home but also provide you with a constant supply of fresh chilies. We’ll explore creative upcycling ideas, space-saving techniques, and tips for nurturing your chili plants to ensure a bountiful harvest.
Whether you’re a seasoned gardener or a complete beginner, these DIY tricks will empower you to create a thriving chili garden that’s both beautiful and practical. So, grab your gloves, gather your supplies, and let’s get started on this exciting journey of growing your own fiery flavors!
DIY Upcycled Tire Chili Planters: Spice Up Your Garden!
Hey there, fellow gardening enthusiasts! I’m super excited to share a fun and eco-friendly project with you: turning old tires into vibrant chili planters! Not only is this a great way to recycle, but it also adds a unique and rustic touch to your garden. Plus, who doesn’t love fresh, homegrown chilies? Let’s get started!
Materials You’ll Need:
* Old tires (any size will do, but I recommend starting with two or three)
* Utility knife or jigsaw
* Drill with various sized drill bits
* Gloves (essential for handling tires)
* Safety glasses (protect those peepers!)
* Measuring tape or ruler
* Marker or chalk
* Exterior paint (bright colors recommended!)
* Paintbrushes or rollers
* Heavy-duty landscape fabric
* Staple gun and staples
* Potting soil (lots of it!)
* Chili pepper seedlings or seeds
* Optional: Decorative elements like rope, stones, or stencils
Preparing the Tires: The Foundation of Your Planter
This is arguably the most important step, so take your time and be careful!
1. Clean the Tires: First things first, give those tires a good scrub! Use soap and water to remove any dirt, grime, or debris. A pressure washer can be super helpful here, but a good old-fashioned hose and scrub brush will do the trick too. Let them dry completely before moving on. This ensures the paint adheres properly.
2. Decide on Your Design: Now’s the time to get creative! Do you want a simple, stacked tire planter? Or something more elaborate with cutouts or different levels? I personally love the look of stacked tires, but feel free to experiment! If you’re planning on stacking, decide how many tires you’ll use per planter.
3. Cutting (Optional): If you want to get fancy, you can cut designs into the tires. This is where the utility knife or jigsaw comes in. Safety first! Always wear gloves and safety glasses.
* Mark Your Cuts: Use your marker or chalk to draw the shapes you want to cut out. Simple geometric shapes, wavy lines, or even chili pepper silhouettes can look fantastic.
* Cutting with a Utility Knife: This method is best for smaller cuts or creating textures. Score the tire multiple times along your marked lines until you can cut through. It takes some elbow grease, so be patient!
* Cutting with a Jigsaw: This is faster and easier for larger cuts. Make sure you use a blade designed for cutting rubber or plastic. Follow your marked lines carefully.
* Smoothing the Edges: After cutting, use a file or sandpaper to smooth any rough edges. This will prevent injuries and give your planter a more polished look.
4. Drilling Drainage Holes: This is crucial for healthy chili plants! Waterlogged soil is a chili pepper’s worst enemy.
* Mark the Holes: Flip the tire over and mark several spots on the inside of the tire that will be the bottom of your planter. I usually aim for about 6-8 holes per tire.
* Drill the Holes: Use a drill bit that’s at least 1/2 inch in diameter to create adequate drainage. Make sure you drill all the way through the tire.
Painting and Decorating: Adding Your Personal Touch
This is where your creativity can really shine!
1. Prime the Tires (Optional): For best results, especially if you’re using light-colored paint, consider priming the tires first. This will help the paint adhere better and prevent the black rubber from showing through. Use an exterior-grade primer.
2. Paint the Tires: Choose bright, vibrant colors that complement your garden and your chili peppers! I love using reds, oranges, yellows, and greens. Apply several coats of paint, allowing each coat to dry completely before applying the next. This will ensure a durable and long-lasting finish.
3. Get Creative with Decorations: This is where you can really personalize your planters!
* Stencils: Use stencils to add patterns or designs to your painted tires. Chili peppers, suns, or geometric shapes are all great options.
* Rope: Wrap rope around the tires for a nautical or rustic look. Secure the rope with glue or staples.
* Stones: Glue small stones or pebbles to the tires for a textured effect.
* Mosaic Tiles: Create a mosaic design using broken tiles or glass. This is a more time-consuming project, but the results can be stunning!
Lining and Filling: Preparing for Planting
This step ensures your soil stays put and your plants thrive.
1. Line the Tires: Cut pieces of landscape fabric that are large enough to line the inside of each tire. The fabric will prevent the soil from washing out through the drainage holes and will also help to retain moisture.
2. Secure the Fabric: Use a staple gun to attach the landscape fabric to the inside of the tires. Make sure the fabric is securely fastened and that there are no gaps where soil can escape. Overlap the fabric edges for extra security.
3. Add Potting Soil: Now it’s time to fill your planters with potting soil! Use a high-quality potting mix that is well-draining and rich in nutrients. Fill the tires almost to the top, leaving a few inches of space for watering.
Planting Your Chili Peppers: The Grand Finale!
The moment we’ve all been waiting for!
1. Choose Your Chili Peppers: Select chili pepper seedlings or seeds that are appropriate for your climate and growing conditions. There are so many varieties to choose from, ranging from mild to scorching hot! Consider your personal preferences and the amount of sunlight your planters will receive.
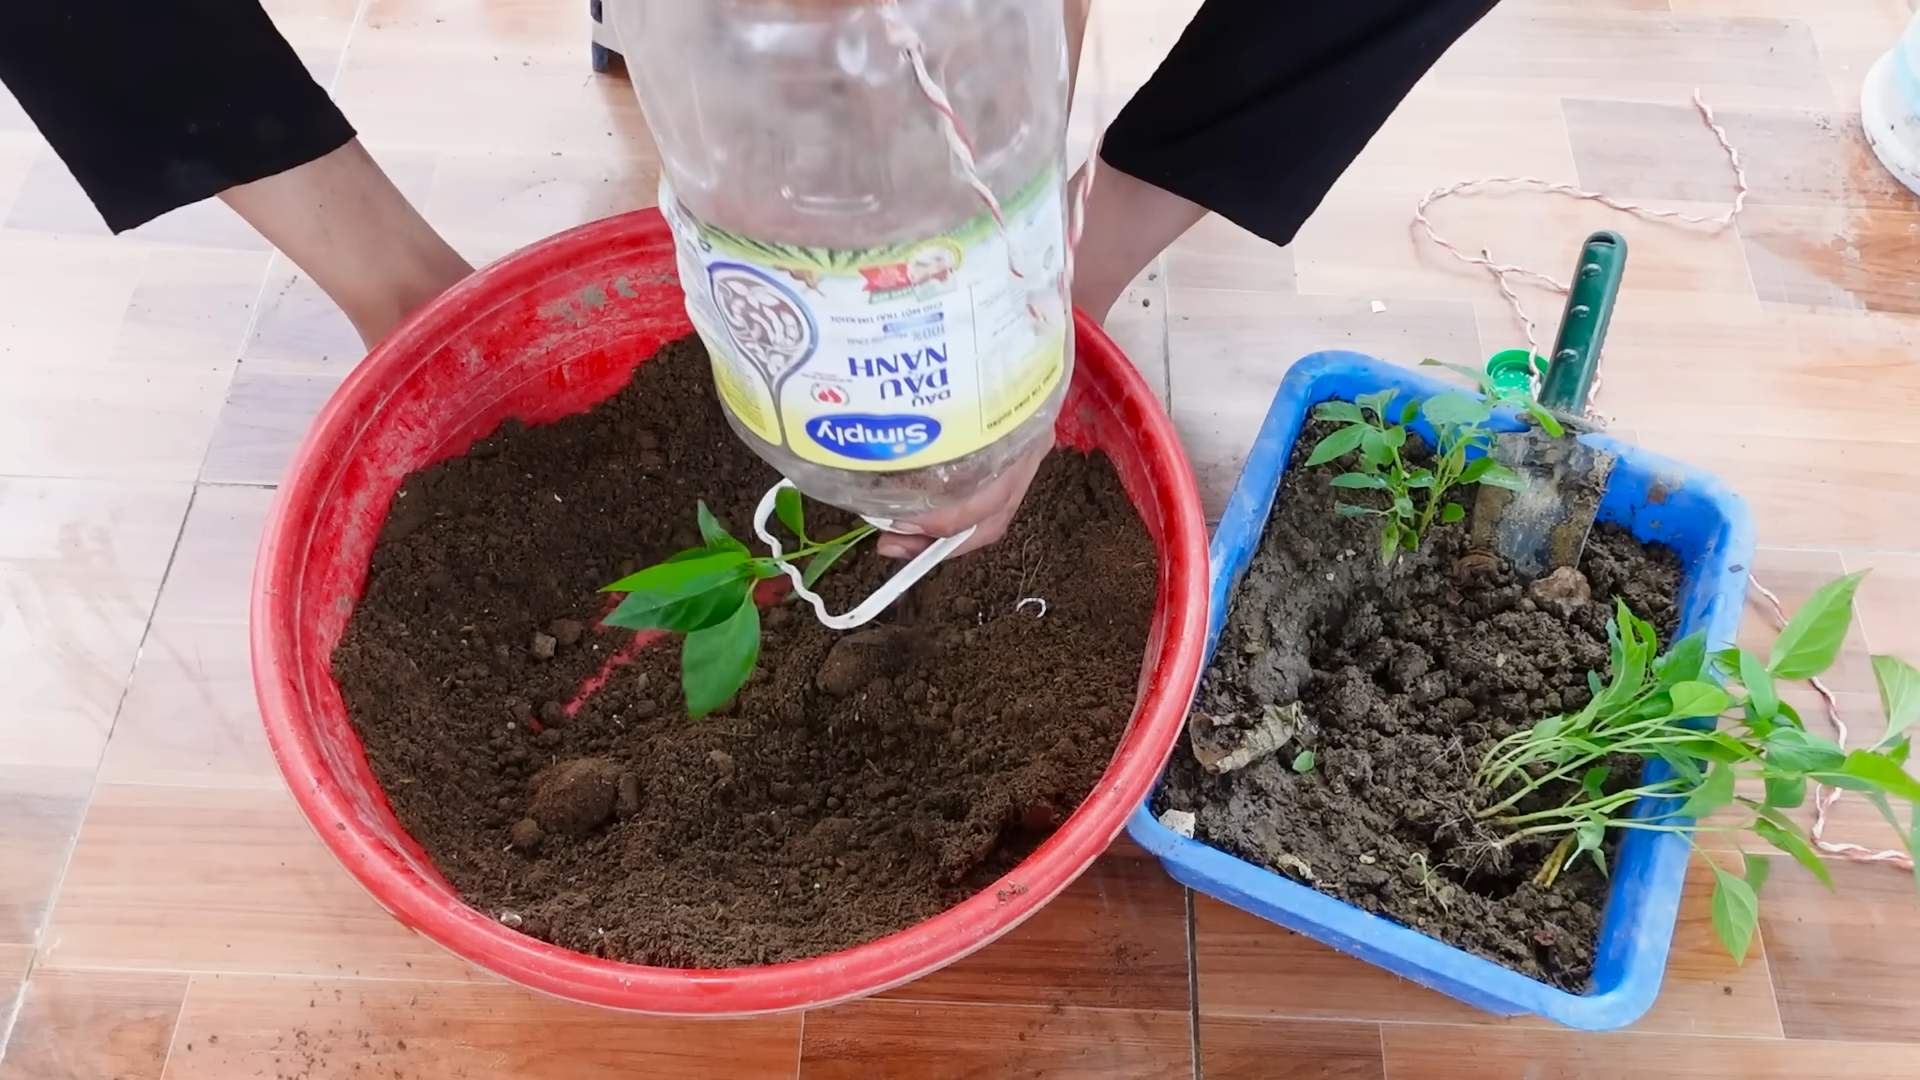
2. Plant the Seedlings or Seeds: Follow the instructions on the seed packet or seedling label for proper planting depth and spacing. Gently remove the seedlings from their containers and plant them in the prepared soil. If you’re planting seeds, sow them directly into the soil and water gently.
3. Water Thoroughly: After planting, water your chili peppers thoroughly. This will help to settle the soil and encourage root growth.
4. Provide Support (Optional): As your chili plants grow, they may need some support. Use stakes or cages to prevent them from falling over, especially when they are laden with fruit.
Maintaining Your Chili Planters: Keeping Your Plants Happy
A little TLC goes a long way!
1. Water Regularly: Chili peppers need consistent moisture, but they don’t like to be waterlogged. Water them deeply whenever the top inch of soil feels dry to the touch.
2. Fertilize: Feed your chili plants with a balanced fertilizer every few weeks to promote healthy growth and abundant fruit production. Follow the instructions on the fertilizer label.
3. Sunlight: Chili peppers need at least 6-8 hours of sunlight per day. Place your planters in a sunny location where they will receive plenty of light.
4. Pest Control: Keep an eye out for pests like aphids, spider mites, and whiteflies. Treat any infestations promptly with insecticidal soap or neem oil.
5. Harvesting: Harvest your chili peppers when they are fully ripe and have reached their desired color. Use scissors or pruning shears to cut the peppers from the plant.
Stacking Tires for a Tiered Planter (Optional)
If you want to create a tiered planter, here’s how I do it:
1. Choose Your Tires: Select tires of different sizes. A larger tire for the bottom, a medium-sized tire for the middle, and a smaller tire for the top works well.
2. Prepare the Bottom Tire: Follow the steps above for cleaning, cutting (optional), drilling drainage holes, painting, lining, and filling the bottom tire with soil.
3. Position the Middle Tire: Place the medium-sized tire on top of the bottom tire, centering it as best as you can.
4. Secure the Tires (Important!): This is crucial for stability. I use long screws and drill through the sidewall of the top tire into the sidewall of the bottom tire. Use at least 3-4 screws per tire. You can also use construction adhesive for added security.
5. Prepare and Fill the Middle Tire: Repeat the steps for cleaning, cutting (optional), drilling drainage holes, painting, lining, and filling the middle tire with soil.
6. Position, Secure, and Prepare the Top Tire: Repeat steps 3-5 for the top tire.
7. Plant Your Chilies: Plant your chili peppers in each tier, following the instructions above.
And there you have it! Beautiful, upcycled tire chili planters that will add a touch of spice and personality to your garden. Enjoy your homegrown chilies! Happy gardening!
Conclusion
So, there you have it! Creating your own DIY chili planters is not just a fun weekend project; it’s a gateway to fresh, flavorful chilies right at your fingertips. Forget those bland, store-bought peppers – imagine the vibrant colors and intense flavors you’ll be adding to your dishes with chilies you’ve nurtured from seedling to spicy perfection.
This DIY project is a must-try for several reasons. First, it’s incredibly cost-effective. Starting from seeds or small starter plants is significantly cheaper than buying mature chili plants from a nursery. Second, it gives you complete control over the growing environment. You can choose the perfect soil mix, ensure adequate drainage, and provide the ideal amount of sunlight for your specific chili varieties. Third, and perhaps most importantly, it’s incredibly rewarding. There’s a unique satisfaction in watching your plants thrive and knowing that you played an active role in their growth.
But the beauty of DIY chili planters lies in their versatility. Feel free to experiment with different container types. Upcycle old buckets, repurpose terracotta pots, or even create a vertical garden using pallet wood. The possibilities are endless! Consider adding companion plants like basil or marigolds to your planters. Basil is known to improve the flavor of chilies, while marigolds can help deter pests.
For those who prefer a milder flavor, try growing Anaheim or Poblano peppers. If you’re feeling adventurous, go for the fiery Scotch Bonnet or Habanero. You can even create a mixed planter with a variety of chili types, adding visual appeal and a range of flavors to your garden.
Don’t be afraid to get creative with your soil mix. While a standard potting mix will work, you can enhance it by adding compost, perlite, or vermiculite. Compost provides essential nutrients, perlite improves drainage, and vermiculite helps retain moisture.
The key to success with DIY chili planters is consistent care. Water your plants regularly, especially during hot weather. Fertilize them every few weeks with a balanced fertilizer. And be sure to protect them from pests and diseases.
We are confident that you’ll find this DIY project both enjoyable and rewarding. The satisfaction of harvesting your own homegrown chilies is unparalleled. So, gather your supplies, get your hands dirty, and start creating your own DIY chili planters today!
We can’t wait to hear about your experiences! Share your photos, tips, and tricks in the comments below. Let’s build a community of chili-loving gardeners and inspire each other to grow the best chilies possible. What varieties are you planning to grow? What container ideas are you excited to try? Let us know! Your insights could help other readers on their chili-growing journey.
Frequently Asked Questions (FAQ)
What type of container is best for DIY chili planters?
The best type of container for your DIY chili planters depends on your space, budget, and aesthetic preferences. Terracotta pots are a classic choice, offering good drainage and a traditional look. Plastic pots are lightweight and affordable, but they may not drain as well as terracotta. Upcycled containers like buckets, crates, or even old tires can add a unique touch to your garden. The most important factor is ensuring that the container has adequate drainage holes to prevent waterlogging, which can lead to root rot. The size of the container also matters; chili plants need enough space for their roots to grow. A container that is at least 12 inches in diameter and 12 inches deep is generally recommended for most chili varieties. Larger varieties may require even bigger containers.
How often should I water my DIY chili planters?
Watering frequency depends on several factors, including the weather, the type of container, and the size of the plant. As a general rule, water your chili plants when the top inch of soil feels dry to the touch. During hot, dry weather, you may need to water them daily. In cooler, wetter weather, you may only need to water them every few days. Avoid overwatering, as this can lead to root rot. When you water, water deeply, ensuring that the water reaches the bottom of the container. Allow excess water to drain out of the drainage holes. Using a moisture meter can help you determine when your plants need water.
What kind of soil should I use for my DIY chili planters?
The ideal soil for your DIY chili planters is a well-draining potting mix that is rich in organic matter. Avoid using garden soil, as it can be too heavy and may not drain well. A good potting mix will contain a blend of peat moss, perlite, and vermiculite. You can also amend your potting mix with compost to provide additional nutrients. Compost also helps improve drainage and water retention. The pH of the soil should be slightly acidic, around 6.0 to 6.8. You can test the pH of your soil using a soil testing kit.
How much sunlight do chili plants need?
Chili plants need at least 6-8 hours of direct sunlight per day to thrive. Choose a location for your DIY chili planters that receives plenty of sunlight. If you live in a hot climate, you may need to provide some afternoon shade to prevent the plants from getting scorched. If you are growing your chili plants indoors, you will need to supplement with artificial light. Grow lights are a great option for providing the necessary light for indoor chili plants.
What kind of fertilizer should I use for my DIY chili planters?
Chili plants benefit from regular fertilization. Use a balanced fertilizer with an NPK ratio of 10-10-10 or 14-14-14. Fertilize your plants every few weeks during the growing season. You can also use a fertilizer specifically formulated for peppers and tomatoes. Avoid over-fertilizing, as this can lead to excessive foliage growth and fewer peppers. Organic fertilizers, such as compost tea or fish emulsion, are also a good option.
How do I protect my chili plants from pests and diseases?
Chili plants can be susceptible to a variety of pests and diseases. Common pests include aphids, spider mites, and whiteflies. Diseases include powdery mildew, blossom end rot, and fungal infections. To prevent pests and diseases, keep your plants healthy and well-watered. Inspect your plants regularly for signs of pests or diseases. If you find pests, you can try spraying them with insecticidal soap or neem oil. For diseases, you can try using a fungicide. Good air circulation can also help prevent fungal diseases.
When should I harvest my chilies?
The time to harvest your chilies depends on the variety and your personal preference. Most chilies will change color as they ripen, from green to red, yellow, or orange. You can harvest them at any stage of ripeness, but the flavor will be more intense when they are fully ripe. To harvest, simply cut the chili from the plant using a sharp knife or scissors.
Can I grow chilies indoors in my DIY chili planters?
Yes, you can absolutely grow chilies indoors in your DIY chili planters! The key is to provide them with enough light, warmth, and humidity. As mentioned earlier, supplemental grow lights are essential for indoor chili growing. Maintain a consistent temperature between 70-80°F during the day and 60-70°F at night. Increase humidity by misting the plants regularly or using a humidifier. Ensure good air circulation to prevent fungal diseases.
What are some good companion plants for chilies in DIY chili planters?
Companion planting can benefit your chili plants in several ways. Basil is a classic companion plant for chilies, as it is believed to improve their flavor and deter pests. Marigolds are also effective at deterring pests, particularly nematodes. Other good companion plants for chilies include onions, garlic, carrots, and tomatoes. Avoid planting chilies near fennel, as it can inhibit their growth.
How do I save seeds from my chilies for future DIY chili planters?
Saving seeds from your chilies is a great way to ensure a continuous supply of your favorite varieties. To save seeds, allow the chilies to fully ripen on the plant. Once they are ripe, cut them open and remove the seeds. Spread the seeds out on a paper towel and allow them to dry completely. Once they are dry, store them in an airtight container in a cool, dark place. Be aware that if you are growing hybrid chili varieties, the seeds may not produce plants that are true to type.
Leave a Comment