
DIY Hydroponic Gardening Home: Ever dreamed of fresh, vibrant greens and juicy tomatoes right at your fingertips, without the hassle of traditional soil gardening? I know I have! Imagine stepping outside your back door and harvesting a salad just minutes before dinner. That’s the magic of hydroponics, and it’s more accessible than you might think! For centuries, cultures around the globe have experimented with soilless cultivation, from the Hanging Gardens of Babylon (though debated, some believe they utilized hydroponic principles) to the floating gardens of the Aztecs.
Today, DIY Hydroponic Gardening Home systems are experiencing a resurgence, and for good reason. In a world where space is often limited and concerns about food security are growing, hydroponics offers a sustainable and efficient solution. Whether you live in an apartment with a tiny balcony or a house with a sprawling yard, you can create a thriving hydroponic garden.
This article is your ultimate guide to unlocking the secrets of DIY hydroponics. I’ll walk you through simple, budget-friendly techniques and hacks that will empower you to build your own hydroponic system from scratch. Say goodbye to weeding, soil-borne diseases, and unpredictable yields. Get ready to experience the joy of growing your own food, the easy way!
DIY Hydroponic Gardening at Home: A Beginner’s Guide
Hey there, fellow plant enthusiasts! Ever dreamed of growing your own fresh herbs, veggies, or even flowers indoors, without the mess of soil? Well, you’re in the right place! I’m going to walk you through building your very own hydroponic garden at home. It’s easier than you think, and trust me, the satisfaction of harvesting your own produce is totally worth it.
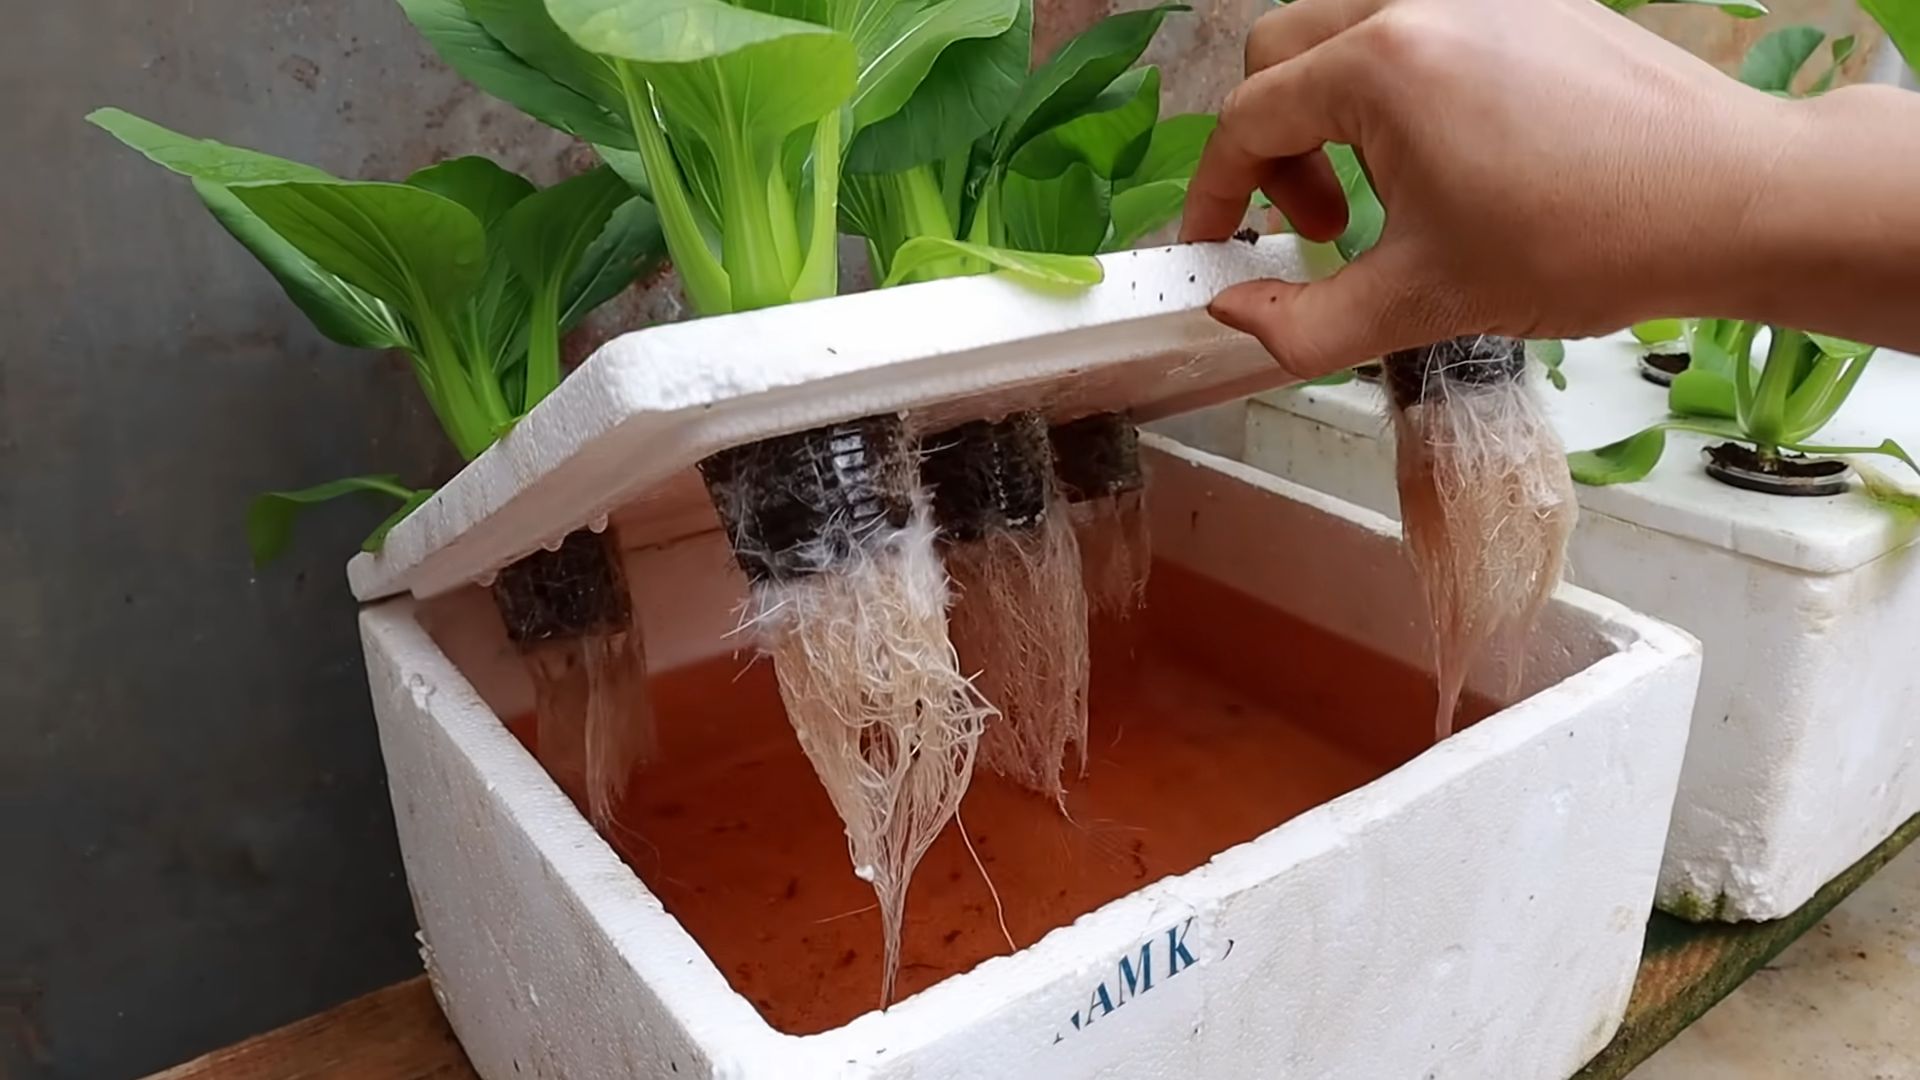
This guide will focus on a simple Deep Water Culture (DWC) system, perfect for beginners. DWC is a straightforward method where plant roots are suspended in a nutrient-rich water solution, providing them with everything they need to thrive. Let’s get started!
What You’ll Need: The Shopping List
Before we dive in, let’s gather our supplies. Don’t worry, most of these are readily available at your local hardware store or online.
* **A Container:** A dark-colored plastic storage bin (approximately 5-10 gallons) is ideal. The darkness prevents algae growth. I recommend a bin with a lid.
* **Net Pots:** These will hold your plants and allow the roots to dangle into the nutrient solution. Choose a size that fits comfortably in your container lid. 3-inch net pots are a good starting point.
* **Grow Media:** Clay pebbles (also known as hydroton) are the most common choice. They provide support for the plant and allow for good aeration. You can also use rockwool cubes.
* **Air Pump and Air Stone:** The air pump provides oxygen to the nutrient solution, which is crucial for root health. The air stone diffuses the air into tiny bubbles, maximizing oxygen absorption.
* **Air Tubing:** To connect the air pump to the air stone.
* **Nutrient Solution:** Specially formulated hydroponic nutrients are essential. Look for a balanced nutrient solution designed for leafy greens or vegetables, depending on what you plan to grow. I suggest starting with a two-part nutrient solution (A & B).
* **pH Testing Kit:** Maintaining the correct pH level is vital for nutrient absorption. A liquid pH test kit or a digital pH meter will do the trick.
* **pH Up and pH Down Solutions:** To adjust the pH of your nutrient solution.
* **Seedlings or Seeds:** Choose plants that are well-suited for hydroponics, such as lettuce, spinach, herbs (basil, mint, oregano), strawberries, or tomatoes (dwarf varieties). Starting with seedlings is often easier for beginners.
* **Drill with Hole Saw Attachment:** To create holes in the container lid for the net pots. The hole saw should match the diameter of your net pots.
* **Measuring Cups and Spoons:** For accurately measuring nutrient solutions.
* **Water:** Use filtered or dechlorinated water. Tap water can contain chemicals that are harmful to plants.
* **Optional: Timer:** To control the light cycle if you’re growing indoors.
* **Optional: Grow Light:** If you don’t have a sunny spot, a grow light will provide the necessary light for your plants. LED grow lights are energy-efficient and work well.
Step-by-Step Instructions: Building Your DWC System
Okay, let’s get our hands dirty (well, not really, since it’s hydroponics!). Follow these steps carefully, and you’ll have your own DWC system up and running in no time.
1. **Prepare the Container:**
* First, clean the plastic storage bin thoroughly with soap and water. Rinse it well to remove any soap residue.
* Next, using the hole saw attachment on your drill, carefully cut holes in the lid of the container. The number of holes will depend on the size of your container and the number of plants you want to grow. Make sure the holes are spaced evenly and are slightly smaller than the diameter of your net pots so they sit snugly.
* I usually aim for about 4-6 inches of space between each hole.
2. **Assemble the Air System:**
* Attach one end of the air tubing to the air pump.
* Attach the other end of the air tubing to the air stone.
* Place the air stone at the bottom of the container.
* Make sure the air pump is placed outside the container and above the water level to prevent water from siphoning back into the pump.
3. **Prepare the Nutrient Solution:**
* This is a crucial step! Follow the instructions on your hydroponic nutrient solution packaging carefully.
* Fill the container with filtered or dechlorinated water. Leave a few inches of space at the top.
* Add the nutrient solution according to the manufacturer’s instructions. Typically, you’ll add part A first, stir well, and then add part B.
* Use your measuring cups and spoons to ensure accurate measurements. Too much or too little nutrient can harm your plants.
* I always double-check the instructions to be sure I’m getting the ratios right.
4. **Test and Adjust the pH:**
* Use your pH testing kit to measure the pH of the nutrient solution.
* The ideal pH range for most hydroponic plants is between 5.5 and 6.5.
* If the pH is too high, add a small amount of pH Down solution, stir well, and test again.
* If the pH is too low, add a small amount of pH Up solution, stir well, and test again.
* Adjust the pH gradually until it falls within the desired range.
* This step is super important! Don’t skip it.
5. **Prepare the Net Pots:**
* Rinse the clay pebbles thoroughly to remove any dust or debris.
* Fill the net pots with the rinsed clay pebbles.
* If you’re starting with seeds, sow them directly into the clay pebbles in the net pots. You may need to use a small amount of rockwool or coco coir to help the seeds germinate.
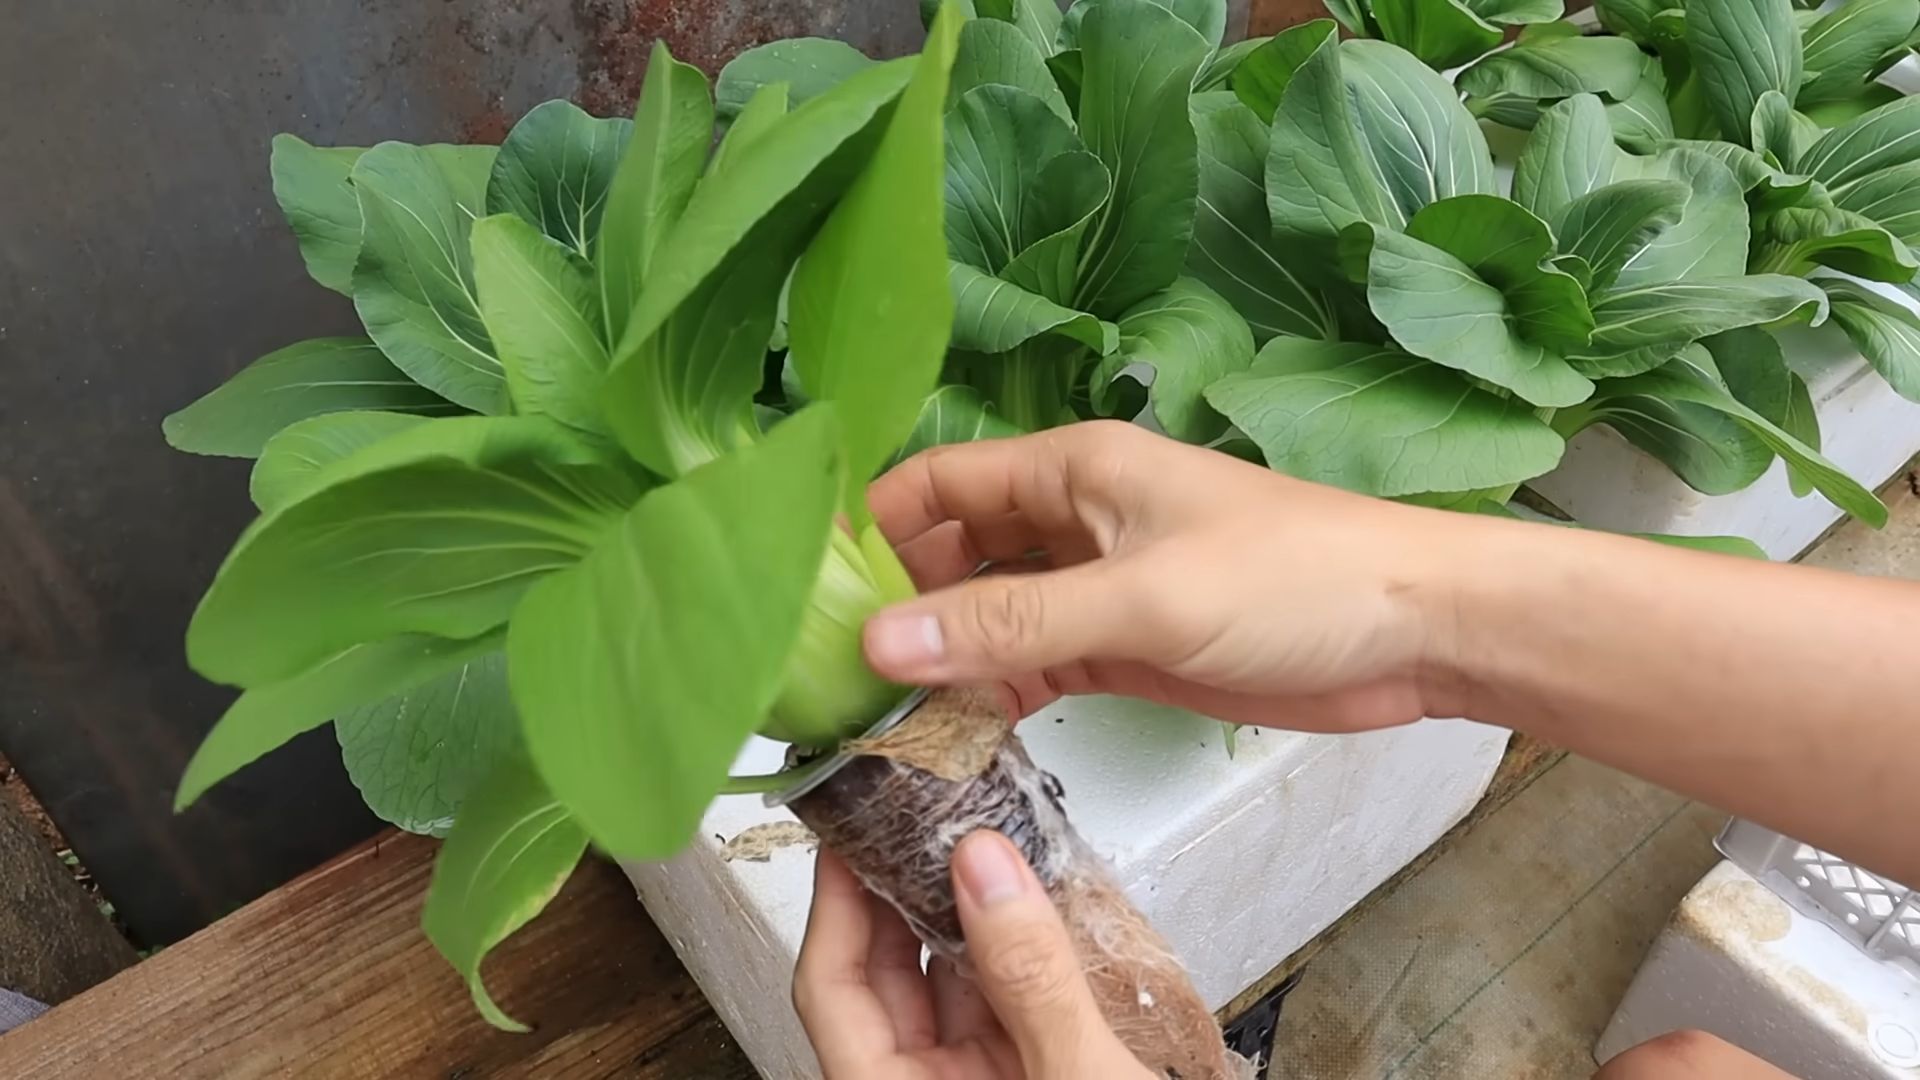
* If you’re starting with seedlings, gently remove them from their existing containers and carefully place them into the net pots, surrounding the roots with clay pebbles.
* Make sure the roots are well-supported and that the plant is stable.
6. **Place the Net Pots in the Lid:**
* Carefully place the net pots into the holes you cut in the container lid.
* The bottom of the net pots should be submerged in the nutrient solution.
* If the water level is too low, add more water to the container.
* If the water level is too high, remove some water from the container.
7. **Position the Lid on the Container:**
* Place the lid securely on the container.
* Make sure the air tubing is not pinched or kinked.
8. **Provide Light:**
* If you’re growing indoors, place the container under a grow light.
* Follow the manufacturer’s instructions for the grow light’s distance from the plants and the recommended light cycle.
* A typical light cycle for leafy greens is 14-16 hours of light per day.
* If you’re growing outdoors, place the container in a location that receives at least 6 hours of sunlight per day.
* Be mindful of extreme temperatures. Hydroponic systems can heat up quickly in direct sunlight.
9. **Turn on the Air Pump:**
* Plug in the air pump and make sure it’s working properly.
* You should see bubbles rising from the air stone in the nutrient solution.
* The air pump will provide oxygen to the roots, which is essential for their growth.
Maintaining Your Hydroponic Garden: Keeping Things Thriving
Now that your DWC system is set up, it’s important to maintain it properly to ensure healthy plant growth. Here are a few key things to keep in mind:
* **Monitor the Water Level:** Check the water level in the container regularly and add more water as needed. The roots should always be submerged in the nutrient solution.
* **Check and Adjust the pH:** Test the pH of the nutrient solution every few days and adjust it as needed to maintain the ideal range of 5.5 to 6.5.
* **Change the Nutrient Solution:** Replace the nutrient solution every 1-2 weeks. This will prevent the buildup of salts and other impurities.
* When changing the nutrient solution, carefully remove the plants from the net pots and set them aside.
* Empty the container and clean it thoroughly.
* Prepare a fresh batch of nutrient solution and refill the container.
* Place the plants back into the net pots and return them to the container.
* **Monitor for Pests and Diseases:** Inspect your plants regularly for signs of pests or diseases.
* If you find any pests, such as aphids or spider mites, you can try using insecticidal soap or neem oil.
* If you find any diseases, such as powdery mildew or root rot, you may need to use a
Conclusion
So, there you have it! A simple, effective, and incredibly rewarding way to bring the joys of gardening indoors with your own DIY hydroponic system. We’ve walked you through the steps, highlighted the benefits, and hopefully, inspired you to ditch the dirt and embrace a cleaner, more efficient way to grow your favorite herbs, vegetables, and flowers.
Why is this DIY hydroponic gardening home setup a must-try? Because it offers a unique blend of convenience, sustainability, and control. Imagine fresh, flavorful basil readily available for your pasta dishes, crisp lettuce for your salads, or vibrant strawberries for your desserts, all grown right in your kitchen, regardless of the season or your outdoor space limitations. You’re not just growing plants; you’re cultivating a connection to your food source, reducing your reliance on store-bought produce, and minimizing your environmental footprint.
But the beauty of DIY lies in its adaptability. Feel free to experiment with different nutrient solutions to find the perfect blend for your chosen plants. Consider adding a timer to your grow lights for optimal growth cycles. Explore different container sizes and configurations to maximize your space. You could even incorporate a small fountain or waterfall into your system for added ambiance and oxygenation. The possibilities are truly endless!
Don’t be afraid to get creative and personalize your hydroponic garden to suit your specific needs and preferences. For example, if you’re short on space, try a vertical hydroponic system using stacked containers or PVC pipes. If you’re growing leafy greens, you might want to focus on nitrogen-rich nutrient solutions. And if you’re growing fruiting plants, you’ll need to adjust the nutrient balance to support flowering and fruit development.
We’ve found that starting with easy-to-grow plants like lettuce, spinach, herbs (basil, mint, chives), and strawberries is a great way to get your feet wet. Once you’ve mastered the basics, you can move on to more challenging crops like tomatoes, peppers, and cucumbers. Remember to research the specific needs of each plant to ensure optimal growth and yields.
This DIY hydroponic gardening home project isn’t just about growing plants; it’s about learning, experimenting, and connecting with nature in a whole new way. It’s about taking control of your food source, reducing your environmental impact, and enjoying the satisfaction of growing your own fresh, healthy produce.
So, what are you waiting for? Gather your materials, follow our guide, and embark on your own hydroponic adventure. We’re confident that you’ll be amazed by the results. And most importantly, we want to hear about your experience! Share your photos, tips, and challenges in the comments below. Let’s build a community of DIY hydroponic gardeners and inspire others to embrace this innovative and rewarding way to grow. We can’t wait to see what you create!
Frequently Asked Questions (FAQ)
What exactly is hydroponics, and why should I try it?
Hydroponics is a method of growing plants without soil, using mineral nutrient solutions in water. Instead of soil providing nutrients, the water solution directly feeds the roots. There are several compelling reasons to try hydroponics:
* Faster Growth: Plants in hydroponic systems often grow faster than those in soil because they have direct access to nutrients and don’t have to expend energy searching for them.
* Higher Yields: Hydroponic systems can produce higher yields in a smaller space compared to traditional gardening.
* Water Conservation: Hydroponics uses significantly less water than soil-based gardening because the water is recycled within the system.
* Pest and Disease Control: Hydroponic systems are less susceptible to soilborne pests and diseases, reducing the need for pesticides.
* Year-Round Growing: You can grow plants year-round, regardless of the weather conditions outside.
* Space Efficiency: Hydroponics is ideal for people with limited space, such as apartment dwellers or those with small yards.
What materials do I need to build a simple DIY hydroponic system?
The specific materials will depend on the type of hydroponic system you choose to build, but here’s a general list of essentials:
* Container: A plastic tub, bucket, or storage container to hold the nutrient solution and plants.
* Net Pots: Small plastic pots with holes or slits to hold the plants and allow the roots to access the nutrient solution.
* Growing Medium: An inert material like perlite, vermiculite, coco coir, or rockwool to support the plants and provide aeration to the roots.
* Nutrient Solution: A balanced hydroponic nutrient solution containing all the essential elements for plant growth.
* Air Pump and Air Stone: To oxygenate the nutrient solution and prevent root rot.
* Grow Lights: LED grow lights are recommended for indoor hydroponic systems to provide the necessary light for photosynthesis.
* pH Meter: To monitor and adjust the pH of the nutrient solution.
* Timer: To control the on/off cycles of the grow lights.
What are the best plants to grow in a DIY hydroponic system?
Some of the easiest and most rewarding plants to grow in a DIY hydroponic system include:
* Lettuce: Grows quickly and easily, providing a continuous supply of fresh greens.
* Spinach: Another leafy green that thrives in hydroponic systems.
* Herbs: Basil, mint, chives, parsley, and oregano are all excellent choices for hydroponic gardening.
* Strawberries: Produce delicious and abundant fruit in hydroponic systems.
* Tomatoes: Can be grown successfully in hydroponic systems with proper support and nutrient management.
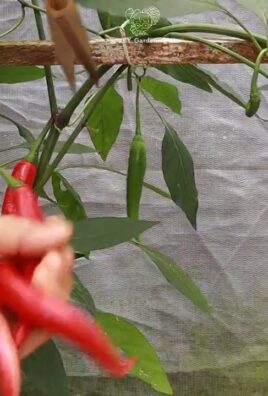
* Peppers: Similar to tomatoes, peppers require adequate support and nutrient balance.
* Cucumbers: Another vining plant that can be grown hydroponically with proper trellising.
How often should I change the nutrient solution in my hydroponic system?
The frequency of nutrient solution changes depends on the size of your system, the type of plants you’re growing, and the rate at which they consume nutrients. As a general rule, you should change the nutrient solution every 1-2 weeks. However, it’s essential to monitor the pH and nutrient levels regularly and adjust the frequency of changes accordingly. If you notice a significant drop in pH or nutrient levels, it’s time to change the solution.
How do I maintain the pH level in my hydroponic system?
Maintaining the correct pH level is crucial for nutrient uptake. The ideal pH range for most hydroponic plants is between 5.5 and 6.5. You can use a pH meter to measure the pH of the nutrient solution and adjust it using pH up or pH down solutions, which are readily available at hydroponic supply stores. Check the pH regularly, ideally every day or two, and make small adjustments as needed.
What if I encounter problems like algae growth or root rot in my hydroponic system?
Algae growth and root rot are common problems in hydroponic systems, but they can be prevented or treated with proper management.
* Algae Growth: Algae thrives in light and nutrient-rich environments. To prevent algae growth, keep the nutrient solution covered and out of direct sunlight. You can also use an opaque container to block light.
* Root Rot: Root rot is caused by anaerobic bacteria that thrive in oxygen-deprived environments. To prevent root rot, ensure adequate aeration of the nutrient solution using an air pump and air stone. You can also add beneficial bacteria or fungi to the solution to help suppress harmful pathogens. If you suspect root rot, remove the affected plants, trim away any rotten roots, and treat the remaining roots with a fungicide before replanting.
Can I use tap water in my hydroponic system?
It depends on the quality of your tap water. If your tap water is heavily chlorinated or contains high levels of minerals, it’s best to use filtered or distilled water. You can also let tap water sit for 24 hours to allow the chlorine to evaporate. Test your tap water to determine its pH and mineral content before using it in your hydroponic system.
Where can I find more information and resources about DIY hydroponic gardening?
There are many online resources available to help you learn more about DIY hydroponic gardening. Some helpful websites and forums include:
* YouTube: Search for “DIY hydroponics” to find numerous videos demonstrating different hydroponic techniques.
* Hydroponics Forums: Online forums dedicated to hydroponics are a great place to ask questions, share tips, and connect with other growers.
* University Extension Websites: Many universities have extension websites with information on hydroponics and other gardening topics.
* Hydroponic Supply Stores: Local hydroponic supply stores can provide expert advice and resources.

Leave a Comment