
DIY kale bottle garden: Ever dreamt of fresh, homegrown kale gracing your salads, smoothies, and stir-fries, even if you’re short on space or gardening experience? I know I have! Forget sprawling gardens and complicated setups. We’re diving into a super simple, incredibly rewarding project that brings the joy of gardening right to your windowsill – a DIY kale bottle garden!
The concept of container gardening, a close relative to our bottle garden adventure, has roots stretching back centuries. From the Hanging Gardens of Babylon to the humble window boxes of Victorian England, people have always found creative ways to cultivate plants in limited spaces. But what makes our DIY kale bottle garden so special? It’s all about accessibility and sustainability. We’re repurposing materials, minimizing waste, and creating a thriving ecosystem in a single plastic bottle.
In today’s fast-paced world, finding moments of connection with nature can be a challenge. A DIY kale bottle garden offers a therapeutic escape, a chance to nurture something green, and a delicious reward for your efforts. Plus, knowing exactly where your food comes from and how it’s grown is incredibly empowering. So, if you’re ready to embrace a fun, eco-friendly, and delicious project, let’s get started! I’m excited to show you how easy it is to create your own thriving kale oasis, one bottle at a time.
DIY Kale Bottle Garden: Grow Your Greens in Style!
Hey there, fellow gardening enthusiasts! I’m so excited to share this super easy and rewarding DIY project with you: creating a kale bottle garden. It’s a fantastic way to grow your own fresh, nutritious kale, even if you’re short on space or don’t have a traditional garden. Plus, it’s a great way to recycle those plastic bottles that seem to multiply in our homes!
This project is perfect for beginners, and I promise you’ll be munching on homegrown kale in no time. Let’s dive in!
What You’ll Need
Before we get started, let’s gather all the necessary materials. Trust me, having everything ready beforehand will make the process much smoother.
* Plastic Bottles: You’ll need at least two plastic bottles per kale plant. I recommend using 2-liter bottles, but any size will work as long as they’re clean and sturdy. The more bottles you use, the more kale you can grow!
* Scissors or Utility Knife: For cutting the plastic bottles. Be careful and always cut away from yourself!
* Potting Soil: Choose a good quality potting mix that’s well-draining. Kale needs nutrient-rich soil to thrive.
* Kale Seeds or Seedlings: You can start from seeds or buy seedlings from your local garden center. Seedlings will give you a head start.
* Water: Essential for keeping your kale hydrated.
* Gravel or Small Stones: For drainage at the bottom of the bottles.
* Drill or Nail and Hammer: To create drainage holes (optional, but recommended).
* Twine or Rope (Optional): For hanging your bottle garden.
* Gloves (Optional): To keep your hands clean.
* Measuring Cup or Scoop: To help with soil distribution.
* Permanent Marker: For labeling (optional).
Preparing the Bottles
This is where we transform those ordinary plastic bottles into mini-gardens!
1. Clean the Bottles: Thoroughly wash the plastic bottles with soap and water to remove any residue. Rinse them well and let them dry completely. This is important to prevent any contamination that could harm your kale.
2. Cut the Bottles: For each kale plant, you’ll need to cut one bottle in half. The top half (the one with the bottle neck) will be inverted and placed inside the bottom half. This creates a self-watering system.
* Mark the Cutting Line: Use a permanent marker to draw a line around the bottle, about halfway down.
* Cut Carefully: Using scissors or a utility knife, carefully cut along the marked line. Be extra cautious when using a utility knife – slow and steady wins the race!
3. Create Drainage Holes (Optional but Recommended): This step is crucial for preventing waterlogging, which can lead to root rot.
* Drill Holes: If you have a drill, use a small drill bit to create several holes in the bottom of the bottle (the half without the bottle neck).
* Hammer and Nail: If you don’t have a drill, you can use a hammer and nail to carefully punch holes in the bottom of the bottle. Be careful not to crack the plastic.
4. Prepare the Top Half: The top half of the bottle (the one with the bottle neck) needs a way to allow water to wick up into the soil.
* Remove the Cap: Take the cap off the bottle.
* Insert a Wick (Optional): You can use a piece of cotton cloth or rope as a wick. Thread it through the bottle neck, leaving a portion hanging down into the water reservoir. This will help draw water up into the soil. If you skip this step, the soil will still absorb water, but the wick can help regulate the moisture.
Planting Your Kale
Now for the fun part – planting your kale!
1. Add Drainage Layer: In the bottom half of the bottle (the one with the drainage holes), add a layer of gravel or small stones. This will further improve drainage and prevent the soil from becoming waterlogged. Aim for a layer about 1-2 inches thick.
2. Add Soil: Fill the top half of the bottle (the one with the bottle neck) with potting soil. Leave about an inch of space at the top. Gently pat down the soil to remove any air pockets.
3. Plant Your Kale:
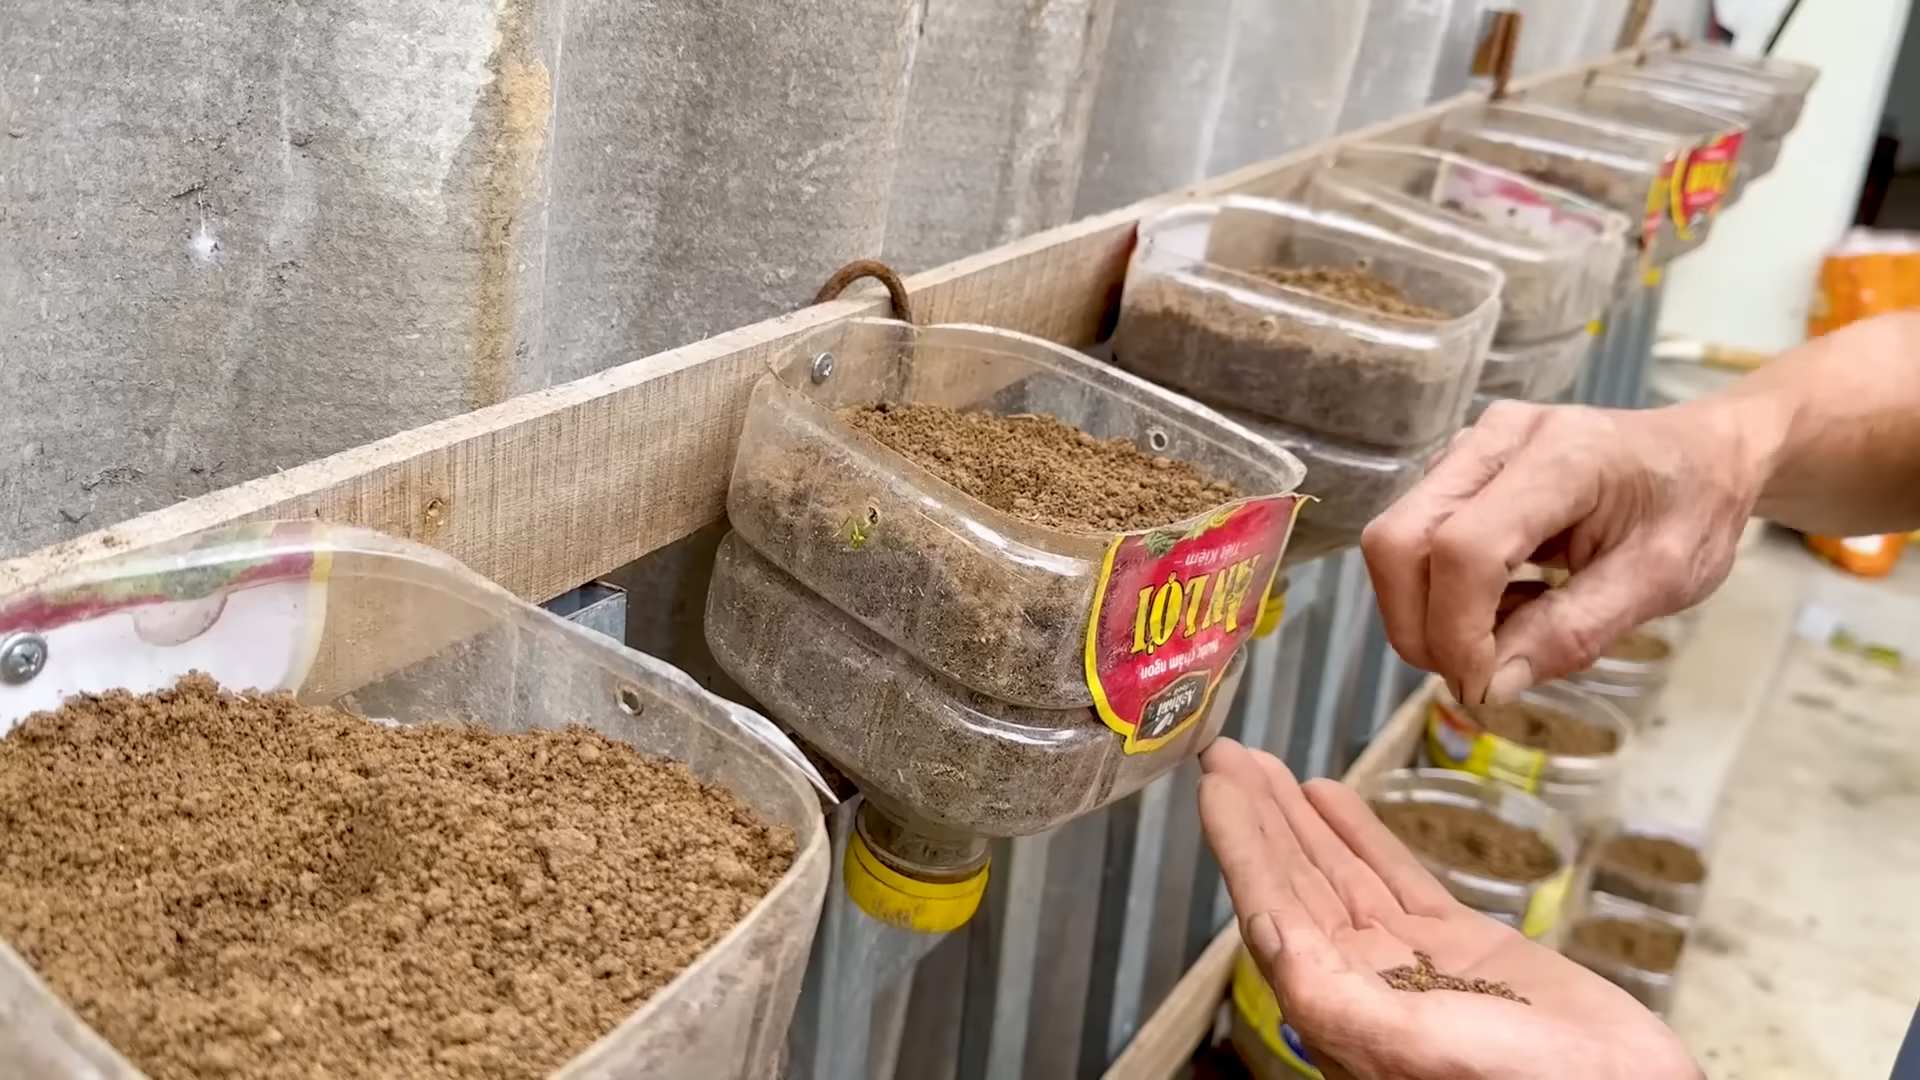
* From Seeds: If you’re starting from seeds, sprinkle a few seeds on top of the soil. Cover them with a thin layer of soil (about ¼ inch). Gently water the soil.
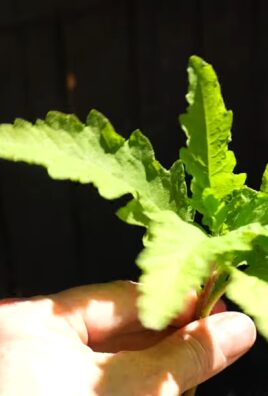
* From Seedlings: If you’re using seedlings, carefully remove them from their containers. Gently loosen the roots and place the seedling in the center of the soil. Fill in around the seedling with more soil, and gently pat it down.
4. Assemble the Bottle Garden: Carefully invert the top half of the bottle (the one with the soil and kale) and place it inside the bottom half of the bottle (the one with the gravel). Make sure the bottle neck is submerged in the water reservoir.
5. Water Thoroughly: Water the soil thoroughly until water drains into the bottom reservoir. This will help settle the soil and ensure the kale roots have access to moisture.
Caring for Your Kale Bottle Garden
Now that your kale is planted, it’s time to provide it with the care it needs to thrive.
1. Sunlight: Kale needs at least 6 hours of sunlight per day. Place your bottle garden in a sunny location, such as a windowsill, balcony, or patio. If you don’t have enough natural sunlight, you can supplement with a grow light.
2. Watering: The beauty of this self-watering system is that you don’t need to water as frequently. Check the water level in the bottom reservoir regularly. When the water level gets low, refill it. Avoid overwatering, as this can lead to root rot. The soil should be moist, but not soggy.
3. Fertilizing: Kale is a heavy feeder, so it needs regular fertilization. Use a liquid fertilizer diluted to half strength every 2-3 weeks. Follow the instructions on the fertilizer label. You can also add compost tea to the water reservoir for an extra boost of nutrients.
4. Pest Control: Keep an eye out for pests, such as aphids, cabbage worms, and slugs. If you spot any pests, you can try removing them by hand or using an organic insecticide. Neem oil is a good option for controlling many common garden pests.
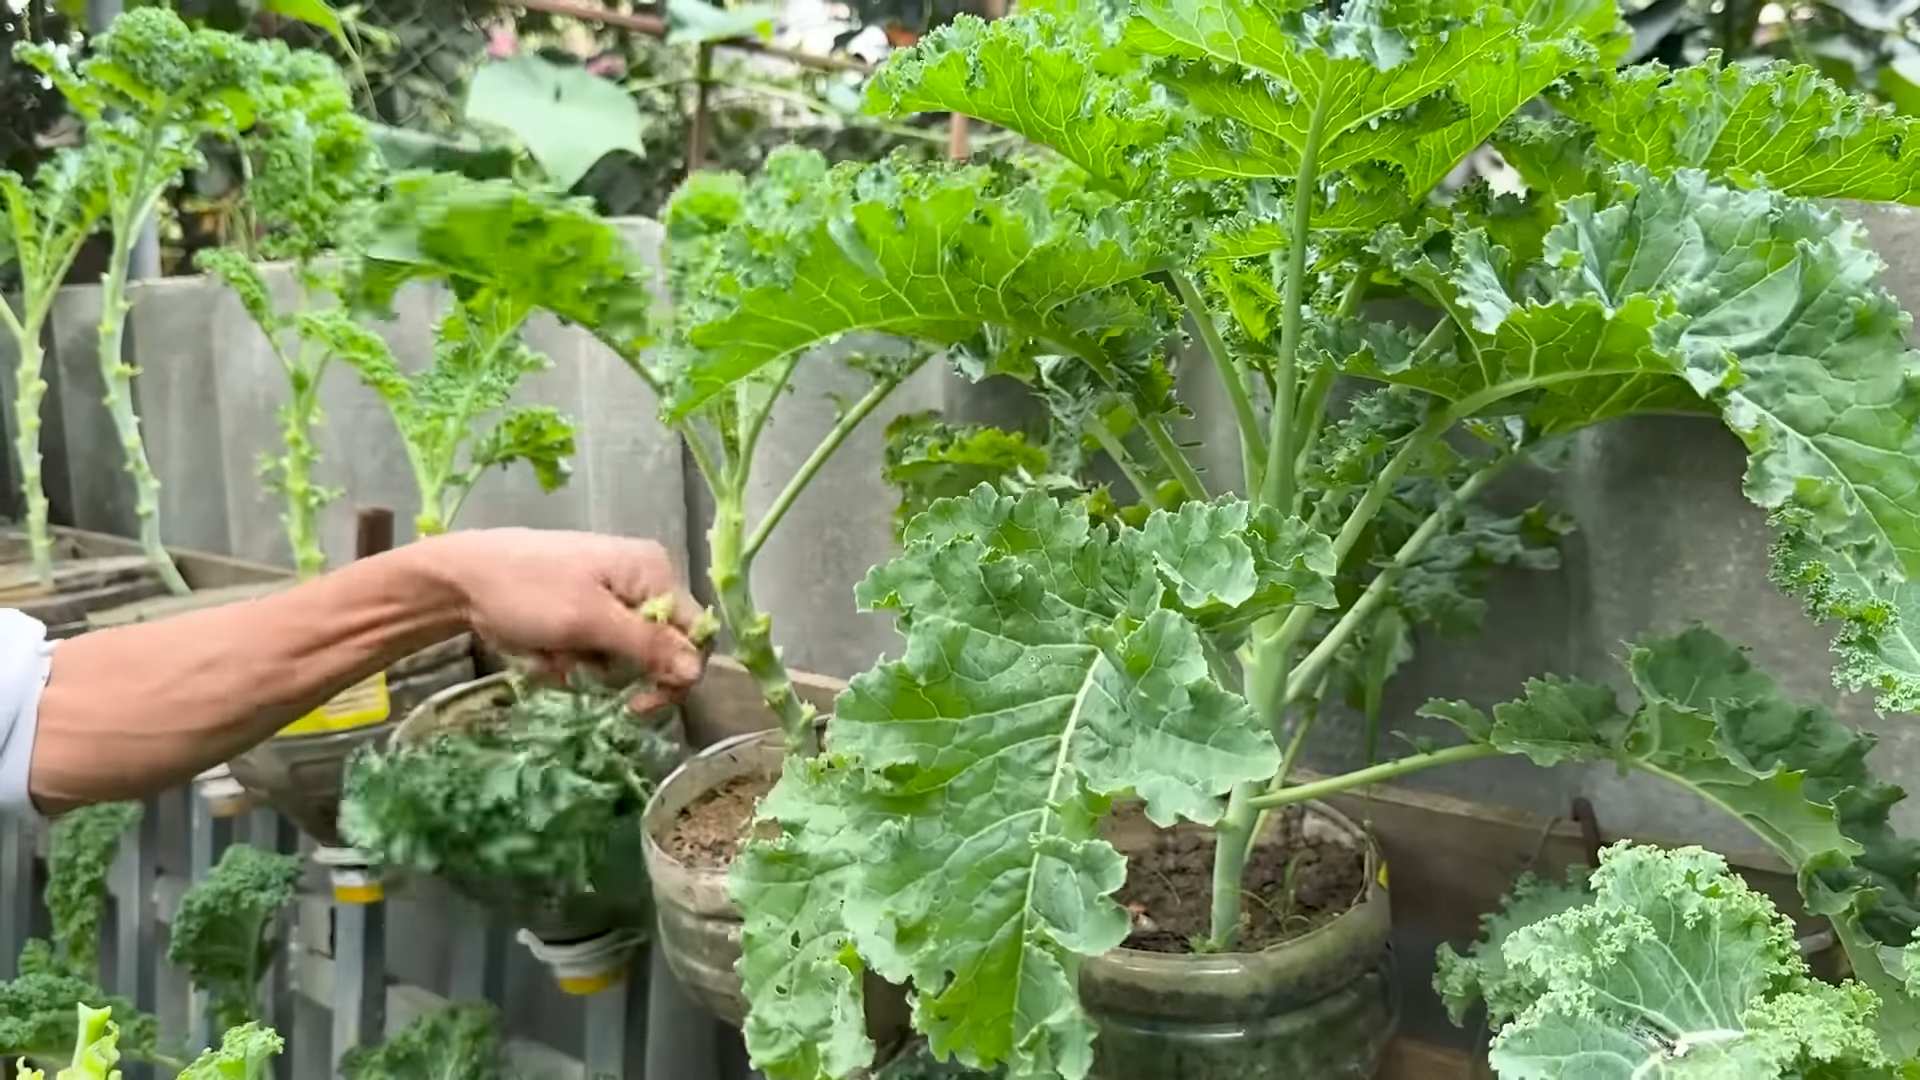
5. Harvesting: You can start harvesting kale leaves when they are about 4-6 inches long. Harvest the outer leaves first, leaving the inner leaves to continue growing. This will encourage the plant to produce more leaves. Simply snip off the leaves with scissors or your fingers.
6. Rotation: Rotate the bottles regularly to ensure even sunlight exposure on all sides of the plant. This will help prevent the kale from leaning towards the light.
7. Support (Optional): As your kale grows taller, it may need some support. You can use a small stake or trellis to help keep the plant upright.
Hanging Your Bottle Garden (Optional)
If you want to hang your bottle garden, here’s how:
1. Drill Holes: Carefully drill two holes on opposite sides of the bottom half of the bottle, near the top.
2. Thread Twine or Rope: Thread twine or rope through the holes, creating a loop for hanging. Make sure the loop is strong enough to support the weight of the bottle garden.
3. Hang Securely: Hang your bottle garden in a sunny location, making sure it’s securely attached.
Troubleshooting
Even with the best care, you might encounter some challenges. Here are a few common problems and how to address them:
* Yellowing Leaves: This could be a sign of overwatering, underwatering, or nutrient deficiency. Check the soil moisture and adjust your watering schedule accordingly. Fertilize regularly to provide the necessary nutrients.
* Leggy Growth: This means the plant is not getting enough sunlight. Move it to a sunnier location or supplement with a grow light.
* Pests: As mentioned earlier, keep an eye out for pests and take action promptly.
* Root Rot: This is caused by overwatering. Make sure the drainage holes are clear and avoid overwatering. If root rot is severe, you may need to transplant the kale into fresh soil.
Hey there, fellow gardening enthusiasts! I’m so excited to share this super easy and rewarding DIY project with you: creating a kale bottle garden. It’s a fantastic way to grow your own fresh, nutritious kale, even if you’re short on space or don’t have a traditional garden. Plus, it’s a great way to recycle those plastic bottles that seem to multiply in our homes!
This project is perfect for beginners, and I promise you’ll be munching on homegrown kale in no time. Let’s dive in!
What You’ll Need
Before we get started, let’s gather all the necessary materials. Trust me, having everything ready beforehand will make the process much smoother.
* Plastic Bottles: You’ll need at least two plastic bottles per kale plant. I recommend using 2-liter bottles, but any size will work as long as they’re clean and sturdy. The more bottles you use, the more kale you can grow!
* Scissors or Utility Knife: For cutting the plastic bottles. Be careful and always cut away from yourself!
* Potting Soil: Choose a good quality potting mix that’s well-draining. Kale needs nutrient-rich soil to thrive.
* Kale Seeds or Seedlings: You can start from seeds or buy seedlings from your local garden center. Seedlings will give you a head start.
* Water: Essential for keeping your kale hydrated.
* Gravel or Small Stones: For drainage at the bottom of the bottles.
* Drill or Nail and Hammer: To create drainage holes (optional, but recommended).
* Twine or Rope (Optional): For hanging your bottle garden.
* Gloves (Optional): To keep your hands clean.
* Measuring Cup or Scoop: To help with soil distribution.
* Permanent Marker: For labeling (optional).
Preparing the Bottles
This is where we transform those ordinary plastic bottles into mini-gardens!
1. Clean the Bottles: Thoroughly wash the plastic bottles with soap and water to remove any residue. Rinse them well and let them dry completely. This is important to prevent any contamination that could harm your kale.
2. Cut the Bottles: For each kale plant, you’ll need to cut one bottle in half. The top half (the one with the bottle neck) will be inverted and placed inside the bottom half. This creates a self-watering system.
* Mark the Cutting Line: Use a permanent marker to draw a line around the bottle, about halfway down.
* Cut Carefully: Using scissors or a utility knife, carefully cut along the marked line. Be extra cautious when using a utility knife – slow and steady wins the race!
3. Create Drainage Holes (Optional but Recommended): This step is crucial for preventing waterlogging, which can lead to root rot.
* Drill Holes: If you have a drill, use a small drill bit to create several holes in the bottom of the bottle (the half without the bottle neck).
* Hammer and Nail: If you don’t have a drill, you can use a hammer and nail to carefully punch holes in the bottom of the bottle. Be careful not to crack the plastic.
4. Prepare the Top Half: The top half of the bottle (the one with the bottle neck) needs a way to allow water to wick up into the soil.
* Remove the Cap: Take the cap off the bottle.
* Insert a Wick (Optional): You can use a piece of cotton cloth or rope as a wick. Thread it through the bottle neck, leaving a portion hanging down into the water reservoir. This will help draw water up into the soil. If you skip this step, the soil will still absorb water, but the wick can help regulate the moisture.
Planting Your Kale
Now for the fun part – planting your kale!
1. Add Drainage Layer: In the bottom half of the bottle (the one with the drainage holes), add a layer of gravel or small stones. This will further improve drainage and prevent the soil from becoming waterlogged. Aim for a layer about 1-2 inches thick.
2. Add Soil: Fill the top half of the bottle (the one with the bottle neck) with potting soil. Leave about an inch of space at the top. Gently pat down the soil to remove any air pockets.
3. Plant Your Kale:
* From Seeds: If you’re starting from seeds, sprinkle a few seeds on top of the soil. Cover them with a thin layer of soil (about ¼ inch). Gently water the soil.
* From Seedlings: If you’re using seedlings, carefully remove them from their containers. Gently loosen the roots and place the seedling in the center of the soil. Fill in around the seedling with more soil, and gently pat it down.
4. Assemble the Bottle Garden: Carefully invert the top half of the bottle (the one with the soil and kale) and place it inside the bottom half of the bottle (the one with the gravel). Make sure the bottle neck is submerged in the water reservoir.
5. Water Thoroughly: Water the soil thoroughly until water drains into the bottom reservoir. This will help settle the soil and ensure the kale roots have access to moisture.
Caring for Your Kale Bottle Garden
Now that your kale is planted, it’s time to provide it with the care it needs to thrive.
1. Sunlight: Kale needs at least 6 hours of sunlight per day. Place your bottle garden in a sunny location, such as a windowsill, balcony, or patio. If you don’t have enough natural sunlight, you can supplement with a grow light.
2. Watering: The beauty of this self-watering system is that you don’t need to water as frequently. Check the water level in the bottom reservoir regularly. When the water level gets low, refill it. Avoid overwatering, as this can lead to root rot. The soil should be moist, but not soggy.
3. Fertilizing: Kale is a heavy feeder, so it needs regular fertilization. Use a liquid fertilizer diluted to half strength every 2-3 weeks. Follow the instructions on the fertilizer label. You can also add compost tea to the water reservoir for an extra boost of nutrients.
4. Pest Control: Keep an eye out for pests, such as aphids, cabbage worms, and slugs. If you spot any pests, you can try removing them by hand or using an organic insecticide. Neem oil is a good option for controlling many common garden pests.
5. Harvesting: You can start harvesting kale leaves when they are about 4-6 inches long. Harvest the outer leaves first, leaving the inner leaves to continue growing. This will encourage the plant to produce more leaves. Simply snip off the leaves with scissors or your fingers.
6. Rotation: Rotate the bottles regularly to ensure even sunlight exposure on all sides of the plant. This will help prevent the kale from leaning towards the light.
7. Support (Optional): As your kale grows taller, it may need some support. You can use a small stake or trellis to help keep the plant upright.
Hanging Your Bottle Garden (Optional)
If you want to hang your bottle garden, here’s how:
1. Drill Holes: Carefully drill two holes on opposite sides of the bottom half of the bottle, near the top.
2. Thread Twine or Rope: Thread twine or rope through the holes, creating a loop for hanging. Make sure the loop is strong enough to support the weight of the bottle garden.
3. Hang Securely: Hang your bottle garden in a sunny location, making sure it’s securely attached.
Troubleshooting
Even with the best care, you might encounter some challenges. Here are a few common problems and how to address them:
* Yellowing Leaves: This could be a sign of overwatering, underwatering, or nutrient deficiency. Check the soil moisture and adjust your watering schedule accordingly. Fertilize regularly to provide the necessary nutrients.
* Leggy Growth: This means the plant is not getting enough sunlight. Move it to a sunnier location or supplement with a grow light.
* Pests: As mentioned earlier, keep an eye out for pests and take action promptly.
* Root Rot: This is caused by overwatering. Make sure the drainage holes are clear and avoid overwatering. If root rot is severe, you may need to transplant the kale into fresh soil.
Enjoy Your Homegrown Kale!
And there you have it! Your very own DIY kale bottle garden. Now you can enjoy fresh, homegrown kale in salads, smoothies, soups, or any other dish you like. This project is not only fun and rewarding, but it’s also a great way to reduce waste and connect with nature. Happy gardening! I hope you enjoy this project as much as I do!
Conclusion
So, there you have it! Transforming a humble plastic bottle and some leftover kale into a thriving miniature garden is not just a fun project; it’s a sustainable, space-saving, and surprisingly rewarding way to bring fresh greens into your life. This DIY kale bottle garden is more than just a trendy craft; it’s a practical solution for urban dwellers, apartment residents, or anyone looking to maximize their gardening potential with minimal resources.
Why is this a must-try? Because it’s incredibly accessible. You likely already have most of the materials on hand, making it a budget-friendly endeavor. It’s also a fantastic educational opportunity, especially for children, to learn about plant life cycles, resourcefulness, and the importance of sustainability. Plus, let’s be honest, there’s something deeply satisfying about nurturing life from something that would otherwise end up in a landfill.
But the beauty of this project lies in its adaptability. Feel free to experiment with different types of kale. Curly kale, Lacinato kale (also known as dinosaur kale), or even Red Russian kale would all thrive in this environment. You could also try companion planting. Consider adding some chives or basil to your bottle garden to deter pests and enhance the flavor of your kale. For a more decorative touch, paint the outside of your bottles or add some colorful gravel to the bottom.
Don’t be afraid to get creative with the bottle design itself. While a simple cut-and-inverted bottle works perfectly, you could explore more elaborate designs, creating tiered gardens or even hanging bottle planters. The possibilities are truly endless!
We wholeheartedly encourage you to give this DIY kale bottle garden a try. It’s a simple project with a big impact, both on your access to fresh produce and on your commitment to sustainable living. Once you’ve created your own miniature kale oasis, we’d love to hear about your experience! Share your photos, tips, and variations in the comments below. Let’s inspire each other to grow more, waste less, and embrace the joy of DIY gardening. We are confident that you will find this project to be a fun and rewarding experience. Happy gardening!
Frequently Asked Questions (FAQ)
What type of plastic bottle is best for a kale bottle garden?
Ideally, you should use a food-grade plastic bottle, such as a water bottle or a soda bottle. Look for the recycling symbol with a number inside, typically a “1” (PET or PETE) or a “2” (HDPE). These are generally considered safer for growing food. Avoid bottles with the number “3” (PVC) or “7” (other), as they may leach harmful chemicals. Thoroughly wash and sanitize the bottle before use, regardless of the type.
What kind of soil should I use for my kale bottle garden?
A well-draining potting mix is crucial for the success of your kale bottle garden. Avoid using garden soil, as it can become compacted in a container and hinder drainage. A good potting mix will retain moisture while allowing excess water to escape, preventing root rot. You can also amend your potting mix with perlite or vermiculite to improve drainage and aeration. Consider using an organic potting mix for the healthiest and most flavorful kale.
How much sunlight does my kale bottle garden need?
Kale thrives in full sun, which means at least 6 hours of direct sunlight per day. However, it can also tolerate partial shade, especially in hotter climates. If you don’t have a sunny spot outdoors, you can supplement with grow lights. Place your kale bottle garden near a south-facing window for maximum sunlight exposure. Rotate the bottle regularly to ensure even growth on all sides.
How often should I water my kale bottle garden?
The frequency of watering will depend on the climate, the type of potting mix you’re using, and the size of your bottle garden. Generally, you should water when the top inch of soil feels dry to the touch. Avoid overwatering, as this can lead to root rot. Ensure that the bottle has drainage holes to allow excess water to escape. Water thoroughly until water drains out of the bottom, then allow the soil to dry slightly before watering again.
How do I fertilize my kale bottle garden?
Kale is a heavy feeder, so it will benefit from regular fertilization. You can use a liquid fertilizer diluted to half strength every two weeks. Alternatively, you can incorporate slow-release fertilizer granules into the potting mix at planting time. Choose a fertilizer that is specifically formulated for vegetables or leafy greens. Organic options like compost tea or fish emulsion are also excellent choices.
How do I harvest kale from my bottle garden?
You can start harvesting kale leaves once they are about 4-6 inches long. Harvest the outer leaves first, leaving the inner leaves to continue growing. This will encourage the plant to produce more leaves. Use scissors or a sharp knife to cut the leaves close to the stem. Avoid harvesting more than one-third of the plant at a time to prevent stressing it.
What pests and diseases are common in kale bottle gardens, and how do I prevent them?
Common pests that may affect kale include aphids, cabbage worms, and flea beetles. You can prevent these pests by inspecting your plants regularly and removing any pests you find by hand. You can also use insecticidal soap or neem oil to control infestations. Diseases like powdery mildew and black rot can also affect kale. To prevent these diseases, ensure good air circulation around your plants and avoid overwatering. Remove any infected leaves promptly.
How long will my kale plant last in a bottle garden?
With proper care, your kale plant can last for several months in a bottle garden. However, kale is a biennial plant, meaning it typically lives for two years. After the first year, it may bolt (produce flowers and seeds), which can make the leaves taste bitter. To prolong the life of your plant, you can pinch off any flower buds that appear. Eventually, the plant will exhaust its resources and need to be replaced.
Can I grow other vegetables in a bottle garden besides kale?
Yes, you can grow a variety of other vegetables in bottle gardens, including lettuce, spinach, herbs like basil and mint, and even small varieties of tomatoes or peppers. Choose plants that have shallow root systems and don’t require a lot of space. Be sure to provide adequate sunlight, water, and nutrients for the specific plants you are growing.
What do I do with my kale bottle garden in the winter?
Kale is a cold-hardy plant and can tolerate temperatures down to 20°F (-6°C). In mild climates, you can leave your kale bottle garden outdoors throughout the winter. In colder climates, you may need to protect it from frost by bringing it indoors or covering it with a blanket. Reduce watering during the winter months, as the plant will not be growing as actively. You can also supplement with grow lights if needed.
Leave a Comment