
DIY sink unclogging hacks are a lifesaver, trust me! We’ve all been there – staring into a sink full of murky water, wondering how on earth it got so backed up. It’s frustrating, messy, and can feel like a plumbing emergency waiting to happen. But before you reach for the phone and call a professional (and spend a small fortune!), let’s explore some simple, effective, and budget-friendly DIY solutions.
Sink clogs have been a household nuisance for as long as, well, sinks have existed! From ancient Roman bathhouses to modern kitchens, dealing with blocked drains is a timeless challenge. Our ancestors relied on ingenuity and readily available materials to keep their water flowing, and we can too! These aren’t just quick fixes; they’re time-tested methods passed down through generations.
Why do you need these DIY sink unclogging hacks in your arsenal? Because a clogged sink can disrupt your entire day. Washing dishes becomes a chore, brushing your teeth feels unhygienic, and the lingering smell can be unpleasant. Plus, harsh chemical drain cleaners can damage your pipes and harm the environment. I’m here to show you how to tackle those stubborn clogs with items you probably already have in your home, saving you time, money, and a potential plumbing headache. Let’s get started and reclaim your sink!
DIY Sink Unclogging Hacks: Conquer Those Pesky Clogs!
Okay, let’s face it: a clogged sink is a major annoyance. Water backing up, that gurgling sound… it’s enough to drive anyone crazy! But before you reach for harsh chemicals or call a plumber (and spend a fortune!), let’s try some DIY sink unclogging hacks. I’ve personally used these methods with great success, and I’m confident you can too. We’ll go through several options, starting with the simplest and working our way up to the more involved.
The Boiling Water Blitz
This is often the first thing I try because it’s so easy and requires absolutely no special tools. It works best for clogs caused by grease or soap buildup.
1. Clear the Sink: Remove any standing water from the sink. You can use a cup or a small container to scoop it out.
2. Boil the Water: Bring a kettle or pot of water to a rolling boil. Make sure it’s really boiling hot!
3. Pour Carefully: Slowly and carefully pour the boiling water down the drain. Be cautious to avoid splashing, as boiling water can cause serious burns.
4. Wait and See: Give the hot water a few minutes to work its magic. You should hear the water starting to drain.
5. Repeat if Necessary: If the water is still draining slowly, repeat the process one or two more times. Sometimes, it takes a couple of tries to fully dissolve the clog.
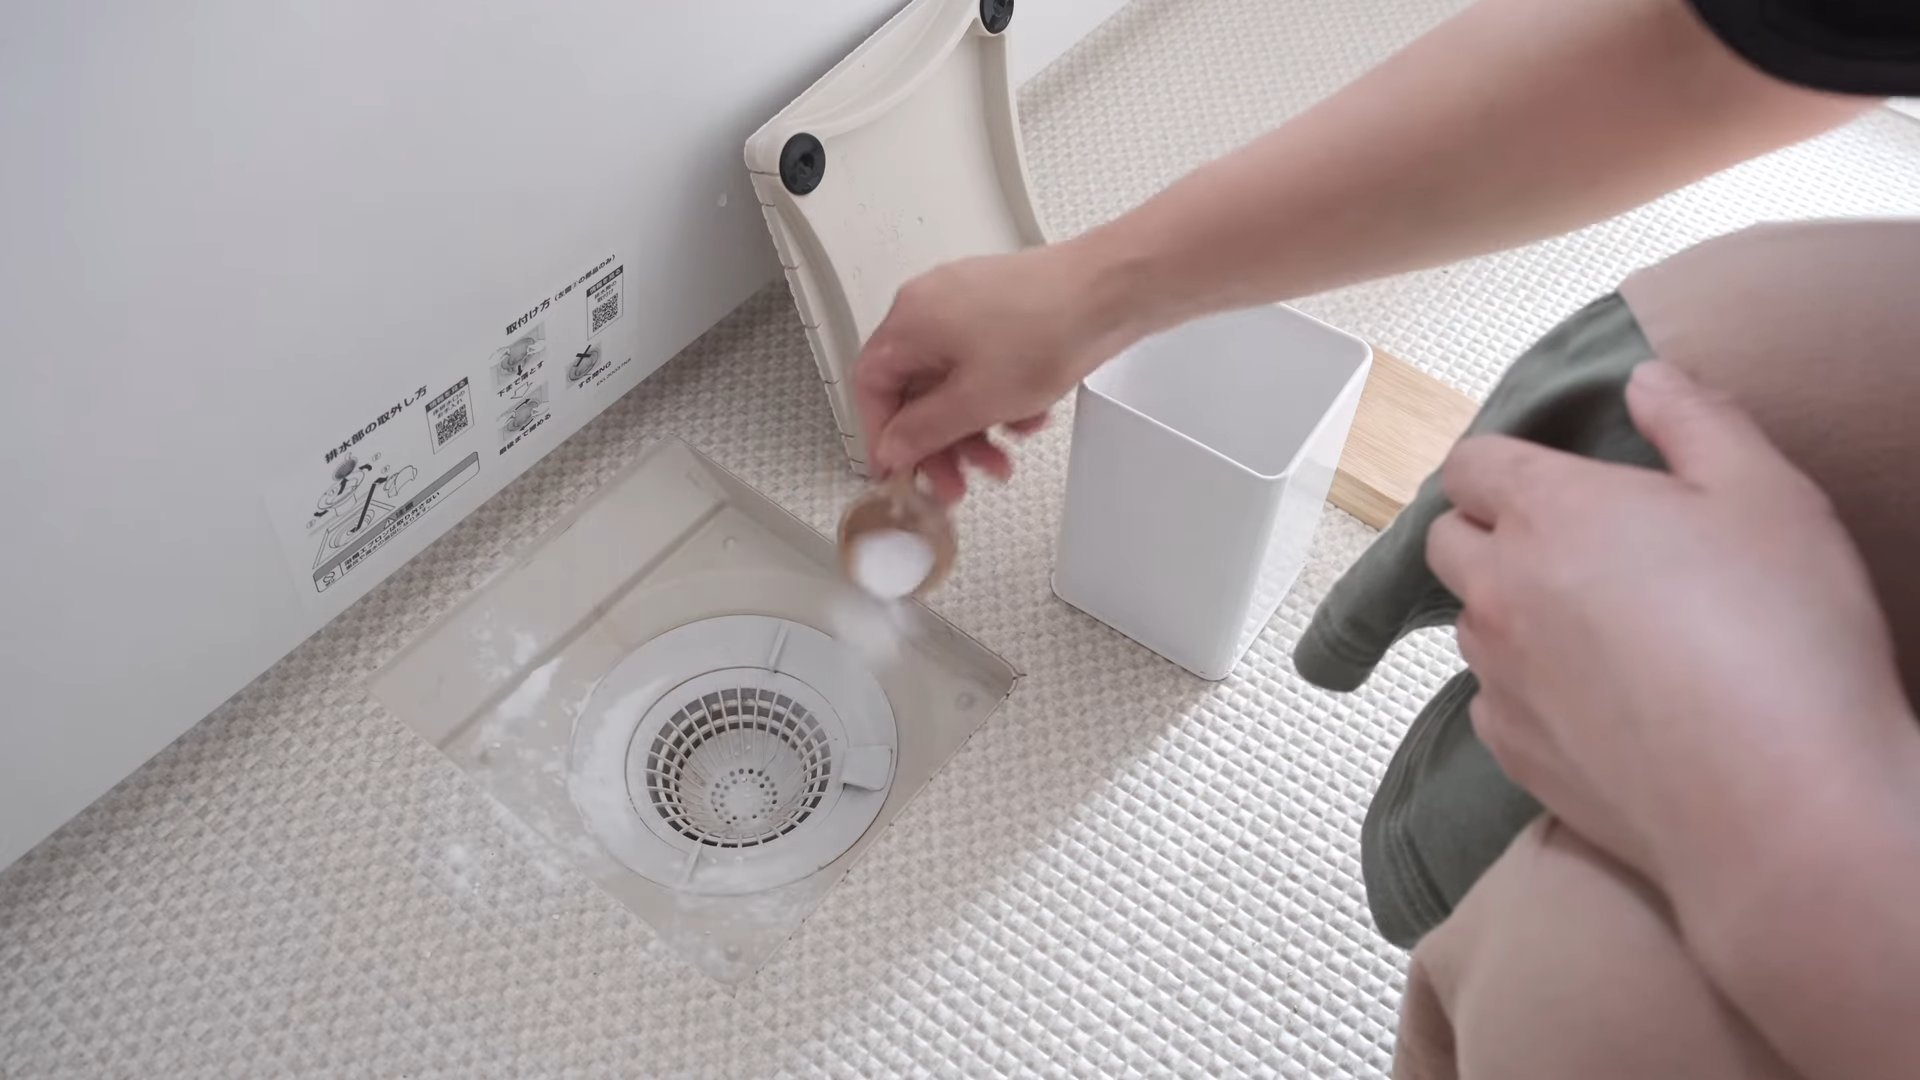
The Baking Soda and Vinegar Volcano
This is a classic DIY solution that’s both effective and environmentally friendly. The chemical reaction between baking soda and vinegar helps to break down clogs.
1. Clear the Sink: Again, remove any standing water from the sink.
2. Pour in Baking Soda: Pour about one cup of baking soda down the drain. Try to get as much of it into the drain opening as possible.
3. Add the Vinegar: Slowly pour one cup of white vinegar down the drain after the baking soda.
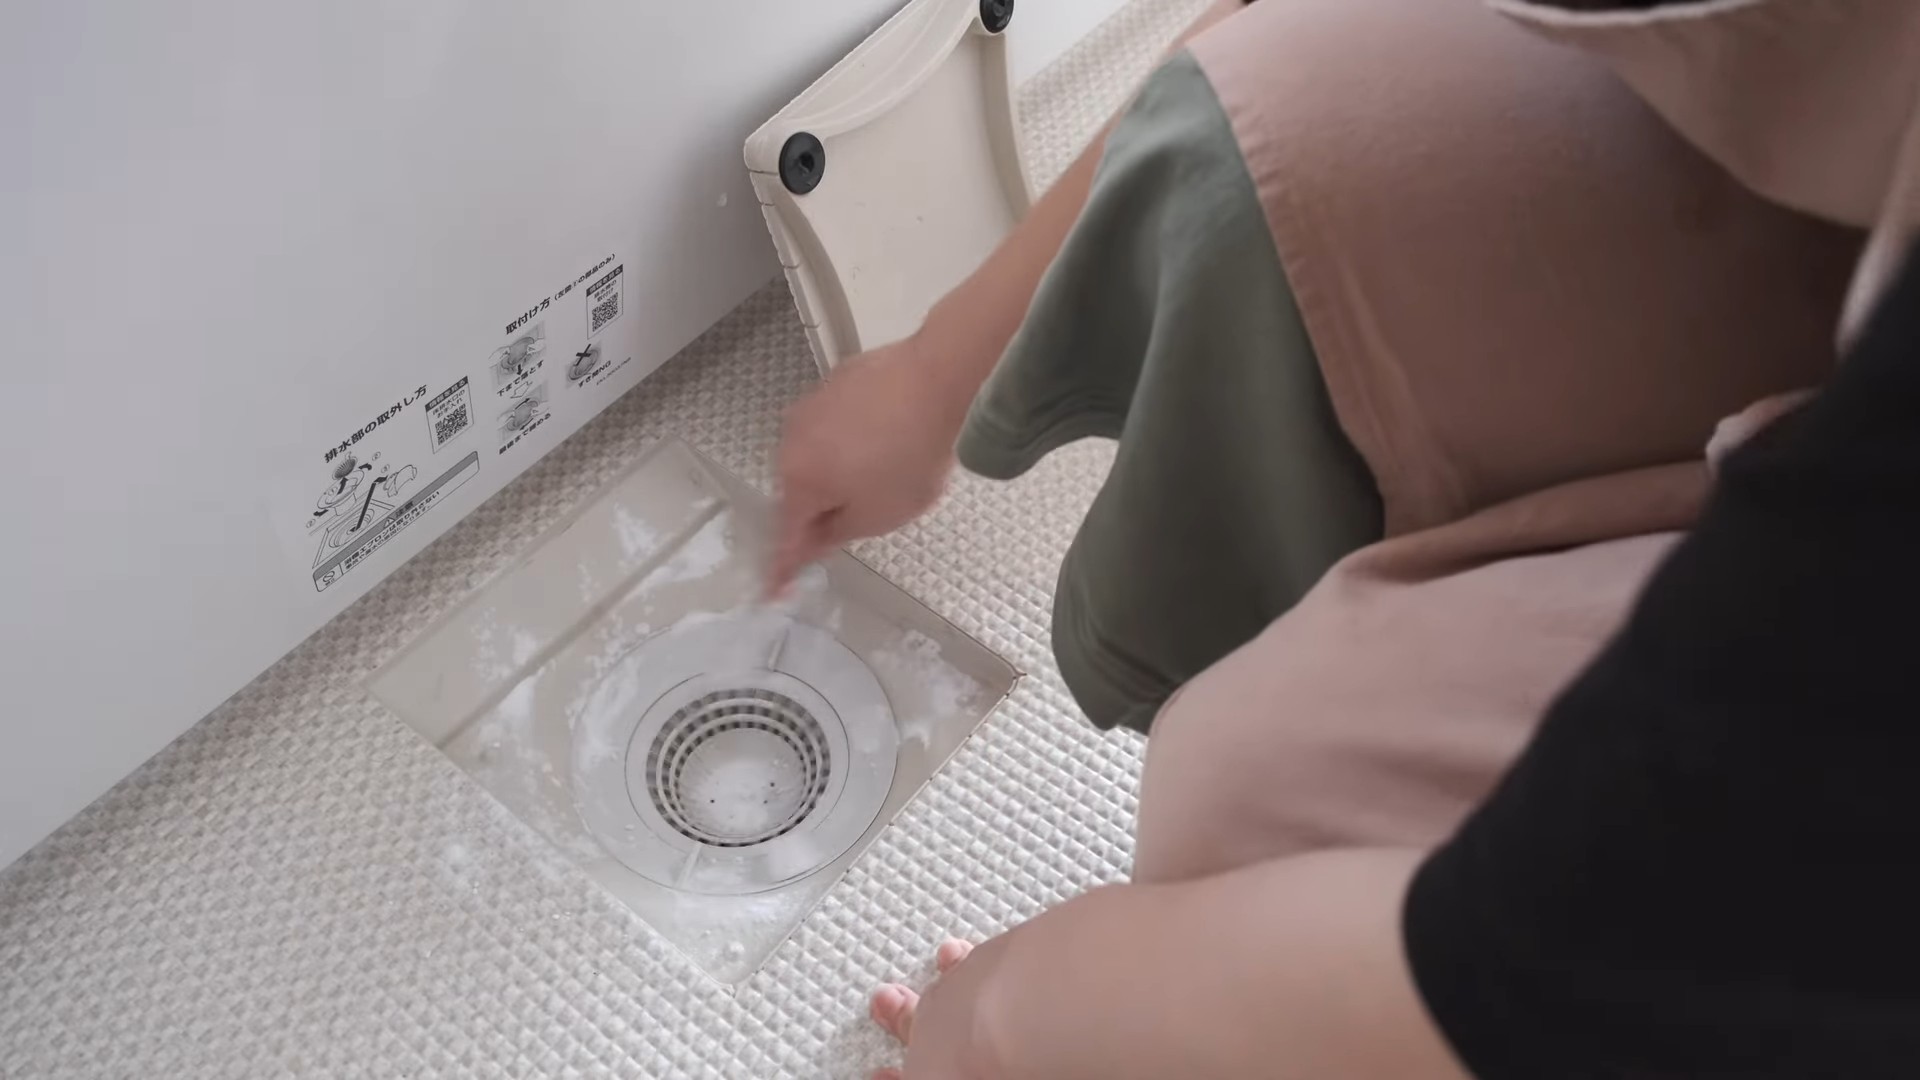
4. The Fizzing Frenzy: You’ll immediately notice a fizzing reaction. This is the baking soda and vinegar working together to break down the clog.
5. Let it Sit: Let the mixture sit for at least 30 minutes, or even better, overnight. This gives it plenty of time to work on the clog.
6. Flush with Hot Water: After the waiting period, flush the drain with hot water. I usually boil a kettle of water for this step to ensure it’s hot enough.
7. Assess and Repeat: Check to see if the drain is flowing freely. If not, you can repeat the process.
The Plunger Power Play
A plunger is a must-have tool for any homeowner, and it can often dislodge stubborn clogs. Make sure you’re using a *cup plunger* for sinks, not a flange plunger (which is designed for toilets).
1. Remove Standing Water: Leave just enough water in the sink to cover the cup of the plunger. Too much water will make it difficult to create a seal.
2. Create a Seal: Place the plunger over the drain opening, ensuring that the cup is completely submerged in water and forms a tight seal.
3. Plunge Vigorously: Push and pull the plunger up and down with a strong, steady motion. Maintain the seal as you plunge. You should feel the pressure building up and releasing.
4. Repeat and Observe: Continue plunging for several minutes. After a while, remove the plunger and see if the water drains.
5. Persistent Clog? If the clog persists, repeat the plunging process several times. Sometimes, it takes a bit of effort to dislodge a stubborn clog. You might also try adding a bit more water if the seal isn’t holding well.
The Wire Hanger Rescue
This is a surprisingly effective method for retrieving hair and other debris that’s causing the clog.
1. Straighten the Hanger: Take a wire coat hanger and straighten it out as much as possible.
2. Create a Hook: Bend one end of the hanger into a small hook. This will be used to grab the clog.
3. Insert and Fish: Carefully insert the hooked end of the hanger into the drain opening. Gently probe around, trying to snag any hair or debris.
4. Pull Out the Gunk: Once you’ve hooked something, slowly and carefully pull the hanger out of the drain. Be prepared for some… unpleasantness.
5. Clean the Hanger: Remove the debris from the hanger and dispose of it properly.
6. Repeat as Needed: Repeat the process until you’re no longer pulling out any debris.
7. Flush with Hot Water: After you’ve removed as much debris as possible, flush the drain with hot water to clear any remaining residue.
Diving Deeper: Cleaning the P-Trap
If the above methods haven’t worked, the clog might be located in the P-trap, the curved pipe under your sink. This requires a bit more effort, but it’s still a manageable DIY project.
Preparation is Key
1. Gather Your Supplies: You’ll need a bucket, adjustable wrench or pliers, and some old towels or rags.
2. Protect Yourself: Wear gloves to protect your hands from grime and bacteria.
3. Position the Bucket: Place the bucket directly under the P-trap to catch any water and debris that will spill out when you remove it.
Disassembling the P-Trap
1. Loosen the Slip Nuts: Locate the slip nuts that connect the P-trap to the drain pipes. Use your wrench or pliers to loosen these nuts. Be careful not to overtighten them, as they can be easily damaged.
2. Remove the P-Trap: Once the slip nuts are loose, carefully remove the P-trap. Hold it over the bucket to catch any water and debris.
3. Inspect the P-Trap: Examine the P-trap for any visible clogs. You’ll likely find a buildup of hair, grease, and other debris.
Cleaning the P-Trap
1. Remove the Clog: Use your fingers (with gloves on!) or a wire hanger to remove the clog from the P-trap. You can also rinse the P-trap with water to help dislodge any stubborn debris.
2. Clean the Drain Pipes: While the P-trap is removed, take the opportunity to clean the drain pipes that connect to it. You can use a wire hanger or a bottle brush to remove any buildup.
Reassembling the P-Trap
1. Reattach the P-Trap: Carefully reattach the P-trap to the drain pipes, making sure the slip nuts are properly aligned.
2. Tighten the Slip Nuts: Tighten the slip nuts by hand, then use your wrench or pliers to give them a final snug tightening. Be careful not to overtighten them.
3. Test for Leaks: Turn on the water and check for any leaks around the slip nuts. If you see any leaks, tighten the nuts a bit more.
A Word on Chemical Drain Cleaners
While chemical drain cleaners might seem like a quick and easy solution, I generally advise against using them. They can be harsh on your pipes, potentially causing corrosion and damage over time. They’re also harmful to the environment and can be dangerous if not handled properly. Plus, they often don’t even work that well! I’ve found that the DIY methods I’ve described are usually just as effective, and they’re much safer and more environmentally friendly.
Prevention is Better Than Cure
Of course, the best way to deal with a clogged sink is to prevent it from happening in the first place. Here are a few tips to keep your drains clear:
* Use a Drain Strainer: A drain strainer is a simple and inexpensive device that catches hair and other debris before they can enter the drain.
* Avoid Pouring Grease Down the Drain: Grease is a major culprit when it comes to clogged drains. Always dispose of grease in a separate container.
* Flush with Hot Water Regularly: Periodically flushing your drains with hot water can help to prevent buildup.
* Baking Soda and Vinegar Maintenance: Once a month, pour a cup of baking soda followed by a cup of vinegar down your drain to keep it clear.
By following these tips and using the DIY unclogging hacks I’ve shared, you can keep your sink drains flowing freely and avoid the frustration of dealing with clogs. Good luck, and happy unclogging!
Conclusion
So, there you have it! Forget those expensive, harsh chemical drain cleaners that can damage your pipes and harm the environment. This DIY sink unclogging hack is a game-changer, offering a simple, effective, and eco-friendly solution to a common household problem. We’ve walked you through the steps, highlighting the ease and accessibility of using ingredients you likely already have in your pantry.
But why is this DIY approach a must-try? Beyond the cost savings and environmental benefits, it’s about empowerment. Taking control of your home maintenance, understanding the process, and achieving a satisfying result – that’s a feeling you can’t buy in a store. Plus, you’re avoiding the potential health risks associated with breathing in the fumes of commercial drain cleaners.
This isn’t just a quick fix; it’s a sustainable solution.
Now, let’s talk variations. While the baking soda and vinegar combination is a powerhouse, you can adapt this method to suit your specific needs. For instance, if you suspect a grease buildup is the culprit, try pouring a kettle of boiling water down the drain *after* the baking soda and vinegar have fizzed. The hot water will help to melt and dislodge the grease. Alternatively, for a more stubborn clog, you can increase the amount of baking soda and vinegar used, or repeat the process a second time.
Another variation involves using washing soda (sodium carbonate) instead of baking soda (sodium bicarbonate). Washing soda is a stronger alkali and can be more effective for particularly tough clogs. However, be sure to wear gloves when handling washing soda, as it can be irritating to the skin.
And don’t forget the power of prevention! Regularly flushing your drain with hot water can help prevent buildup in the first place. Also, consider using a drain strainer to catch hair and other debris before they enter your pipes.
We’re confident that this DIY sink unclogging hack will become your go-to solution for a slow or clogged drain. It’s simple, safe, and incredibly effective. But the real magic happens when you try it yourself.
So, what are you waiting for? Gather your baking soda, vinegar, and boiling water, and say goodbye to that frustrating clogged sink. We encourage you to try this method and share your experience with us! Let us know in the comments how it worked for you, if you tried any variations, and any tips you discovered along the way. Your feedback will help others conquer their own drain dilemmas. Let’s build a community of DIY drain-clearing experts!
We are eager to hear your success stories and any creative adaptations you come up with. Happy unclogging!
Frequently Asked Questions (FAQs)
What causes sink clogs in the first place?
Sink clogs are typically caused by a buildup of various materials that accumulate over time. Common culprits include hair, soap scum, food particles (especially grease and coffee grounds), and mineral deposits from hard water. These materials can stick to the inside of your pipes, gradually narrowing the passage and eventually causing a complete blockage. Regularly flushing your drain with hot water and using a drain strainer can help prevent these clogs from forming.
How often should I use this DIY sink unclogging method?
The frequency depends on how often your sink clogs. If you experience slow draining regularly, using this method once a month as a preventative measure can help keep your pipes clear. For sinks that rarely clog, you can use it as needed when you notice the water draining slowly. Overusing the method is unlikely to cause any harm, but it’s generally not necessary unless you’re experiencing drainage issues.
Is this DIY method safe for all types of pipes?
Generally, yes, this DIY method is safe for most types of pipes, including PVC, copper, and older metal pipes. The baking soda and vinegar reaction is relatively mild and doesn’t produce the intense heat or corrosive chemicals found in commercial drain cleaners, which can damage pipes over time. However, if you have very old or fragile pipes, it’s always a good idea to exercise caution and avoid using excessive force when plunging or using other mechanical methods. If you are unsure about your pipes, consult a plumber.
What if the clog is really stubborn and this method doesn’t work?
If the baking soda and vinegar method doesn’t completely clear the clog, there are a few things you can try. First, repeat the process a second time, using slightly more baking soda and vinegar. You can also try using a plunger after the baking soda and vinegar have fizzed to help dislodge the clog. If the clog persists, you might need to resort to a drain snake or auger to physically break up and remove the blockage. As a last resort, you may need to call a professional plumber.
Can I use this method to unclog my toilet?
While the baking soda and vinegar method can sometimes work for minor toilet clogs, it’s generally more effective for sink drains. Toilets often have larger and more complex clogs that require more forceful methods, such as plunging or using a toilet auger. If you want to try it, use the same proportions as for a sink, but be careful not to overflow the toilet bowl. If the clog doesn’t clear after a few attempts, it’s best to use a plunger or call a plumber.
What are the environmental benefits of using this DIY method compared to commercial drain cleaners?
Commercial drain cleaners often contain harsh chemicals like sodium hydroxide (lye) and sulfuric acid, which can be harmful to the environment. These chemicals can contaminate waterways and harm aquatic life. They can also corrode pipes and release harmful fumes into the air. The DIY baking soda and vinegar method, on the other hand, is made with natural, biodegradable ingredients that are safe for the environment. It’s a much more sustainable and eco-friendly way to unclog your drains.
Can I use lemon juice instead of vinegar?
While lemon juice is acidic, it’s not as strong as vinegar and may not be as effective at dissolving clogs. Vinegar (especially white vinegar) is the preferred choice because of its higher acidity and lower cost. However, if you don’t have vinegar on hand, you can try using lemon juice as a substitute, but be prepared for it to potentially take longer or not work as well.
How do I prevent future sink clogs?
Prevention is key to avoiding future sink clogs. Here are a few tips:
* **Use a drain strainer:** This will catch hair, food particles, and other debris before they enter your pipes.
* **Flush with hot water regularly:** Pouring hot water down the drain after each use can help prevent grease and soap scum from building up.
* **Avoid pouring grease down the drain:** Dispose of grease in a separate container instead of pouring it down the sink.
* **Don’t grind coffee grounds in the garbage disposal:** Coffee grounds can clump together and cause clogs.
* **Clean your drain stopper regularly:** Remove the drain stopper and clean it to remove any accumulated hair or debris.
Is there a specific type of baking soda or vinegar that works best?
Regular baking soda (sodium bicarbonate) and white vinegar are the most commonly used and effective types for this DIY method. You don’t need to use any special or expensive varieties. Just make sure the baking soda is fresh and hasn’t expired.
What if I have a septic system? Is this method still safe?
Yes, this DIY method is generally safe for septic systems. The baking soda and vinegar reaction is mild and doesn’t introduce harmful chemicals into the septic tank. However, it’s always a good idea to avoid pouring excessive amounts of any substance down the drain if you have a septic system. Stick to the recommended amounts in the recipe and avoid using harsh chemicals or commercial drain cleaners, as these can disrupt the balance of bacteria in the septic tank.

Leave a Comment