
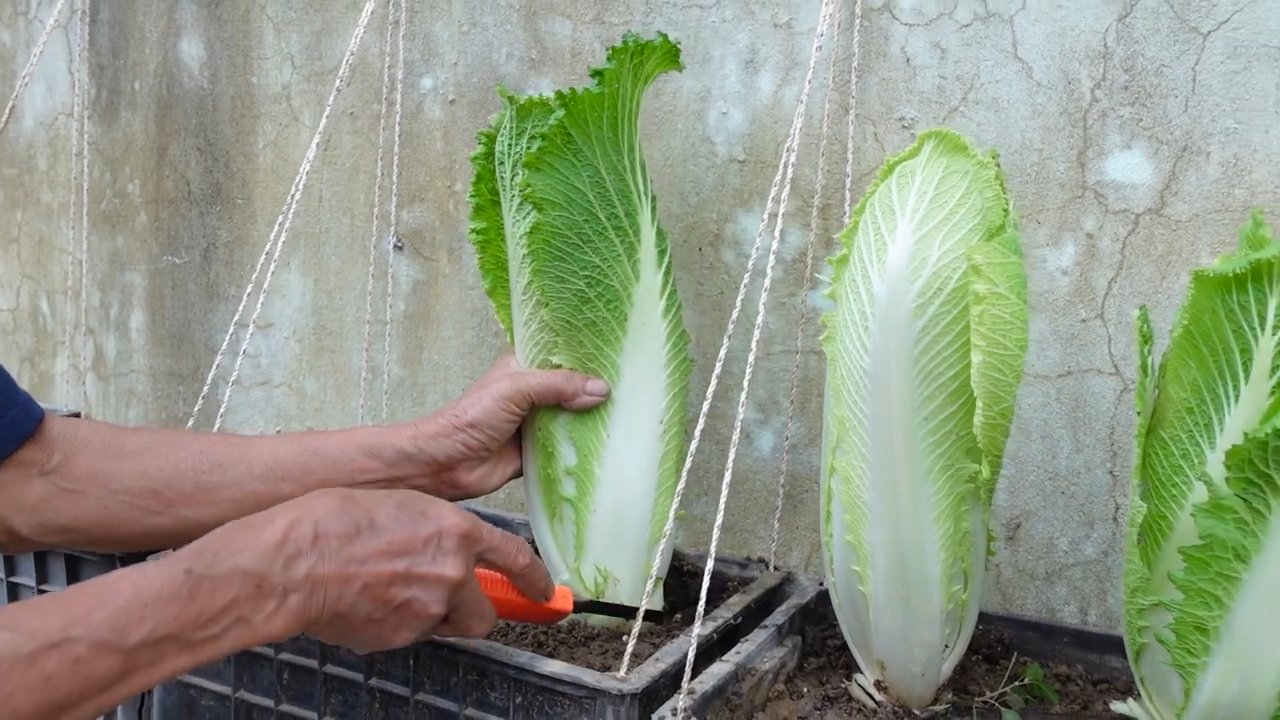
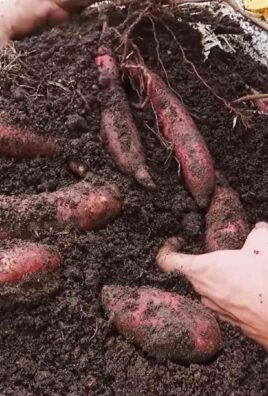
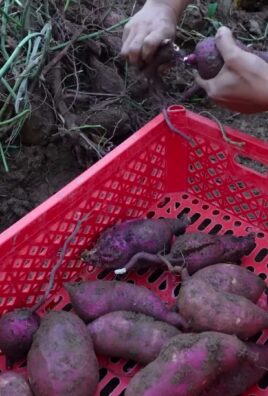
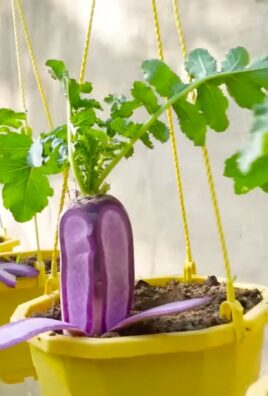
Easy Grow Delicious Home produce is within your reach, even if you think you have a “brown thumb”! Have you ever dreamed of stepping outside your back door and picking a sun-ripened tomato, bursting with flavor that no store-bought variety can match? Or snipping fresh herbs to elevate your weeknight meals from ordinary to extraordinary? Well, stop dreaming and start doing! This article is packed with simple, yet effective, DIY tricks and hacks to transform your space – no matter how small – into a thriving edible garden.
For centuries, humans have cultivated their own food, connecting with nature and nourishing their bodies. From the ancient hanging gardens of Babylon to the humble victory gardens of wartime, the desire to grow our own has deep roots. But in today’s fast-paced world, many of us feel disconnected from the source of our food. That’s where these DIY solutions come in.
Let’s face it, gardening can seem intimidating. Where do you even begin? What if you don’t have a lot of space or time? That’s why I’ve compiled these easy-to-follow tips and tricks. They’ll help you overcome common gardening challenges, save money, and ultimately, easy grow delicious home produce that you can be proud of. Get ready to unlock your inner gardener and enjoy the satisfaction of harvesting your own homegrown goodness!
DIY: So ziehst du köstliche Kräuter ganz einfach zu Hause!
Hallo liebe Gartenfreunde! Ich zeige euch heute, wie ihr ganz einfach und ohne viel Aufwand eure eigenen, köstlichen Kräuter zu Hause ziehen könnt. Egal ob ihr einen großen Garten, einen kleinen Balkon oder nur ein sonniges Fensterbrett habt, mit dieser Anleitung klappt es garantiert! Frische Kräuter sind nicht nur superlecker, sondern auch viel gesünder als getrocknete und aus dem Supermarkt. Also, lasst uns loslegen!
Was du brauchst: Die Zutaten für deinen Kräutergarten
Bevor wir starten, hier eine Liste mit allen Dingen, die du für deinen kleinen Kräutergarten benötigst:
* Kräutersamen oder Jungpflanzen: Wähle deine Lieblingskräuter aus! Basilikum, Petersilie, Schnittlauch, Minze, Rosmarin, Thymian – die Auswahl ist riesig! Für Anfänger empfehle ich robuste Sorten wie Petersilie oder Schnittlauch. Jungpflanzen sind einfacher, aber Samen sind günstiger und machen mehr Spaß.
* Anzuchterde oder Kräutererde: Normale Blumenerde ist oft zu nährstoffreich für junge Kräuter. Anzuchterde ist lockerer und enthält weniger Dünger, was das Wurzelwachstum fördert. Kräutererde ist speziell auf die Bedürfnisse von Kräutern abgestimmt.
* Töpfe oder Pflanzkästen: Achte darauf, dass die Töpfe Abzugslöcher haben, damit überschüssiges Wasser ablaufen kann. Die Größe der Töpfe hängt von der Art der Kräuter ab. Basilikum und Petersilie brauchen mehr Platz als Schnittlauch.
* Kleine Schaufel oder Löffel: Zum Befüllen der Töpfe mit Erde.
* Gießkanne oder Sprühflasche: Zum Bewässern der Kräuter.
* Optional: Anzuchttöpfe oder Eierkartons: Für die Voranzucht von Samen.
* Optional: Mini-Gewächshaus oder Frischhaltefolie: Um die Luftfeuchtigkeit für die Keimung zu erhöhen.
* Optional: Pflanzenetiketten: Damit du nicht vergisst, welche Kräuter du gepflanzt hast.
Phase 1: Die Vorbereitung – Der Grundstein für deinen Erfolg
1. Töpfe vorbereiten: Zuerst reinige ich die Töpfe gründlich, falls sie schon mal benutzt wurden. Dann lege ich eine Schicht Tonscherben oder Kies auf den Boden der Töpfe. Das sorgt für eine gute Drainage und verhindert Staunässe.
2. Erde einfüllen: Jetzt fülle ich die Töpfe mit Anzuchterde oder Kräutererde. Lasse dabei etwa 2-3 cm Platz bis zum Rand. Die Erde sollte locker und nicht zu fest angedrückt sein.
3. Erde anfeuchten: Bevor ich die Samen oder Pflanzen einsetze, feuchte ich die Erde leicht an. Das geht am besten mit einer Sprühflasche, damit die Erde nicht zu stark durchnässt wird.
Phase 2: Aussaat oder Einpflanzen – Jetzt wird’s ernst!
Hier gibt es zwei Möglichkeiten, je nachdem ob du Samen oder Jungpflanzen verwendest:
Aussaat von Kräutersamen:
1. Samen aussäen: Ich verteile die Samen gleichmäßig auf der Erde. Achte darauf, dass du nicht zu viele Samen in einen Topf säst, da die Pflanzen sonst zu eng stehen und sich nicht richtig entwickeln können. Die meisten Kräutersamen sind Lichtkeimer, das heißt, sie brauchen Licht zum Keimen. Deshalb bedecke ich sie nur ganz leicht mit Erde oder drücke sie nur leicht an. Bei Dunkelkeimern (steht auf der Samenpackung) bedecke ich sie mit einer dünnen Schicht Erde.
2. Befeuchten und abdecken: Nach dem Aussäen befeuchte ich die Erde noch einmal vorsichtig mit der Sprühflasche. Dann decke ich die Töpfe mit Frischhaltefolie oder einem Mini-Gewächshaus ab. Das erhöht die Luftfeuchtigkeit und fördert die Keimung. Wichtig: Regelmäßig lüften, damit sich kein Schimmel bildet!
3. Warm und hell stellen: Die Töpfe stelle ich an einen warmen und hellen Ort, aber nicht in die pralle Sonne. Eine Temperatur von 20-25 Grad Celsius ist ideal für die Keimung.
4. Geduld haben: Jetzt heißt es warten! Je nach Kräutersorte dauert es unterschiedlich lange, bis die Samen keimen. In der Regel dauert es aber 1-3 Wochen. Während dieser Zeit halte ich die Erde feucht, aber nicht nass.
Einpflanzen von Jungpflanzen:
1. Pflanzen vorbereiten: Bevor ich die Jungpflanzen einsetze, lockere ich den Wurzelballen vorsichtig auf. Das fördert das Anwachsen.
2. Pflanzlöcher graben: Ich grabe kleine Löcher in die Erde, die etwas größer sind als der Wurzelballen der Pflanzen.
3. Pflanzen einsetzen: Jetzt setze ich die Pflanzen in die Löcher und fülle die Löcher mit Erde auf. Die Erde drücke ich leicht an.
4. Angießen: Nach dem Einpflanzen gieße ich die Pflanzen gründlich an.
Phase 3: Die Pflege – Damit deine Kräuter prächtig gedeihen
1. Richtig gießen: Kräuter brauchen regelmäßig Wasser, aber Staunässe vertragen sie nicht. Ich gieße meine Kräuter, wenn sich die oberste Erdschicht trocken anfühlt. Am besten gieße ich morgens, damit die Blätter über den Tag abtrocknen können.
2. Düngen: Kräuter brauchen nicht viel Dünger. Wenn du Anzuchterde oder Kräutererde verwendet hast, reicht es, wenn du die Kräuter nach etwa 4-6 Wochen das erste Mal düngst. Ich verwende am liebsten organischen Flüssigdünger, der speziell für Kräuter geeignet ist.
3. Sonniger Standort: Die meisten Kräuter lieben die Sonne. Ich stelle meine Kräuter an einen sonnigen Standort, am besten auf einen Balkon oder eine Fensterbank mit Südausrichtung.
4. Regelmäßig ernten: Durch das regelmäßige Ernten werden die Kräuter buschiger und produzieren mehr Blätter. Ich schneide die Kräuter am besten morgens, wenn sie noch frisch und aromatisch sind.
5. Schädlinge und Krankheiten: Auch Kräuter können von Schädlingen und Krankheiten befallen werden. Ich kontrolliere meine Kräuter regelmäßig auf Blattläuse, Spinnmilben oder Pilzbefall. Bei Bedarf bekämpfe ich die Schädlinge mit natürlichen Mitteln, wie z.B. Brennnesseljauche oder Schmierseife.
Spezialtipps für bestimmte Kräuter:
* Basilikum: Basilikum ist sehr frostempfindlich und sollte erst nach den Eisheiligen (Mitte Mai) ins Freie gepflanzt werden. Er liebt die Sonne und braucht viel Wasser.
* Petersilie: Petersilie ist zweijährig. Im ersten Jahr bildet sie Blätter, im zweiten Jahr blüht sie und stirbt dann ab. Ich säe Petersilie am besten jedes Jahr neu aus.
* Schnittlauch: Schnittlauch ist sehr pflegeleicht und kann auch im Halbschatten wachsen. Ich schneide die Halme regelmäßig ab, damit er nicht blüht.
* Minze: Minze ist sehr wuchsfreudig und kann sich schnell im Garten ausbreiten. Ich pflanze Minze am besten in einen Topf, damit sie nicht andere Pflanzen überwuchert.
* Rosmarin: Rosmarin ist ein mediterranes Kraut und liebt die Sonne und trockene Böden. Ich gieße Rosmarin nur wenig.
* Thymian: Thymian ist ebenfalls ein mediterranes Kraut und liebt die Sonne und trockene Böden. Ich schneide Thymian nach der Blüte zurück, damit er buschiger wird.
Häufige Fehler und wie du sie vermeidest:
* Zu viel gießen: Staunässe ist der Tod vieler Kräuter. Ich achte darauf, dass das Wasser gut ablaufen kann und gieße nur, wenn die Erde trocken ist.
* Falsche Erde verwenden: Normale Blumenerde ist oft zu nährstoffreich für junge Kräuter. Ich verwende Anzuchterde oder Kräutererde.
* Zu wenig Licht: Kräuter brauchen viel Licht. Ich stelle meine Kräuter an einen sonnigen Standort.
* Nicht ernten

Conclusion
So, there you have it! Mastering the art of easy grow delicious home produce is not just a dream; it’s an achievable reality with this simple yet incredibly effective DIY trick. We’ve walked you through the process, highlighting the ease and accessibility of creating your own thriving garden, even if you’ve never considered yourself to have a green thumb.
But why is this DIY method a must-try? Beyond the sheer satisfaction of nurturing life and watching your plants flourish, this approach offers a multitude of benefits. First and foremost, you gain complete control over the quality of your food. Say goodbye to pesticides, herbicides, and other unwanted chemicals often found in commercially grown produce. You’ll be enjoying fresh, healthy, and truly organic fruits, vegetables, and herbs, knowing exactly where they came from and how they were grown.
Furthermore, this DIY project is incredibly cost-effective. While there might be a small initial investment in materials, the long-term savings are significant. Think about how much you spend on produce each week at the grocery store. By growing your own, you’ll drastically reduce your grocery bills, especially during peak growing seasons. Plus, you’ll have the added bonus of reducing your carbon footprint by minimizing transportation and packaging waste.
But the benefits don’t stop there. Gardening is a fantastic stress reliever. The act of tending to plants, getting your hands dirty, and connecting with nature has been proven to lower cortisol levels and boost your mood. It’s a therapeutic activity that can bring a sense of calm and well-being to your life. And let’s not forget the educational aspect. Growing your own food is a wonderful way to teach children about the natural world, where their food comes from, and the importance of sustainability.
Now, let’s talk about variations. While we’ve focused on a specific method, feel free to experiment and adapt it to your own needs and preferences. For example, if you have limited space, consider vertical gardening or container gardening. You can grow herbs and vegetables in pots on your balcony, patio, or even indoors with the help of grow lights.
Another variation is to explore different types of plants. While we’ve suggested some common options, don’t be afraid to try growing more exotic or unusual varieties. Research what grows well in your climate and soil conditions, and have fun experimenting with different flavors and textures. You can also incorporate companion planting techniques, where you plant certain species together to benefit each other, such as deterring pests or improving soil quality.
Consider adding a composting system to your garden. Composting is a great way to recycle kitchen scraps and yard waste into nutrient-rich soil for your plants. It’s an environmentally friendly practice that will further reduce your waste and improve the health of your garden.
Finally, remember that gardening is a learning process. Don’t be discouraged if you encounter challenges along the way. Every gardener experiences setbacks, but the key is to learn from your mistakes and keep trying. There are countless resources available online and in libraries to help you troubleshoot problems and improve your gardening skills.
We wholeheartedly encourage you to give this DIY trick a try. It’s a rewarding experience that will not only provide you with fresh, healthy food but also enrich your life in countless other ways. Once you’ve experienced the joy of harvesting your own homegrown produce, you’ll never look at gardening the same way again.
We’d love to hear about your experiences! Share your photos, tips, and stories with us in the comments section below. Let’s create a community of passionate gardeners who are dedicated to growing their own food and living a more sustainable lifestyle. Embrace the journey of easy grow delicious home produce and discover the magic of bringing nature into your home.
Frequently Asked Questions (FAQ)
What if I don’t have a lot of space for a garden?
That’s perfectly fine! One of the great things about this DIY trick is that it can be adapted to fit any space. If you have limited space, consider container gardening. You can grow herbs, vegetables, and even small fruit trees in pots on your balcony, patio, or even indoors with the help of grow lights. Vertical gardening is another excellent option for maximizing space. You can use trellises, hanging baskets, or even repurposed pallets to create a vertical garden that will add beauty and functionality to your home. Remember, even a small garden can provide you with a surprising amount of fresh produce.
What kind of soil should I use?
The type of soil you use will depend on the plants you’re growing. However, in general, you’ll want to use a well-draining soil that is rich in organic matter. You can purchase potting mix at your local garden center, or you can make your own by mixing equal parts compost, peat moss, and perlite. Avoid using soil from your backyard, as it may contain pests, diseases, or other contaminants. Amending your soil with compost is always a good idea, as it will improve its fertility and drainage.
How often should I water my plants?
The frequency of watering will depend on the type of plants you’re growing, the climate, and the soil conditions. As a general rule, you should water your plants when the top inch of soil feels dry to the touch. Avoid overwatering, as this can lead to root rot. When watering, water deeply and thoroughly, so that the water reaches the roots. It’s best to water in the morning, so that the plants have time to dry out before nightfall.
What about pests and diseases?
Pests and diseases can be a challenge for any gardener, but there are many things you can do to prevent them. Start by choosing disease-resistant varieties of plants. Also, make sure to provide your plants with adequate sunlight, water, and nutrients, as healthy plants are less susceptible to pests and diseases. Regularly inspect your plants for signs of pests or diseases, and take action immediately if you spot any problems. There are many organic pest control methods you can use, such as insecticidal soap, neem oil, and diatomaceous earth. You can also attract beneficial insects to your garden, such as ladybugs and lacewings, which will prey on pests.
What if I don’t have a green thumb?
Don’t worry! Gardening is a skill that can be learned. Start small and don’t be afraid to experiment. There are countless resources available online and in libraries to help you learn about gardening. Join a local gardening club or community garden, where you can learn from experienced gardeners. The most important thing is to be patient and persistent. Even if you encounter setbacks along the way, don’t give up. With a little practice, you’ll be surprised at how much you can grow. Remember, even experienced gardeners make mistakes. The key is to learn from your mistakes and keep trying.
What are some easy plants to start with?
If you’re a beginner gardener, there are several easy plants you can start with. Herbs like basil, mint, and chives are relatively easy to grow and can be grown in pots or in the ground. Vegetables like lettuce, spinach, and radishes are also good choices for beginners, as they grow quickly and don’t require a lot of maintenance. Cherry tomatoes are another popular option, as they are prolific producers and relatively easy to care for.
How much sunlight do my plants need?
The amount of sunlight your plants need will depend on the type of plants you’re growing. Most vegetables and herbs need at least six hours of sunlight per day. However, some plants, such as lettuce and spinach, can tolerate partial shade. If you’re growing plants indoors, you may need to supplement with grow lights.
How do I know when my vegetables are ready to harvest?
The best way to know when your vegetables are ready to harvest is to consult a gardening guide or online resource. Each vegetable has its own specific harvesting guidelines. In general, you should harvest vegetables when they are fully ripe and have reached their mature size.
Can I grow my own food indoors year-round?
Yes, you can! With the help of grow lights, you can grow many types of vegetables and herbs indoors year-round. Leafy greens, herbs, and tomatoes are all good choices for indoor gardening. You’ll need to provide your plants with adequate light, water, and nutrients, and you may also need to pollinate them manually.
How can I get my kids involved in gardening?
Gardening is a great way to get kids involved in nature and teach them about where their food comes from. Start by letting them help you choose what to grow. Give them their own small plot of land or container to care for. Let them help with planting, watering, and harvesting. Make it fun by creating a scavenger hunt or a gardening-themed craft project.
Leave a Comment