
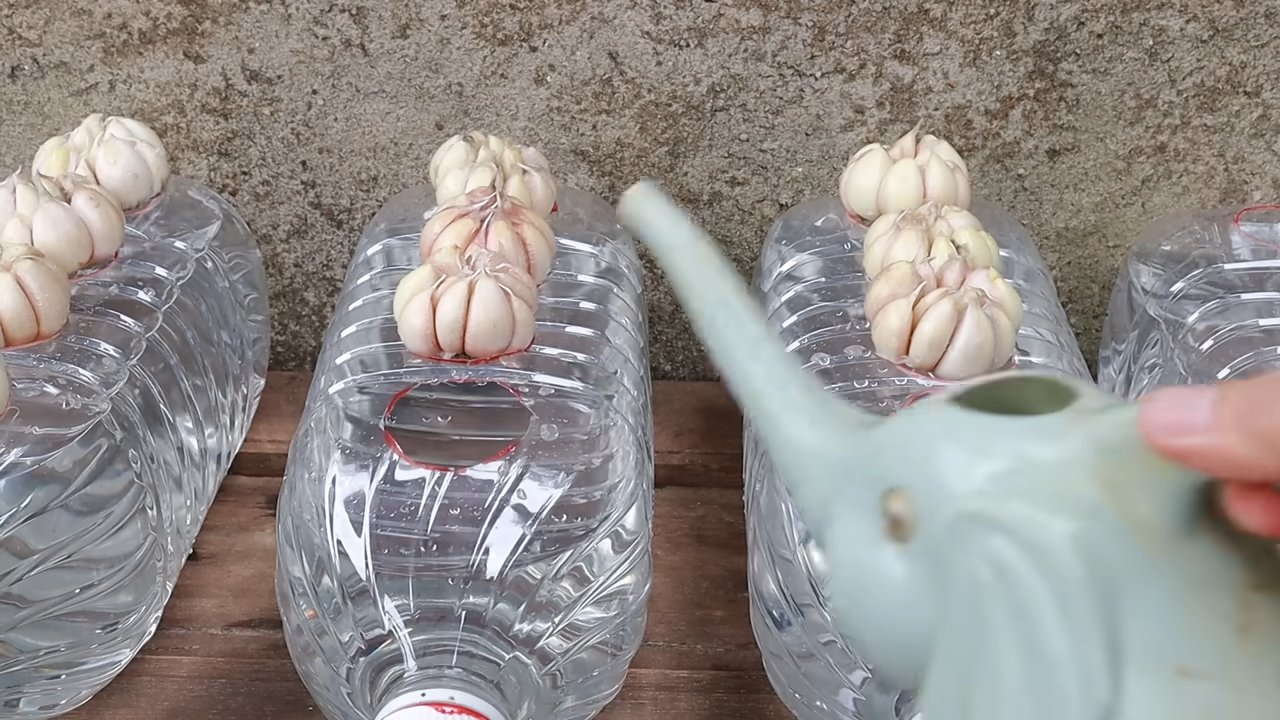
Fast Garlic Harvest: Who doesn’t love the pungent, flavorful kick of fresh garlic in their cooking? But the waiting game for harvest can feel like an eternity! I get it – you’re eager to enjoy the fruits (or rather, bulbs!) of your labor. That’s why I’m so excited to share some game-changing DIY tricks that will help you achieve a fast garlic harvest and enjoy those delicious cloves sooner than you ever thought possible.
Garlic has been cultivated for thousands of years, with roots tracing back to Central Asia. Ancient Egyptians even revered it, using it for both culinary and medicinal purposes. Today, garlic remains a staple in cuisines worldwide, and growing your own allows you to experience its incredible flavor at its peak freshness.
But let’s face it, the traditional garlic growing process can be slow. We’re talking months from planting to harvest! This DIY article is your shortcut to a more efficient and rewarding garlic-growing experience. I’ll show you simple, effective techniques to speed up the maturation process, ensuring you get to savor your homegrown garlic without the agonizing wait. Get ready to unlock the secrets to a bountiful and, most importantly, fast garlic harvest!
Fast Garlic Harvest: The Lazy Gardener’s Guide to Bountiful Bulbs
Okay, fellow garden enthusiasts! Let’s be honest, sometimes we want that amazing homegrown garlic, but the thought of spending hours hunched over, wrestling those bulbs from the earth? Not so appealing. That’s why I’m sharing my super-efficient, slightly lazy (but totally effective!) method for a fast garlic harvest. This method focuses on speed and minimizing back strain, perfect for those of us who prefer to spend more time enjoying the fruits (or, in this case, bulbs) of our labor.
What You’ll Need
Before we dive in, let’s gather our supplies. Having everything ready will make the process even smoother.
* Garden Fork or Shovel: A garden fork is my personal preference because it’s less likely to slice through the garlic bulbs. A shovel works too, but be extra careful.
* Trowel: This is handy for loosening stubborn bulbs or digging around individual plants.
* Gloves: Protect your hands from dirt and potential irritants. Garlic can sometimes cause skin irritation.
* Sharp Knife or Pruning Shears: For trimming the roots and stalks after harvesting.
* Wheelbarrow or Garden Cart: To transport your harvested garlic. Trust me, it can get heavy!
* Soft Brush: For gently removing excess dirt without damaging the bulbs.
* Well-Ventilated Drying Area: A shed, garage, or covered porch works great. Make sure it’s dry and has good airflow.
* Twine or String: For braiding or tying the garlic into bundles for drying.
* Optional: Garlic Peeler: If you plan on using some of your garlic right away, a garlic peeler can save you time and effort.
When to Harvest: The Timing is Key
Knowing when to harvest is crucial for getting the best flavor and storage life from your garlic. Here’s how I determine the perfect time:
* Check the Leaves: This is the most reliable indicator. Wait until the bottom leaves (the ones closest to the ground) have started to turn yellow or brown. You want about 50-60% of the leaves to be showing signs of drying out.
* Don’t Wait Too Long: If you wait until all the leaves are completely brown, the bulbs may start to separate and the cloves will be less tightly held together, reducing their storage life.
* Test Dig a Bulb: If you’re unsure, gently dig up one bulb to inspect it. The cloves should be plump and well-formed, and the wrappers should be thick and papery.
* Harvest Before Rain: If possible, try to harvest your garlic before a period of rain. Wet garlic is more prone to mold and rot during the drying process.
Harvesting the Garlic: The Fast and Easy Method
Alright, let’s get down to the nitty-gritty! Here’s my step-by-step guide to a speedy garlic harvest:
1. Loosen the Soil: This is where the garden fork or shovel comes in. Insert the fork about 6-8 inches away from the garlic plant, being careful not to stab the bulb. Gently rock the fork back and forth to loosen the soil around the plant. Repeat this on all sides of the plant. If you’re using a shovel, insert it at an angle and lift gently.
2. Lift the Bulbs: Once the soil is loosened, gently lift the garlic plant from the ground. If the bulb is still stuck, use the trowel to carefully dig around it and loosen it further. Avoid pulling on the stalk, as this can cause the bulb to separate.
3. Shake Off Excess Dirt: Gently shake off as much loose dirt as possible. Don’t wash the garlic at this stage, as moisture can promote mold growth. Use the soft brush to remove any stubborn clumps of dirt.
4. Gather Your Harvest: Place the harvested garlic bulbs in your wheelbarrow or garden cart.
5. Repeat: Continue loosening, lifting, and cleaning the garlic bulbs until you’ve harvested your entire crop.
Preparing for Drying: Trimming and Cleaning
Now that you’ve harvested your garlic, it’s time to prepare it for drying. This step is important for preventing rot and ensuring a long storage life.
1. Trim the Roots: Using your sharp knife or pruning shears, trim the roots of each garlic bulb to about 1/2 inch. This helps to prevent the roots from rotting and attracting pests.
2. Remove Excess Soil: If there’s still a lot of dirt clinging to the bulbs, use the soft brush to gently remove it. Again, avoid washing the garlic.
3. Optional: Trim the Stalks: You have two options here: you can either leave the stalks long for braiding, or you can trim them to about 4-6 inches. If you plan to braid your garlic, leave the stalks long. If you prefer to tie them into bundles, trim the stalks.
Drying the Garlic: The Key to Long-Term Storage
Drying is the most crucial step in preserving your garlic. Proper drying ensures that the bulbs will store well for months.
1. Choose Your Drying Method: You can either braid the garlic into strands, tie it into bundles, or spread it out on screens or racks.
* Braiding: This is a traditional method that looks beautiful and allows for good airflow. To braid, start with three stalks and weave them together, adding more stalks as you go. Secure the end with twine.
* Bundling: Tie the garlic stalks together in bundles of 6-10 bulbs. Make sure the bundles aren’t too thick, as this can restrict airflow.
* Screens or Racks: Spread the garlic bulbs out on screens or racks, making sure they’re not touching each other. This method provides excellent airflow.
2. Find a Suitable Drying Location: Choose a well-ventilated, dry, and shaded location for drying your garlic. A shed, garage, or covered porch works well. Avoid direct sunlight, as this can cause the bulbs to dry out too quickly and lose flavor.
3. Monitor the Drying Process: Check the garlic regularly for signs of mold or rot. If you see any, remove the affected bulbs immediately. The drying process typically takes 2-4 weeks, depending on the humidity and temperature.
4. Test for Dryness: The garlic is dry when the stalks and wrappers are papery and brittle, and the cloves feel firm.
Storing Your Garlic: Keeping it Fresh
Once your garlic is fully dried, it’s time to store it properly.
1. Choose a Cool, Dark, and Dry Place: The ideal storage conditions for garlic are cool (55-65°F), dark, and dry. A pantry, cellar, or unheated garage are good options.
2. Store in a Breathable Container: Avoid storing garlic in airtight containers, as this can trap moisture and promote mold growth. Instead, store it in a mesh bag, a wire basket, or a paper bag with holes punched in it.
3. Check Regularly: Check your stored garlic regularly for signs of spoilage. Discard any bulbs that are soft, moldy, or sprouting.
Using Your Harvest: Enjoying the Fruits (or Bulbs!) of Your Labor
Now for the best part – enjoying your homegrown garlic!
* Fresh Garlic: Use your fresh garlic in all your favorite recipes. It’s especially delicious roasted, sautéed, or added to sauces and soups.
* Garlic Powder: Dehydrate some of your garlic and grind it into garlic powder for a convenient spice.
* Garlic-Infused Oil: Infuse olive oil with garlic for a flavorful cooking oil. Be careful to store garlic-infused oil properly to prevent botulism.
* Seed Garlic: Save some of your best bulbs to plant next year’s crop.
And there you have it! My fast and easy method for harvesting and storing garlic. With a little bit of effort, you can enjoy a bountiful harvest of delicious, homegrown garlic all year long. Happy gardening!

Conclusion
So, there you have it! The “Fast Garlic Harvest” method isn’t just a clever trick; it’s a game-changer for anyone who grows their own garlic. Forget back-breaking labor and the anxiety of damaging your precious bulbs. This technique, focusing on careful observation and strategic timing, allows you to efficiently and effectively harvest your garlic at its peak, ensuring maximum flavor and storage potential.
Why is this a must-try? Because it simplifies a process that can often feel overwhelming. It empowers you to take control of your harvest, minimizing waste and maximizing yield. Imagine the satisfaction of pulling up perfectly formed, plump garlic bulbs with minimal effort, knowing you’ve unlocked the secret to a successful and stress-free harvest.
But don’t stop there! Experiment with variations to tailor this method to your specific garden and garlic variety. For example, if you’re growing a hardneck variety, pay close attention to the scapes. Once they begin to curl and straighten, it’s a strong indicator that your garlic is nearing maturity. For softneck varieties, focus on the lower leaves turning brown. You can also adjust the timing based on your local climate and growing conditions. If you live in a particularly wet area, you might want to harvest slightly earlier to prevent rot. Conversely, in drier climates, you might be able to wait a bit longer for the bulbs to fully mature.
Consider using a garden fork instead of a shovel if your soil is particularly compacted. The fork will help to loosen the soil around the bulbs without damaging them. And remember to cure your garlic properly after harvesting. This involves drying the bulbs in a well-ventilated area for several weeks to allow the outer layers to dry and protect the inner cloves. Proper curing is essential for long-term storage.
We encourage you to embrace this “Fast Garlic Harvest” technique and experience the difference it can make. It’s not just about saving time and effort; it’s about connecting with your garden and enjoying the fruits (or rather, vegetables) of your labor.
Don’t just take our word for it! Try it out for yourself and see the amazing results. We’re confident that you’ll be impressed with the ease and efficiency of this method. And most importantly, we want to hear about your experience! Share your tips, tricks, and photos in the comments below. Let’s build a community of garlic growers who are passionate about maximizing their harvest and enjoying the delicious flavor of homegrown garlic. What worked best for you? Did you encounter any challenges? What variations did you try? Your feedback will help other gardeners learn and improve their own garlic harvesting techniques. Let’s unlock the secrets to a perfect “Fast Garlic Harvest” together!
Frequently Asked Questions (FAQ)
Q: How do I know when my garlic is ready to harvest using the “Fast Garlic Harvest” method?
A: The key indicator is the state of the lower leaves. When the bottom one or two leaves start to turn yellow or brown, it’s a sign that the garlic bulb is nearing maturity. Don’t wait until all the leaves are brown, as this indicates over-maturity, which can lead to the bulb splitting and reduced storage life. For hardneck varieties, also observe the scapes. When they begin to curl and then straighten, it’s another signal that harvest time is approaching. Remember that the “Fast Garlic Harvest” method relies on careful observation, so pay close attention to your plants!
Q: What tools do I need for the “Fast Garlic Harvest”?
A: You’ll need a garden fork or shovel, depending on your soil type. A garden fork is generally preferred for looser soils, as it’s less likely to damage the bulbs. A shovel might be necessary for compacted soils, but use it carefully to avoid cutting into the garlic. You’ll also need gloves to protect your hands and a clean, dry space for curing the garlic after harvest. A small brush can be helpful for removing excess soil from the bulbs.
Q: Can I use this method for all types of garlic?
A: Yes, the “Fast Garlic Harvest” method is applicable to both hardneck and softneck garlic varieties. However, the specific indicators of maturity may vary slightly. As mentioned earlier, hardneck varieties have scapes that provide an additional visual cue. Softneck varieties rely more heavily on the browning of the lower leaves. Regardless of the variety, the principle remains the same: harvest when the plant is nearing maturity but before it’s fully overripe.
Q: What if I harvest my garlic too early or too late?
A: Harvesting too early will result in smaller bulbs with less flavor and shorter storage life. Harvesting too late can cause the bulbs to split, making them more susceptible to rot and also reducing their storage potential. The “Fast Garlic Harvest” method aims to help you find the sweet spot – harvesting at the peak of maturity for optimal flavor and storage. If you’re unsure, it’s better to err on the side of harvesting slightly early rather than too late.
Q: How do I cure my garlic after harvesting?
A: Curing is a crucial step in the garlic harvesting process. After digging up your garlic, gently remove any excess soil. Do not wash the bulbs. Tie the plants in bundles of 5-10 bulbs and hang them in a well-ventilated, dry, and shaded area. Avoid direct sunlight, as it can damage the bulbs. Allow the garlic to cure for 2-4 weeks, or until the necks are completely dry and the outer layers of the bulbs are papery. Proper curing allows the garlic to develop its full flavor and prevents rot during storage.
Q: How should I store my garlic after it’s cured?
A: Once the garlic is fully cured, you can trim the roots and cut off the stems, leaving about an inch or two above the bulb. Store the bulbs in a cool, dry, and dark place with good air circulation. Mesh bags or baskets are ideal for storage. Avoid storing garlic in the refrigerator, as it can cause it to sprout. Properly cured and stored garlic can last for several months.
Q: What if my garlic bulbs are small even when the leaves are turning brown?
A: Several factors can contribute to small garlic bulbs, including poor soil fertility, insufficient watering, and competition from weeds. Make sure your soil is rich in organic matter and that your garlic receives adequate water, especially during bulb formation. Also, keep your garden free of weeds, as they can steal nutrients and water from your garlic plants. If you consistently have small bulbs, consider amending your soil with compost or other organic fertilizers.
Q: Can I eat the garlic scapes?
A: Absolutely! Garlic scapes are a delicious and versatile ingredient. They have a mild garlic flavor and can be used in a variety of dishes, such as pesto, stir-fries, and soups. Harvest the scapes when they are still young and tender, before they become too tough.
Q: What if I don’t have a garden; can I still use this “Fast Garlic Harvest” method?
A: While the “Fast Garlic Harvest” method is primarily designed for gardeners who grow their own garlic, the principles of observation and timing can still be applied if you purchase fresh garlic from a farmer’s market or local grower. Ask the grower about the harvest date and storage recommendations. Look for bulbs that are firm, plump, and free of blemishes. Avoid bulbs that are soft, sprouting, or have a strong odor, as these may be signs of spoilage.


Leave a Comment