
Grow Asparagus at Home – sounds like a dream, right? Imagine stepping into your backyard and harvesting fresh, tender asparagus spears, ready to be steamed, grilled, or tossed into a delicious spring salad. Forget those bland, overpriced bundles at the grocery store! This isn’t just about saving money; it’s about connecting with nature and enjoying the unparalleled flavor of homegrown goodness.
Asparagus has been enjoyed for centuries, with evidence of its cultivation dating back to ancient Rome. The Romans prized it for its culinary and medicinal properties, and its cultivation spread throughout Europe. Today, asparagus remains a beloved vegetable worldwide, and I’m here to tell you that you don’t need a sprawling farm to enjoy it.
Many people shy away from growing asparagus because they think it’s too difficult or time-consuming. But with a few simple tricks and a little patience, you can successfully grow asparagus at home, even in a small space. This DIY guide will break down the process into manageable steps, from choosing the right variety to preparing your soil and harvesting your first spears. I’ll share my favorite tips and hacks to ensure a bountiful harvest year after year. So, ditch the grocery store asparagus and let’s get growing!
Growing Asparagus at Home: A Beginner’s Guide
Asparagus, that delicious and slightly grassy spring vegetable, is surprisingly easy to grow at home! It does require a bit of patience upfront, as you won’t be harvesting spears in the first year, but trust me, the years of fresh asparagus from your own garden are well worth the wait. I’m going to walk you through everything you need to know to successfully grow asparagus, from choosing the right location to harvesting your first spears.
Choosing the Right Asparagus Variety
Before you even think about digging, you need to decide what kind of asparagus you want to grow. There are male and female varieties, and all-male varieties are generally preferred. Here’s why:
* All-male varieties: These produce significantly more spears because they don’t waste energy on producing seeds. They also prevent the spread of unwanted asparagus seedlings in your garden. Popular all-male varieties include ‘Jersey Knight,’ ‘Jersey Giant,’ and ‘Millennium.’
* Male and female varieties: Female plants produce berries, which can lead to volunteer asparagus plants popping up everywhere. While this might sound appealing, these volunteers are often weaker and less productive.
I highly recommend sticking with an all-male variety for the best results. You can usually find these at your local garden center or online.
Preparing Your Asparagus Bed
Asparagus is a perennial, meaning it will come back year after year. Because of this, it’s crucial to choose the right location and prepare the soil properly. This is a long-term investment, so let’s do it right!
* Sunlight: Asparagus needs at least 6-8 hours of direct sunlight per day. Choose a spot in your garden that gets plenty of sun.
* Soil: Asparagus thrives in well-drained, sandy loam soil. Heavy clay soil can lead to root rot. If you have clay soil, you’ll need to amend it with plenty of organic matter, like compost or well-rotted manure.
* Drainage: Good drainage is essential. Asparagus roots don’t like to sit in water. If your soil is poorly drained, consider creating raised beds.
* Space: Asparagus plants can get quite large, so you’ll need to give them plenty of space. Allow at least 18 inches between plants and 4-5 feet between rows.
Step-by-Step Planting Guide
Now for the fun part – planting! You can start asparagus from seed, but it’s much easier and faster to plant crowns (one-year-old asparagus plants).
1. Dig a Trench: Dig a trench that is about 6-8 inches deep and 12 inches wide. The length of the trench will depend on how many asparagus crowns you are planting.
2. Amend the Soil: Mix plenty of compost or well-rotted manure into the soil at the bottom of the trench. This will provide nutrients for your asparagus plants.
3. Create Mounds: Create small mounds of soil about 18 inches apart along the bottom of the trench. These mounds will support the asparagus crowns.
4. Place the Crowns: Place an asparagus crown on top of each mound, spreading the roots out around the mound. Make sure the crown is facing upwards.
5. Cover the Crowns: Cover the crowns with about 2 inches of soil. Water thoroughly.
6. Gradually Fill the Trench: As the asparagus spears begin to grow, gradually fill in the trench with soil. This will encourage the plants to develop a strong root system. Continue filling the trench until it is level with the surrounding soil.
Caring for Your Asparagus Plants
Once your asparagus plants are in the ground, they’ll need regular care to thrive.
* Watering: Water your asparagus plants regularly, especially during dry periods. Asparagus needs consistent moisture to produce healthy spears.
* Weeding: Keep your asparagus bed free of weeds. Weeds can compete with your asparagus plants for nutrients and water. Hand-pull weeds or use a hoe to remove them.
* Fertilizing: Fertilize your asparagus plants in the spring with a balanced fertilizer. You can also side-dress them with compost or well-rotted manure.
* Mulching: Mulch your asparagus bed with straw, wood chips, or other organic material. Mulch will help to retain moisture, suppress weeds, and regulate soil temperature.
* Pest and Disease Control: Asparagus is relatively pest-resistant, but it can be susceptible to asparagus beetles and fusarium wilt. Inspect your plants regularly for signs of pests or disease. If you find any, take action immediately. For asparagus beetles, you can hand-pick them off the plants or use an insecticidal soap. For fusarium wilt, remove and destroy infected plants.
Harvesting Your Asparagus
This is the part you’ve been waiting for! But remember, patience is key.
* Year 1: Do not harvest any spears in the first year. This allows the plants to establish a strong root system.
* Year 2: You can harvest a few spears in the second year, but only for a short period (about 2 weeks).
* Year 3 and Beyond: In the third year and beyond, you can harvest asparagus for 6-8 weeks in the spring.
How to Harvest:
1. Wait for the Spears: Wait until the spears are about 6-8 inches tall and about as thick as your finger.
2. Cut or Snap: You can either cut the spears at ground level with a sharp knife or snap them off. Snapping is often preferred because it breaks the spear at its natural breaking point.
3. Harvest Regularly: Harvest spears every day or two during the harvest season. This will encourage the plants to produce more spears.
4. Stop Harvesting: Stop harvesting when the spears become thin and spindly. This indicates that the plants are starting to run out of energy.
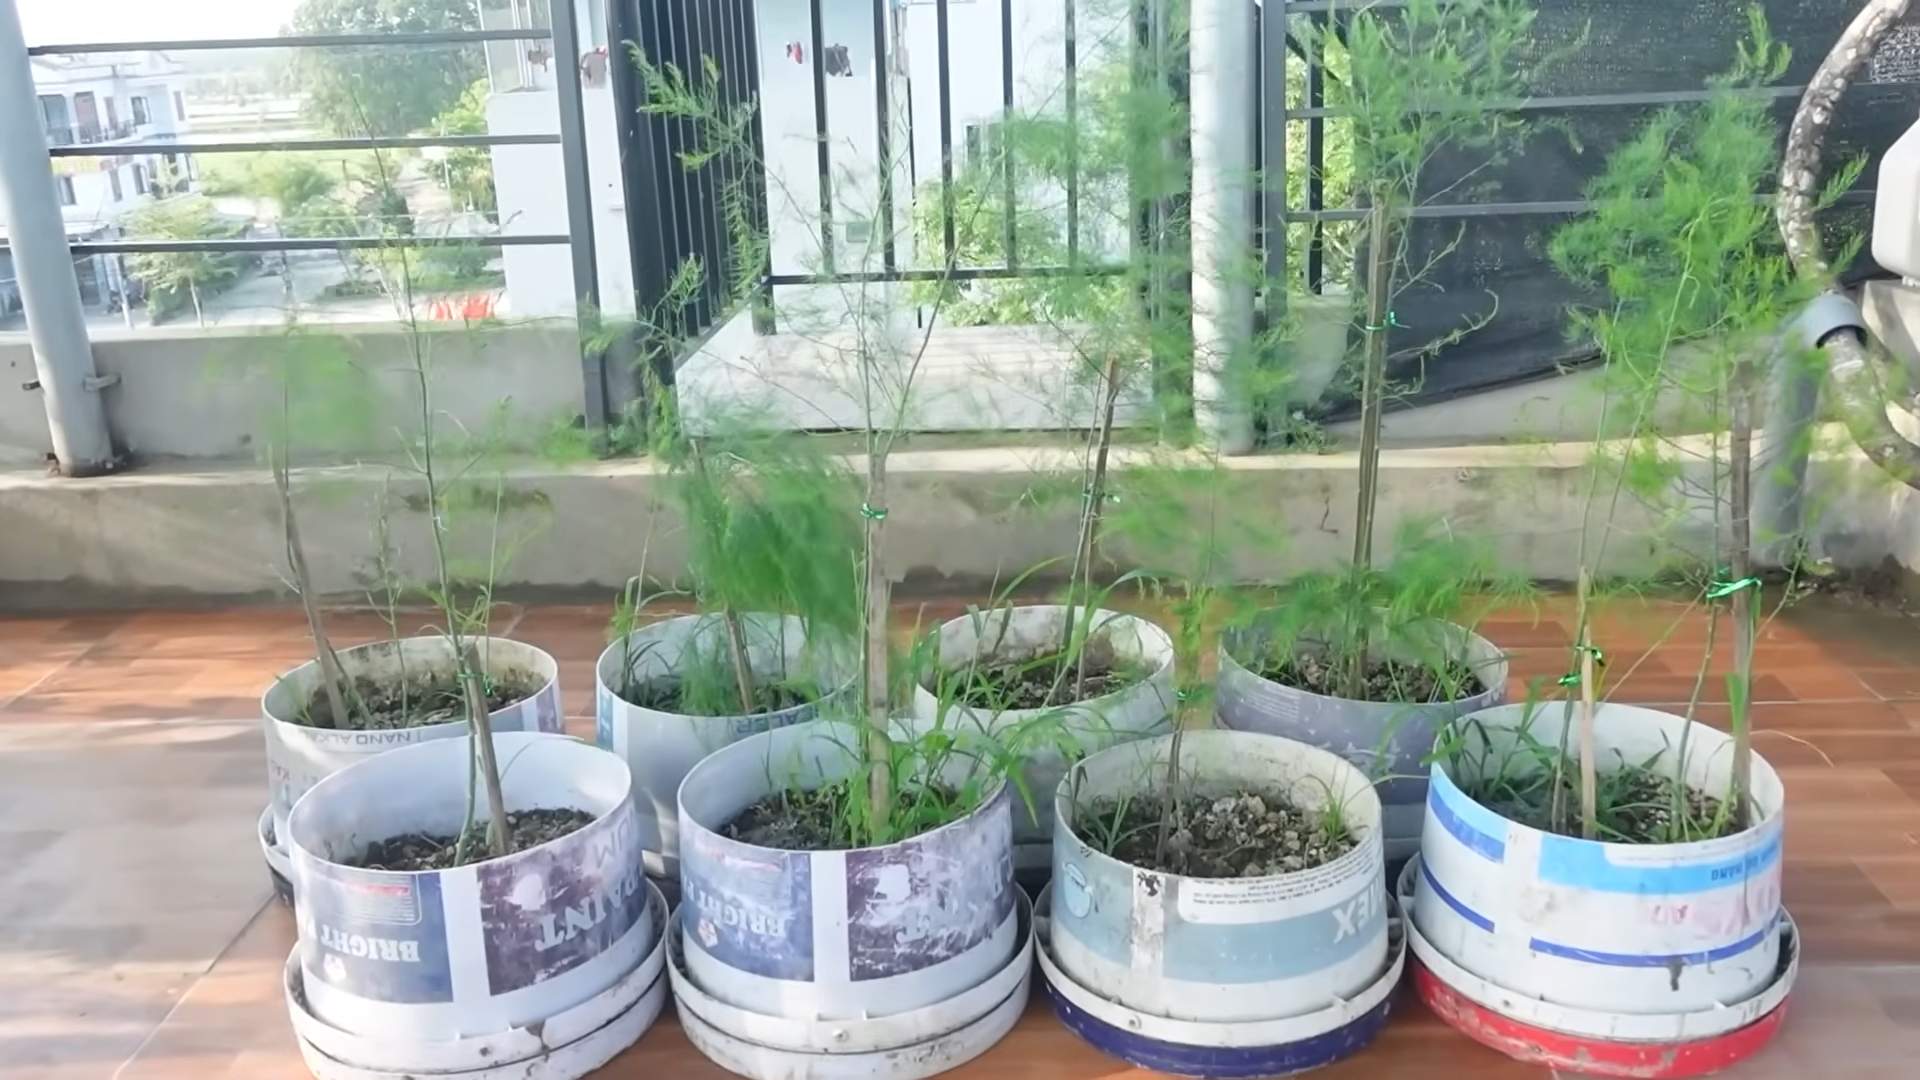
Preparing Asparagus for Winter
After the harvest season is over, let the asparagus ferns grow and mature. These ferns will help to nourish the roots for the following year.
1. Let the Ferns Grow: Allow the ferns to grow until they turn yellow or brown in the fall.
2. Cut Back the Ferns: Cut back the ferns to about 2 inches above the ground in late fall or early winter.
3. Mulch the Bed: Mulch the asparagus bed with straw or other organic material to protect the roots from the cold.
Troubleshooting Common Asparagus Problems
Even with the best care, you might encounter some problems with your asparagus. Here are a few common issues and how to address them:
* Thin Spears: Thin spears can be caused by a number of factors, including lack of water, nutrients, or sunlight. Make sure your asparagus plants are getting enough of all three.
* Asparagus Beetles: Asparagus beetles are small, colorful beetles that can damage asparagus spears and ferns. Hand-pick them off the plants or use an insecticidal soap.
* Fusarium Wilt: Fusarium wilt is a fungal disease that can cause asparagus plants to wilt and die. Remove and destroy infected plants.
* Volunteer Asparagus: If you have female asparagus plants, you may find volunteer asparagus plants popping up in your garden. These volunteers are often weaker and less productive than cultivated asparagus plants. Remove them as soon as you see them.
Enjoying Your Homegrown Asparagus
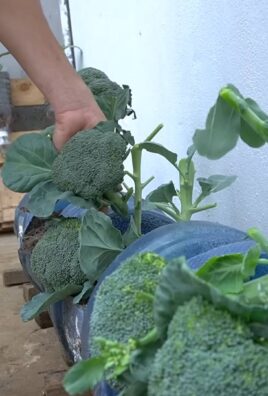
Growing your own asparagus is a rewarding experience. There’s nothing quite like the taste of fresh, homegrown asparagus. You can enjoy it steamed, roasted, grilled, or added to salads and other dishes. I personally love grilling it with a little olive oil, salt, and pepper.
Storing Asparagus:
* Refrigerate: Store asparagus in the refrigerator, wrapped in a damp paper towel or standing upright in a jar with a little water.
* Freeze: You can also freeze asparagus for later use. Blanch the spears for 2-3 minutes, then cool them in ice water. Drain well and freeze in freezer bags.
Propagating Asparagus
While starting from crowns is the easiest method, you can also propagate asparagus from seed. Keep in mind that it takes longer to get a harvestable crop when starting from seed.
1. Collect Seeds: Collect seeds from mature female asparagus plants in the fall.
2. Soak Seeds: Soak the seeds in water for 24 hours before planting.
3. Start Indoors: Start the seeds indoors in early spring, about 8-10 weeks before the last frost.
4. Transplant Seedlings: Transplant the seedlings outdoors after the last frost, following the same planting instructions as for crowns.
Extending Your Asparagus Season
Want to enjoy asparagus for a longer period? Here are a few tips:
* Choose Different Varieties: Some asparagus varieties mature earlier
Conclusion
So, there you have it! Growing asparagus at home isn’t just a gardening project; it’s an investment in years of delicious, fresh harvests right from your backyard. Forget the pale, often woody asparagus spears you find at the grocery store. Imagine snapping off vibrant green stalks, bursting with flavor, just moments before you cook them. That’s the promise of homegrown asparagus, and it’s a promise well worth pursuing.
This DIY trick, starting from seed or crown, empowers you to control every aspect of your asparagus’s journey, from soil composition to watering schedule. You’ll know exactly what’s going into your food, ensuring a healthier and more flavorful outcome. Plus, there’s an undeniable satisfaction in nurturing a plant from its earliest stages to a thriving, productive patch.
But the benefits don’t stop there. Asparagus is a perennial, meaning it will return year after year, providing you with a consistent supply of this delectable vegetable. Think of it as a long-term investment in your culinary enjoyment. And with a little planning and care, you can create an asparagus bed that will flourish for decades.
Ready to take your asparagus game to the next level? Consider these variations:
* Companion Planting: Enhance your asparagus bed by planting beneficial companions like tomatoes, basil, or parsley. These plants can help deter pests and improve the overall health of your asparagus.
* Different Varieties: Explore different asparagus varieties to find the perfect flavor profile for your palate. ‘Jersey Knight’ is a popular choice for its high yield and disease resistance, while ‘Purple Passion’ offers a unique color and sweeter taste.
* Raised Beds: If you have poor soil or limited space, consider growing your asparagus in raised beds. This allows for better drainage and easier management.
* Succession Planting: Stagger your planting times to extend your harvest season. Plant some asparagus crowns in early spring and others a few weeks later to enjoy a longer period of fresh asparagus.
Don’t be intimidated by the perceived complexity of growing asparagus. With the right information and a little patience, you can successfully cultivate your own thriving patch. This DIY trick is more than just a method; it’s a gateway to a more sustainable and flavorful way of eating.
We encourage you to embrace the challenge and embark on your own asparagus-growing adventure. Share your experiences, successes, and even your struggles in the comments below. Let’s build a community of asparagus enthusiasts and learn from each other. What are you waiting for? Get your hands dirty and start growing your own delicious asparagus today! We are confident that you will find that growing asparagus at home is a rewarding and delicious experience.
Frequently Asked Questions (FAQ)
How long does it take to grow asparagus from seed?
Growing asparagus from seed requires patience. It typically takes about three years from seed to harvestable spears. The first year is focused on developing a strong root system. You’ll need to start the seeds indoors in late winter or early spring, then transplant the seedlings outdoors after the last frost. The second year involves continued care and maintenance, allowing the plants to establish themselves further. By the third year, you should be able to harvest a small amount of asparagus. Remember, it’s crucial to let the plants mature fully before harvesting heavily to ensure their long-term productivity.
Is it better to grow asparagus from seed or crowns?
Both methods have their advantages. Growing from seed is more economical, as seeds are generally cheaper than crowns. However, it requires more time and patience, as it takes longer to reach harvestable spears. Crowns, on the other hand, offer a head start. They are one-year-old plants that are ready to be planted directly into the garden. This reduces the time to harvest by about a year. Crowns are also more reliable, as they have already established a root system. The best method depends on your budget, time constraints, and desired level of involvement.
What kind of soil is best for growing asparagus?
Asparagus thrives in well-drained, sandy loam soil with a pH between 6.5 and 7.5. Good drainage is essential to prevent root rot. Before planting, amend the soil with plenty of organic matter, such as compost or well-rotted manure, to improve its fertility and drainage. Asparagus is a heavy feeder, so it’s also beneficial to incorporate a slow-release fertilizer into the soil at planting time. Avoid heavy clay soils, as they can become waterlogged and hinder asparagus growth. If you have clay soil, consider growing asparagus in raised beds.
How often should I water my asparagus plants?
Asparagus needs consistent moisture, especially during the growing season. Water deeply and regularly, aiming for about 1-2 inches of water per week. Avoid overhead watering, as this can promote fungal diseases. Instead, water at the base of the plants. During dry spells, increase the watering frequency. Mulching around the plants can help retain moisture and suppress weeds. In the fall, reduce watering as the plants enter dormancy.
When is the best time to harvest asparagus?
The harvest season typically begins in the spring, about three years after planting from seed or two years after planting from crowns. Harvest spears when they are about 6-8 inches tall and have tightly closed tips. To harvest, snap or cut the spears at ground level. Avoid cutting too deeply, as this can damage the crown. In the first year of harvesting, only harvest for a few weeks to allow the plants to continue developing. In subsequent years, you can harvest for a longer period, typically 6-8 weeks. Stop harvesting when the spears become thin and spindly, as this indicates that the plants need to replenish their energy reserves.
How do I prevent asparagus beetles?
Asparagus beetles are a common pest that can damage asparagus plants. To prevent them, inspect your plants regularly for beetles and their larvae. Handpick any beetles or larvae you find and drop them into a bucket of soapy water. You can also use insecticidal soap or neem oil to control infestations. Encourage beneficial insects, such as ladybugs and lacewings, which prey on asparagus beetles. Crop rotation and good garden hygiene can also help prevent infestations.
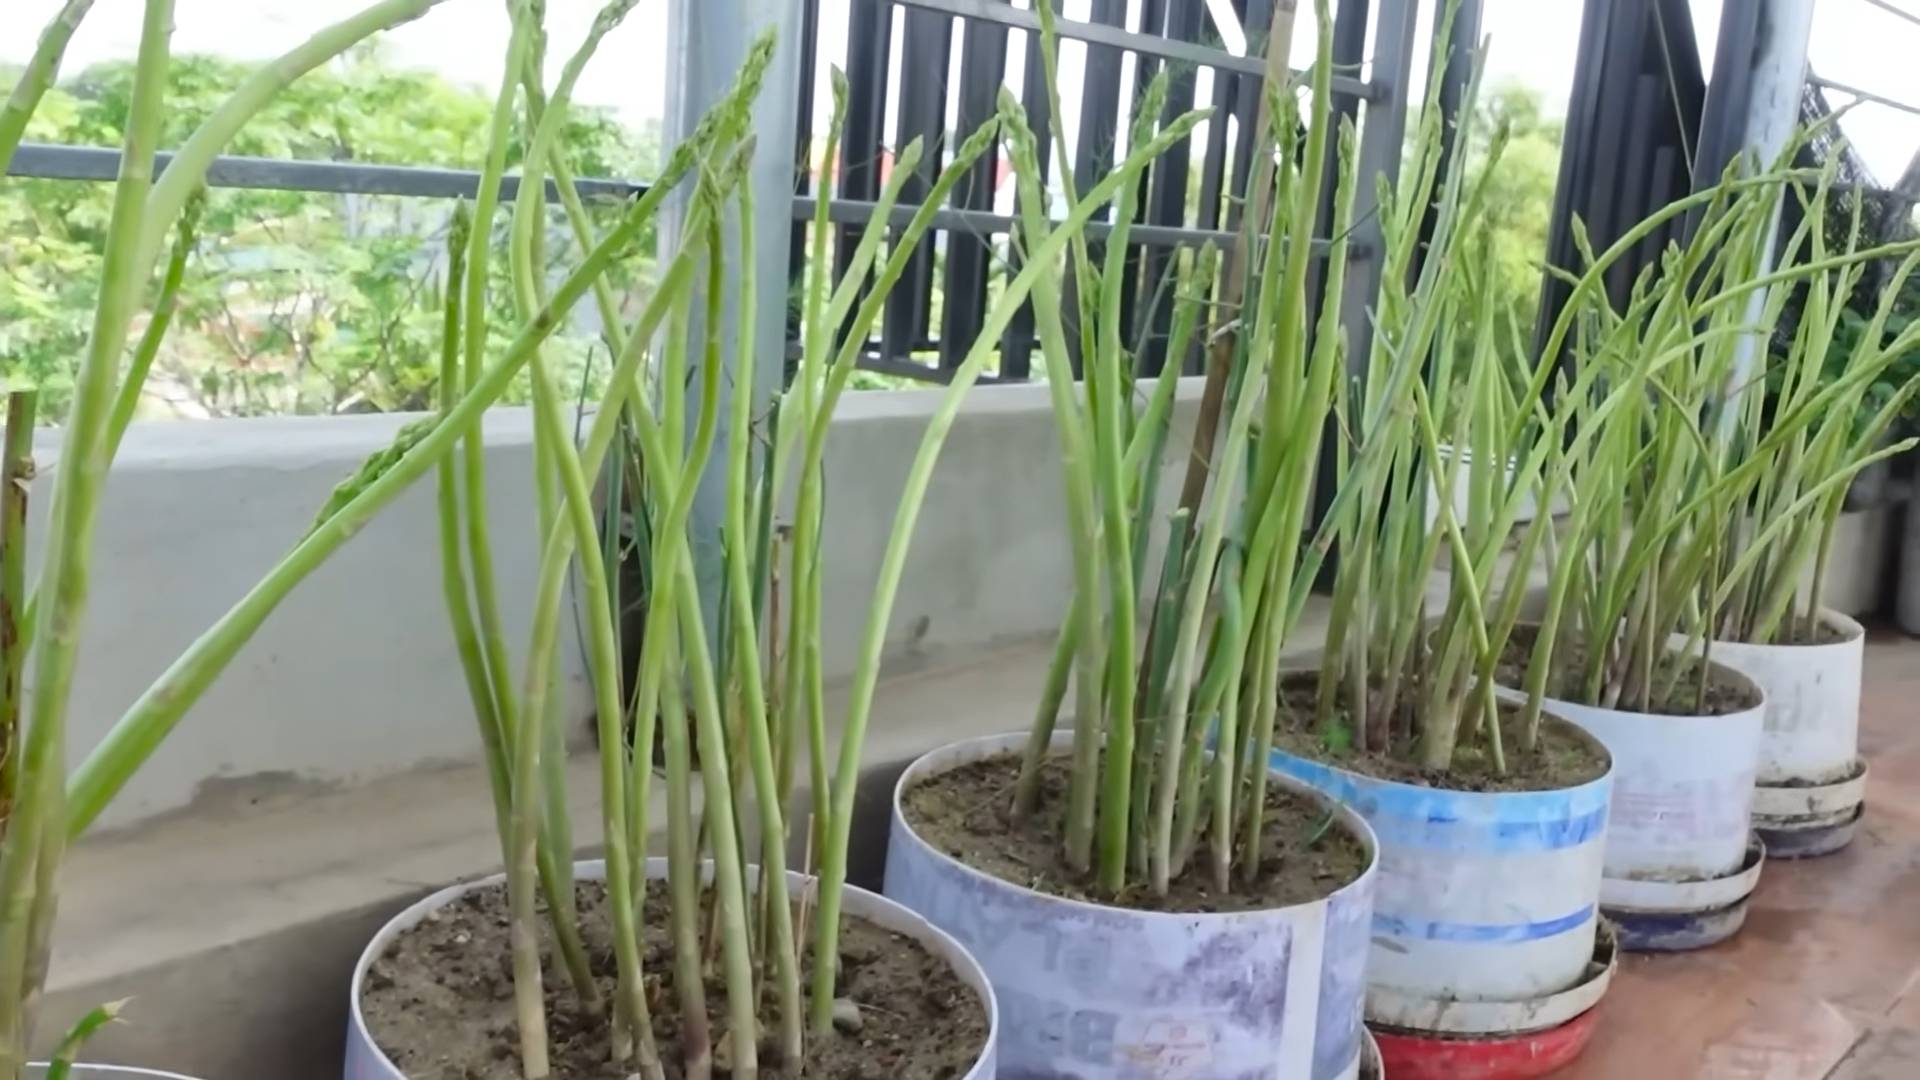
Can I grow asparagus in containers?
Yes, you can grow asparagus in containers, but it requires a large container (at least 18 inches in diameter and 24 inches deep) to accommodate the plant’s extensive root system. Use a well-draining potting mix and ensure the container has drainage holes. Water regularly and fertilize every few weeks during the growing season. Container-grown asparagus may not be as productive as plants grown in the ground, but it’s a viable option for those with limited space.
How do I overwinter asparagus plants?
Asparagus plants are hardy and can withstand cold temperatures. In the fall, after the foliage has turned yellow and brown, cut it back to ground level. This helps prevent diseases and pests from overwintering in the foliage. Apply a layer of mulch around the plants to protect the crowns from freezing temperatures. In the spring, remove the mulch as new growth emerges.
What are some good companion plants for asparagus?
Several plants can benefit asparagus when planted nearby. Tomatoes, basil, and parsley are good companions, as they help deter asparagus beetles. Marigolds can also repel nematodes. Avoid planting asparagus near onions, garlic, or potatoes, as they can inhibit its growth.
How long will my asparagus patch last?
With proper care and maintenance, an asparagus patch can last for 15-20 years or even longer. The key is to provide the plants with adequate water, nutrients, and protection from pests and diseases. Avoid over-harvesting, especially in the early years, to allow the plants to establish themselves fully. Regularly amend the soil with organic matter to maintain its fertility and drainage.
Leave a Comment